
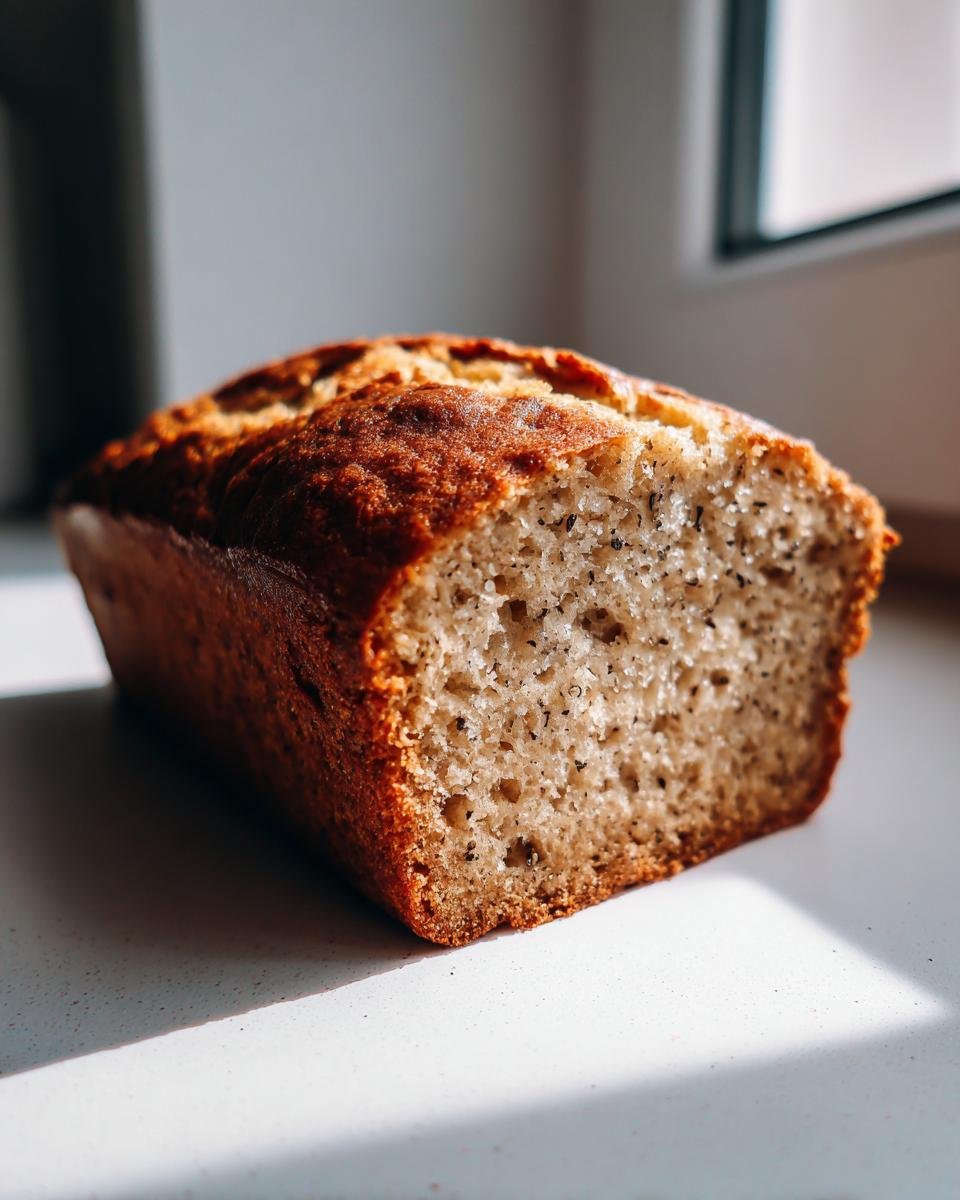
Oh, there’s just nothing that smells cozier than when the kitchen starts warming up and you know bread is coming out of the oven. It’s the best feeling, right? Forget those complicated bakery loaves that require proofing for hours. We are talking about real kitchen comfort here. I’ve spent years—and trust me, years—fine-tuning my recipe for banana bread. This isn’t complicated; this is the easiest, most foolproof way to guarantee a wonderfully moist loaf every single time. If you have three mushy bananas sitting on the counter staring at you, you’re halfway to baking the best comfort quick bread you’ve ever made.
Why This Simple Banana Bread Recipe Works So Well
I get nervous when recipes start demanding strange things like buttermilk or specialty flours. Who has time for that? This recipe, my favorite easy banana bread, honestly shines because it uses what you already have. We’re talking butter, sugar, eggs, flour, and those three sad-looking spotted bananas in your fruit bowl.

It’s such a fantastic option when you need a quick treat, which is why I love classifying it as a true quick bread. It always comes out perfectly, and people always ask me what my secret is. It’s not really a secret; it’s just trusting the process!
- It requires zero special equipment—a bowl and a spoon will do!
- The ingredient list is ridiculously short, meaning fewer trips to the store.
- It achieves maximum moisture without any complicated folding techniques.
If you’re looking for fun ways to double down on that chocolate flavor, you should absolutely check out my double chocolate version, but for pure, classic comfort, this original recipe wins every time.
Key Factors for Perfect Banana Bread Texture
The difference between a good banana bread and an amazing one just comes down to two things, trust me. First, those bananas need to look like they belong in the compost heap—almost black spots mean maximum sweetness and moisture. Second, and this is huge: once you add the flour, you need to stop stirring almost immediately. If you beat that batter up like you’re making a sponge cake, you develop the gluten and end up with something tough instead of that tender crumb we want.
Ingredients You Need for Easy Banana Bread
Okay, let’s gather our supplies! This is where we lay the foundation for success. I always lay everything out on my counter before I start mixing—it’s the best way to make sure you don’t forget that tiny pinch of salt, which actually does wonders for balancing the sweetness. Remember, this recipe relies on simple, common items, but the preparation of those items matters a lot!
Here is everything you need sitting right there:
- 3 very ripe bananas, peeled and mashed thoroughly—I mean, really mashed until they are practically liquid soup.
- 1/3 cup butter, melted and allowed to cool down for just a minute or two—we don’t want scrambled eggs!
- 1 teaspoon baking soda—this is what gives us that nice rise in the quick bread.
- A healthy pinch of salt—don’t skip this; it makes the banana flavor *pop*.
- 3/4 cup granulated sugar—just the regular white stuff works perfectly here.
- 1 large egg, beaten lightly in a separate little bowl first.
- 1 teaspoon vanilla extract—a nice splash of quality vanilla always improves things.
- 1 1/2 cups all-purpose flour—measured correctly, please! (Spoon flour into the cup, then level it off.)
If you’re feeling adventurous and want to add nuts—walnuts or pecans are my favorite—toss in about a half-cup of them. Oh, and if you want to see how I apply the same simple measuring rules to cookies, take a look at my banana oatmeal cookies recipe! It’s a different bake but uses a similar philosophy of using what you have on hand.
Essential Equipment for Making Banana Bread
Since we’re keeping things ridiculously easy, you don’t need a stand mixer or a fancy array of whisks. I prefer doing most of the mixing by hand because it really helps me monitor how much I’m stirring, which is key for keeping this banana bread tender!
You really only need a few reliable tools for this job:
- A standard 9×5 inch loaf pan. Seriously, that’s the classic size, and the baking time is based on it.
- One large mixing bowl. This is where all the magic happens, from the bananas to the flour.
- A sturdy rubber spatula or a wooden spoon. You’ll use this for everything—mashing the bananas slightly, combining the wet ingredients, and gently folding in the flour.
- A separate small bowl for beating your egg. It’s just a little extra step that ensures the yolk breaks up nicely.
- Measuring cups and spoons. Accuracy matters most when you’re using baking soda, so measure that teaspoon carefully!
That’s it! No fancy gear required to make a loaf that tastes like it came from a gourmet bakery. Keep your tools clean, and you’re ready to go!
Step-by-Step Instructions to Bake Banana Bread
Okay, this is where the real fun starts! I always tell people that successful baking is 90% getting organized upfront. Once everything is measured, the actual mixing takes maybe ten minutes, tops. We’re moving fast, but we’re not rushing the crucial steps, especially where that flour is concerned. Follow these steps exactly, and you’ll have the best loaf of banana bread ready for the oven. If you are looking for inspiration on how to use up other leftover veggies in bread form, check out my zucchini bread recipe—it’s also super simple!
Mixing Wet Ingredients for Your Banana Bread Batter
First things first: get that oven heated up to 350 degrees F (175 degrees C) and your loaf pan greased and floured. We want the oven ready when you are!
In your big bowl, start by whisking together those mashed bananas, the melted (but not hot!) butter, the baking soda, and that pinch of salt. Mix it until it looks evenly combined. You aren’t whipping it; you’re just wanting everything to incorporate smoothly. Once that’s happy, stir in your sugar, your pre-beaten egg, and the vanilla extract. Keep stirring until it’s all one unified, creamy base. It should look lovely and thick, full of mashed banana goodness.
Combining Dry Ingredients and Final Banana Bread Batter Assembly
Now, the careful part! Add your 1 1/2 cups of flour all at once right on top of the wet mixture. This is where you have to put your spoon down and step away from the urge to mix hard! We’re folding here, people. Gently fold the flour in until you see almost no dry streaks left. Seriously, I mean it—a few tiny white pockets of flour are totally fine. Overmixing at this stage develops the gluten, and that leads to tough, dense bread, and we want soft, cozy bread!
Baking Time and Testing Doneness for Banana Bread
Pour that slightly lumpy batter into your prepared pan and slide it gently into the hot oven. It needs about 50 to 60 minutes to bake perfectly at 350 degrees F (175 degrees C). Around the 50-minute mark, grab a toothpick or a thin wooden skewer and poke it right into the very center of the loaf. If it comes out clean, or with just a few moist, tender crumbs clinging to it, you’re done! If you see wet batter, give it another five minutes and check again.
The most important cooling tip: leave the bread in the pan for 10 minutes after you take it out. This lets it firm up just enough so it doesn’t fall apart when you turn it out onto the wire rack to cool completely.
Tips for Success When Making Banana Bread
I’ve baked this loaf probably a hundred times over the years, and I’ve learned that even when you follow the steps perfectly, a few tiny adjustments can take your simple banana bread from good to absolutely unforgettable. These are the little household secrets I’ve picked up that make sure every slice is tender and flavorful. Remember how I mentioned pudding being a creamy dream? Well, if you ever get curious about getting that same creamy texture in a different dessert, my creamy banana pudding recipe uses some similar flavor principles!
Here are the insider tips I insist on following when I pull out my ingredients:
- The Ripeness Rule is Gold: I cannot stress this enough—use bananas that are spotted, bruised, or nearly black. If your bananas are still bright yellow, they haven’t converted enough starch to sugar yet. You need that deep, almost caramelized banana flavor that only the mushiest ones can give you. If you only have yellow ones, just wait another day or two, seriously.
- A Quick Melt, Not a Boil: When melting your butter, use the microwave but stop it short. The butter should be liquid, but it needs to cool for five minutes before hitting the main bowl. If it’s too hot, it can slightly cook the egg when you add it later, giving you a strange texture. Melted and slightly warm is the sweet spot over here.
- Nuts Should Be Toasted (If You Use Them!): If you decide to toss in those optional chopped nuts—walnuts are my go-to for this quick bread—give them a quick toast in a dry skillet for about five minutes beforehand. This wakes up their oils and keeps them crunchy inside the finished loaf instead of getting soft and chewy.
- Don’t Crowd the Pan: If you’re baking this loaf, make sure your oven racks are centered. Uneven heat is the number one reason one side bakes faster than the other. If the heat is too close to the top element, the crust forms too fast before the center is done, leading to a slight dome or even a collapse.
Follow these little pointers, and you’ll never have a dry or disappointing loaf of banana bread again. It makes the whole process stress-free!
Variations on Classic Banana Bread
I love this recipe because it’s so incredibly sturdy. It handles additions like a champ! While the classic, plain version is pure perfection for me, I totally understand wanting to mix things up now and then. You can easily transform this basic sweet bread into something new without affecting the cooking time too much, which is the best part!
If you’re looking for ways to use up ingredients sitting in your cupboard, here are a few simple things I often throw into my batter right before it goes into the pan. If you’re a chocolate fiend like some of my neighbors, you might even want to see my amazing zucchini chocolate brownies for another dark, moist treat!
- Chocolate Chip Heaven: Just fold in one cup of semi-sweet chocolate chips. I usually toss them in with the flour so they get coated and don’t sink straight to the bottom of the loaf. They melt just enough to create gooey little pockets. So good!
- Spice it Up: If you want that warmer, almost nostalgic flavor, add about one teaspoon of ground cinnamon and maybe a quarter teaspoon of nutmeg along with your flour. That spice mix just pairs beautifully with the rich banana flavor.
- A Fiber Boost: If you want to make it slightly heartier, you can substitute up to half of the all-purpose flour with whole wheat flour. Just be careful not to overmix when you do this, as whole wheat can sometimes make the batter a little heavy if you work it too long.
- A Little Zing: For a tiny lift of citrus brightness (which pairs unexpectedly well with the banana), grate the zest of one small orange right into the wet ingredients after the egg. It’s a subtle twist, but I think it makes the bread taste fresher.
See? You barely have to change a thing, and you’ve got a brand new experience. That’s the beauty of a solid, reliable banana bread recipe like this one!
Storage and Reheating Instructions for Banana Bread
So you’ve baked the perfect loaf of banana bread, and now you’re looking at a beautiful, golden-brown creation. What now? Well, if you’re anything like me, you hope to eat half of it immediately, but the other half needs to last! Keeping it fresh is super easy, provided you follow a couple of small rules—mostly centered around air exposure.
The key is wrapping it up snugly once it’s completely cool. Don’t try wrapping it warm, or you’ll end up with a soggy crust, and nobody wants that disappointment!
For keeping it on the counter, I find that it stays surprisingly moist for a good three to four days. You just need to wrap the whole loaf tightly in plastic wrap first. Then, I like to pop that wrapped loaf into a large zip-top bag or even an aluminum foil pouch. This double-layer protection keeps the air out and locks in all that glorious moisture that those ripe bananas gave us.
Tips for Freezing Your Banana Bread
If you know you won’t get to the rest of the loaf within four days, or if you make a double batch (which you absolutely should!), freezing is the way to go. This preserves the freshness perfectly for later enjoyment.
Wrap each slice individually in plastic wrap first. This lets you grab just one or two slices later without having to thaw the whole loaf! After the individual wraps, place those slices into a sturdy, freezer-safe bag. You can press out as much air as possible before sealing it up tight. This banana bread will keep beautifully in the freezer for up to three months!
How to Reheat Slices to Bring Back Freshness
When you’re ready for that frozen slice, the reheating process is what makes it taste like it just came out of the oven. Microwaving is fast, yes, but it can sometimes make quick breads feel tough. I prefer the toaster oven or a regular oven for the best texture refresh!
If using the toaster oven or conventional oven, just wrap the slice loosely in a tiny piece of foil and warm it at about 300 degrees F until it’s heated through—this usually takes about 8 to 10 minutes. If you are desperate for a quick bite, microwave that wrapped slice for about 15 to 20 seconds. Adding a tiny dab of butter right after microwaving helps simulate that fresh-baked moisture, too. Enjoy!
Frequently Asked Questions About Banana Bread
I always get the same questions when folks try this recipe for the first time. Baking is full of little mysteries, and I’m happy to clear up anything confusing so you get the absolute best results out of this simple banana bread. It’s so satisfying when the kitchen smells amazing and you know the bake is going to be perfect!
Can I use yellow bananas instead of very ripe ones for Banana Bread?
Yes, you absolutely *can* use yellow bananas, because the recipe will still technically bake. However, you’re going to miss out on so much of the magic that makes this quick bread so special! Brown spots mean the starches in the banana have converted to sugar, which is where all that deep sweetness and incredible moisture comes from. Yellow bananas are firm and starchy, and they just won’t perfume your kitchen nearly as much as those almost-black ones will.
How do I prevent my Banana Bread from sinking in the middle?
Oh, the dreaded banana bread sinkhole! It’s the saddest sight after you wait patiently for an hour. Nine times out of ten, sinking happens because the center wasn’t quite done when you pulled it out. The structure collapses as it cools because it didn’t have enough time to set up properly. Make sure you are really testing it deep down with that toothpick; if it looks wet, leave it in! Also, don’t be peeking through the oven door constantly during the first 40 minutes of baking. That rush of cool air can sometimes make liquids shift before the structure is stable.
What is the best way to sweeten Banana Bread without refined sugar?
I totally get wanting to swap out the white sugar sometimes! Maple syrup is my favorite substitute for the granulated sugar in this recipe. It lends a wonderful little earthy flavor that pairs beautifully with the banana. If you use maple syrup or honey, you’ll need to adjust the wet ingredients slightly. Since both are liquids, I recommend reducing the melted butter by about two tablespoons, or adding just a tablespoon or two of extra flour to keep the batter consistency correct. You can check out my banana blueberry muffins recipe for some tips on working with natural sweeteners in different baked goods too!
Share Your Simple Banana Bread Results
Well, that’s really all there is to it! You’ve taken a few simple ingredients and turned them into the most comforting loaf of banana bread imaginable. I just hope your kitchen smells as amazing as mine does right now!
I truly, truly want to know how it turned out for you. Did you try adding those walnuts I mentioned, or maybe you went rogue and tossed in some chocolate chips? Don’t keep the success (or the necessary tweaks!) to yourself!
Take a moment when you get a chance, and leave a rating right here below the recipe. Even just a star rating helps everyone else know this simple recipe is worth trying. If you manage to snap a photo before everyone dives in and devours the entire loaf, I would absolutely love to see your beautiful bake! Tag me on social media if you share it, because sharing baking triumphs is what keeps the cozy kitchen vibes going!
And if you want one last little deep dive into the world of this perfect quick bread, sometimes the best tips come from the community itself. I found some extra helpful advice over at my post about the secret to the best banana bread that you might find interesting too!
Print
Simple Banana Bread
- Total Time: 75 min
- Yield: 1 loaf 1x
- Diet: Vegetarian
Description
A straightforward recipe for moist banana bread using ripe bananas.
Ingredients
- 3 ripe bananas, mashed
- 1/3 cup melted butter
- 1 teaspoon baking soda
- Pinch of salt
- 3/4 cup granulated sugar
- 1 large egg, beaten
- 1 teaspoon vanilla extract
- 1 1/2 cups all-purpose flour
Instructions
- Preheat your oven to 350 degrees F (175 degrees C). Grease and flour a standard loaf pan.
- In a large bowl, mix the mashed bananas, melted butter, baking soda, and salt.
- Stir in the sugar, beaten egg, and vanilla extract. Mix well.
- Add the flour and mix until just combined. Do not overmix.
- Pour the batter into the prepared loaf pan.
- Bake for 50 to 60 minutes, or until a toothpick inserted into the center comes out clean.
- Let the bread cool in the pan for 10 minutes before turning it out onto a wire rack to cool completely.
Notes
- Use very ripe, spotty bananas for the best flavor.
- You can add 1/2 cup of chopped nuts if desired.
- Prep Time: 15 min
- Cook Time: 60 min
- Category: Dessert
- Method: Baking
- Cuisine: American
Nutrition
- Serving Size: 1 slice
- Calories: 220
- Sugar: 15
- Sodium: 150
- Fat: 9
- Saturated Fat: 5
- Unsaturated Fat: 4
- Trans Fat: 0
- Carbohydrates: 35
- Fiber: 2
- Protein: 3
- Cholesterol: 35
Keywords: banana bread, quick bread, sweet bread, easy baking, banana cake