
When that weeknight slump hits, and you need dinner on the table *yesterday*, but you refuse to eat something boring? I totally get it. That’s when I reach for this recipe. Honestly, these simple **Chicken Pitas** are my secret weapon for feeling accomplished without spending an hour over the stove. I first perfected this exact version about five years ago when I realized I kept throwing away half my spice cabinet on boring chicken breasts, but never actually used them!
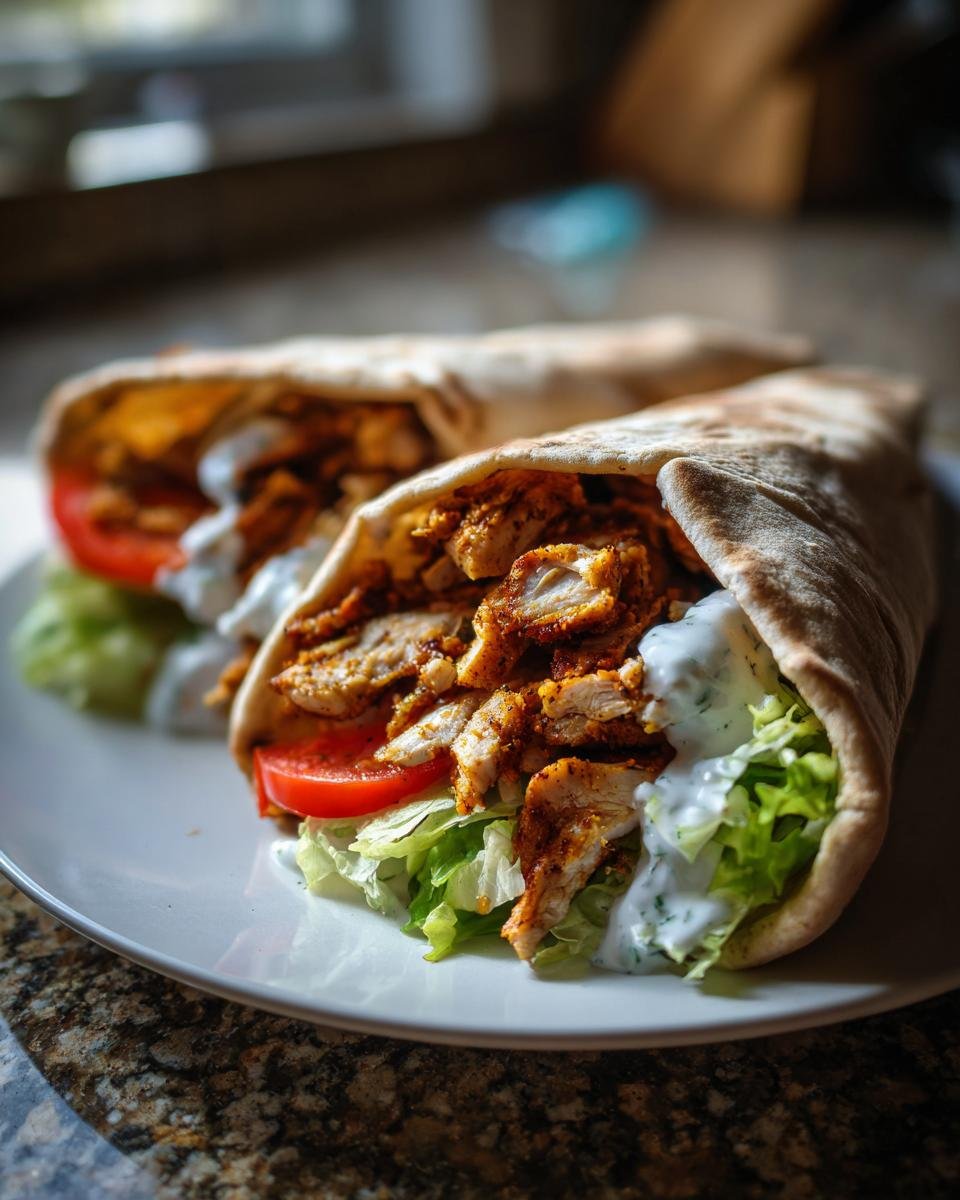
Trust me on this one: this recipe is the absolute *easiest* and most flavorful way you will ever stuff fillings into a warm piece of bread. We’re talking tender, seasoned chicken, bright herbs, and a creamy sauce that ties the whole Mediterranean vibe together. It’s genuinely fantastic, and you only need about 20 minutes from start to finish. Seriously, you need this in your rotation!
Why You Will Love These Simple Chicken Pitas
I know you’re busy, so I won’t waste your time telling you how great something is unless it truly lives up to the hype. These chicken pitas? They are superstars for the weeknight rush. They come together so fast, but they taste like you spent ages preparing something special.
You’re going to get hooked because:
- It’s lightning fast! We’re talking less than 25 minutes total time. Perfect for when hunger strikes unexpectedly.
- The flavor profile is total sunshine—that little kick from the paprika and oregano just screams fresh Mediterranean goodness.
- Cleanup is a dream. Seriously, one skillet for the chicken, one little bowl for the sauce. You can’t beat that ease of assembly, especially after a long day.

Essential Ingredients for Flavorful Chicken Pitas
The beauty of these chicken pitas is that they use ingredients you probably already have, but we’re going to make them sing! Everything is straightforward, but quality matters, even in a quick recipe like this. Don’t skip the fresh parsley for the sauce; it makes such a difference compared to dried herbs when you’re going for that bright Mediterranean feel.
Here’s the lineup you’ll need for four happy servings. Remember, I write these measurements assuming you’re going straight into cooking!
For the Chicken:
- 1 pound boneless, skinless chicken breasts, cut into bite-sized pieces
- 2 tablespoons olive oil (Don’t use cheap, flavorless stuff here; olive oil is key!)
- 1 teaspoon paprika
- 1/2 teaspoon dried oregano
- 1/4 teaspoon garlic powder
- Salt and pepper to taste
For the Creamy Yogurt Sauce:
- 1/2 cup plain Greek yogurt (Get the thick kind, zero percent fat works great if you’re watching your macros!)
- 1 tablespoon lemon juice
- 1/4 cup chopped fresh parsley
For Assembly:
- 4 whole wheat pita breads
- 1 cup chopped lettuce
- 1/2 cup sliced tomatoes
Now, for my little tip on the chicken: if you happen to have chicken thighs on hand instead of breasts, please, go for it! Thighs stay juicier under high heat, which is a real lifesaver. If you’ve got an extra 30 minutes, even just tossing the seasoned chicken with the spices and a tiny splash more of oil before you cook will make the flavor pop even harder. You can totally check out my tips for a full marinade here: flavorful chicken marinade recipe juicy grilled.
Step-by-Step Instructions to Make Perfect Chicken Pitas
Okay, deep breaths! This is where the magic happens, and honestly, it’s so straightforward you’ll be amazed at how fast you make this impressive lunch. The structure here is efficiency—we multitask the chicken cooking while whipping up the sauce. That’s how we get these flavorful chicken pitas ready in under 25 minutes, as promised! If you want to see another quick recipe that prioritizes speed, take a peek at my easy chicken and broccoli pasta recipe.
Preparing and Seasoning the Chicken for your Chicken Pitas
First things first, we need to prep the protein. Take those chicken breasts and slice them right up into nice, bite-sized pieces. We want them to cook evenly and quickly, so aim for roughly one-inch cubes, nothing too wild.
Now grab a good mixing bowl. Dump the seasoned chicken pieces in there. This is where we layer the flavor! Toss them thoroughly with the olive oil first—this helps the spices stick. Then, sprinkle in that paprika, oregano, garlic powder, and a good pinch of salt and pepper. Use your hands to massage that spice mixture all over every piece of chicken until they look warmly coated. Don’t be shy!
Cooking the Chicken and Whipping Up the Greek Yogurt Sauce
While your chicken waits for its close-up, let’s tackle the sauce. In a small little bowl (the smaller the better for less cleanup!), combine your Greek yogurt, that zingy lemon juice, and the finely chopped fresh parsley. Give that a good whisk until it’s smooth and creamy; if it looks a little thick, just add a tiny splash of water or milk to loosen it up. Set that aside; it’s ready when you are!
Next, fire up your skillet over medium-high heat. You want it hot enough to brown the chicken nicely, but not so hot that it burns the spices immediately. Add the seasoned chicken—and here’s my pro-tip for great texture: make sure you don’t overcrowd the pan! If you crowd it, the chicken steams instead of searing, and we want that lovely brown color. Cook the chicken for about 6 to 8 minutes, turning occasionally, until everything is fully cooked through. No pink allowed!
Assembling Your Delicious Chicken Pitas
Once the chicken is done, turn off the heat under the skillet. Now, take your whole wheat pita breads and warm them up. The package instructions give you guidelines, but honestly, wrapping a stack in a slightly damp paper towel and microwaving for 20 seconds, or quickly toasting them open-faced in the oven for two minutes, works wonders to make them soft and pliable.
Time to build! Lay those warm pitas flat. Start by dividing the perfectly cooked chicken evenly among the four breads. Then, pile on your fresh toppings—a layer of crisp lettuce and those bright slices of tomato go on top of the hot chicken. Finally, drizzle that gorgeous, herby yogurt sauce over everything. Fold them up carefully (they can get a little messy, that’s how you know they are good!) and serve them up while everything is still warm. They are best eaten right away!
Tips for Success When Making Chicken Pitas
Even though this recipe is super simple, a few little tricks can bump your chicken pitas from ‘good lunch’ to ‘I need this every Tuesday’ status. I’ve learned these through trial and error—mostly just me being impatient in the kitchen, but hey, now you don’t have to be!
Here are the three things I swear by when assembling these beauties to make sure every bite has that authentic, vibrant flavor:
Marinate if you have five extra minutes: I mentioned this earlier, but I can’t stress it enough! Even if you only have time to toss the chicken pieces with the oil and spices and just let them sit on the counter while you chop the tomatoes (maybe 15 minutes), it makes a difference. If you can plan ahead, letting them sit for 30 minutes or overnight in the fridge is even better. It lets that oregano and paprika really penetrate the chicken. If you want to get serious about marinating, I wrote up a whole guide on juicy flavor enhancers here: flavorful chicken marinade recipe juicy grilled.
Don’t skimp on seasoning the yogurt sauce: That Greek yogurt sauce is your creamy hero here, and sometimes it tastes a little flat if we don’t treat it right. After you mix the yogurt, lemon juice, and parsley, taste it! I always add a tiny pinch of salt and recently started adding just a whisper of black pepper. That little bit of seasoning wakes up the lemon and makes the whole sauce taste ridiculously fresh and balanced against the savory chicken.
Toast your pitas strategically: Forget the microwave if you want structural integrity! A slightly toasted pita holds up way better to the juiciness of the chicken and tomatoes without getting soggy right away. My favorite way is to pop them directly onto the burner grates on low for about 10 seconds per side—just watch them closely! This gives them a little char and makes them delightfully chewy. If you’re nervous about the open flame, the oven method I mentioned before works well too.
Finally, don’t toss those tomato slices in the sauce! Layering them *under* the sauce drizzle keeps them crisp and prevents the pita bread bottom from getting soaked too fast. It’s all about texture management, my friend!
Ingredient Notes and Substitutions for Chicken Pitas
I always hear from folks asking if they can tweak things in a recipe this fast. Yes, absolutely! This recipe is built to be flexible, but I want to be super clear about what matters most. Since this is such a simple assembly, swapping out one core element can change the whole vibe, so choose wisely!
Let’s talk swaps based on what I’ve learned playing around with this meal:
Using Chicken Thighs Instead of Breasts
This is the most common question I get, and the answer is a resounding ‘yes’! If you prefer dark meat, or just want a slightly richer flavor, go ahead and substitute chicken thighs for the breasts. The texture will be more forgiving if you accidentally cook them a minute too long, which I totally appreciate on a hectic night.
The cooking time stays about the same—maybe check them closer to the 7-minute mark—but you might need a tiny bit less olive oil since thighs naturally have more fat. They’ll crisp up beautifully with the paprika and oregano blend!
What If I Don’t Have Fresh Parsley?
Oh, the fresh herbs struggle! If you are totally out of fresh parsley, it’s okay. We need that brightness in the sauce, so dried is the sad, but necessary, backup. I’d suggest using about one teaspoon of dried parsley for the quarter cup of fresh we usually call for in my Greek yogurt sauce.
Warning, though: dried herbs don’t look as pretty suspended in the yogurt, and they don’t release flavor as immediately. If you have dried dill, that’s actually a sneaky good substitute here, adding a little extra Mediterranean depth. Just use a little less dried dill than you would dried parsley!
Can I Skip the Lemon Juice?
You could, technically, but I really advise against it! That tablespoon of lemon juice isn’t just for flavor; its acidity cuts through the richness of the yogurt and balances the dried spices on the chicken. It stops the sauce from tasting heavy.
If you are truly out of lemons, your next best bet is a splash of white wine vinegar or apple cider vinegar. Just use half the amount I call for (start with about a half tablespoon of vinegar) because vinegar is much sharper than fresh lemon juice. Whisk it in slowly until it tastes bright and tangy!
Serving Suggestions for Your Chicken Pitas
So, you’ve nailed the chicken pitas, and now you’re looking at the plate thinking, “It needs a friend!” I get it. A great meal feels complete with a little something fresh on the side, especially when you’re serving up something savory and bright like this Mediterranean filling.
Since these chicken pitas are already filling and packed with flavor between the chicken, veggies, and that creamy sauce, you don’t need anything heavy. Forget heavy rice dishes or big sides; we want crisp, cool accompaniments that match that speedy Greek vibe. Trust me, these pairings take zero extra effort but elevate the whole experience.
Here are my absolute favorites:
A Simple Kick of Cool Cucumber
Nothing cuts through the richness of the yogurt sauce and warms up the spices like fresh cucumber. I usually toss super thinly sliced cucumbers with a bit of fresh dill (if I have it), a tiny drizzle of olive oil, and a pinch of salt. That’s it! It’s hydrating and crunchy, contrasting perfectly with the soft pita.
If you want to formalize that side dish a little bit, I highly recommend taking a look at one of my absolute favorite salad recipes—it uses cucumber and feta and is just amazing alongside this meal. You can find the full recipe here: refreshing cucumber feta salad recipe for all occasions.
A Dash of Briny Olives
This is the easy button for complexity! Keep a jar of Kalamata olives around—they last forever! Just draining a handful and placing them on the side of the serving platter instantly adds that necessary salty, briny punch that screams Mediterranean flavor. You don’t even have to chop them!
If you’re planning a bigger spread, you could even mix them with some feta cubes and bell peppers for a classic Greek salad feel, but honestly, just the olives by themselves are perfect for a quick Tuesday night.
Quick Pickled Red Onions
Okay, this one takes an extra five minutes, but it’s worth it. If you happen to have red onions, thinly slicing them and soaking them for just 10 minutes in a mix of equal parts white vinegar and water, plus a tiny pinch of sugar, totally transforms them. They turn bright pink and lose that harsh bite. These snappy onions are amazing scattered over the top of the chicken inside the pita, or just served on the side as a crunchy garnish.
It adds crunch, color, and tang, and it makes your simple chicken pita look like you put in way more effort than you actually did. Win-win!
Storage and Reheating Instructions for Leftover Chicken Pitas
No matter how hard I try, there are usually a couple of leftovers, especially since I always cook a little extra chicken just in case! The number one rule when it comes to keeping these chicken pitas tasting fresh? Don’t assemble them the night before. Seriously, don’t do it. The moisture from the tomatoes and the yogurt sauce will turn your pita bread into a sad, soggy mess by morning. We want structural integrity in our bread!
The key to glorious leftovers is keeping everything separate—treating the filling and the bread like independent guests at a party. If you follow this separation method, you can easily enjoy these leftovers for two, maybe three days.
Storing the Components Separately
I always use three small, airtight containers. This makes reheating a breeze because everything is portioned out nicely.
- The Chicken: The seasoned cooked chicken goes into one container. Because it’s already been cooked, it holds up really well. It will last perfectly fine in the fridge for about three days.
- The Yogurt Sauce: This needs its own place! Seal the Greek yogurt sauce up tight. Since it has fresh lemon and parsley, it’s best eaten within three days, but honestly, it usually tastes best within 48 hours. That fresh parsley starts to wilt after that, losing its punch.
- The Veggies and Pitas: Keep the lettuce and tomatoes in a separate container, maybe even lined with a paper towel to soak up any condensation. The plain pita breads should go into a zip-top bag so they don’t dry out completely in the fridge air.
Reheating for the Best Texture
Reheating is where you recapture that fresh-off-the-skillet flavor. You need to treat the chicken and the bread differently, so don’t just blast the whole thing in the microwave!
For the chicken, I prefer the stovetop method again. Heat a tiny drizzle of olive oil in your skillet over medium heat. Toss the cold chicken pieces in there until they are piping hot all the way through. This brings back some of the sear we got the first time around. It only takes 3 to 4 minutes!
For the pitas, the microwave is great for softness, but a toaster oven or even a dry skillet is better for texture. If you’re using a skillet, warm them over low heat until they are pliable and slightly toasty. This stops them from ripping when you fill them. If you’re in a mega-rush, 15 seconds in the microwave is acceptable, but I always prefer the slight crispness you get from dry heat!
Once the chicken is hot and the pita is warm, assemble the sandwich fresh, drizzle on the cool sauce, and enjoy! It tastes almost brand new, promise!
Frequently Asked Questions About Making Chicken Pitas
I’ve answered a lot of questions about this recipe over the years, especially through comments! Sometimes things that seem obvious to me, like not microwaving the herbs, aren’t obvious to everyone else. So, here are the top things everyone always asks about when making their own flavorful chicken pitas.
Can I make the yogurt sauce ahead of time?
Yes, you totally can, and I recommend it if you’re trying to speed up your assembly time! The Greek yogurt sauce stores beautifully in an airtight container in the fridge. Because it relies on fresh lemon juice and parsley, it’s best enjoyed within three days. Any longer, and the parsley starts looking a little sad, even though the flavor will still be okay.
Just remember my earlier warning: if you make it ahead, keep it separate from the warm chicken and bread until you are totally ready to eat. Cold sauce on hot chicken is a requirement for perfection!
What other vegetables work well in Chicken Pitas?
This is where you can really customize your **Chicken Pitas**! Beyond the lettuce and tomatoes, I love adding things that bring an extra crunch or tang. Pickled red onions are fantastic, as I mentioned, but if you want something cooler, thinly sliced cucumber works miracles in balancing that spice.
If you want to get really wild and add more texture, try adding some finely chopped bell peppers—red or yellow pepper adds a lovely sweetness. Some folks even chop up some canned artichoke hearts and toss them in for an earthy bite. If you’re looking for ideas to bulk up your side dishes or add salad components right into the pita, check out this link for some vibrant mediterranean salad recipes for a flavorful feast!
Do I really have to use whole wheat pitas?
Nope, not at all! Whole wheat provides a nice nutty flavor, and I prefer it because it holds up a little better to the juiciness of the chicken and sauce, but if you only have classic white pita pockets, go for it! The exact same instructions apply. If you are using the thicker, rounder pita breads instead of the pocket style, just be mindful of the filling amount so you can actually fold them over without tearing.
Can I prepare the chicken ahead of time?
Absolutely, this is a great meal prep strategy! You can cook the well-seasoned chicken breast pieces completely once or twice a week and store them in the fridge. When dinner time rolls around, you just need to reheat the chicken—which takes maybe 4 minutes on the stovetop—and then quickly mix up a fresh batch of the Greek yogurt sauce. That cuts your active cooking time down to about 7 minutes flat!
What can I use if I don’t have plain Greek yogurt for the sauce?
If you don’t have Greek yogurt, you are going to need something thick for the sauce base, otherwise, it will just run right out! Your next best options are sour cream or regular plain yogurt. If you use regular (thinner) yogurt, you’ll definitely need to drain off some of the liquid first or add a little less lemon juice, or it will be too runny.
If you are out of all dairy, tahini is a wonderful, classic substitution for a Mediterranean vibe. Just thin the tahini paste with water and lemon juice until it’s sauce-like, but know that the flavor will shift from creamy tang to nutty richness. It’s different, but still delicious!
Nutritional Snapshot of This Chicken Pitas Recipe
Okay, I know you’re all about flavor first, and so am I—I’m not kidding if I didn’t care about macros, I probably wouldn’t even know what they were! But since a few of you asked about fitting these delicious chicken pitas into your healthy routines, I pulled the numbers based on the exact ingredients list. Remember, this is just an estimate, because how much olive oil you use or how much sauce you drizzle on top changes things instantly!
We’re working with a low-fat, high-protein lunch here. If you stick to the recipe as written, this is roughly what you’re looking at for one serving (one whole pita):
Estimated Nutrition Data Per Serving:
- Calories: Right around 450 calories, which is fantastic for a satisfying lunch that keeps you full!
- Protein: This is where this recipe shines! You get about 45 grams of protein per pita. That’s keeping your energy up for the whole afternoon, no sleepy slump here.
- Fat: Total fat clocks in around 15 grams. Since a good chunk of that is healthy unsaturated fat from the olive oil, I like what we’re seeing. Saturated fat stays pretty low at just 3 grams.
- Carbohydrates: You’ll be getting about 35 grams of carbs, including about 4 grams of dietary fiber, which is great since we used whole wheat pitas!
- Sodium & Sugar: These are kept reasonably controlled, too, with only about 5 grams of sugar and 450mg of sodium.
I think that’s a winning profile for something that tastes this good and takes less than 25 minutes to make, don’t you?
Print
Simple Chicken Pitas
- Total Time: 23 min
- Yield: 4 servings 1x
- Diet: Low Fat
Description
A straightforward recipe for making flavorful chicken pitas.
Ingredients
- 1 pound boneless, skinless chicken breasts
- 2 tablespoons olive oil
- 1 teaspoon paprika
- 1/2 teaspoon dried oregano
- 1/4 teaspoon garlic powder
- Salt and pepper to taste
- 4 whole wheat pita breads
- 1/2 cup plain Greek yogurt
- 1 tablespoon lemon juice
- 1/4 cup chopped fresh parsley
- 1 cup chopped lettuce
- 1/2 cup sliced tomatoes
Instructions
- Cut the chicken breasts into bite-sized pieces.
- In a bowl, toss the chicken with olive oil, paprika, oregano, garlic powder, salt, and pepper.
- Cook the chicken in a skillet over medium-high heat until fully cooked, about 6-8 minutes.
- While the chicken cooks, mix the Greek yogurt, lemon juice, and parsley in a small bowl.
- Warm the pita breads according to package directions.
- Divide the cooked chicken among the four pita breads.
- Top the chicken with lettuce and sliced tomatoes.
- Drizzle the yogurt sauce over the fillings in each pita.
- Fold the pitas and serve immediately.
Notes
- You can substitute chicken thighs for breasts if you prefer.
- For extra flavor, marinate the chicken for 30 minutes before cooking.
- Prep Time: 15 min
- Cook Time: 8 min
- Category: Lunch
- Method: Stovetop
- Cuisine: Mediterranean
Nutrition
- Serving Size: 1 pita
- Calories: 450
- Sugar: 5
- Sodium: 450
- Fat: 15
- Saturated Fat: 3
- Unsaturated Fat: 12
- Trans Fat: 0
- Carbohydrates: 35
- Fiber: 4
- Protein: 45
- Cholesterol: 110
Keywords: chicken pitas, easy chicken recipe, greek yogurt sauce, quick lunch, pita bread