
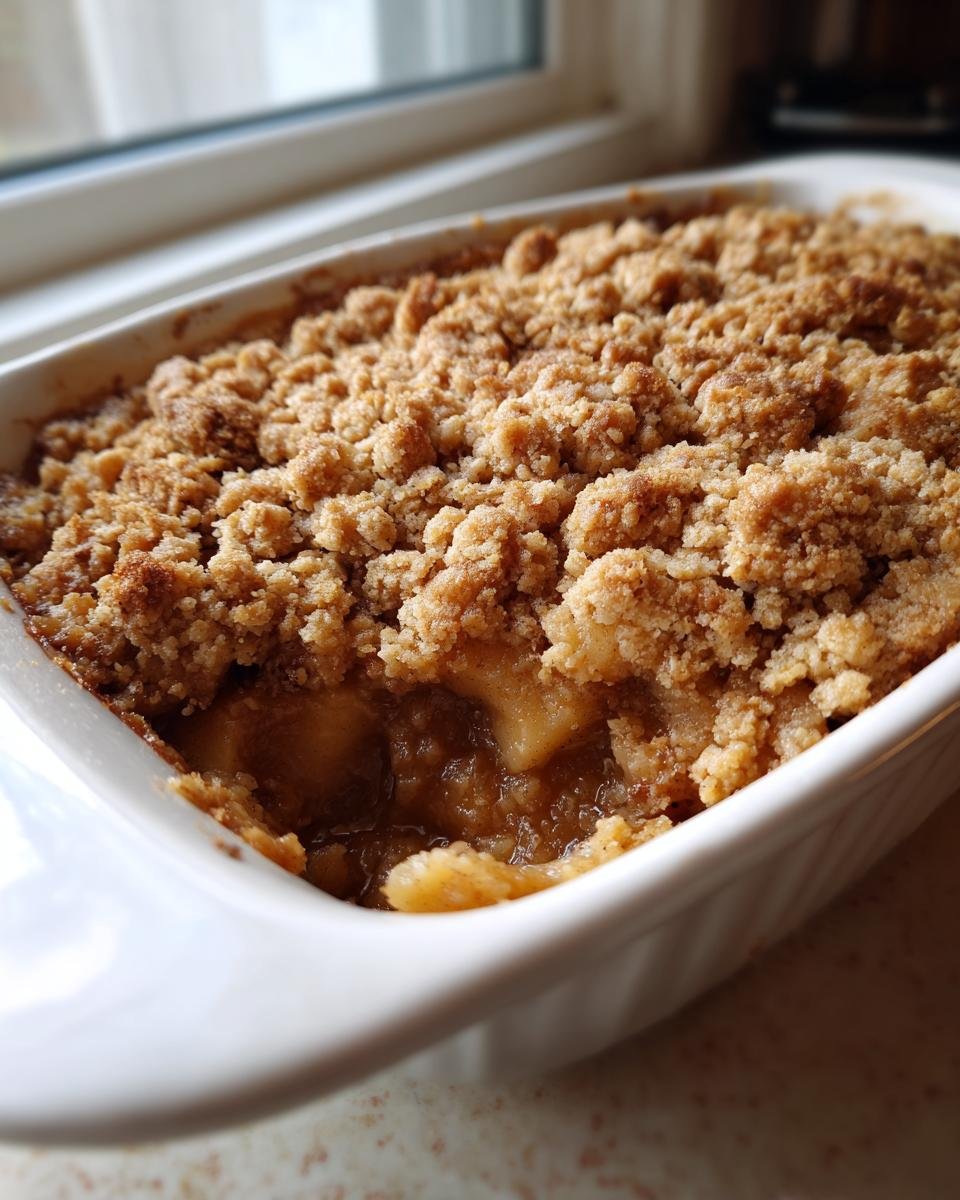
There is absolutely nothing on this planet that says “home” and “comfort” quite like a warm bubbling fruit dessert, right? When I need a true hug in a bowl, I skip the fancy pastries and go straight for the baked apples. People often overcomplicate this dessert, but I’m here to tell you that my recipe for this apple crumble is the simplest, most reliable one you will ever find. Seriously, we’ve been making this exact version for years because it never fails to deliver that perfect contrast: sweet, tender spiced apples underneath a buttery, crunchy blanket. It’s my go-to dessert for everything from weeknight dinners to casual summer get-togethers. Trust me, you’re going to want to keep this one card.
Why This Simple Apple Crumble Recipe Works So Well
Honestly, this recipe is built for convenience without sacrificing flavor. It’s everything I want when I need a homemade apple crumble in my life without spending an hour prepping.
-
Quick Prep Time for Your Apple Crumble
You can get this into the oven in about 20 minutes! That’s right, you toss the apples, mix the dry stuff, rub in the butter, and you’re done. It’s almost instant gratification.
-
Perfect Texture in Every Apple Crumble
The magic here is the texture contrast. You get those soft, warm, tart apples right next to that crunchy, golden oat topping. If the apples are mushy or the topping is soft, I feel like I’ve failed, but this method nails it every single time.
Ingredients Needed for the Best Apple Crumble
I love this recipe because all the ingredients are kitchen staples—nothing fancy required! When you stick to what I’ve listed here, you guarantee that signature homemade taste. Having everything measured out beforehand makes the process so smooth; prepping the ingredients properly is half the battle won, especially when it comes to getting that topping just right. For more amazing variations, check out my thoughts on an apple crumble cheesecake!
For the Apple Filling in Your Apple Crumble
This is where the heart of the dessert comes from. You need good, firm apples here. Make sure you have:
- 6 medium apples, peeled, cored, and sliced
- 1/4 cup granulated sugar (for apples)
- 1 teaspoon ground cinnamon
- 1 tablespoon lemon juice
For the Crisp Topping of Your Apple Crumble
This topping is what makes it crumble and not cake! The butter absolutely must be cold; don’t even think about using room temperature butter here. You’ll need:
- 1 cup all-purpose flour
- 1/2 cup packed light brown sugar
- 1/2 cup (1 stick) cold unsalted butter, cut into small pieces
- 1/4 cup rolled oats
Tips for Perfecting Your Apple Crumble Ingredients
Even though this is a simple recipe, paying attention to a couple of ingredient details makes a huge difference in the final result! My goal is always maximum flavor and crunch. Now, if you’re out of regular flour, remember you can swap out half of it for whole wheat flour for a nuttier background flavor, which I think is just heavenly!
Choosing the Right Apples for Apple Crumble
Listen, you can’t just throw in any soft, eating apple in here or you’ll end up with apple soup. You need apples that hold their shape during that 40-minute bake time. My favorites are Granny Smiths—their tartness cuts right through the sweet crumble—or Honeycrisp if you want something a little sweeter that still keeps some structure.
Butter Temperature and Texture for the Apple Crumble Topping
This bears repeating: the butter has to be straight from the fridge, ice cold! If your butter melts even slightly before you incorporate it into the flour and sugar, you’ll end up with a greasy paste instead of a glorious, sandy crumble. That cold fat creates little pockets that steam up in the oven, giving you that amazing bite.

Step-by-Step Instructions for Making Apple Crumble
Okay, let’s get this baked, because honestly, smelling this dessert baking is half the fun! I always set up my station before I even touch the apples so I can move fast once everything is prepped for baking. This recipe is streamlined—you just mix wet stuff, then mix dry stuff, then combine. We’re aiming for amazing flavor in about an hour total, so keep that timer handy! If you want inspiration for other fast fruit desserts, check out my thoughts on making an apple crisp.
Preparing the Apples for the Apple Crumble Base
First things first: get that oven fired up to 375°F (190°C). Then, grab your 8×8 inch baking dish and give it a light greasing—just enough so nothing sticks later! Now for the apples. They need to be coated perfectly. Toss those sliced apples together in a bowl with the granulated sugar, that little bit of cinnamon, and the lemon juice. Make sure every slice is kissed by the coating before you spread them out evenly in the bottom of your prepared dish.
Creating the Signature Apple Crumble Topping
While the apples settle in, we make the best part! In a separate bowl, mix the flour, brown sugar, and those rolled oats together. Next comes the crucial part: cutting in the cold butter. I use my pastry blender, but your fingertips work really well too if you move quickly so the heat from your hands doesn’t melt the butter. You’re going to massage and squeeze until the mixture looks exactly like coarse, wet crumbs. Don’t overdo it, we want texture!
Baking and Resting Your Apple Crumble
Sprinkle that lovely crumble topping evenly across the apples. Try not to press it down, let it sit loose on top! Pop it into the oven for about 35 to 40 minutes. You’ll know it’s ready when the topping is deep golden brown and those apples underneath are soft—give them a gentle prod with a fork to check for tenderness. Once it comes out, DO NOT dive in immediately! Let it rest for at least ten minutes so the juices can settle down before you serve.
Expert Tips for the Ultimate Apple Crumble
Now that you know the basic steps for our super easy apple crumble, I want to share a couple of little tricks I’ve picked up over the years. These aren’t fancy, but they elevate the dessert from good to absolutely unforgettable. We want that perfect, shatteringly crisp top and absolutely zero watery apple situation on the bottom, right? These details are what make the difference between a decent baked fruit dessert and the best one you’ve ever made.
Preventing a Soggy Bottom on Your Apple Crumble
Ugh, the dreaded soggy bottom! It ruins everything. The biggest culprit is usually the apples releasing too much moisture too quickly. Here’s my secret weapon against that: before you even put the topping on, pop the apples (just the apples, nothing else) into the 375°F oven for about 10 minutes. This kickstarts the softening process and lets some of that excess liquid evaporate before the topping gets there to insulate it. If you forget that step, another trick is to lightly dust the bottom of your greased dish with a tablespoon of flour or maybe even those rolled oats before you add the seasoned apples. It acts like a tiny sponge!
How to Get the Best Crumble Topping Texture
When you’re mixing the cold butter into your flour and sugar, you really have to stop yourself from overworking it. I know it feels like you need to massage everything until it’s uniform, but if you mix those butter pieces too much, they melt from the friction of your hands and you end up with one big, flat, greasy layer instead of delightful crumbs. You’re aiming for pieces ranging from coarse sand texture all the way up to pea-sized chunks. The varying sizes are what give you that dynamic crunch when you bite into the final apple crumble!
Serving Suggestions for Your Delicious Apple Crumble
A freshly baked apple crumble is wonderful all by itself, yes, but let’s be real—it’s the required toppings that truly take this dessert over the top from tasty to unforgettable perfection. I mean, I usually make it just so I have an excuse to pull out my favorite vanilla bean ice cream. Don’t skip the finish!
The recipe notes mention a couple of classics, and believe me, they are classics for a reason. Never be afraid to go big on the dairy with this fruit dessert. The warmth of the apples contrasts so nicely with something cold and creamy.
Here are the ways I love to serve my baked apples:
- Vanilla Ice Cream: This is non-negotiable for me when serving warm, especially right after it comes out of the oven. The ice cream melts into all those nooks and crannies of the crumble topping and mixes with the cinnamon spice. You can find my favorite homemade recipe here if you’re feeling ambitious: the creamiest homemade ice cream.
- Heavy Cream or Crème Anglaise: If you’re not an ice cream person, or maybe you want something slightly less icy, a thick drizzle of heavy cream works wonders. If you want to get fancy, a pour of light crème anglaise is decadent and really soaks into the apple layer beautifully.
- Simply Warm: If you are in a rush, just let it cool down just enough so it doesn’t burn your mouth, and eat it straight from the pan. The oat topping is still crunchy, and that’s a win in my book!
Storing and Reheating Leftover Apple Crumble
The best part about making a big batch of apple crumble is definitely having leftovers for breakfast—or second dessert later that night! Luckily, this dessert keeps really well, but how you store and reheat it makes a huge difference in maintaining that glorious crunchy topping.
If you happen to have any left (which is rare in my house!), you should definitely let it cool completely on the counter first. Don’t cover it while it’s warm, or you’ll invite steam, and steam leads directly to softness, which we simply cannot tolerate on our lovely crumble.
Once it’s totally cool, cover the dish tightly with plastic wrap or transfer it to an airtight container. It will happily sit in your refrigerator for about three to four days. Honestly, I think the flavor gets even better the next day because the spices really meld!
Reheating to Keep the Crumble Crisp
Microwaving is fast, I’ll grant you that, but it’s the enemy of crispness. If you use the microwave for your leftover apple crumble, the topping turns immediately chewy and sad. You want that crunch back, right?
So, reheat single portions in a toaster oven or a regular oven set to about 350°F (175°C). Just spread your serving onto a small, oven-safe plate or foil and bake it for about 8 to 10 minutes. That blast of dry heat reactivates the butter and makes that brown sugar topping brittle and crisp again. It comes out tasting almost freshly baked, trust me on this one; resisting the microwave is worth it for this delicious dessert!
Common Questions About Making Apple Crumble
Whenever I share this recipe for my favorite apple crumble, people always have a few things they need clarification on. It’s totally normal when baking! We want to make sure every single batch turns out as perfect and comforting as the last, especially when we are aiming for that fantastic crunchy topping against soft fruit. Here are some of the most frequent things I get asked about this classic baked dessert.
Can I make this Apple Crumble ahead of time?
Yes, you absolutely can prep this ahead, but you have to choose your timing wisely! If you assemble the entire thing—apples coated, topping sprinkled—and cover it tightly, you can stick it in the fridge for up to 24 hours. However, I really recommend against that if you can help it. The slightest moisture can wick up into the topping while it waits, and we don’t want any sogginess! If you must prep ahead, keep the apple mixture and the crumble topping completely separate in sealed containers in the fridge, and only combine and bake them right before you plan to eat them.
What is the difference between an Apple Crumble and a Fruit Crisp?
Oh, that’s a great question that trips up everyone! In the world of baked fruit desserts, the difference between an apple dessert called a crumble and one called a crisp usually just comes down to one ingredient: oats. Typically, a true ‘crumble’ topping is just flour, butter, and sugar—maybe some spices—creating a sandy, crumbly effect. But a ‘crisp’? That texture is supposed to be a little crunchier, and that’s because the oats are included in that topping mixture! Since my recipe uses the oats, technically mine is a fruit crisp, but I’ve always called it an apple crumble because it sounds cozier, don’t you think?
Do I need to peel the apples for this recipe?
I always peel them, and here’s why: when you bake apples for 40 minutes, the skin doesn’t soften nearly as much as the flesh does. If you leave the skin on, you end up with strips of slightly tough apple skin surrounding your lovely tender fruit. Nobody wants to chew on apple skin when they are expecting soft sweetness! Plus, peeling them makes sure that cinnamon and sugar coat the fruit evenly without sticking to the outside peel. It’s just easier and tastes better if you take the time to peel them first.
Can I use different fruit besides apples in this recipe?
Oh, absolutely! This topping is my secret weapon and works perfectly with almost any firm fruit. In the fall, pears are an amazing stand-in for the apples, though you might need a splash less lemon juice since pears are naturally sweeter. Try substituting half the apples with blackberries or raspberries during the summer; they cook down beautifully underneath that sturdy topping. If you want to try a mix, make sure the fruit you choose cooks at roughly the same rate so everything is perfect when the topping turns golden brown!
Nutritional Snapshot of This Apple Crumble
Now, listen up, because here is where I have to put on my “responsible adult” hat for just a second, even though this is supposed to be fun comfort food! When you’re baking something this delicious, especially with butter and brown sugar involved, you probably already know this isn’t exactly diet food. And honestly, that’s okay sometimes!
I put a lot of effort into making sure the ingredients themselves are high quality—using real butter, for example—but I always want to remind everyone that the nutritional information I share for this amazing apple crumble is just an estimate, okay? It’s based on the exact measurements in the recipe card, like using those 6 medium apples and that one stick of butter.
But baking is never perfectly exact, right? The size of your apples, whether you used light or dark brown sugar, or even what brand of oats you grab off the shelf can change those numbers! So, take these figures as a general guide for your fruit crisp, not as a sworn guarantee. Enjoy it because it tastes amazing, and forget the spreadsheets for dessert!
Print
Simple Apple Crumble
- Total Time: 60 min
- Yield: 6 servings 1x
- Diet: Vegetarian
Description
A straightforward recipe for a classic baked apple dessert with a crisp topping.
Ingredients
- 6 medium apples, peeled, cored, and sliced
- 1/4 cup granulated sugar (for apples)
- 1 teaspoon ground cinnamon
- 1 tablespoon lemon juice
- 1 cup all-purpose flour
- 1/2 cup packed light brown sugar
- 1/2 cup (1 stick) cold unsalted butter, cut into small pieces
- 1/4 cup rolled oats
Instructions
- Preheat your oven to 375 degrees F (190 degrees C). Lightly grease an 8×8 inch baking dish.
- In a bowl, toss the apple slices with the granulated sugar, cinnamon, and lemon juice. Place the apples evenly in the prepared baking dish.
- In a separate medium bowl, combine the flour, brown sugar, and rolled oats.
- Cut in the cold butter using a pastry blender or your fingers until the mixture resembles coarse crumbs.
- Sprinkle the crumble topping evenly over the apples.
- Bake for 35 to 40 minutes, or until the topping is golden brown and the apples are tender when pierced with a fork.
- Let cool slightly before serving.
Notes
- Serve warm with vanilla ice cream or heavy cream.
- You can substitute half the flour with whole wheat flour for a nuttier flavor.
- Prep Time: 20 min
- Cook Time: 40 min
- Category: Dessert
- Method: Baking
- Cuisine: American
Nutrition
- Serving Size: 1 serving
- Calories: 350
- Sugar: 30g
- Sodium: 5mg
- Fat: 18g
- Saturated Fat: 11g
- Unsaturated Fat: 7g
- Trans Fat: 0g
- Carbohydrates: 48g
- Fiber: 4g
- Protein: 4g
- Cholesterol: 45mg
Keywords: apple crumble, baked apples, dessert, fruit crisp, cinnamon apples