
Okay, ditch the idea that cheesecake has to be a fussy, water-bath nightmare! Seriously, that whole process always makes me nervous. I want that creamy, tangy goodness without the potential for a giant crack running down the middle of my dessert. That’s why I spent ages perfecting bar recipes, and these beautiful **Raspberry Cheesecake Bars** are my absolute go-to when I need something that looks totally impressive but comes together so easily.
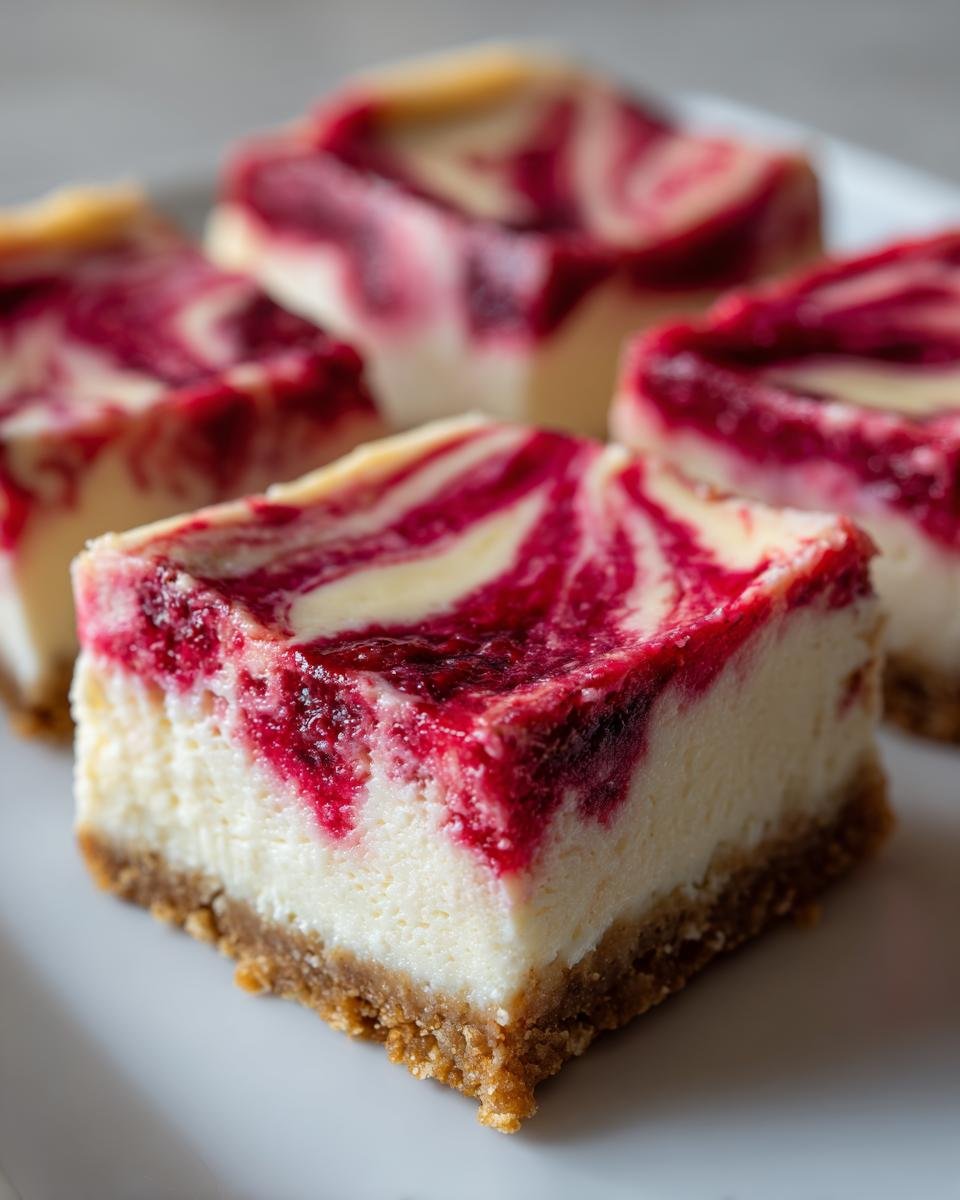
You get the perfect crunch from the buttery graham cracker base layered underneath this impossibly smooth, rich filling. And, oh my goodness, the swirl! That pop of tart raspberry cuts right through the richness. Since I bake bars constantly—for potlucks, bake sales, or just Tuesday night—I’ve figured out the exact tricks to guarantee they set up beautifully every single time. Trust me, once you see how easy this baked swirl is, you won’t look back!

Why You Will Love These Raspberry Cheesecake Bars
Honestly, I keep coming back to this recipe week after week because it checks every single box. You don’t need complicated springform pans or hours hovering over boiling water. It’s pure dessert magic with minimal effort!
- Zero Fuss Baking: We use a simple 9×13 pan! Line it with paper, press the crust, pour the filling, and you’re basically done. The cleanup is shockingly easy, too.
- The Flavor Balance is Spot On: You get that perfect contrast! The sweet, cozy graham cracker crust anchors the rich, creamy cheesecake filling, and then BAM—the bright, slightly tart raspberry swirl hits you. It’s truly decadent.
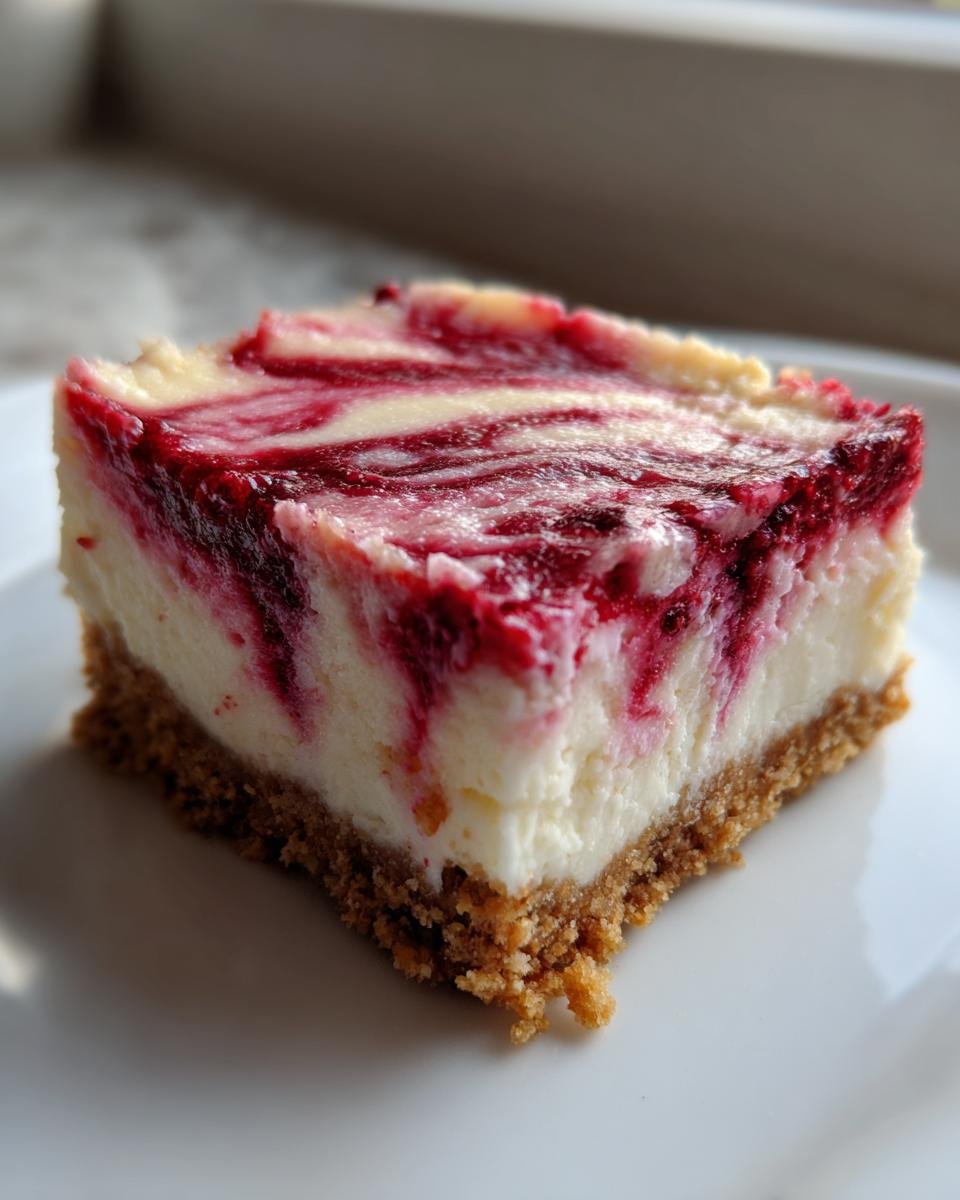
- Texture Perfection Guaranteed: Because these are baked bars, the texture holds up beautifully. You get a sturdy, buttery base that doesn’t crumble into dust when you pick it up, and a filling that’s dense—but never heavy.
- Make-Ahead Champion: These taste even better the next day after they’ve fully set up in the fridge. You can whip these up the day before a party, and they’ll be ready to slice and serve!
Essential Ingredients for Perfect Raspberry Cheesecake Bars
I’m going to lay out exactly what you need, down to the consistency. Don’t skip the prep notes, especially for the cream cheese! Getting the ingredients right is half the battle, and I promise these specific measurements give you that perfect creamy-to-crust ratio every time. We break it down by layer so you don’t mix anything up prematurely.
For the Graham Cracker Crust
This base needs to be sturdy enough to hold up the rich filling. The butter must be melted to bind those crumbs together properly before we give it that first little bake!
- 1 1/2 cups graham cracker crumbs
- 1/4 cup granulated sugar
- 6 tablespoons unsalted butter, melted
For the Cheesecake Filling
This is where we hit that signature tangy richness. Make sure your cream cheese is fully softened—if it’s cold, you get lumps, and we absolutely don’t want lumps in our beautiful baked bars!
- 2 (8 ounce) packages cream cheese, softened
- 1/2 cup granulated sugar
- 2 large eggs
- 1 teaspoon vanilla extract
For the Raspberry Swirl Topping
This swirl adds the color and that bright acidity we need to balance the heavy cream cheese. Don’t worry if your raspberries are frozen; they work perfectly fine for this part!
- 1 cup fresh or frozen raspberries
- 1 tablespoon lemon juice
Equipment Needed for Making Raspberry Cheesecake Bars
Okay, I know what you’re thinking: “Do I need fancy springform pans for these cheesecake bars?” Nope! That’s the beauty of keeping things simple. For this recipe, we’re sticking to standard kitchen gear, which makes cleanup an absolute breeze. Having everything measured and ready before you start mixing is my number one piece of advice—it keeps the process flowing smoothly!
Here is the list of things I always pull out for this batch. If you have an electric mixer, great, use it! But I’ve certainly made this by hand when the mood strikes and I wanted to really work out my arm.
- A 9×13 inch baking pan. This is non-negotiable for getting the right thickness!
- Parchment paper. This is our secret weapon for easy removal later. Make sure you get a sheet big enough to hang over the long sides of the pan like little handles.
- Large mixing bowls. You need one for the crust, one for the filling, and a small one for mashing those raspberries.
- An electric hand mixer or a stand mixer. This really helps get that cream cheese perfectly smooth and airy without any lumps.
- Measuring cups and spoons. Cheesecake is all about precision, especially with the filling!
- A fork or a small whisk for mashing the raspberries into that lovely sauce.
- A sharp knife and a cutting board for when it’s time to slice those perfectly chilled bars.
Seriously, that’s it! No weird gadgets needed here. Just good old-fashioned baking tools!
Step-by-Step Instructions for Baked Raspberry Cheesecake Bars
Alright, now that we have our ingredients gathered and our oven preheating to 350 degrees F (175 degrees C), let’s get these beauties assembled! This process moves fast once you get started. Remember to line that 9×13 pan with parchment paper, making sure you leave a lovely overhang on those long sides. That overhang is what you’ll use later to lift everything out cleanly, so don’t skimp on it!
Preparing and Baking the Crust
First up is getting that buttery base ready. In a bowl, you just combine your graham cracker crumbs and the 1/4 cup of sugar. Pour in that melted butter and stir it all up until it looks like wet sand. Then, you need to press this mixture down firmly into the bottom of your prepared pan. Get it nice and compact—a flat-bottomed glass works great for this! Pop this crust into the oven and bake it for exactly 10 minutes. This little pre-bake makes sure the crust doesn’t get soggy later.
Mixing the Cream Cheese Batter
Once the crust is out, it’s time for the smooth stuff. Take your softened cream cheese and that 1/2 cup of sugar and beat them together until they are truly smooth. I mean *perfectly* smooth before the eggs even think about joining the party. Then, beat in your two eggs, one at a time, mixing just until they disappear. Finish it off with the vanilla extract. Stop mixing as soon as it’s combined. Over-beating the filling is how you invite air in, and air causes cracks!
Creating the Raspberry Swirl and Final Bake
While the oven is busy, grab a little bowl and mash your cup of raspberries together with just the tablespoon of lemon juice. If you’re using frozen berries, grab them straight from the freezer—no thawing needed! Now, dollop spoonfuls of that beautiful, chunky raspberry mixture all over the top of your cheesecake batter. Take a butter knife or a skewer and gently drag it through the top layers to create those gorgeous swirls. Don’t stir it completely; we want ribbons!
Bake this for 25 to 30 minutes. You’re looking for a center that is mostly set—it might still wiggle just a tiny bit in the very middle, but it shouldn’t look liquid.
If you want to see some other ways I use berries in my baking, check out my recipe for divine raspberry crumble cookies—they’re ready in a flash!
Cooling and Chilling the Raspberry Cheesecake Bars
This is the hardest part, I know, but you have to be patient! Let the bars cool completely down on a wire rack first. Resist the urge to cut them hot! Once they are just room temperature, cover the pan and move them into the refrigerator to chill for a minimum of 2 hours. Seriously, 2 hours minimum! This chilling time allows the bars to firm up completely, which is the secret to getting those clean slices we want. Remember that overhang we left? Grab it, lift the whole slab out of the pan onto a cutting board, and then slice away!
Tips for Success When Making Raspberry Cheesecake Bars
I’ve made enough cheesecake of every kind to know where things go wrong, and luckily, these baked bars are pretty forgiving! But if you want that magazine-perfect, sliceable result every single time, I have a few personal rules I stick by. These tips focus on keeping that filling silky smooth and making sure the chilling process does its job!
First off, let’s talk about temperature. If your cream cheese is cold, you are already fighting a losing battle. I always pull my cream cheese out an hour before I plan on mixing to let it get nicely soft. That way, it creams up with the sugar into that cloud-like texture we want, meaning no frustrating clumps!
My next big piece of advice is to be gentle with the filling once the eggs go in. I mentioned it before, but it bears repeating: once you add the eggs, you’re mixing just enough to incorporate them. Too much whipping after the eggs join the party introduces air bubbles. Those air bubbles are what pop during baking and leave you with a cracked top. We want smooth, not airy!
And remember the chilling! This cannot be overstated. If you try to cut these warm or even room temperature, you end up with a sloppy mess that looks nothing like the beautiful bars you see online. The refrigeration time bonds the ingredients together and firms up the fat. Plan for that two-hour chill period, minimum. If you’re curious about other amazing setups, I’ve always loved looking into amazing no-bake cheesecake recipes for inspiration, but for these baked beauties, chilling is king.
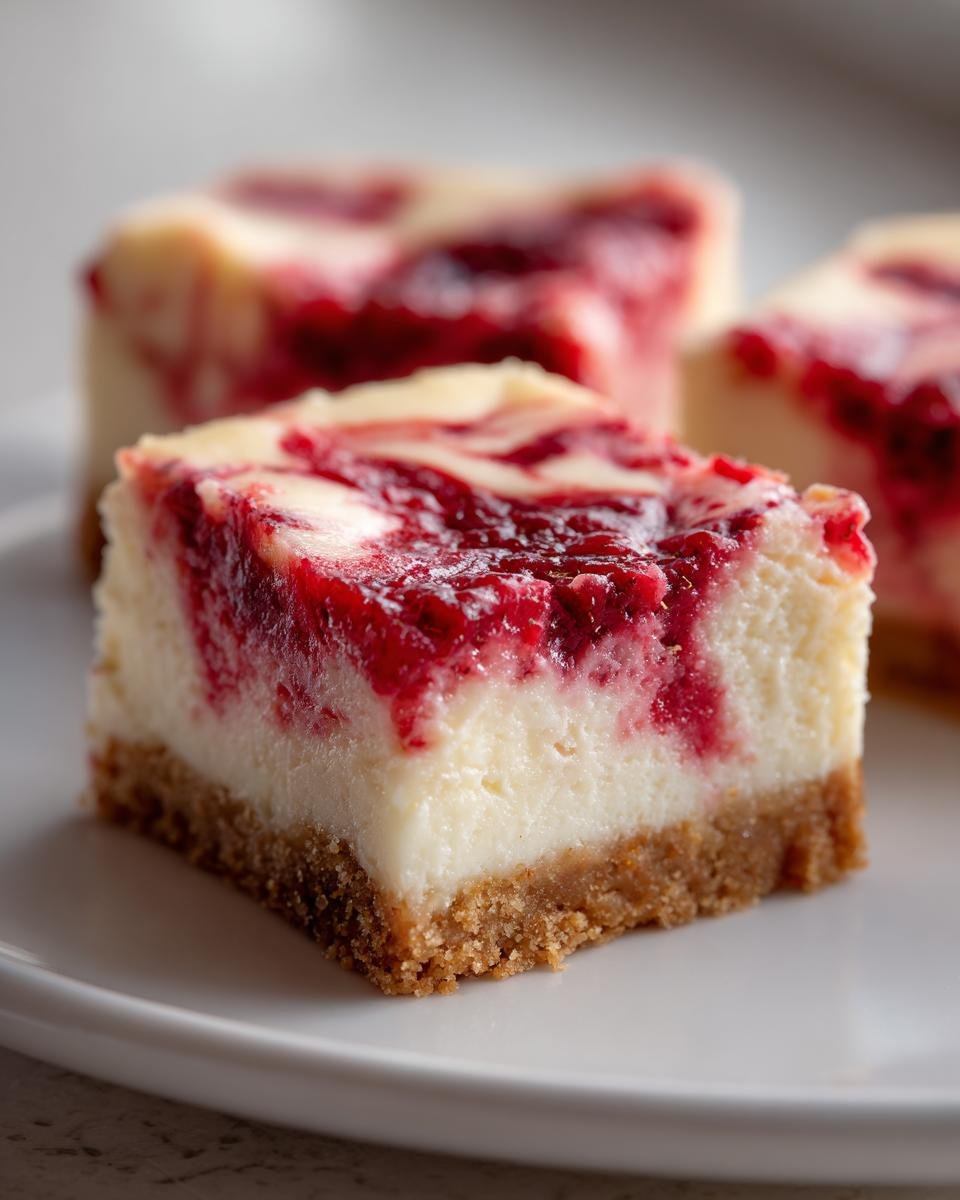
Finally, how do you get the cleanest cut? Once they are totally chilled, use the parchment handles to lift the whole slab onto a cutting board. Then, grab your sharpest knife, dip it into hot water, wipe it completely dry, and make your slice. Wipe the knife clean and re-heat it for every single cut. It sounds tedious, but it results in perfectly sharp edges for those gorgeous raspberry swirls!
Variations on Classic Raspberry Cheesecake Bars
While I think this classic combination of graham cracker, vanilla, and raspberry is pretty much perfection, I’m all about playing around once you have the core technique down! Once you master the crust bake and the gentle mixing of the filling, you can start swapping things out and making these bars totally yours. Don’t be afraid to try small changes!
The crust is the easiest thing to change, honestly. If you aren’t feeling graham crackers, you can absolutely use vanilla wafers or shortbread cookies for your crumbs. Just use the same amount of crumbs and sugar, and bind it with the melted butter. It changes the final flavor, giving you a richer, almost buttery base instead of that classic cinnamon spice. It’s wonderful!
If you want to jazz up the main cheesecake body, try swapping out the vanilla extract for something brighter. A teaspoon of fresh lime zest mixed into the cream cheese batter before the eggs go in makes these taste practically tropical. It pairs unbelievably well with the tartness of the raspberry, too. It gives the whole bar a refreshing little kick!
And of course, the berries! Maybe you’re not feeling raspberries this week, or maybe you just want a burst of ruby red color. You can follow the exact same instructions, swapping those raspberries out for another fruit. Frozen cherries work stunningly well; I just mash them up with a little sugar instead of lemon juice. If you want to see how amazing cherries can be in a creamy dessert, you have to look at the recipe for irresistible no-bake cherry cheesecake; that flavor translates beautifully here too!
Sometimes, I even mix two types of berries into the swirl! A handful of raspberries and a handful of blueberries make the color even more vibrant and give you a layered fruit flavor instead of just one note. As long as you keep the total amount of fruit mash about the same amount as the original recipe calls for, you should be totally fine!
Storage and Reheating Instructions for Your Cheesecake Bars
Okay, let’s talk about what happens after you nail that perfect chill time and slice them up. Part of the magic of these baked bars is that they actually get *better* the next day, as the filling settles in and firms up even more. But you do have to treat them right, because they are cream cheese, after all!
The number one rule here is refrigeration. You absolutely must keep these raspberry cheesecake bars cold. Once they are fully chilled and cut, I store leftovers in an airtight container in the fridge. I stack them in a single layer, using a piece of parchment paper between layers if I have to stack them higher. They stay wonderfully fresh and creamy for about four to five days this way. Just make sure the container is sealed well so they don’t absorb any weird fridge smells!
Now, here’s where I get firm with you: please, please do not try to reheat these. They are baked, yes, but the finished texture relies on the cold fat content holding everything tight. If you try to microwave them or warm them up, you’re going to end up with a soupier filling and a soggy crust. That’s just cheesecake science for you!
If you pull them out of the fridge and they feel rock hard—maybe you stored them for a few days and they got a little too cold—don’t worry! You don’t need heat to fix them. Just take them out about 10 to 15 minutes before you plan on serving them. That little bit of time at room temperature is just enough to let the texture soften slightly from firm-solid to that perfect, creamy sliceable texture without turning them mushy. That’s the trick to serving them perfectly every time!
Quick Answers: Frequently Asked Questions About Raspberry Cheesecake Bars
I know you have questions! When you’re making something as potentially fussy as a baked cheesecake, even in bar form, doubts pop up. I try to cover everything that trips me up, but here are the most common things folks ask me about getting these **baked cheesecake bars** absolutely perfect.
Can I use frozen raspberries in the swirl?
Yes, you totally can! I often use frozen ones because they are usually cheaper and available year-round. The important thing to remember, which is noted in the recipe, is that you should *not* thaw them first. Throw them straight from the bag into the bowl with the lemon juice. They mash up a little bit differently than fresh ones, but they break down beautifully when you bake them, giving you that fantastic, colorful **cheesecake swirl**.
How do I get clean cuts on my Raspberry Cheesecake Bars?
This is all about physics and patience! If you try to cut these bars when they are even slightly warm or soft, you’ll just smudge the filling. You need that minimum 2 hours of chilling time, but honestly, I find they are best after four hours or even overnight. Once they are rock-solid cold, pull out that parchment overhang and lift the whole block onto a cutting board. Then, run your sharp knife under hot water, wipe it bone dry, and make your first cut. Wipe the knife again, reheat it, and slice again. Repeat this for every single cut. It guarantees you get those sharp, clean edges instead of a crumbly mess!
Why did my cheesecake filling crack?
Ugh, the dreaded crack! It almost always comes down to two things when making any cheesecake, bars included. First, over-baking. If you leave it in until the center looks totally solid, it’s likely overcooked. It should set while cooling, so taking it out right when the edges look firm and the center has just a tiny bit of wobble is key. Second, temperature shock. Did you yank them straight from a hot 350-degree oven and stick them immediately into the ice-cold fridge? That sudden change causes the filling to contract too fast and crack. Always let them cool on the counter for at least an hour before they go into the fridge. If you want to dive really deep into cheesecake mysteries, you might enjoy checking out the tips shared for a key lime cheesecake—the principles are very similar!
Nutritional Snapshot of Raspberry Cheesecake Bars
Now, I always feel a little awkward sharing this part because I’m not a nutritionist, and let’s be real, when we’re eating cream cheese and graham crackers, we aren’t exactly counting calories! But sometimes you just want the ballpark figure. Think of these numbers as estimates, okay? Your portion size and your specific ingredients will always change the final tally.
Based on how I measure things out, you’re looking at a dessert that’s definitely rich but offers a decent amount of protein for a treat!
- Serving Size: 1 bar
- Calories: 250
- Fat: 16g (A good amount from that buttery crust and cream cheese!)
- Carbohydrates: 24g
- Sugar: 18g
- Protein: 4g
They do contain some fat and sugar, as expected, but hey, they are worth every single bite! Enjoy them!
Print
Raspberry Cheesecake Bars
- Total Time: 55 min
- Yield: 16 bars 1x
- Diet: Vegetarian
Description
A simple recipe for baked cheesecake bars with a raspberry swirl topping.
Ingredients
- 1 1/2 cups graham cracker crumbs
- 1/4 cup granulated sugar
- 6 tablespoons unsalted butter, melted
- 2 (8 ounce) packages cream cheese, softened
- 1/2 cup granulated sugar
- 2 large eggs
- 1 teaspoon vanilla extract
- 1 cup fresh or frozen raspberries
- 1 tablespoon lemon juice
Instructions
- Preheat your oven to 350 degrees F (175 degrees C). Line a 9×13 inch baking pan with parchment paper, leaving an overhang on the sides.
- Combine graham cracker crumbs and 1/4 cup sugar in a bowl. Pour in melted butter and mix until combined. Press the mixture firmly into the bottom of the prepared pan.
- Bake the crust for 10 minutes. Remove from the oven.
- In a large bowl, beat the softened cream cheese and 1/2 cup sugar until smooth. Beat in the eggs one at a time, then mix in the vanilla extract.
- Pour the cream cheese mixture over the baked crust.
- In a small bowl, mash the raspberries with the lemon juice. Drop spoonfuls of the raspberry mixture over the cheesecake batter. Use a knife or skewer to gently swirl the raspberry mixture into the batter.
- Bake for 25 to 30 minutes, or until the center is mostly set.
- Let the bars cool completely on a wire rack before cutting. Chill in the refrigerator for at least 2 hours before serving.
Notes
- For easier removal, use the parchment paper overhang to lift the cooled bars from the pan.
- If using frozen raspberries, do not thaw them before mashing.
- Prep Time: 20 min
- Cook Time: 35 min
- Category: Dessert
- Method: Baking
- Cuisine: American
Nutrition
- Serving Size: 1 bar
- Calories: 250
- Sugar: 18g
- Sodium: 150mg
- Fat: 16g
- Saturated Fat: 10g
- Unsaturated Fat: 6g
- Trans Fat: 0g
- Carbohydrates: 24g
- Fiber: 1g
- Protein: 4g
- Cholesterol: 55mg
Keywords: raspberry, cheesecake, bars, graham cracker, dessert, baked