
Oh, the smell of the holidays! Nothing kicks off that cozy, festive feeling in my kitchen quite like pulling out the cookie cutters and that big bag of sprinkles. If you’re serious about holiday baking, you know you need a foolproof base recipe—something that doesn’t melt into puddles the second it hits the oven. Well, stop looking! This recipe for classic **Christmas Sugar Cookies** is the one I’ve relied on since I was tall enough to reach the counter.
We’re talking about the perfect construction here: edges that hold their shape beautifully, so your reindeer look like reindeer and not blobs, but the centers stay delightfully soft. It’s the ideal canvas for all that colorful icing you’ve been dreaming about. Making these every December isn’t just tradition; it’s how we build memories. Trust me, you’re going to want this recipe close for years!

Why You Will Love These Classic Christmas Sugar Cookies
I’ve tested dozens of cutout recipes over the years, and these just keep winning holiday gatherings. You need a cookie that works hard for you, right?
- They won’t spread out on the baking sheet—your detailed shapes stay perfect!
- The texture is the dream combo: perfectly crisp edges meeting a tender, melt-in-your-mouth center.
- The dough is sturdy enough to handle rolling out thin and maneuvering cookie cutters without tearing.
- They’ve got that wonderful, straightforward vanilla flavor that pairs perfectly with any icing or topping you throw at them.
Essential Ingredients for Perfect Christmas Sugar Cookies
You can’t rush perfection when it comes to the foundation of a great cutout cookie, and that starts right here with high-quality ingredients. Forget shortcuts! The flavor of these **Christmas Sugar Cookies** comes down to simple, honest pantry staples. The success of the rolling and cutting stage totally depends on how you handle the butter and eggs here. It sounds dramatic, but it’s true!
I always measure carefully, especially the flour—we’ll talk about how to do that properly in a bit—but the real secret sauce in this recipe is making sure everything joins the party at the right temperature.
Dry Ingredients for Christmas Sugar Cookies
We keep this part easy. The combination of these elements gives our cookies the lift they need without making them cakey or crumbly. You’ll need these amounts whisked together first:
- 3 cups all-purpose flour
- 1 teaspoon baking powder
- 1/2 teaspoon salt
Wet Ingredients for Christmas Sugar Cookies
This is where texture gets decided! The butter absolutely must be softened—not melted, mind you, but soft enough that if you press it, your finger leaves a distinct mark. And use two large eggs. Always use good vanilla extract here; it really shines through since there are no strong spices masking it.
- 1 cup unsalted butter, softened
- 1 1/2 cups granulated sugar
- 2 large eggs
- 1 teaspoon vanilla extract
Expert Tips for Preparing the Best Christmas Sugar Cookies Dough
Okay, this is where we earn our baker badge. People get frustrated with holiday baking because they rush the dough stage, but honestly, a little patience here saves so much heartache later when you’re trying to cut out shapes!
The creaming step—mixing the softened butter and sugar until it’s pale and fluffy—is non-negotiable. You’re not just mixing; you’re whipping air into the fat. This air is what gives the final cookie some lightness so they aren’t hockey pucks! I use my stand mixer for this on medium speed, scraping down the sides constantly. Don’t stop until it visibly looks almost white.
Why Overmixing Equals Sad, Puffy Cookies
Once you add that flour mixture, your job changes! Stop mixing the second you don’t see any more dry streaks. Seriously, stop. Overmixing develops gluten in the flour, and gluten loves to make bread chewy, but it makes our **Christmas Sugar Cookies** spread out like lava in the oven. We want them neat, not messy!
The Absolute Must-Do: Chilling Time
Chilling isn’t optional here; it’s like letting a sleeping dog lie. The dough needs time for the fats to solidify again after all that mixing action. When the butter is cold, the cookie holds its shape better when baking. I always aim for at least an hour, but honestly, if I can manage two hours, I do it. It makes rolling so much easier. Speaking of flavor, I learned switching to pure vanilla bean paste instead of standard extract brightens up the whole vanilla profile—you won’t regret using the good stuff for this classic flavor base!
If you want a deeper dive on other ways to make fantastic roll-out cookies, you should check out this guide on the best sugar cookie recipe—it covers some of the science behind why these steps work so well!
Step-by-Step Instructions for Baking Your Christmas Sugar Cookies
Alright, we’ve got our beautifully chilled dough. Now it’s transformation time! Baking these cookies is a two-part show: first, we get the dough ready for its close-up, and second, we get them perfectly baked so they don’t burn around the edges while the middle is still gooey. Don’t worry about complex timing; just listen to what the dough and the oven are telling you.
Mixing and Chilling the Christmas Sugar Cookies Dough
Remember, we already creamed the butter and sugar until it looked like fluffy sunshine. Now, we need to introduce the eggs slowly. Beat them in one at a time. This means you mix the first egg until it’s totally incorporated before adding the second one. Then, pour in that vanilla extract.
Next up are the dry stuffs—that flour, baking powder, and salt mix we prepared earlier. Add this mixture gradually to the wet stuff. I mean it when I say gradually! Mix only until you see the flour disappear—that’s it. If you mix too long here, those wonderful shapes you plan to cut out will spread everywhere, and that defeats the entire purpose of this recipe!
The final, crucial step for this part? Wrap up that dough into two flat discs. Put them in the fridge and let them chill for at least 1 hour. If you skip this, you’ll hate rolling it out later, trust me. Set a timer so you don’t forget!
Rolling, Cutting, and Baking the Christmas Sugar Cookies
Once chilled, preheat your oven to 375 degrees F (190 degrees C) and line those baking sheets, preferably with parchment paper—it makes cleanup feel like a dream! If you need tips on making your own pan release for other baking, this guide on amazing homemade bread rolls actually has a great trick that works here too!
Take one package of dough out at a time (keep the other chilled!) and roll it out on a lightly floured surface to about 1/4 inch thickness. This thickness is perfect for getting a slightly crisp edge but keeping that soft center.

Use your favorite cookie cutters to punch out the shapes. Now, place them gently on your prepared sheets. Bake them for 8 to 10 minutes. You’re watching for the visual cue: the edges should just look lightly golden. Pull them out then! Let them sit right there on the hot pan for 5 minutes before carefully moving them to a wire rack to cool completely. Resist the urge to decorate too soon—they have to be fully cooled, or the icing melts right off!
Ingredient Notes and Substitution Guide for Christmas Sugar Cookies
I know sometimes life throws you a curveball, and maybe you’re out of parchment paper or you just want that dough *extra* firm. That’s fine! This recipe is forgiving if you understand why we do things the way we do.
Remember how I said you could chill the dough longer? If you’re feeling super organized, chilling it for up to 2 hours actually helps the dough handle rougher rolling, which is great if you have little helpers involved. If you don’t have parchment paper, lightly greasing your baking sheets works too, though you might have slightly browner bottoms on your cookies.
Now, let’s talk flour, because this is crucial for keeping your **Christmas Sugar Cookies** from spreading. The biggest trap is scooping flour straight from the bag with your measuring cup—that packs it in densely! Always use a spoon to gently fluff up the flour, then spoon it lightly into your measuring cup. Level off the top with a knife. That small step ensures you aren’t accidentally adding an extra quarter cup of flour, which leads to tough cookies!
Decorating Ideas for Your Beautiful Christmas Sugar Cookies
Now, this is the fun part! Baking the perfect **Christmas Sugar Cookie** is just the opening act; decorating is the main event, right? It’s where you can really let your holiday spirit shine. Since our base cookie is sturdy, it handles nearly any type of decoration you throw at it, which is why this is my go-to base for all my Christmas cake truffles inspiration, too!
The first decision is your icing. Royal icing is the absolute standard if you want that hard, shiny finish that stacks well, but it can be fussy. If you want something quick that tastes amazing and sets up firm enough for light handling, a simple powdered sugar glaze works wonders.
Mastering Icing Consistency for Cutout Cookies
You need two main consistencies for professional-looking results, even if you’re just fooling around!
- Outline Consistency (Stiff): This icing should be thick enough to hold a defined peak when you lift your spoon. Use this only to pipe the *edges* or borders of your cookie. It needs to hold its shape and keep the flood icing contained!
- Flood Consistency (Runny): Once you pipe the outline, you thin the rest of your icing slightly with a tiny bit of water or lemon juice until it flows smoothly off the spoon in a ribbon that slowly disappears back into the bowl—that’s flooding consistency! Pour this inside your outline and gently spread it out.
Quick Decorating Tricks for Holiday Baking
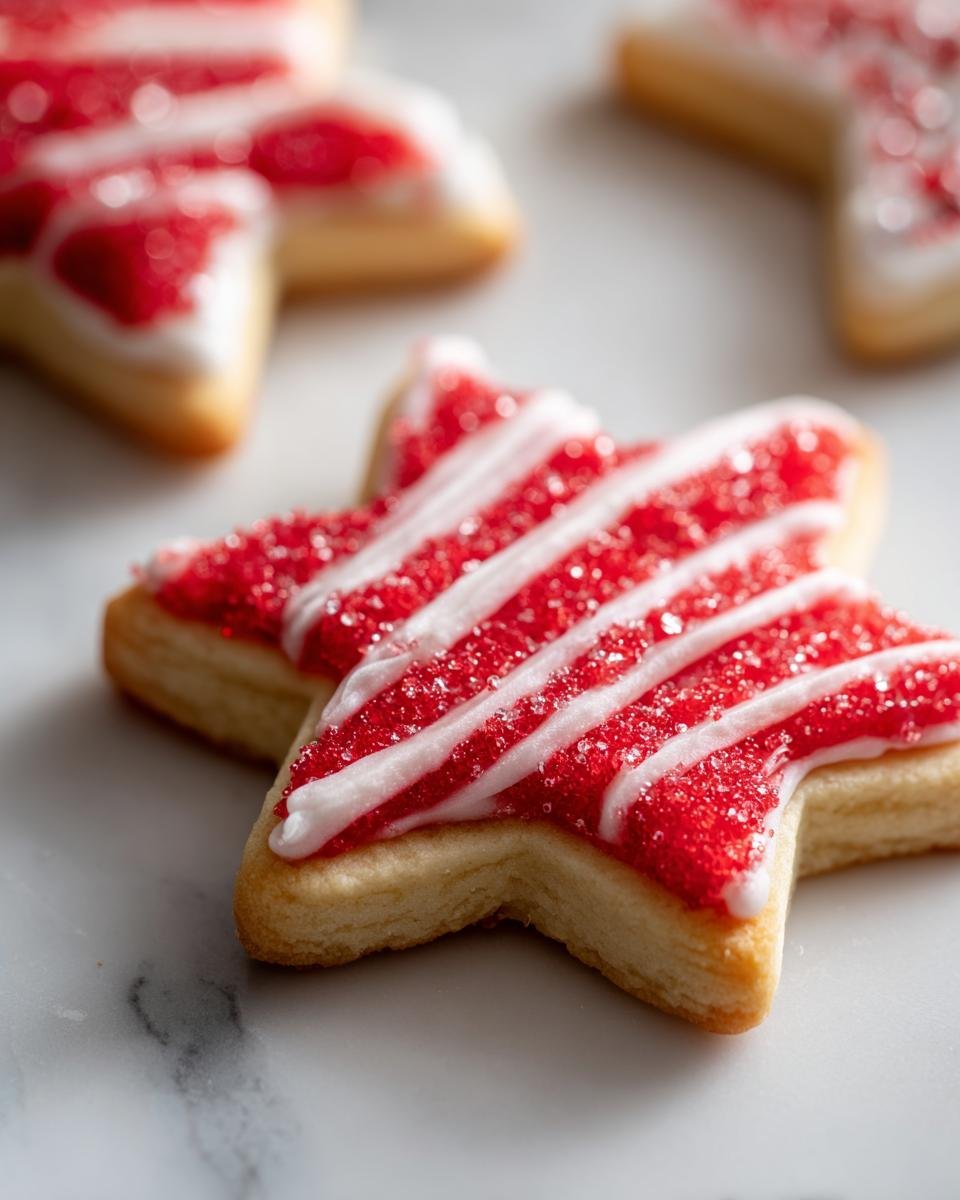
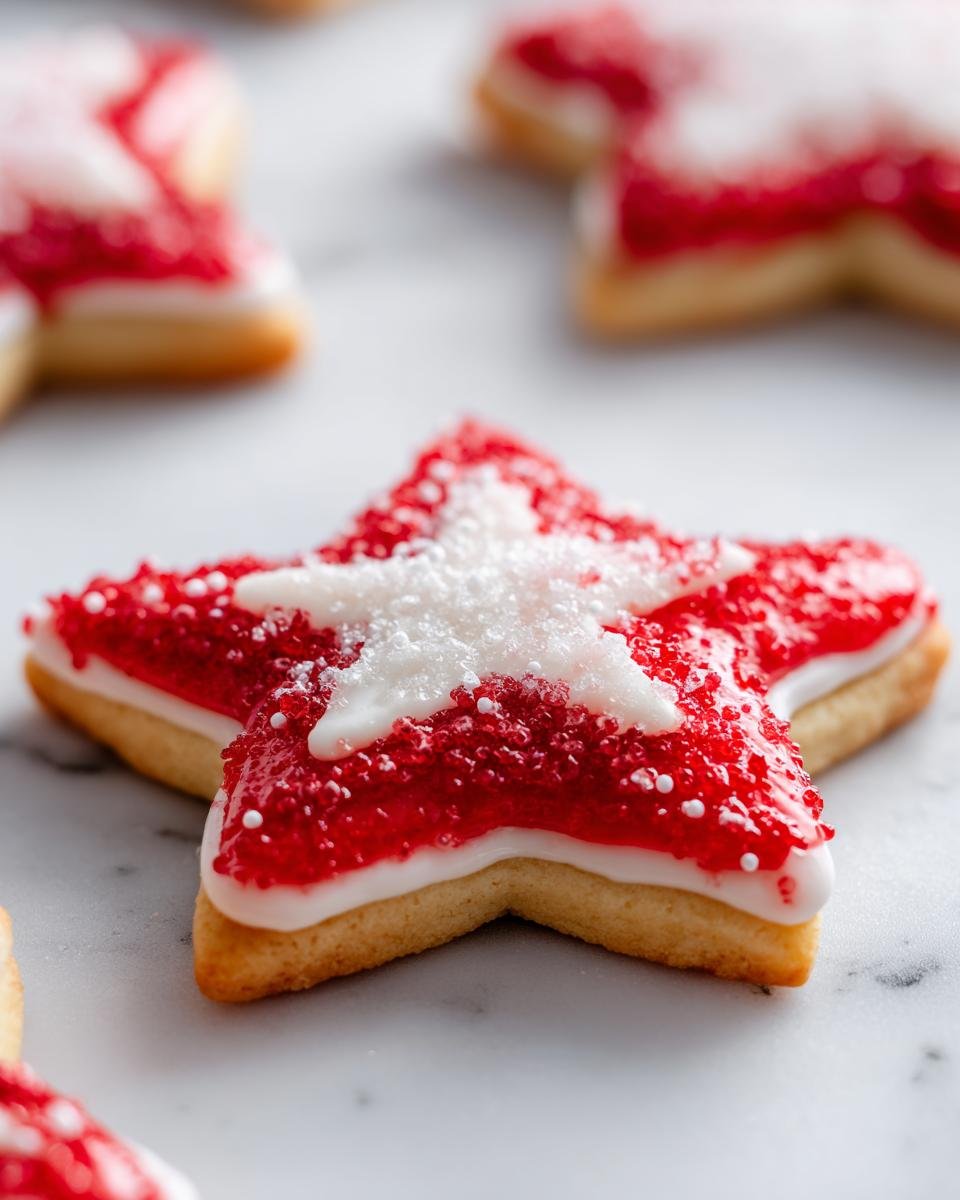
If you aren’t into the whole piping bag wrestling match, there are beautiful shortcuts. Right after you flood a cookie with icing, this is the moment to add your texture. Don’t wait for it to dry!
Try gently tapping the pan on the counter a few times; this helps the air bubbles rise so you can pop them with a toothpick. Then, it’s time for sparkle! Rainbow nonpareils, sanding sugar, or even edible glitter sprinkled liberally on top of the wet flood icing look fantastic and require zero extra skill. If you’re short on time during peak **holiday baking**, a simple drizzle of two contrasting icing colors, followed by a swirl with a toothpick works miracles to make a busy pattern that still looks hand-decorated!
Storage and Make-Ahead Tips for Christmas Sugar Cookies
The best part about making **Christmas Sugar Cookies** is that you can totally get ahead in your **holiday baking** schedule! Who wants to stress about rolling dough on Christmas Eve? Not me! Storing these cookies correctly is key, whether they are baked or still dough, so they look stunning when it’s time to decorate.
If you bake your cutout cookies but don’t want to decorate yet—maybe you’re waiting for the kids to get home from school, or you’re just pacing yourself—they are super happy sitting out on the counter. Just make sure they are completely cool, and keep them in a single layer in an airtight container. They’ll stay crisp for about a week this way. If you stack them, you really need something between the layers, like wax paper, or you risk smearing any slightly soft spots or breaking those delicate edges.
Freezing Baked Christmas Sugar Cookies
This is my personal secret weapon during the busy holidays. You can absolutely freeze these cookies! I recommend freezing them *undecorated*. Once they are totally cool, stack them with wax paper or parchment squares between each layer, seal them tightly in a freezer-safe container or heavy-duty freezer bag. Frozen cookies usually last wonderfully for about three months.
When you want to bake, just take them out of the freezer while they are still wrapped and let them thaw right on the counter for a few hours. This slows down condensation! As for freezing the raw dough, I divide mine, wrap it tight, and freeze it; it thaws beautifully overnight in the fridge, ready for rolling the next day. If you want to learn about preserving other goodies for later, I found this neat trick on freezing fresh herbs in olive oil, which is a totally different kind of preservation, but it shows how much freshness you can lock in when you do it right!
How to Store Decorated Holiday Baking
Once you’ve gone through the fun of decorating, storage gets a little gentler. If you used royal icing—the hard stuff—you are totally fine! They can be stacked with wax paper just like the undecorated ones. The icing acts as a protective barrier.
If you opted for a softer frosting, like buttercreams, you have to be more careful. I generally don’t keep those cookies stacked very high, maybe two layers maximum, always with wax paper between them, and I try to decorate them no more than four days before serving. For the best result for your beautiful **Christmas Sugar Cookies**, I always recommend decorating them just a day or two before assembly so everything tastes its freshest!
Frequently Asked Questions About Making Christmas Sugar Cookies
I get so many messages after the holidays about people running into common snags while **holiday baking**. Don’t worry if your results aren’t perfect the first time! These **cutout cookies** can be a little picky, but we can troubleshoot them together.
Why did my sugar cookies spread out while baking?
This is the #1 question I hear! Usually, spreading means one of two things happened. First, your butter was too soft—or worse, melted—when you creamed it. You need cold fat pockets when putting them in the oven. Second, you overmixed the flour into the dough. Remember, we stop mixing the second the streaks disappear to keep that gluten quiet! If you suspect this happens, you absolutely must chill the dough longer before rolling.
Do I really have to chill the dough overnight?
You don’t *have* to chill it overnight, but trust me, it helps. The mandatory minimum is one hour, which stiffens the dough enough to roll without sticking everywhere. If you roll it warm, it gets sticky fast, and you end up adding way too much flour to the surface, which dries out your finished cookie. If you can manage two hours, your rolling experience will be 100 times smoother.
What’s the best way to store undecorated cookies?
For undecorated **Christmas Sugar Cookies**, airtight containers are your best friend. I stack them with parchment paper or wax paper between layers. They keep beautifully at room temperature for up to a week. If you need longer storage than that, definitely pop them into the freezer! They hold up great.
Nutritional Estimates for Classic Christmas Sugar Cookies
Now, I know when we’re making holiday cookies, we aren’t exactly aiming for health food, right? These recipes are made with love and shouldn’t be worried about too much when they come out of the oven during Christmas! But, since you asked, I pulled the rough estimates from the standard recipe breakdown. Here’s what you’re looking at on average for one of these beautiful little treats.
Just keep in mind—this is just a guide! If you use salted butter instead of unsalted, or if you decide to use that extra thick layer of frosting we talked about decorating with, these numbers are definitely going to change. Every kitchen is different, and these are based on standard measuring, so treat these like friendly guidelines rather than strict rules!
- Serving Size: 1 cookie
- Calories: 150
- Sugar: 15 grams
- Sodium: 75 mg
- Fat: 8 grams
- Saturated Fat: 5 grams
- Unsaturated Fat: 3 grams
- Trans Fat: 0 grams
- Carbohydrates: 18 grams
- Fiber: 0 grams
- Protein: 2 grams
- Cholesterol: 30 mg
See? They’re not too terrible, especially considering how much joy they bring to the table! Enjoy every single one!
Print
Classic Christmas Sugar Cookies
- Total Time: 90 min
- Yield: 3 dozen 1x
- Diet: Vegetarian
Description
A straightforward recipe for traditional sugar cookies perfect for holiday decorating.
Ingredients
- 3 cups all-purpose flour
- 1 teaspoon baking powder
- 1/2 teaspoon salt
- 1 cup unsalted butter, softened
- 1 1/2 cups granulated sugar
- 2 large eggs
- 1 teaspoon vanilla extract
Instructions
- Whisk together the flour, baking powder, and salt in a medium bowl. Set aside.
- In a large bowl, cream together the softened butter and sugar until light and fluffy.
- Beat in the eggs one at a time, then mix in the vanilla extract.
- Gradually add the dry ingredients to the wet ingredients, mixing until just combined. Do not overmix.
- Divide the dough in half, wrap each half in plastic wrap, and chill for at least 1 hour.
- Preheat your oven to 375 degrees F (190 degrees C). Line baking sheets with parchment paper.
- On a lightly floured surface, roll out one portion of the dough to about 1/4 inch thickness.
- Use cookie cutters to cut out desired shapes. Place shapes on the prepared baking sheets.
- Bake for 8 to 10 minutes, or until the edges are lightly golden.
- Let the cookies cool on the baking sheets for 5 minutes before transferring them to a wire rack to cool completely.
- Decorate as desired once fully cooled.
Notes
- For easier handling, chill the dough for longer, up to 2 hours.
- If you do not have parchment paper, lightly grease your baking sheets.
- Roll scraps of dough together quickly to avoid warming them too much before re-rolling.
- Prep Time: 30 min
- Cook Time: 10 min
- Category: Dessert
- Method: Baking
- Cuisine: American
Nutrition
- Serving Size: 1 cookie
- Calories: 150
- Sugar: 15
- Sodium: 75
- Fat: 8
- Saturated Fat: 5
- Unsaturated Fat: 3
- Trans Fat: 0
- Carbohydrates: 18
- Fiber: 0
- Protein: 2
- Cholesterol: 30
Keywords: Christmas, Sugar Cookies, Holiday Baking, Cutout Cookies, Vanilla Cookies