
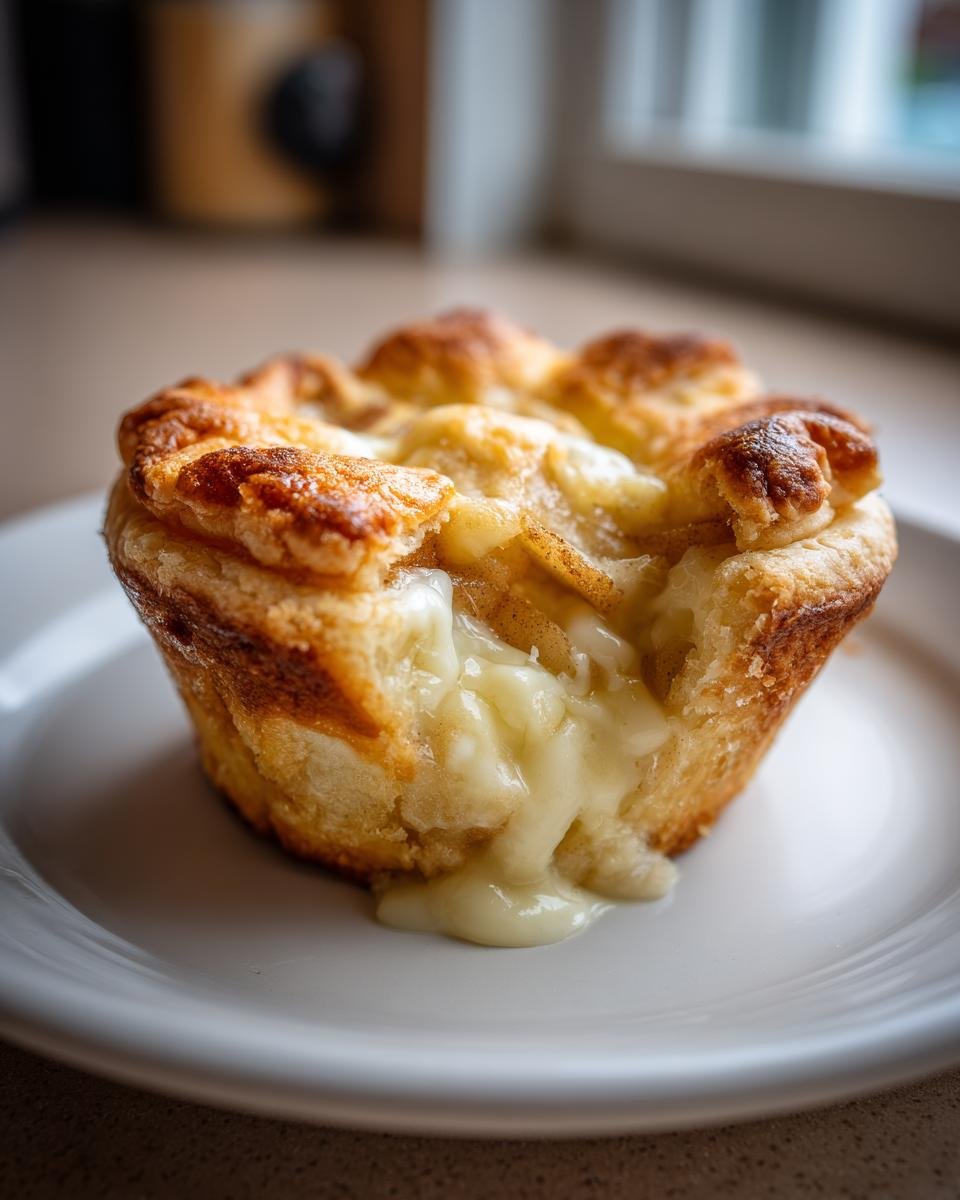
Okay, stop what you’re doing right now because I have merged two of my absolute favorite things into one tiny, perfect package. We’re talking cozy, spiced autumn apples meeting that cool, rich, tangy cream cheese filling we all crave. Seriously, who decided apple pie and cheesecake had to live separately? Because they were wrong!
I first tried stuffing pastries with cream cheese years ago when I used leftover filling in some leftover puff pastry, and it was instant love. This recipe is the ultimate evolution of that idea. We’re making individual, perfectly portioned Cheesecake Stuffed Apple Pies, and trust me, they disappear faster than you can bake them.
They bake up beautifully in a muffin tin, keeping everything neat and tidy. It’s the best of both worlds on one little plate. You’re going to want to double the batch, I’m warning you now!

Why You Will Love Making These Cheesecake Stuffed Apple Pies
Listen, I know baking can feel like a chore sometimes, but these mini gems make all the effort feel worthwhile. They solve so many problems! Here’s why you should run, not walk, to your oven right now for these goodies.
- Perfect Portion Control: Forget trying to slice a regular pie neatly! These individual portions are ready to go. Grab one, and you’re done! No messy leftovers, unless you hide them really well, which I often do.
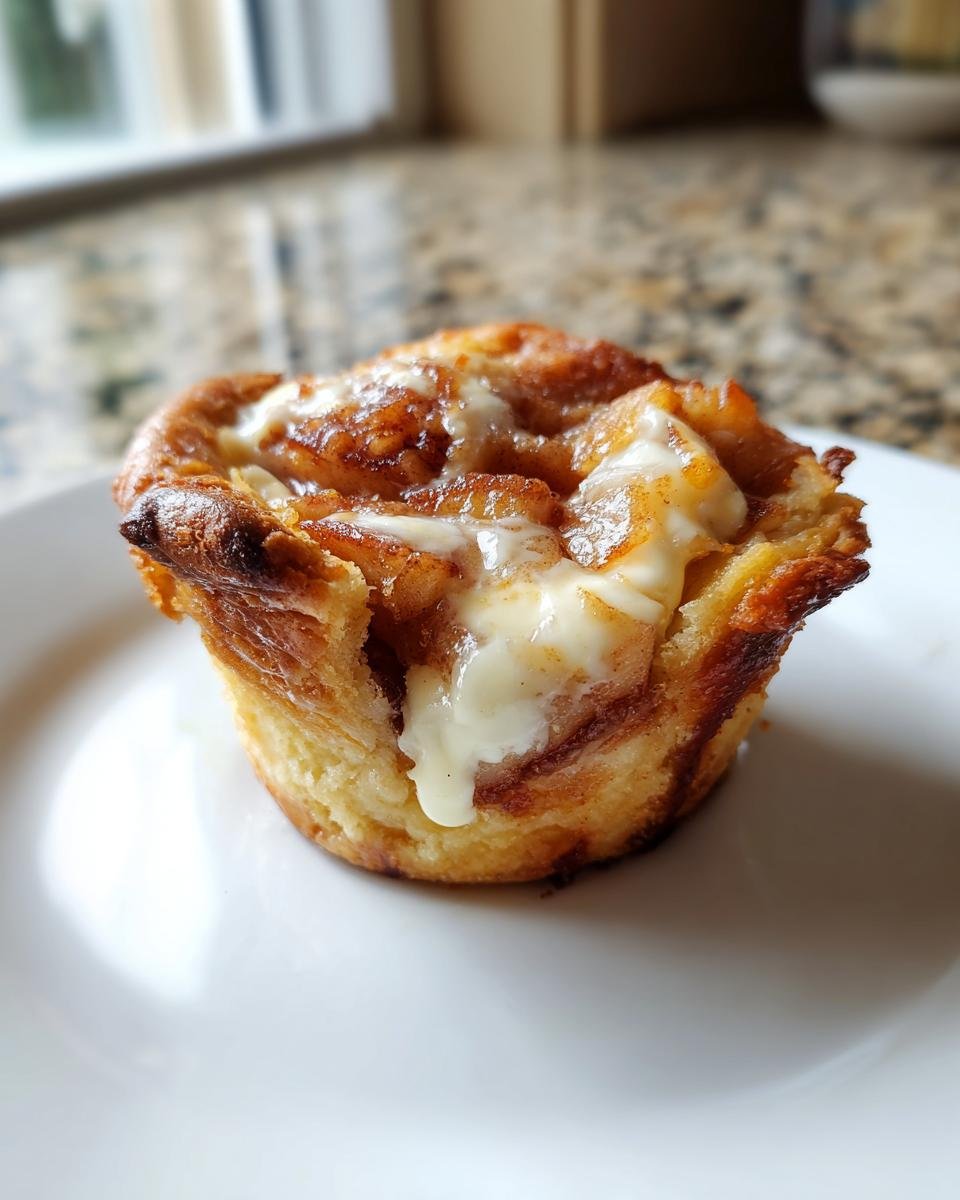
- The Flavor Combo is Next Level: That warm, spiced apple filling hitting that cool, slightly tart cheesecake layer mid-bite? It’s pure magic. Sweet, tangy, and comforting all at once—it hits every craving.
- Super Fast Assembly: Since we’re using pre-made pie crusts here (don’t judge—busy lives need shortcuts!), the prep time stays low. You get that amazing homemade taste without spending half a day rolling dough.
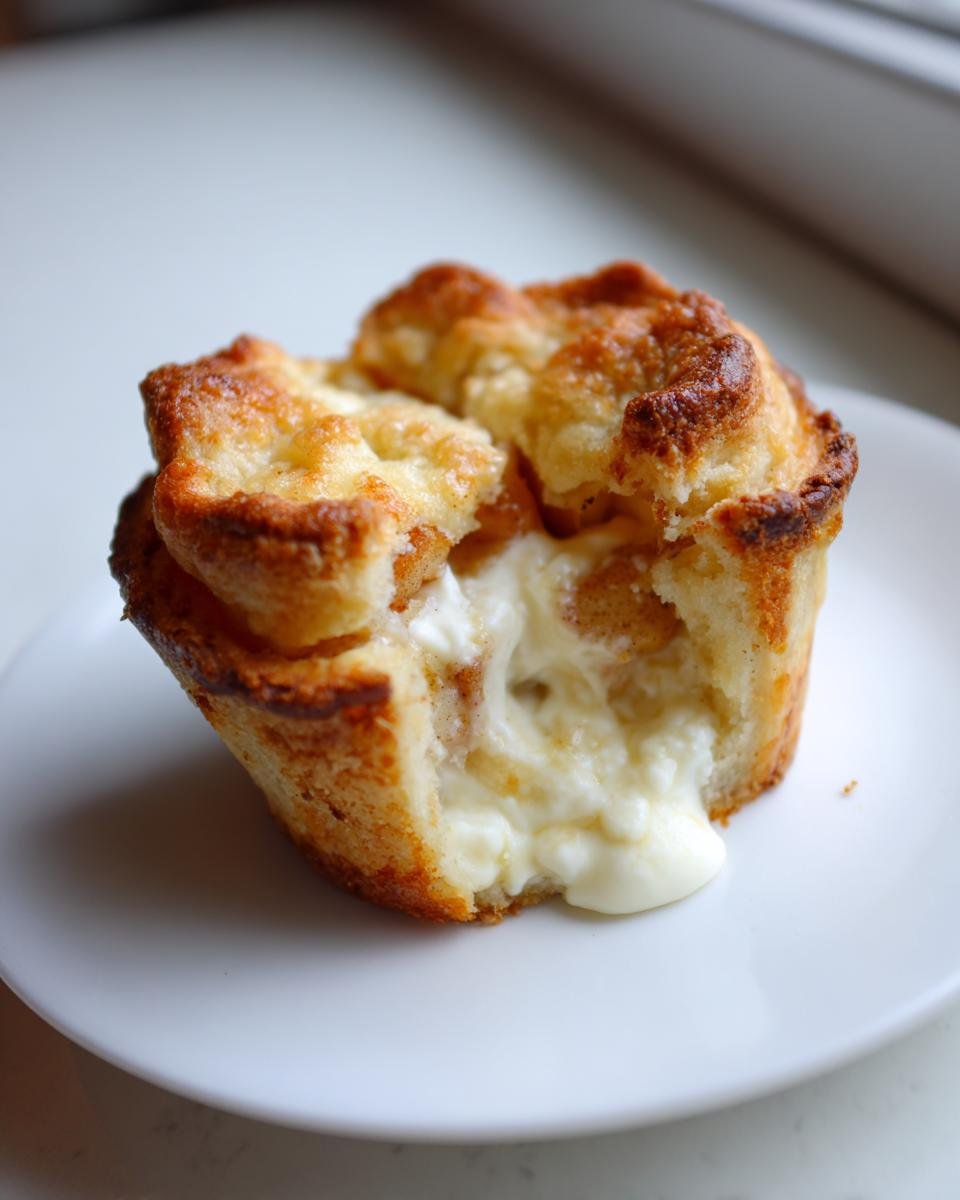
- They Look Like a Million Bucks: Honestly, these are showstoppers. They puff up in that muffin tin, looking like fancy little domes you’d pay too much for at a bakery. Perfect for potlucks or just making Tuesday feel special.
- No Sog Factor on the Bottom: Because they bake right in the tin, the bottoms stay firmer than giant pies, which is a huge win when you love a crisp crust.
Essential Ingredients for Perfect Cheesecake Stuffed Apple Pies
Okay, listen up. You can’t cheat on the good stuff when you’re combining two heavy hitters like this! The ingredients are simple, but the quality matters, especially for that cheesecake layer. I’ve broken everything down here so you know exactly what you need before you start mixing. Don’t skip softening that cream cheese—that’s super important for a silky smooth texture!
For the Apple Filling
- 4 medium apples, like those tart Granny Smiths, peeled, cored, and sliced thin—we want bites of apple, not chunks!
- 1/2 cup granulated sugar
- 1 tablespoon all-purpose flour to thicken things up nicely
- 1 teaspoon ground cinnamon (the warmer the better!)
- 1/4 teaspoon ground nutmeg
- 1 tablespoon fresh lemon juice to keep those apples bright
For the Creamy Cheesecake Layer in Your Cheesecake Stuffed Apple Pies
- 8 ounces cream cheese, and I mean fully softened—take it out early!
- 1/4 cup extra granulated sugar for the cheesecake part
- 1 large egg yolk (this helps bind the cheesecake so it doesn’t run everywhere)
- 1 teaspoon vanilla extract
For the Crust and Assembly of Your Cheesecake Stuffed Apple Pies
- 2 whole pie crusts—homemade is amazing, but good store-bought works just fine for these mini guys.
- 1 large egg, beaten well, for the egg wash that gives us that shiny golden top.
Expert Tips for Preparing the Cheesecake Stuffed Apple Pies Filling
Getting the fillings right is half the battle with these layered beauties. You need apples that hold their shape and a cheesecake layer so smooth it melts in your mouth. Don’t rush the prep here; a few extra minutes makes all the difference between good and OMG-I-need-another-one!
First things first: apples. I always reach for something tart, like Granny Smith, or maybe a crisp Honeycrisp. Why? Because that gentle tartness cuts right through the richness of the cream cheese filling. If you use only sweet apples, things get a little one-note, you know? We toss those slices right away with the lemon juice, flour, and spices so they all get coated evenly before they even think about going into the oven.
Now, let’s talk texture for the creamy part. You absolutely must have softened cream cheese. I mean, room temperature soft. If you try to mix cold cream cheese, you end up with those little white lumps, and nobody wants a lumpy dessert, right? I usually pop mine in the microwave for just ten seconds if I forgot to take it out early, but watch it—too long and it melts, which is bad news later. Beat that cheese until it’s totally silky before you even think about adding the sugar and yolk. If you want that ultra-silky texture you see in fancy dessert shops, sometimes I whisk the cream cheese on high speed for a full minute just on its own before adding anything else. It almost airs it up a bit!
If you’re looking for totally next-level creamy results, you might want to check out this great guide on how they manage super smooth batter for those amazing delicate baked custards, though our little mini pies are much more forgiving! It gives some fantastic tips on beating dairy bases until they are perfectly uniform before baking.
Remember, we’re layering! You want enough apple mix to cover the bottom, but don’t overfill it, or you risk pushing the cheesecake mix right out of the sides when you place that top crust on. A generous teaspoon of apple, then a generous dollop of the cheesecake mix on top of that. Keep it neat; those muffin cups get crowded fast!
Step-by-Step Instructions for Baking Amazing Cheesecake Stuffed Apple Pies
Alright, this is where the magic happens! We’ve got our fillings prepped, and now it’s time to get organized into those little muffin tins. Trust me, taking the time to do the layering right means you won’t have any cheesecake surprise oozing out the sides later. Keep your oven mitts close, because things move quickly once you start assembling!
Preparing the Muffin Tin and Crusts for Your Cheesecake Stuffed Apple Pies
First, let’s get that oven cranked up to 400 degrees F (that’s 200 degrees C). Once it’s hot, lightly grease your 12-cup muffin tin. Don’t skip the greasing, or you’ll be fighting with those little pies later when you try to get them out. Next, grab your pie dough. You need to cut out circles that are big enough to line the bottom and sides of each muffin cup when you press them in gently. Use a bowl or a large cutter to trace your circles—it makes it so much easier than trying to fit squares in there!
Layering the Apple and Cheesecake Fillings in the Cheesecake Stuffed Apple Pies
Now for the construction! Take your spiced apple mixture and spoon just enough into the bottom of each dough-lined cup to cover the base nicely. We don’t want mountains of apples right now! Then, carefully add a spoonful of that gorgeous, smooth cheesecake mixture right on top of the apples. You only want one nice layer of each. If you pile the apples too high, the cheesecake won’t sit right when you add the top crust.
Sealing, Washing, and Baking the Cheesecake Stuffed Apple Pies
Take your second piece of dough and cut slightly smaller circles for the tops. Place them over the filling and gently press the edges of the top and bottom crusts together. Really crimp those edges shut with a fork—we need a good seal so that filling stays contained while baking. Once sealed, brush the tops with that beaten egg wash; this gives them that professional, deep golden-brown color. Don’t forget to cut a tiny vent hole right in the center of the top crust of each little pie so the steam can escape. Bake these cuties for about 25 to 30 minutes, or until that crust is golden and you see the filling bubbling gently. The hardest part? Letting them cool in the tin for 10 minutes before moving them to the rack. Patience pays off!
Troubleshooting Common Issues with Cheesecake Stuffed Apple Pies
Even the best recipes have moments where things don’t go exactly to plan, especially when you’re mixing wet fruit and creamy dairy into pastry! Don’t worry if your first batch looks a little rustic; that’s just character showing through. Most problems come down to temperature or sealing, and once you know the fix, you’ll master these mini pies in no time.
The biggest fear I hear about is soggy bottoms, right? That’s usually because the apple filling releases too much moisture before the crust has a chance to set below it. The fix is simple: make sure you are mixing that **1 tablespoon of flour** in with the apples! That flour is crucial; it absorbs the juice while baking. Also, baking them in a 400-degree oven helps blast the bottom quickly so the crust firms up fast. If you’re still struggling, you can always pre-bake the bottom shells for just 5 minutes before adding filling, but honestly, I rarely have to do that with this recipe.
Now, the dreaded ooze. If your sweet cheesecake mixture escapes, it’s almost always because the pie wasn’t sealed properly. When you crimp the edges, you need real pressure there! Use a fork and press down hard all the way around. You want to see clear indentations pinching the dough together. If the dough is cold or dry, it won’t stick to itself very well, so make sure your crust hasn’t been sitting out too long and drying out before you pinch those edges together. A good egg wash over the entire exterior, including the crimps, helps seal everything up nicely too, giving you that beautiful, crisp barrier.
Finally, if your tops are browning way too fast before the center is cooked, you risk the filling not being set. This usually happens if your oven runs hot. Easy fix: just loosely tent a small piece of aluminum foil over the muffin tin. You don’t want to seal it shut—we need that steam release venting through the top hole—but just loosely draping the foil will protect the crust while allowing the inside to finish baking through.
Storage and Reheating Instructions for Leftover Cheesecake Stuffed Apple Pies
Now, I know what you’re thinking when you look at these gorgeous little things: will they even last until tomorrow? Good news! Because we have that sturdy crust and that nicely bound cheesecake filling, these hold up surprisingly well. But you definitely don’t want to reheat them in the microwave—trust me on this one, that will turn your crust into sad, chewy cardboard!
Once they are totally cool, put any leftovers into an airtight container. I find that placing a paper towel underneath them in the container helps wick away any ambient moisture, which is always the enemy of a crisp pie crust. Stored this way in the fridge, they are fantastic for about three to four days. They’ll still taste great cold on day four, but honestly, we save those for breakfasts!
When you decide it’s time to enjoy one again—maybe with an afternoon coffee—you want to bring back that golden crunch. The best way, seriously, is the oven or the air fryer. Set your oven to about 325 degrees F (160 degrees C).
Place the mini pie directly on the oven rack, or on a small baking sheet if you’re worried about crumbs, and reheat for about 8 to 10 minutes. You’re just warming the filling through and crisping up that top crust again. If you’re using an air fryer, which is my personal favorite hack for second-day pastries, 300 degrees F for about 4 minutes works miracles. It brings back that fresh-baked texture without drying out the filling!
If you really can’t wait, eating them cold is totally fine, especially that cheesecake layer, which gets extra firm and delicious when chilled. Just avoid the microwave at all costs, unless you secretly love soft pastry!
Creative Variations for Your Next Batch of Cheesecake Stuffed Apple Pies
Once you nail the basic structure of these **Cheesecake Stuffed Apple Pies**, you can really start having some fun with them! I love keeping the main technique the same but swapping out just one or two elements to make the next batch feel completely new. Why stick to one flavor when you can have endless combinations?
The beauty of this recipe is that the apple filling is just the perfect canvas for all sorts of additions. If you want to keep that classic fall vibe but give it a little twist, try switching up the spices. Instead of just cinnamon and nutmeg, try adding a tiny pinch of cardamom—it adds this wonderfully warm, almost floral note that pairs beautifully with the baked apple.
Another simple change that makes a big impact is texture in the apple layer. If you’re feeling extra bold, stir in about a quarter cup of finely chopped pecans right along with your apples before spooning them into the crust. They toast up in the oven and give you that wonderful earthy crunch against the soft apple and smooth cheesecake. They disappear into the baked texture so nicely!
But if you want to get really adventurous, play with the cheese itself! While the classic block of cream cheese gives you that perfect tang, sometimes I get bored. You can substitute half of the cream cheese with mascarpone cheese. Mascarpone is silkier and less tangy, which creates a richer, almost custard-like filling once baked. It’s delicious, though slightly less sturdy, so make sure you really press those top crusts on tight!
For those of you who like a bit of fruit kick but want to skip the apples sometimes, you can follow the same layering technique using cherry pie filling instead. If you do that, you get this incredible bright red and white presentation. I found this wonderful guide on making cherry cheesecake fillings, and their suggestions for balancing the tartness really inspire things like this!
Honestly, the possibilities are endless once you have the base recipe down. Just remember whatever you add, make sure it’s incorporated into the right layer—don’t mix cardamom into the cheesecake batter unless you want a weirdly spiced cheese layer. Keep the apple mix spicy and the cheese mix creamy, and you can’t go wrong!
Frequently Asked Questions About Cheesecake Stuffed Apple Pies
I totally get it—baking is fun, but the little details can sometimes trip you up! These mini apple pies stuffing two desserts into one flaky shell are usually pretty straightforward, but here are answers to the things folks ask me most often after they try making them the first time.
Can I make the dough for these Cheesecake Stuffed Apple Pies ahead of time?
Yes, you absolutely can! If you’re making your dough from scratch, I highly recommend making it the day before. Wrap the finished dough ball up tightly in cling wrap and keep it in the fridge. It actually lets the gluten relax, which means it rolls out easier for you later! If you’re using store-bought dough, just keep it chilled until about 15 minutes before you plan to roll it out. Cold dough is your best friend for getting those crisp edges that seal so well.
What is the best apple to use for these Cheesecake Stuffed Apple Pies?
I’m sticking to my guns here: tart is always better! Stick with Granny Smith if you can find them fresh. They have that great firm texture that holds up against the moisture from the fruit and the creaminess of the cheesecake filling in pastry without turning into total mush. If you must mix it up, try blending Granny Smith with a slightly sweeter but still firm apple like Honeycrisp or Fuji, but make sure you use at least half tart ones for that necessary zing!
Do I need to use a muffin tin for these Cheesecake Stuffed Apple Pies?
Oh, you definitely need that muffin tin! These are designed to be individual, upright pies, and the muffin tin acts like a little mold to give them that perfect shape and support. Without it, the dough would likely spread out into flat little discs, and the filling would melt out everywhere before it could set. If you absolutely don’t have a muffin tin, you could try making them in a 12-cup *standard* size cupcake/muffin pan, but you’ll need to watch the baking time super closely.
Estimated Nutritional Snapshot for Cheesecake Stuffed Apple Pies
Now, I know you’re probably thinking about how amazing these taste right now, but since you asked, here’s a quick look at the numbers. When you’re mixing fruit, dough, and actual cream cheese filling together, the numbers get a little interesting! This isn’t a diet treat, but hey, they are perfectly portioned, which is half the battle, right?
Keep in mind that these are just estimates based on the standard ingredients I used. If you use puff pastry instead of a standard pie crust, or maybe go for low-fat cream cheese (which I don’t recommend, but you might!), these figures will change quite a bit. Always treat these numbers as a guide, not gospel truth!
- Calories: We’re looking right around 320 per mini pie. That feels pretty fair for a dessert that combines pie and cheesecake!
- Fat: You’ll see about 18 grams of fat here, which is expected since we’re dealing with butter in the crust and full-fat cream cheese in the center.
- Carbohydrates: Expect about 35 grams of carbs—mostly coming from the sugars and the flour in the crust and filling.
- Protein: A modest 5 grams of protein, thanks to that egg yolk and cream cheese in the filling.
If you’re watching anything specific, remember that the sugar content is about 25 grams, so maybe skip the extra scoop of ice cream on the side, even though I know it’s tempting! Enjoy them responsibly, or just make another small batch next week!
Print
Cheesecake Stuffed Apple Pies
- Total Time: 55 min
- Yield: 12 mini pies 1x
- Diet: Vegetarian
Description
Individual apple pies filled with a layer of creamy cheesecake.
Ingredients
- 2 pie crusts (store-bought or homemade)
- 4 medium apples (like Granny Smith), peeled, cored, and sliced
- 1/2 cup granulated sugar
- 1 tablespoon all-purpose flour
- 1 teaspoon ground cinnamon
- 1/4 teaspoon ground nutmeg
- 1 tablespoon lemon juice
- 8 ounces cream cheese, softened
- 1/4 cup granulated sugar
- 1 large egg yolk
- 1 teaspoon vanilla extract
- 1 egg, beaten (for egg wash)
Instructions
- Preheat your oven to 400 degrees F (200 degrees C). Prepare a standard 12-cup muffin tin by lightly greasing it.
- In a bowl, mix the apple slices with 1/2 cup sugar, flour, cinnamon, nutmeg, and lemon juice. Set aside.
- In a separate bowl, beat the softened cream cheese until smooth. Mix in 1/4 cup sugar, egg yolk, and vanilla extract until combined.
- Cut the pie crusts into circles large enough to line the muffin cups. Gently press the dough into the muffin cups, forming a shell.
- Spoon a layer of the apple mixture into the bottom of each crust-lined cup.
- Top the apples with a spoonful of the cheesecake mixture.
- Place a second, smaller circle of pie dough over the filling for the top crust. Crimp the edges to seal and cut a small vent in the top of each pie.
- Brush the top crusts with the beaten egg wash.
- Bake for 25 to 30 minutes, or until the crust is golden brown and the filling is bubbly.
- Let the pies cool in the tin for 10 minutes before carefully removing them to a wire rack to cool completely.
Notes
- Use firm, tart apples for the best texture in the filling.
- You can use pre-made pie dough circles if you prefer not to roll out the dough.
- For a richer flavor, use full-fat cream cheese.
- Prep Time: 25 min
- Cook Time: 30 min
- Category: Dessert
- Method: Baking
- Cuisine: American
Nutrition
- Serving Size: 1 mini pie
- Calories: 320
- Sugar: 25
- Sodium: 200
- Fat: 18
- Saturated Fat: 10
- Unsaturated Fat: 8
- Trans Fat: 0.5
- Carbohydrates: 35
- Fiber: 2
- Protein: 5
- Cholesterol: 50
Keywords: apple pie, cheesecake, mini pies, stuffed dessert, apple dessert, baked goods