
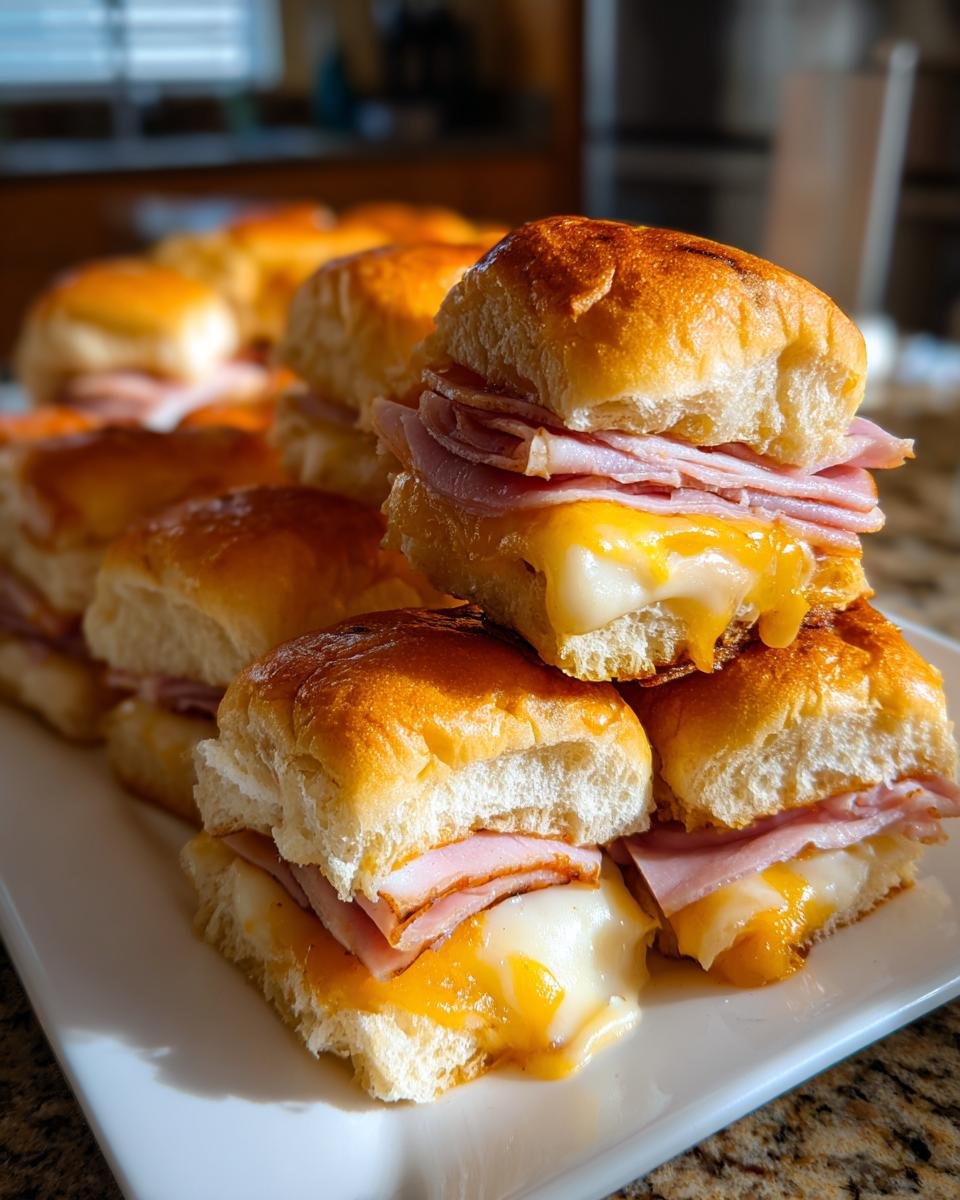
Listen, I have been making party food for what feels like my entire life. From game days to last-minute birthday gatherings, you learn quickly which appetizers actually go the distance. And honestly, sometimes you just need a fast lunch that isn’t a sad desk salad, right? That’s why I am obsessed with taking the magnificent, towering classic club sandwich—that beautiful stack of turkey, ham, cheese, and crisp lettuce—and shrinking it down into these glorious, easy-to-handle Club Sliders.
Trust me when I say these baked sandwiches are magic. I’ve tested dozens of party apps, and nothing disappears faster than a tray of these cheesy, buttery bundles. They come out of the oven melted, glistening from that poppy seed butter topping, and perfectly portioned. Forget fancy plating! These little guys are the definition of maximum flavor payoff for minimum effort. You are going to wonder why you ever made the full-sized version!

Why These Club Sliders Are Your New Go-To Recipe
I’m telling you, these baked sandwiches are going to save you time and impress everyone. Seriously, why deal with cutting a massive club sandwich into awkward triangles when you can have this pre-portioned perfection straight from the oven? If you’re looking for the pinnacle of easy entertaining, stop scrolling. These ingredients come together faster than you can set out the dips!
- They are ridiculously fast to assemble—like, under fifteen minutes fast.
- The combination of two different cheeses and that poppy seed topping makes them taste way more complicated than they are.
- They travel beautifully! Pop them in a Tupperware, and they’re perfect for a picnic or keeping warm.
Quick Prep Time for Busy Days
When I need snacks for a movie night that pops up spontaneously, these are my lifesaver. The actual assembly takes maybe 15 minutes, which is just wild considering the flavor payoff we get. This means you can toss them in the oven and still have time to grab a drink before guests arrive. No stress, just deliciousness!
Perfectly Portioned Club Sliders
The slider format is just genius, isn’t it? It means everyone gets a neat, self-contained little meal or appetizer. You don’t need plates, you don’t need knives—just pick up one of these amazing Club Sliders and go. This size is perfect for little hands or for sampling a few different things at a party buffet. They are simply the easiest way to serve a hearty classic!
Gathering Ingredients for Your Club Sliders
Okay, so the foundation of any great recipe is quality ingredients, right? And with these Club Sliders, we’re keeping the ingredient list short but mighty. I love that this recipe sticks really close to the classic club sandwich profile, which means zero weird fillers or complicated steps. Everything should come together easily, but pay attention to those prep notes—they really matter for the final melt!
Since we’re using deli meats, make sure you ask the counter to slice everything paper-thin. That delicate layering is what makes the slider structure work so well. If you needed ideas for packing sturdy sandwiches for a day trip, you might appreciate some of the tips I shared about classic ham and cheese sandwiches here.
Meat and Cheese Components
Load up on the good stuff! You need a full pound of thinly sliced deli turkey and the same amount of thinly sliced deli ham. For the cheese, we blend two types for the best flavor complexity: 12 slices of Swiss cheese and 12 slices of sharp cheddar cheese. Using exactly one slice of each per slider ensures every single one gets that perfect, gooey ratio when baked!
The Signature Poppy Seed Butter Topping for Club Sliders
This is where the real flavor magic happens for these Club Sliders, so don’t skip the topping! You’ll need about 1/4 cup of butter, melted until it’s just liquid. Then, stir in 1 tablespoon of poppy seeds directly into that melted butter. This buttery, slightly nutty glaze brushes right over the tops of the buns and makes them unbelievably savory and slightly crisp. It’s non-negotiable for me!
The Creamy Dijon Spread
We ditch the standard mayo layer and kick it up a notch underneath the meat. Whisk together 1 cup of mayonnaise with 2 tablespoons of Dijon mustard. That tangy mustard cuts right through the richness of the butter and cheese once it all bakes together. Simple, but it provides a great base flavor layer.
Expert Tips for Perfect Club Sliders Assembly
I’ve tried assembling these Club Sliders every which way, and I’ve learned that technique is everything! You can have the best ingredients in the world, but if you soak the bottom bun or put the cheese on wrong, you’re going to end up with a soggy mess. And nobody wants a soggy slider, especially when you’re counting on that beautiful, gooey cheese pull!
My biggest realization while making these for neighborhood potlucks was keeping the buns contiguous until the very last second. It saves so much time coordinating twelve separate tops and bottoms!
Slicing the Buns for Even Club Sliders
When you get those packages of twelve little slider buns, the absolute best thing you can do is resist the urge to immediately pull them apart. Keep them sitting together, attached horizontally, like one big rectangle of bread. Then, use a large serrated knife—gently, please!—and slice the entire block right through the middle. This gives you one giant bottom piece and one giant top piece. It’s the key to super fast layering, and it ensures every single one gets an even share of meat and cheese without any gaps.
Layering Strategy for Optimal Melt
The order you stack things matters tremendously, both for flavor integration and for the melting process. First, get that creamy Dijon spread across the entire bottom piece of bread. Think of it like the barrier cream. Next, layer your ham and turkey evenly across the base. Don’t just pile it in the center; spread it out to the edges—this prevents ‘meat mountains’ that burn before the outer edges heat up.
Now for the cheese! I always place the Swiss down first, directly touching the meat, and then the cheddar slice on top of that. Why two types? Swiss melts beautifully but has a milder flavor, while cheddar gives you that rich, sharp color and amazing texture. When the heat hits that double-layer, you get a melt that’s both creamy and deeply flavored. I actually found that if you let the cheese sit on the meat for about five minutes before adding the tops, it warms slightly and melts more evenly when it hits the oven. Try that out!
Step-by-Step Baking Instructions for Club Sliders
Alright, we’ve got our beautiful, layered creations sitting on a baking sheet. Now comes the best part: making these Club Sliders hot, melty, and golden brown! This whole process is fast, but the two-stage baking method is the secret handshake here. Seriously, don’t be tempted to just toss them in naked!
First things first: make sure your oven is preheated to 350 degrees Fahrenheit. We want that steady, reliable heat warming everything up evenly. If you’re looking for other easy ways to cook delicious things in the oven—maybe you want some roasted carrots to go alongside these later—you can check out my thoughts on easy oven roasting.
Preparing the Sliders for the Oven
By now, you should have: the Dijon mayo spread on the bottoms, the ham and turkey layered on top, and the double layer of cheese on top of that, with the top buns snugly covering everything. Before we wrap them, we need that incredible coating on top. Take that melted butter and poppy seed mixture and brush it lovingly over the entire surface of the top buns. Be generous! This coating is what guarantees a slight crispness and toasted flavor on the bread even while we steam them.
The Two-Stage Baking Method for Flawless Club Sliders
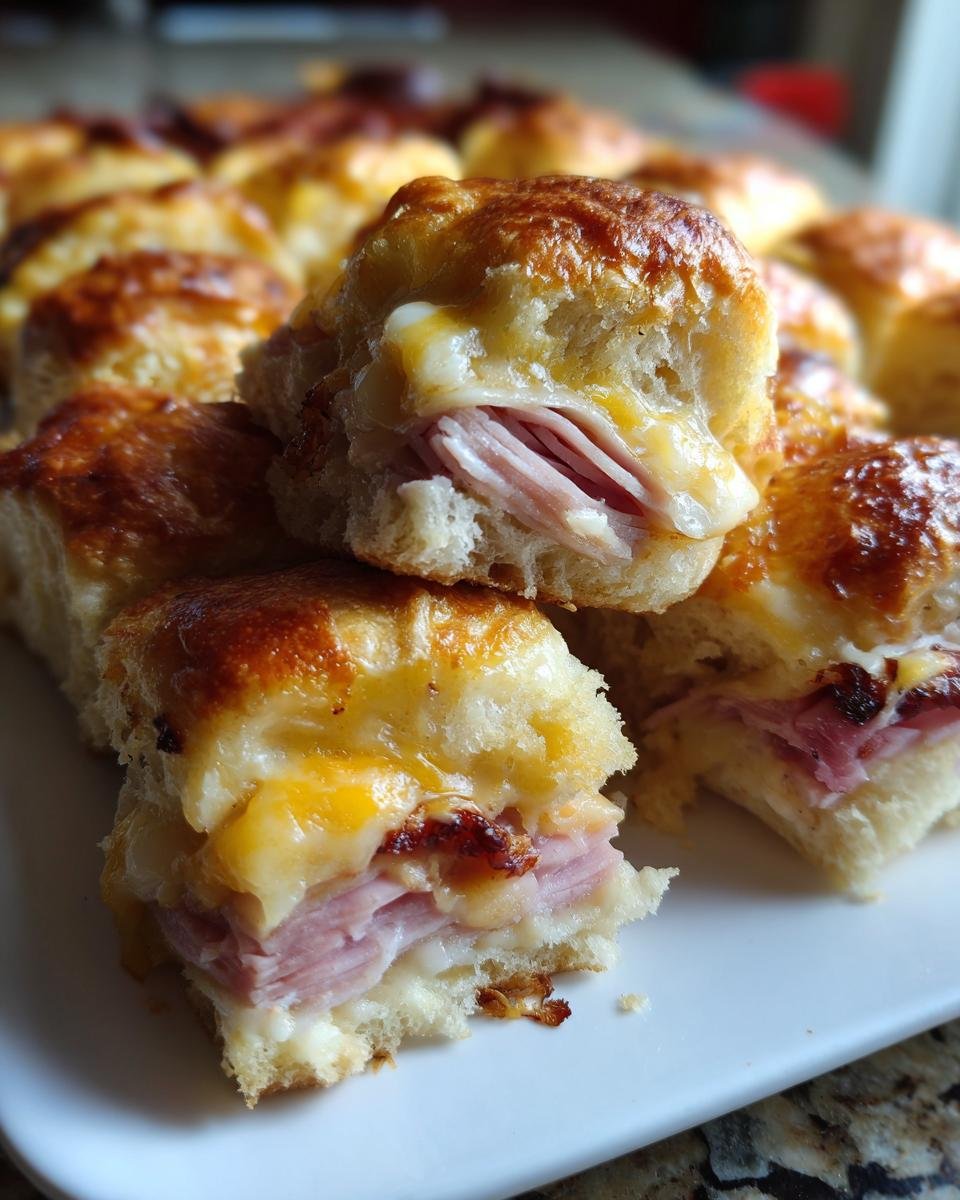
This is the technique that separates good baked sandwiches from *Great* baked sandwiches. Once the butter is brushed on, wrap the entire tray tightly with aluminum foil. This traps the steam, which forces the heat deep into the center, melting that cheese perfectly without drying out the inside layers. Pop this wrapped tray into the 350°F oven for exactly 15 minutes.
When that timer goes off, take them out fast, rip that foil off—caution, steam surprise!—and put the tray right back in. Now, we bake them uncovered for another 5 to 7 minutes. We’re looking for deeply golden, slightly browned tops and cheese that is openly weeping out the sides. Once they look perfect, pull them out, let them cool for just a minute, and then slice them apart between the buns. Perfection achieved!
Ingredient Notes and Substitutions for Your Club Sliders
One of the things I truly love about this recipe for Club Sliders is how much flexibility it gives you! Just because the recipe calls for Swiss and Cheddar doesn’t mean you can’t get creative based on what you have screaming at you from the fridge. This is home cooking, after all—we don’t stick to rigid rules when a little swap can taste just as good, or maybe even better!
I always encourage folks to check out my archives for other sturdy, layered sandwiches, like my tips on packing those perfect picnic sandwiches if you need another packed lunch idea. But for these sliders, let’s talk about how to manage cheese swaps!
Cheese Swaps for These Club Sliders
The key when swapping cheeses here is making sure they still melt well. We need that satisfying, gooey pull, right? The recipe calls for 12 slices of Swiss and 12 slices of cheddar, so you’ll substitute one-for-one. If Swiss isn’t your favorite texture, Provolone is a fantastic, slightly sharper alternative that melts like a dream.
Alternatively, if you want something milder than cheddar but still creamy, Monterey Jack is a wonderful choice. I’ve done half Provolone and half Monterey Jack before, and the result was super mellow and creamy. Just avoid cheeses that tend to separate easily when heated, like very crumbly feta or aged Parmesan, unless you’re adding them sparingly on top of your main melt!
Optional Additions for Flavor Variation
When these Club Sliders come straight out of the oven, that double cheese layer is pretty robust as is. But if you want to sneak in that true ‘club’ element without making them too messy to handle, I highly recommend adding a layer of fresh produce *before* you put the top bun on.
The best thing to add is a single, thin slice of fresh tomato right on top of the cheese layer. When the slider comes out of the oven, the heat warms that tomato just enough that it tastes perfect, but it hasn’t turned into mush. You just have to be careful when slicing them apart later! Another thing I sometimes do for a bit of brightness is toss a few thinly sliced dill pickles between the meat layers. It’s not traditional, but boy, does it taste good with that Dijon spread!
Serving Suggestions for Your Baked Club Sliders
So, these Club Sliders are rich, savory, packed with deli meat, and soaking in that glorious poppy seed butter—we need sides that cut through that richness, don’t we? We want contrast! These aren’t the kind of sandwiches you eat alone; they demand a perfect little partner on the plate. I always try to pair them with something bright, acidic, or crunchy to balance out the baked cheese factor.
If I’m making these for a big group or a casual Sunday lunch, I keep my sides just as easy as the main event. Nobody wants to spend hours making sides when the main dish is already baked! For creamy goodness that balances the saltiness of the ham and turkey, you absolutely have to try a really good, tangy coleslaw. I have a recipe for creamy coleslaw that uses sharp vinegar notes, and it is the perfect foil for these heavy sandwiches.
But if you want something that feels a little bit more substantial but still fresh, I turn to dips! A big bowl of Cowboy Caviar is always a huge hit. It’s full of fresh veggies, beans, and a bright dressing that makes you feel like you’re eating healthy, even though you just demolished three cheesy sliders. Plus, you can make it the day before, which is my favorite kind of hosting trick.
Honestly, simple kettle chips work just fine too—the crunch is satisfying! But when I’m feeling a little bit ambitious without adding real work, it’s definitely slaw or a fresh, crunchy vegetable dip every time. They just make these Club Sliders feel like a complete, satisfying meal.
Storage and Reheating Instructions for Leftover Club Sliders
The thing about these poppy seed topped Club Sliders is that they actually taste fantastic the next day, assuming you store them correctly! If you’re lucky enough to have any leftovers—which, let’s be real, rarely happens in my house—you have to treat them right to keep that buttery top from getting soggy.
As soon as they’ve cooled down to room temperature (don’t put hot sandwiches in the fridge!), transfer them to an airtight container. Keep them in the refrigerator for up to three days. They’ll still be moist inside because of the cheese and meat, but that gorgeous crust needs protection from all that fridge humidity.
The Best Way to Reheat Club Sliders
Okay, here’s my absolute, non-negotiable rule: Never* use the microwave if you want that great texture back. Microwaving melts the cheese again, sure, but it turns that delightful poppy seed crust into sad, damp bread. We worked too hard brushing that butter on to ruin it!
For the best results, you want to use the oven. Preheat your oven—or toaster oven, if you’re just reheating one or two—to about 325 degrees Fahrenheit. Place the sliders directly on a baking sheet. Don’t cover them this time!
Restoring That Golden Crunch
Bake them for about 8 to 10 minutes. You are just trying to heat them through and crisp up the bread again. If you notice the cheese is looking a little stressed or threatening to burn, you can loosely drape a piece of aluminum foil over the top for the first five minutes, then take it off to let the top dry out and crisp up again for the last few minutes. That slight warmth brings the flavor right back to life, making them taste almost freshly baked. Enjoy the second round!
Troubleshooting Common Club Sliders Issues
Even with the best intentions, sometimes baking throws us a curveball! Don’t panic if your Club Sliders don’t come out looking exactly like magazine perfection the first time. I’ve definitely learned a few tricks over the years to save a tray that’s gone slightly sideways. Usually, the issues come down to uneven heat or moisture problems, but they are so easy to fix. Let’s walk through the three most common snags I see!
My Sliders Are Soggy on the Bottom!
Oh, the dreaded soggy bottom! This almost always happens because of one of two things: either you packed the Dijon spread on too thickly, or you didn’t give the buns enough time to dry out before adding the meat. If they are only slightly damp when you take them out of the foil, pull the foil off sooner next time and give them an extra 5 minutes naked to dry out that bottom layer.
If they are already assembled and soggy, here’s my emergency fix: Carefully lift each slider (use a thin spatula!) and place it directly on an oven rack instead of the pan for the last 5 minutes of baking (when the foil is off). Letting air circulate underneath helps evaporate that moisture before the bottom gets totally saturated. It works like a charm!
The Cheese Isn’t Melting—It’s Just Getting Greasy!
This is usually a temperature issue, my friend. If your oven runs cool, everything warms up slowly, and the cheese melts into an oily slick instead of that beautiful, gooey waterfall. If your cheese still looks sad after the oven time is *up*, don’t sweat it. Just keep the foil off and let it bake for another 3 to 5 minutes. If that still doesn’t work, you can briefly place a lid or a slightly larger piece of foil *only* over the cheese layer, resting it gently on the buns, for about 2 minutes. This focuses the trapped heat right on the cheese without over-browning the poppy seed topping.
The Poppy Seed Topping Burned Too Quickly
I totally get it—that beautiful butter topping turns dark fast, especially if your oven has hot spots! If you notice the tops going dark brown way before the middle is heated through (say, within the first 10 minutes of the foil-off bake), it means the heat on top is too direct or too high. The fix is simple: Grab your aluminum foil! Loosely tent the entire tray again. You still need the inside to heat up, so just cover it up until the cheese is fully melted, and then quickly uncover it for just 1 or 2 minutes to re-crisp the top before pulling them out. Better a slightly less-browned top than a burnt one, I say!
Estimated Nutritional Information for Club Sliders
I always feel a little guilty looking at the numbers after I’ve inhaled three of these savory Club Sliders, but I think it’s important to know what we’re dealing with! Since we’re using deli meats, cheese, and a butter topping, these aren’t exactly light fare, but they pack a serious punch in terms of protein which is great if you’re serving them as a main lunch item.
I ran the ingredients through my trusty calculator, and here’s what popped out. Remember, these are just estimates based on standard ingredient brands and serving sizes. If you use extra-lean ham or lower-fat cheese, your numbers are going to change, so treat this as a general guide rather than gospel!
- Serving Size: 1 slider
- Calories: 350
- Protein: 22g (Look at that, sustained energy!)
- Fat: 18g (That includes our delicious butter topping!)
- Carbohydrates: 25g
- Sodium: 850mg (Yeah, that’s a bit high, so maybe skip the salt on the side!)
- Sugar: 3g (Mostly from the bun and the Dijon.)
The protein is fantastic, which usually keeps me satisfied until dinner time, provided I don’t eat the entire platter! The fiber and cholesterol are pretty low, which is surprisingly good for a baked sandwich. Just be mindful of that sodium content—deli meats are notorious for it. If you’re feeling nervous about the fat, you can always substitute lower-fat cheese, but honestly, you lose a little bit of that amazing melt factor when you do that. Everything in moderation, my friends!
Share Your Simple Club Sliders Experience
Honestly, seeing you all enjoy my favorite easy party food makes my day! I put all my best tips into making these Club Sliders foolproof, but nothing beats hearing how they turned out in *your* kitchens. Did you follow my lead and stick with the Swiss and cheddar? Or did you go rogue and try provolone?
Please, please, please leave a comment down below and let me know what you thought! A star rating helps other busy cooks decide to give them a try, and I genuinely read every single note—especially if you found a new variation that worked great!
Tell Me Your Favorite Cheese Swap!
As we talked about, cheese swapping is a fun, low-risk way to customize these baked sandwiches. Did you try the Monterey Jack? Are you a fan of pepper jack for a little kick? I’m always adding new ideas to my list, and your real-world testing is the best kind of research! Let me know which cheese combination made your batch of Club Sliders absolutely sing.
Share Your Party Spreads
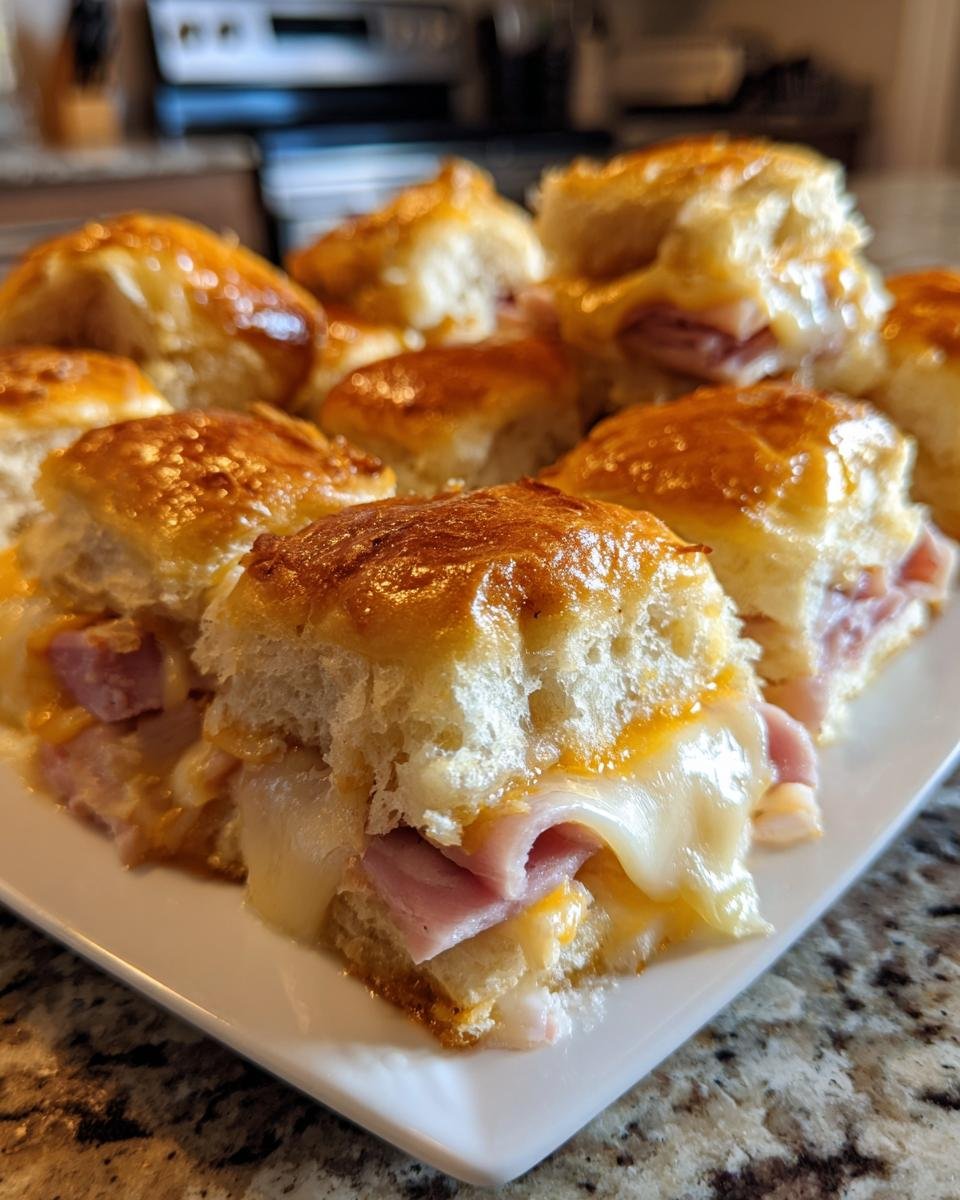
If you ended up snapping a picture of your perfectly browned, glistening sliders on the serving tray—and I really hope you did, because that poppy seed top looks amazing fresh out of the oven—I would absolutely love to see it! Tag me on social media! Seeing my recipes come to life in your homes is the greatest compliment a cook can get.
If you’ve got any other wildly easy appetizer ideas you think the community needs to know about, feel free to send those over too! You can always reach out directly through the contact page if you have a specific question that didn’t get answered. Happy baking, friends!
Print
Simple Club Sliders
- Total Time: 37 min
- Yield: 12 sliders 1x
- Diet: Low Fat
Description
These small sandwiches combine classic club sandwich flavors into an easy-to-eat slider format.
Ingredients
- 12 slider buns
- 1 pound thinly sliced deli turkey
- 1 pound thinly sliced deli ham
- 12 slices Swiss cheese
- 12 slices cheddar cheese
- 1 cup mayonnaise
- 2 tablespoons Dijon mustard
- 1 tablespoon poppy seeds
- 1/4 cup melted butter
Instructions
- Preheat your oven to 350 degrees Fahrenheit.
- In a small bowl, mix the mayonnaise and Dijon mustard together.
- Slice the slider buns horizontally, keeping the top and bottom halves together in rows.
- Spread the mayonnaise mixture evenly over the bottom halves of the buns.
- Layer the turkey and ham evenly over the mayonnaise.
- Place one slice of Swiss cheese and one slice of cheddar cheese on top of the meat layers for each slider.
- Place the top halves of the buns onto the cheese.
- In a small saucepan, melt the butter. Stir in the poppy seeds.
- Brush the melted butter mixture evenly over the tops of the assembled sliders.
- Wrap the entire tray of sliders tightly in aluminum foil.
- Bake for 15 minutes.
- Remove the foil and bake for another 5 to 7 minutes, or until the cheese is melted and the tops are lightly browned.
- Slice the sliders apart before serving.
Notes
- You can substitute provolone or Monterey Jack cheese for the Swiss or cheddar.
- For extra flavor, add a thin slice of tomato to each slider before replacing the top bun.
- Prep Time: 15 min
- Cook Time: 22 min
- Category: Lunch
- Method: Baking
- Cuisine: American
Nutrition
- Serving Size: 1 slider
- Calories: 350
- Sugar: 3
- Sodium: 850
- Fat: 18
- Saturated Fat: 8
- Unsaturated Fat: 10
- Trans Fat: 0
- Carbohydrates: 25
- Fiber: 1
- Protein: 22
- Cholesterol: 65
Keywords: sliders, club sandwich, turkey, ham, baked sandwiches, party food