
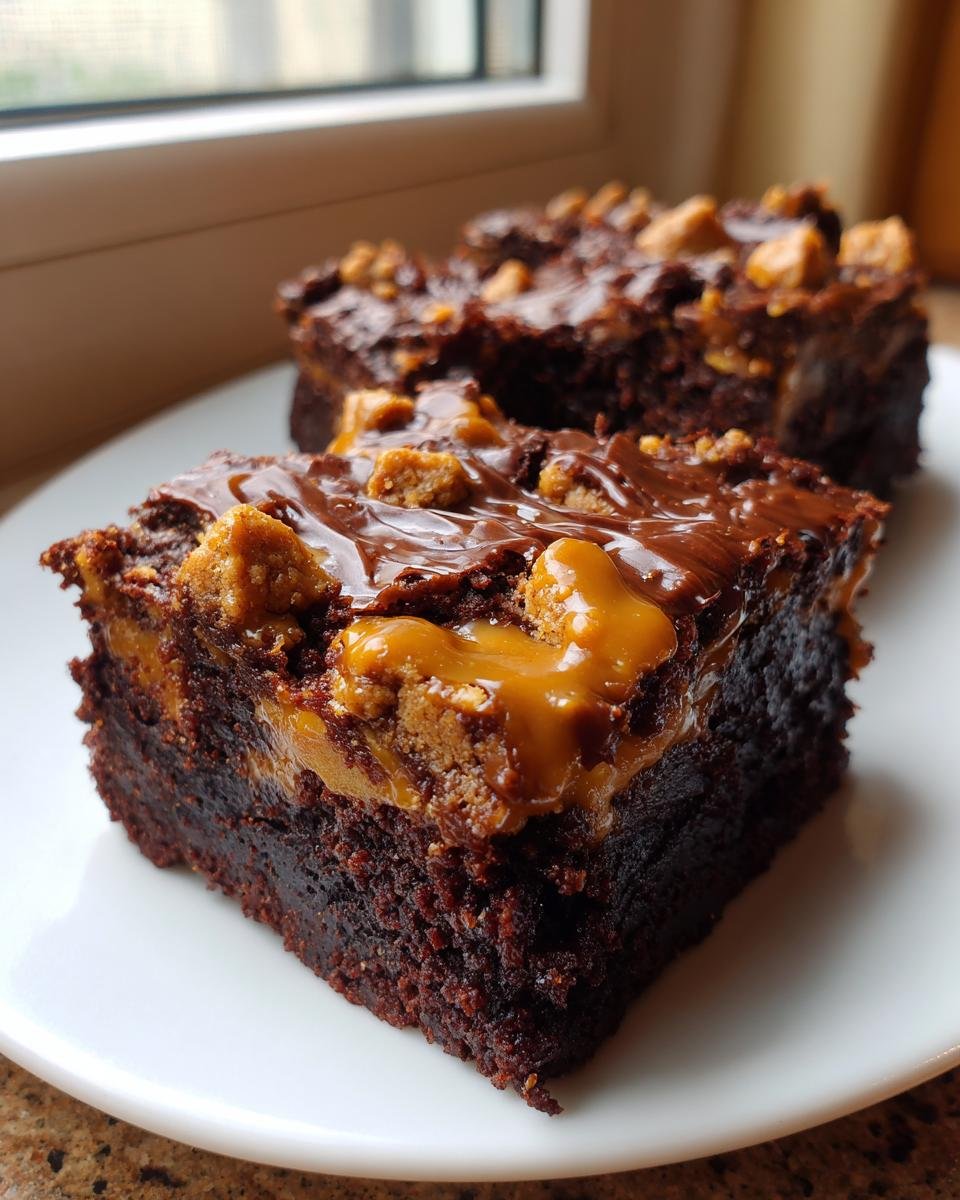
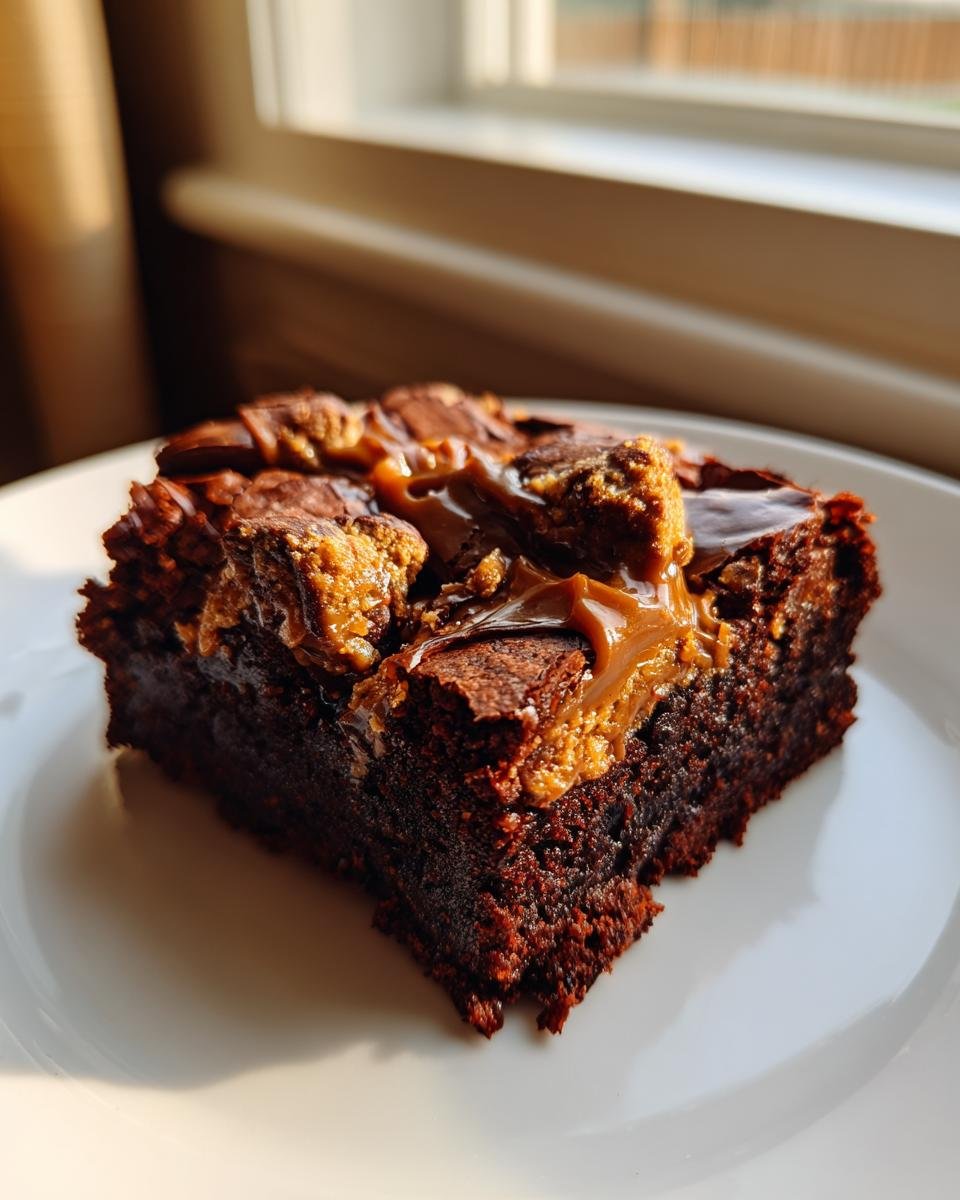
Oh my gosh, forget everything you thought you knew about brownies, because we are leveling UP today! If you’re looking for a dessert that screams decadent comfort, stop scrolling right now. These are, hands down, the fudgiest, most gloriously messy Biscoff Brownies you will ever bake, I promise you that.
I spent weeks trying to get the ratio just right—the perfect dark chocolate base that supports that signature spiced cookie butter flavor without getting lost. When I finally nailed the swirl and the topping? Total kitchen victory! You think you love brownies now? Just wait until you see the texture on these babies.

Why These Biscoff Brownies Are Unforgettable
Look, I’m not going to lie; I’ve made a lot of brownies in my life. Some are cakey, some are just okay, but these? These are different. They are the answer to every craving you’ve ever had for something rich and slightly spiced.
Here’s what makes them totally addictive, setting them apart from plain old chocolate squares:
- Texture Victory: We are going ultra-fudgy here. These are dense, chewy, and melt-in-your-mouth gooey. If you like a cakey brownie, this might not be for you—this is for the pure fudgy fanatics!
- Double the Flavor Punch: You get that deep, dark chocolate hug, immediately followed by the warmth of the spiced cookie butter. It’s truly a flavor combination that’s hard to beat.
- The Perfect Swirl: That gentle swirl we put into the top layer isn’t just for looks. It creates pockets of pure, concentrated Biscoff goodness that hits you mid-bite. The texture contrast is amazing, especially when you chill them afterward.
If you want to explore other brownie madness, check out my guide on four other brownie flavors that might just steal your heart. But seriously, start here first!
Essential Ingredients for Perfect Biscoff Brownies
Okay, to get that signature dense, fudgy texture and that amazing layered flavor, you have to stick closely to the measurements we’ve laid out. This isn’t the time to eyeball things, trust me! We start with the basics: one cup of good unsalted butter—it has to be room temperature for the creaming part to really work its magic later.
For the sugars, we’re using both granulated sugar and one full cup of packed light brown sugar. That brown sugar is key to the chewiness, don’t skip packing it into your measuring cup! Then comes the chocolate backbone: three-quarters of a cup of pure unsweetened cocoa powder. We need a big, bold chocolate taste to stand up to all that cookie butter goodness we add later.
And of course, the star: one full cup of spreadable Biscoff cookie butter. You’ll need a little more butter and cookies for the topping, but this amount in the batter is essential for moisture and flavor.
Ingredient Notes and Substitutions for Biscoff Brownies
A quick heads-up on a couple of these items! When you buy the cookie butter, make sure you grab the smooth, creamy kind for the swirl. The crunchy pieces won’t drizzle nicely, and we reserve the actual cookie crumbs for sprinkling later!
For the cocoa powder, I highly recommend going for a Dutch-process variety if you have it. It gives you that deep, darker, richer color and a smoother chocolate flavor that really balances the spice in the Biscoff. Also, make sure your four eggs aren’t ice cold—room temperature eggs emulsify so much better into the sugar and butter mixture, which helps keep the final brownies fudgy and less greasy looking. It’s a small thing, but it makes a huge difference in the final texture!
Step-by-Step Instructions: Making Fudgy Biscoff Brownies
Alright, listen up, because this is where the magic happens! Making these brownies is deceptively easy, but you have to respect the process, especially how you mix the wet ingredients. We aren’t making cake here; we want density, and density means careful mixing. Follow these steps, and you’ll be halfway to chocolate heaven. And hey, if you’re looking for other ways to sneak veggies into your chocolate fix, check out how I make my famous fudgy zucchini brownies for a lighter option!
Preparing the Pan and Oven for Biscoff Brownies
First things first: heat that oven up to 350°F (175°C) right away so it’s ready when you are. Next, grab your 9×13 inch pan. You must treat this pan right! Grease it well, and then be generous lining it with parchment paper, making sure you leave some overhang on the sides. Those little parchment ‘handles’ are how you lift the whole slab out after they cool—a game-changer, honestly.
Creating the Fudgy Brownie Batter Base
We start on the stovetop. Melt that butter over low heat—no raging fires allowed! Once it’s melted, kill the heat and whisk in both your granulated and brown sugars. They need to merge beautifully into that warm butter. Now, bring in the eggs, one by one. Make sure you beat each egg in until it’s fully incorporated before adding the next one. You want that mixture to look rich and silky, not separated. Then, stir in your vanilla.
In a separate bowl, whisk your cocoa powder and flour together—this breaks up any cocoa clumps. Now, gradually add the dry stuff to the wet stuff, mixing gently until you see *just* no more dry streaks. I mean it, do not overmix! Overmixing is how you turn fudgy perfection into tough, chewy cardboard. Stop stirring the second it comes together.
Swirling and Baking Your Biscoff Brownies
Time for the Biscoff! Microwave half a cup of the spread for just about 20 seconds until it’s runny and ready to drizzle. Pour your batter into that prepared pan and spread it out evenly. Then, drizzle that warmed Biscoff right over the top. Grab a knife or a skewer and make gentle S-shapes to swirl it around. You don’t want to mix it completely into the batter, just enough disruption for those wonderful ribbons!
Bake for 25 to 30 minutes. Don’t overbake! When you test it, you are looking for moist crumbs clinging to the toothpick—if it comes out totally clean, you’ve gone too far, my friend. We want that gooey center!
Finishing Touches: The Ultimate Biscoff Brownies Topping
This is hands-down my favorite part, and it happens while the brownies are still screaming hot from the oven! Immediately after you pull them out, take that remaining half-cup of Biscoff spread and slather it all over the top. You have to do this right away!
Spreading it while they are warm helps the spread melt just enough to smooth out perfectly across the surface. It makes it adhere beautifully without tearing up the top layer of your delicate brownie crust. Once that final layer is smooth, rain down those crushed Biscoff cookies everywhere!
Seriously, don’t hold back on the crumbs; they give the perfect little bite of crunch against the creamy topping. If you want even more exciting single-serving delights, you have to check out how I make amazing brownie cupcakes—they are perfect for parties!
Tips for Achieving the Fudgiest Biscoff Brownies
I know those instructions sound straightforward, but achieving peak fudginess in any brownie is really about managing moisture and temperature. If you want that truly melt-in-your-mouth texture, here are the three things I never skip, no matter how many times I make these Biscoff Brownies.
First, we talked about not over-baking, but let’s talk about the flip side: chilling! You absolutely must let these cool down completely—and I mean *completely*—before you even think about slicing them. For true, dense, perfect fudgy squares, I pop the whole pan into the fridge for at least two hours. This sets the fat and chocolate perfectly, keeping those beautiful swirls intact when you cut them.
Second, stick to the sugar ratio. I tested using only granulated sugar once, and the texture came out too cakey and dry. The ratio of brown sugar to white sugar is essential for that signature chew!
Finally, if you find your brownies are just a touch too soft straight from the fridge, try this trick. Pop a slice onto a microwave-safe plate for about 10 seconds. It warms up the chocolate and cookie butter just enough to make it ooze again without turning the whole thing into a soggy mess. It’s like getting a fresh-out-of-the-oven experience later on. For more great brownie insights, you can always peek at how I manage moisture in my fudgy zucchini brownie guide!
Storage and Reheating Instructions for Biscoff Brownies
Now that you’ve made the most over-the-top brownies ever, we need to talk about how to keep them perfect! They are honestly best eaten the day you make them, but they hold up incredibly well. Store any leftovers in a completely airtight container at room temperature. I find they stay fantastic for about three days that way.
If you need them to last longer, you can definitely pop them in the fridge, but warm them up slightly before serving. To get that glorious gooey center back, zap a square for just 8 to 10 seconds in the microwave. It reheats the chocolate and melts the Biscoff topping just enough!
Serving Suggestions for Your Biscoff Brownies
Honestly, these are so rich and complete on their own that they really don’t *need* anything else. But if I’m being totally real, sometimes you just want to dial up the indulgence factor, right?
My go-to pairing is a scoop of really good vanilla bean ice cream. The cold creaminess against that warm, intense chocolate and spice is just heaven. If it’s a morning treat—or honestly, any time—a strong black coffee cuts through the sweetness perfectly. If you have kids around, or you’re feeling nostalgic, a tall, ice-cold glass of whole milk is the classic move. You might even want to mix up one of my famous ultimate chocolate milkshakes to go with them!
Frequently Asked Questions About Biscoff Brownies
Can I use crunchy Biscoff spread instead of the creamy one?
You totally can, but you have to know what you’re signing up for! If you use the crunchy Biscoff for the swirl, you’ll get little pockets of cookie pieces right in the middle of your brownie, which is great if you love texture. But—and this is important—for the final topping drizzle, you must warm up the creamy kind, or you’ll end up with shards of hard Biscoff on top instead of that lovely smooth layer. For that ultimate fudgy texture, sticking to the smooth spread in the batter is usually best!
How do I know for sure when these Biscoff Brownies are done baking?
That’s the million-dollar question for any fudgy brownie! Never wait until the toothpick comes out totally clean, or you’ve baked them too long. The perfect test is when the toothpick comes out with moist, dark, fudgy crumbs clinging to it. If you see wet batter, give it two more minutes. If it’s completely dry, pull them out anyway, because residual heat will cook them slightly more on the counter!
Can I freeze Biscoff Brownies?
Yes, absolutely! They freeze beautifully, which is great because they are so rich you might not finish them all in one sitting. Wrap the completely cooled, uncut slab tightly in plastic wrap, then wrap that again in aluminum foil. You can freeze them this way for up to three months. When you want one, just thaw them overnight in the fridge, or pop a frozen square in the microwave for a few seconds!
What if I can’t find Biscoff? Can I use peanut butter?
You can substitute peanut butter, but they won’t be the same, obviously! If you use peanut butter, you’ll lose that signature caramelized spice note that makes these treats so unique. If you absolutely must substitute, try a creamy almond butter or sunflower seed butter, but reduce the sugar in the *batter* by about a quarter cup since those alternatives can sometimes be sweeter.
If you have any other burning questions about technique or substitutions, don’t hesitate to reach out to me directly through the contact page!
Nutritional Estimates for Biscoff Brownies
Since these are so rich, they definitely fall into the treat category! Based on my standard measurements and assuming 16 squares per pan, this batch breaks down roughly to about 300 calories per serving, with about 34 grams of carbohydrates and 18 grams of fat. They pack a decent sugar punch, around 30 grams, keeping the protein low at about 4 grams. Please remember these are just my estimates, but they certainly give you a good baseline!
Print
Biscoff Brownies
- Total Time: 45 min
- Yield: 16 servings 1x
- Diet: Vegetarian
Description
Rich, fudgy brownies topped with melted Biscoff spread and cookie pieces.
Ingredients
- 1 cup (2 sticks) unsalted butter
- 1 1/4 cups granulated sugar
- 1 cup packed light brown sugar
- 4 large eggs
- 1 tablespoon vanilla extract
- 3/4 cup unsweetened cocoa powder
- 1 cup all-purpose flour
- 1/2 teaspoon salt
- 1 cup Biscoff cookie butter (spreadable)
- 1/2 cup Biscoff cookies, crushed
Instructions
- Preheat your oven to 350°F (175°C). Grease and line a 9×13 inch baking pan with parchment paper, leaving an overhang on the sides.
- In a medium saucepan over low heat, melt the butter. Remove from heat.
- Whisk the granulated sugar and brown sugar into the melted butter until combined.
- Beat in the eggs one at a time, mixing well after each addition. Stir in the vanilla extract.
- In a separate bowl, whisk together the cocoa powder and flour. Gradually add the dry ingredients to the wet ingredients, mixing until just combined. Do not overmix.
- Pour the batter into the prepared baking pan and spread evenly.
- Warm 1/2 cup of the Biscoff spread slightly in the microwave (about 20 seconds) to make it easier to drizzle. Drizzle the warmed Biscoff over the batter.
- Use a knife or skewer to gently swirl the Biscoff into the batter.
- Bake for 25 to 30 minutes, or until a toothpick inserted near the center comes out with moist crumbs attached, not wet batter.
- Remove from the oven and immediately spread the remaining 1/2 cup of Biscoff spread over the warm brownies. Sprinkle the crushed Biscoff cookies on top.
- Let the brownies cool completely in the pan before lifting them out using the parchment overhang and cutting them into squares.
Notes
- For extra fudginess, chill the brownies for at least two hours before cutting.
- You can substitute dark chocolate chips for some of the Biscoff spread if you prefer a more intense chocolate flavor.
- Prep Time: 15 min
- Cook Time: 30 min
- Category: Dessert
- Method: Baking
- Cuisine: American
Nutrition
- Serving Size: 1 square
- Calories: 300
- Sugar: 30
- Sodium: 150
- Fat: 18
- Saturated Fat: 10
- Unsaturated Fat: 8
- Trans Fat: 0
- Carbohydrates: 34
- Fiber: 1
- Protein: 4
- Cholesterol: 75
Keywords: Biscoff, brownies, cookie butter, chocolate, dessert, fudgy, baked goods