
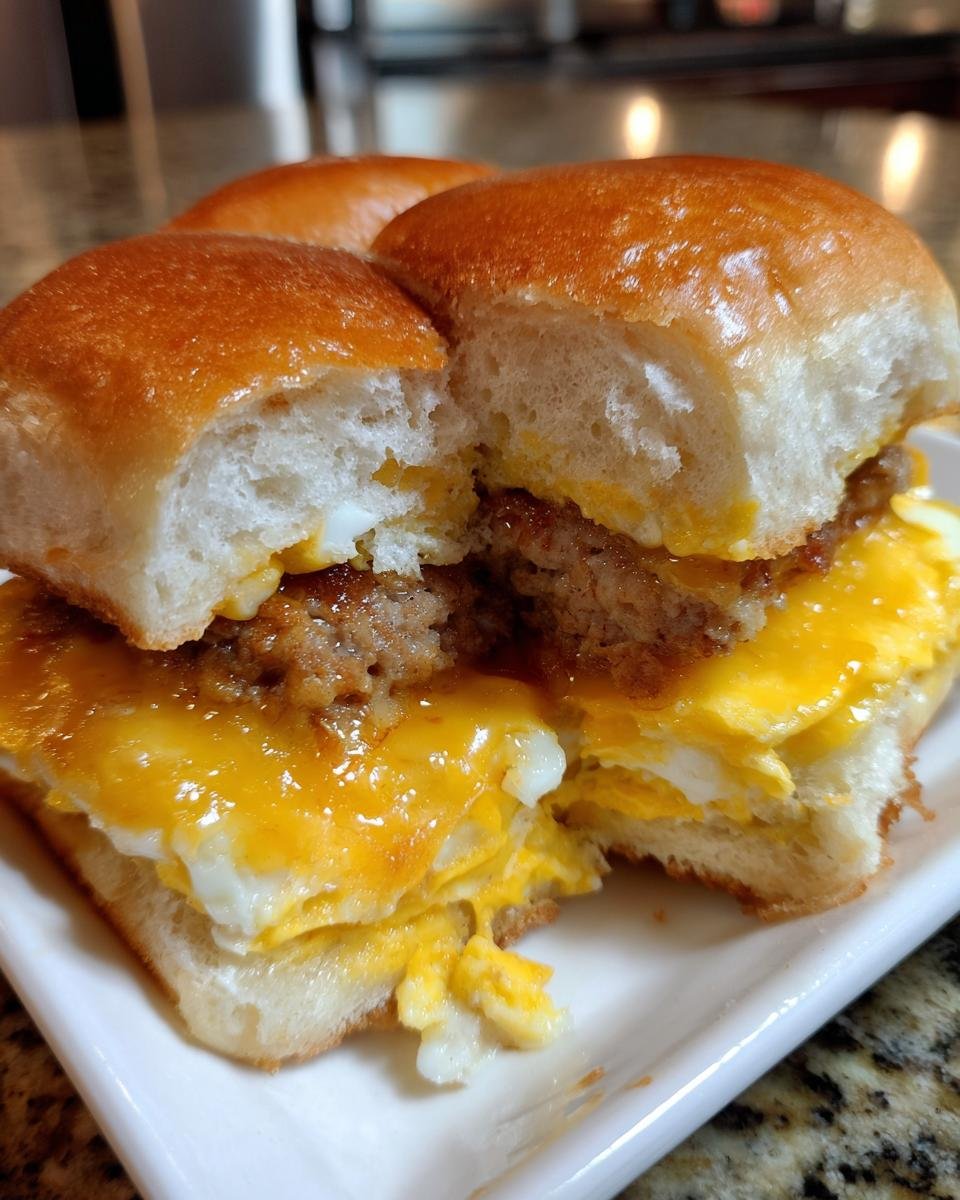
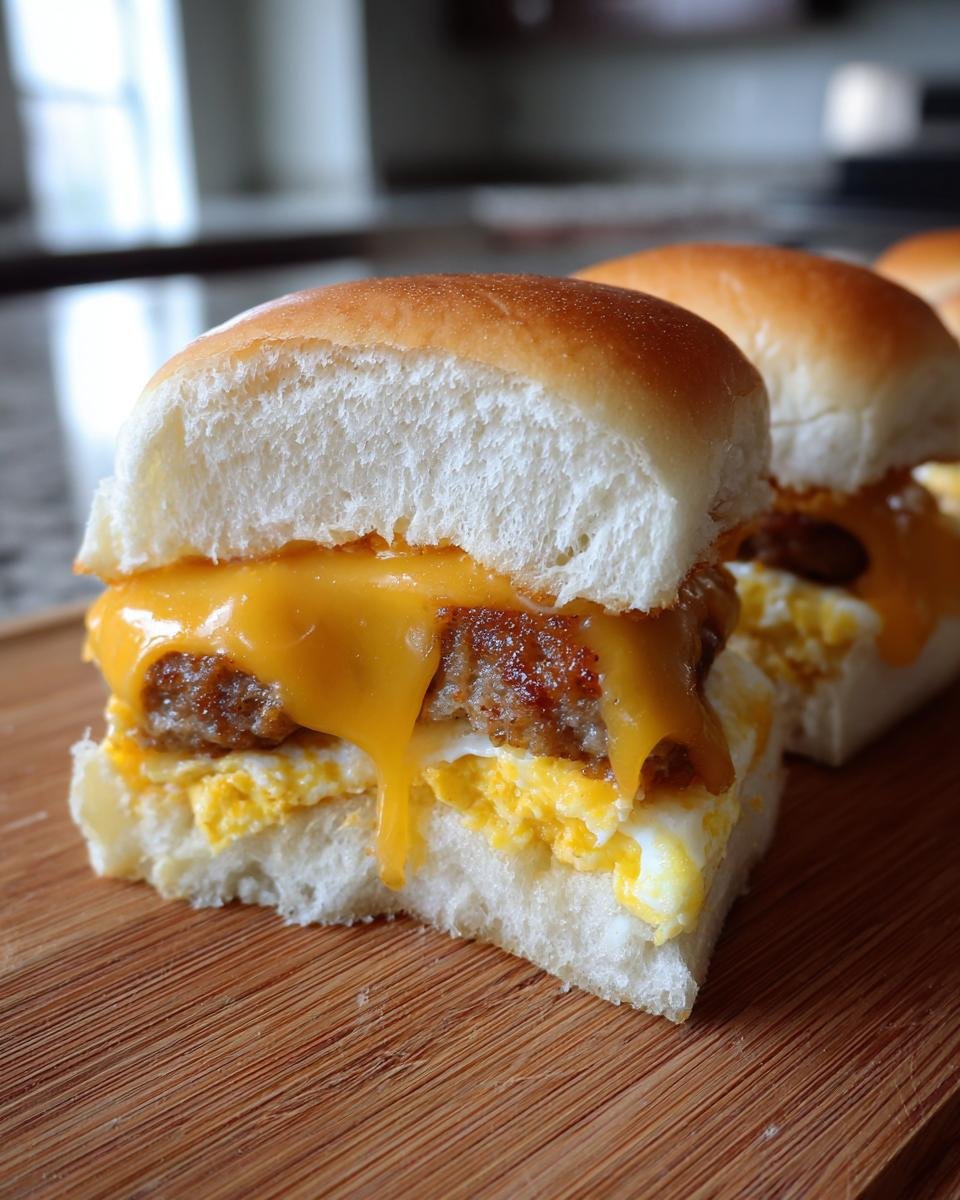
Mornings around here are chaotic, I won’t lie! Between getting everyone out the door and actually needing something remotely hearty to keep me going past 10 AM, simple is usually the goal. But simple doesn’t have to mean sad, right? That’s why I developed this recipe, and honestly, it’s a lifesaver. These little savory bombs—trust me when I say these are the easiest, most flavorful Breakfast Sliders you will ever make. When I realized I could assemble these babies while the coffee was brewing and have a hot, cheesy meal ready for the whole family in under 25 minutes, I knew I struck gold.
I used to just fry up bacon and eggs and eat them standing over the sink, feeling slightly guilty about the mess. But these sliders solve everything. They’re mess-free, stackable, and they absolutely nail the savory, salty, cheesy breakfast trifecta we all crave. You won’t believe how perfectly everything melts together in the oven!

Why You Will Love These Quick Breakfast Sliders
Seriously, the list of reasons I keep this recipe saved as a favorite is long, but here are the highlights. These little guys are just perfect for busy days. They really save the morning when you need something big on flavor but small on effort.
- They come together faster than pouring a bowl of cereal.
- Everything melts beautifully because we bake them all together!
- Minimal dishes—we’re talking about that one baking sheet.
If you’re looking for a heartier alternative to the breakfast casserole, check out my recipe for simple sausage and egg breakfast casserole, but honestly, sometimes you just need the handheld fun of a slider!
Essential Ingredients for Perfect Breakfast Sliders
This recipe is so simple because it uses classic, easy-to-find ingredients. There’s no fancy prep work here, which is exactly what you need for a morning meal. I am going to list out exactly what you need so you can gather everything before you even think about preheating the oven. Don’t try to switch types of rolls, either—the softness of that slider bun is key to the whole experience!
Grab these items before you start layering:
- 6 slider rolls (the kind that come in a pack of 12, usually King’s Hawaiian or similar)
- 6 cooked sausage patties (make sure they’re already cooked!)
- 6 eggs, fried or scrambled (fried is better for neat stacking, but scramble works if you’re careful)
- 6 slices cheddar cheese (sharp or mild, your call, but make sure it’s actual slices)
- 2 tablespoons butter, melted (you need this melted for brushing!)
If you are making a big batch for brunch, you might want to use the recipe inspiration from my simple sausage and egg bake recipe, but for these sliders, we keep it straightforward!
Step-by-Step Instructions to Make Breakfast Sliders
Okay, this is where the magic happens, and seriously, it flies by! Since everything is already cooked—sausage and eggs—we are just bonding the ingredients together and making those sweet rolls crispy on top. Set your oven to 350 degrees Fahrenheit first. That gives the oven a chance to warm up while you do the quick assembly work, which is super important!
I always prep my rolls first, then lay everything out assembly-line style. If you are scrambling your eggs, make sure they are just set, not brown. For fun, you could try making the eggs in the air fryer; I have a great little guide on air fryer eggs simple zero stress bakes if you want to try that!
Preparing the Rolls and Filling the Breakfast Sliders
First thing, take your package of slider rolls and use a serrated knife to slice the whole block carefully in half horizontally. Keep the tops and bottoms together where possible; it makes things so much easier! Lay the bottom halves snugly on your baking sheet. Now, layer up! Put one cooked sausage patty down first, followed by one nice egg, and top that with your slice of cheddar cheese. Don’t squish them down too hard yet; we want some air in there for good melting!
Baking and Finishing Your Breakfast Sliders
Once everything is layered on the bottom buns, place the tops on gently. Now for my favorite part: take that melted butter and just brush it all over the top of the rolls. Be generous! If you miss a spot, the cheese might get stuck later, so make sure it’s evenly coated. This is what gives you that perfect, slightly crunchy golden top we want. Pop them into the 350°F oven for about 10 to 12 minutes. Check them right at the 10-minute mark—you are looking for gooey, melted cheese and rolls that just *look* golden brown. Once they are done, pull them out and let them cool for just a minute before slicing them apart between the fillings. Enjoy that steam!
Tips for Success When Making Breakfast Sliders
Even though this recipe is super straightforward, I have a few tricks I always use to make sure they go from “good” to “absolutely amazing.” It’s all about those little details, you know? I’ve made these so many times, tweaking things until they were just right for my family’s morning chaos.
First off, let’s talk eggs. If you fry them, aim for slightly undercooked yolks. I know, I know, but stick with me! Those runnier yolks basically act as a built-in sauce once they heat up in the oven. They seep right into the roll underneath, making that part of the slider incredibly moist. If you are using scrambled eggs, make sure you don’t overcook them on the stovetop, or they will turn rubbery when they bake again.
To guarantee perfect cheese melt, make sure the cheese slices are right on top of the egg layer. The residual heat from the cooked sausage and egg helps the cheese start softening even before it hits the oven. And don’t skip that butter brush on top!
That melted butter is crucial for getting that beautiful golden shine and slight crunch on the roll tops, which contrasts perfectly with the soft interior. If I’m feeling extra fancy or if I realize my eggs got a little dry, I sometimes bake them covered with foil for the first 8 minutes, and then uncover them for the last 3-4 minutes just to melt the cheese and crisp the top. It’s less stress! For more general egg advice, check out my favorite way to cook them on a sheet pan here.
Ingredient Notes and Delicious Breakfast Sliders Variations
So, I know you might not always have sausage patties lying around—life happens! That’s totally fine because the beauty of these Breakfast Sliders is they are so adaptable. Don’t stress if you need to swap things out; this recipe rolls with the punches!
The recipe notes mention that you can absolutely substitute ham or bacon for the sausage. If you use bacon, make sure it’s cooked until it’s still a little pliable, otherwise, it’ll just snap when you bite into the soft roll. Ham slices work great if you want something super fast, too.
Also, I highly recommend adding a little zing! Before you put the tops on the rolls, spread a tiny bit of mild mustard or maybe a dash of your favorite hot sauce on the inside of the top slider bun. It cuts through the richness of the cheese and sausage beautifully. If you like bold flavors, you might also enjoy my recipe for sausage and peppers skillet—it gives you an idea of how well sausage pairs with some tang!
If you want to get fancy, here’s one variation that I love when I have an extra five minutes: swap the cheddar for Pepper Jack cheese! The slight spice in the Pepper Jack totally elevates the whole thing without adding any extra liquid or ingredients to worry about. It just melts into this incredible, slightly spicy blanket over the egg. It’s still fast, but it feels gourmet, you know?
Serving Suggestions for Your Breakfast Sliders
So, you’ve got these glorious, hot, cheesy Breakfast Sliders sitting on the counter, and you’re wondering what else goes on the plate? Since these are already super hearty—we’ve got protein, carbs, and cheese packed into one perfect handheld bite—you really don’t need much heavy filler.
Keep the sides light and bright to balance out that savory sausage goodness. For my family, it’s always about having something fresh on the side to balance the saltiness. I love serving these sliders alongside a big bowl of fresh fruit. You can check out my recipe for a vibrant fresh fruit salad if you want something colorful and easy.
If it’s a weekend and you have a little more time, a quick side of crispy hash browns or even some roasted sweet potato cubes goes wonderfully with that cheddar cheese. And, of course, if you’re having these for breakfast, you absolutely need coffee! Hot black coffee or a big glass of OJ cuts through the richness perfectly. See? Easy serving, zero stress!
Storage and Reheating Instructions for Leftover Breakfast Sliders
Alright, sometimes these things are so delicious we end up with leftovers—which is rare in my house, but it happens! The good news is that these Breakfast Sliders actually reheat pretty well if you know the secret.
If you have any left, wrap them up tightly in plastic wrap or foil, making sure each one is sealed individually if possible. They’ll keep nicely in the refrigerator for about three days. Don’t push it past that; nobody wants day-four morning slider mush, right?
When it comes to reheating, you have two options, but one is definitely miles better than the other. Microwave is fast, but it’s the enemy of crispy bread. Trust me, save your crispiness!
For the best results that bring back that fresh-from-the-oven joy, use your oven or a toaster oven. Preheat it to about 325 degrees Fahrenheit. Place the sliders directly on a baking sheet—no need to cover them this time. Let them warm up for about 10 minutes, or maybe 12 if they are fridge-cold. This allows the cheese to melt again without turning the bread soggy.
If you are seriously running late and must use a microwave, just pop one on a paper towel for about 20 to 30 seconds. It’s not going to be perfect—the roll will be softer—but it will be hot, cheesy, and edible in a pinch. I always try to avoid that option, but if you need to eat now, it works!
Frequently Asked Questions About Breakfast Sliders
I get so many questions about these sweet little Breakfast Sliders because everyone wants to know how to make them work perfectly for their schedule. The best way to build trust in a recipe is to answer the tough questions, so let’s cover the most common things readers ask me!
Can I use different bread besides the soft slider rolls?
This is a big one! Look, you *can*, but I strongly advise against it if you want that melt-in-your-mouth texture. The success of these sliders relies heavily on those soft, slightly sweet rolls that come in those 12-packs. They bake up beautifully because they compress slightly, holding all the filling in without getting tough. If you use thick slices of regular sandwich bread, they tend to dry out quickly in the oven, and you’ll lose that signature slider experience. Stick to the small, soft buns for these!
Can I make these ahead of time for an early morning?
Yes, you absolutely can! This is one of their best features! You can do the entire assembly—layering the sausage, egg, and cheese on the bottom buns, and even placing the tops on—the night before. Just don’t brush them with the melted butter yet. Cover the entire tray tightly with plastic wrap and stick it right in the fridge. In the morning, take them out, brush the tops with the butter, and bake them according to the instructions. They might need an extra minute or two coming straight from the cold, but it saves you so much assembly time!
What kind of egg works best for these Breakfast Sliders?
This really comes down to how much time you have. If you have 10 minutes before assembly, fried eggs are king because they hold their shape perfectly when you stack them, which keeps the filling neat. But if you’re pressed for time or making a huge batch for a crowd, scrambled eggs are fantastic. Just ensure your scrambled eggs are firmly cooked—not wet or runny—before layering them. If you prefer baking your eggs ahead of time, think about looking into a simple breakfast casserole to cook a big batch quickly!
Do I have to use cheddar cheese?
Nope! Cheddar is my go-to because it melts predictably and has that great sharp flavor that pairs well with sausage. But Swiss melts beautifully too and adds a nuttier taste. If you want maximum meltiness and pull, a low-moisture Monterey Jack is an excellent substitute. The key is using a good melting slice that isn’t too oily when heated!

Share Your Experience Making These Breakfast Sliders
Now that you have all the secrets to making these ridiculously easy and satisfying Breakfast Sliders, I really want to know how they turned out for you! Did you go with the spicy Pepper Jack upgrade, or did you stick to the classic cheddar? Did they save your morning like they save mine nearly every Tuesday?
Don’t be shy! Leave a rating for the recipe below; those little stars really help other busy home cooks decide if they should try this recipe next. I love reading all your feedback and seeing how you customize things in your own kitchen. It keeps the community fun and vibrant.
If you snap a photo of your beautiful, golden-brown sliders fresh out of the oven, please tag me on social media! Seeing them next to your morning coffee makes my day. We all need reminders that breakfast doesn’t have to be complicated to be delicious. You can learn more about my cooking philosophy over on my About Page!
Print
Simple Breakfast Sliders
- Total Time: 22 min
- Yield: 6 servings 1x
- Diet: Vegetarian
Description
Quick and easy sliders made with sausage, egg, and cheese on small rolls.
Ingredients
- 6 slider rolls
- 6 cooked sausage patties
- 6 eggs, fried or scrambled
- 6 slices cheddar cheese
- 2 tablespoons butter, melted
Instructions
- Preheat your oven to 350 degrees Fahrenheit.
- Slice the slider rolls in half horizontally.
- Place the bottom halves of the rolls on a baking sheet.
- Layer each bottom roll with one sausage patty, one egg, and one slice of cheese.
- Place the top halves of the rolls over the fillings.
- Brush the tops of the rolls evenly with melted butter.
- Bake for 10 to 12 minutes, or until the cheese is melted and the rolls are lightly golden.
- Slice the sliders apart before serving.
Notes
- You can substitute ham or bacon for the sausage.
- Add a small amount of mustard or hot sauce before baking for extra flavor.
- Prep Time: 10 min
- Cook Time: 12 min
- Category: Breakfast
- Method: Baking
- Cuisine: American
Nutrition
- Serving Size: 1 slider
- Calories: 350
- Sugar: 4
- Sodium: 750
- Fat: 22
- Saturated Fat: 9
- Unsaturated Fat: 13
- Trans Fat: 0
- Carbohydrates: 25
- Fiber: 1
- Protein: 15
- Cholesterol: 150
Keywords: breakfast, sliders, sausage, egg, cheese, quick meal