
Oh, there is just nothing in the world that beats that warm, sweet smell wafting through the house when something delicious is baking, right? Seriously, I come alive when I’m pulling a fresh loaf out of the oven. If you think making rich, unbelievably moist banana bread is complicated, you can throw that idea out the window! This recipe for simple banana bread is my ride-or-die method. I must have ruined about five batches chasing that perfect texture when I was first learning—usually ending up with something dense and gummy. But this one? It just works. It’s so straightforward, and the result is always that perfectly tender loaf that disappears way too fast.

Why This Banana Bread Recipe Stands Out
I tested what felt like a million variations before settling on this one—it’s that trusty recipe card I always turn to. What makes this the best simple banana bread? It’s all about consistency without needing fancy ingredients or a stand mixer. Honestly, I think you’ll be amazed at how foolproof this quick bread is. If you’re ever tempted to try a richer version, check out my double chocolate banana bread, but for day-to-day comfort, this version wins!
Perfectly Moist Banana Bread Every Time
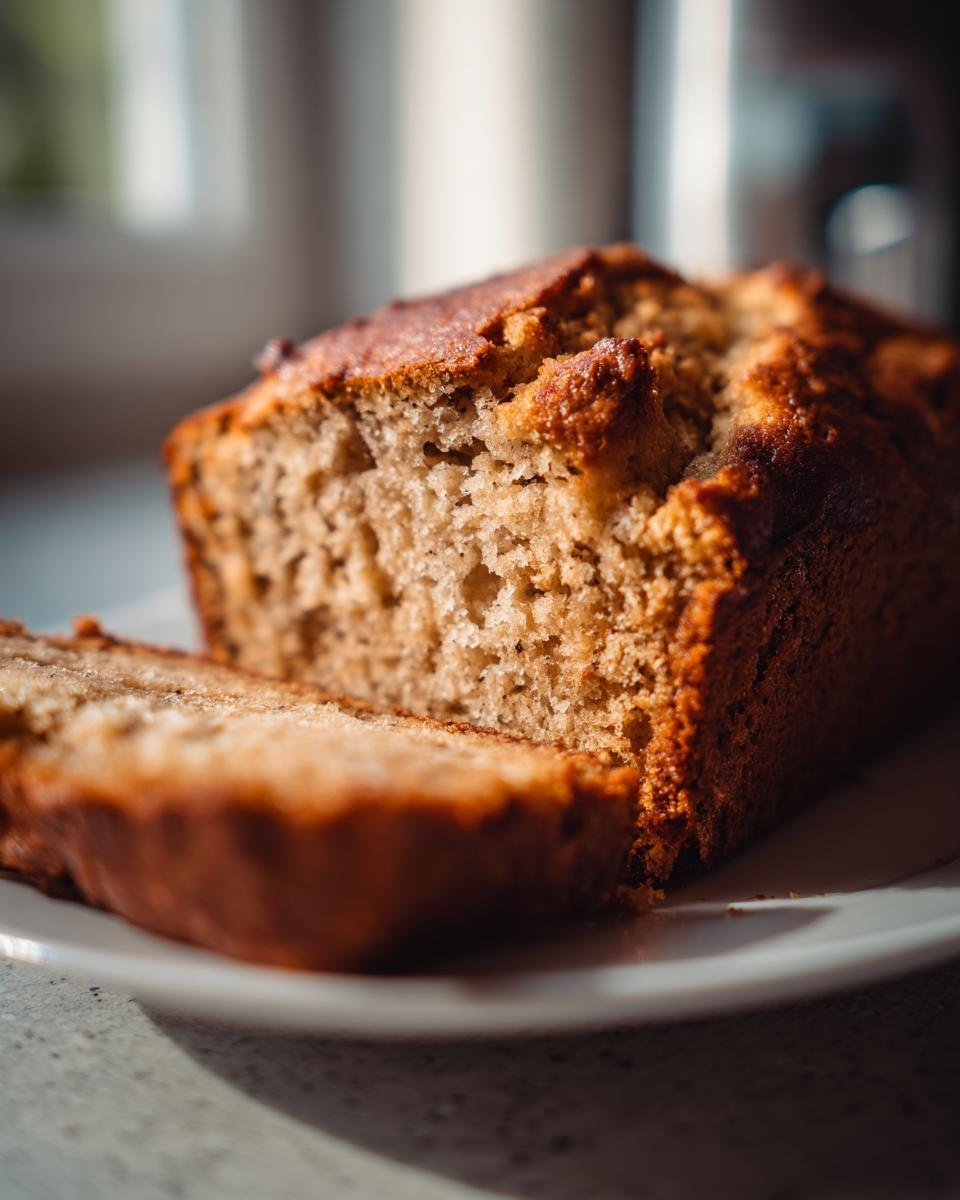
Moisture is the absolute goal here, and we nail it! We rely on using bananas that are practically black—the spottier they look, the better for that deep, sweet flavor. Plus, the simple balance of melted butter against the flour gives us that famous, tender structure. It never comes out dry, I promise!
Quick Preparation for Simple Banana Bread
You seriously cannot beat the speed here. From grabbing bowls to having the batter in the pan, we are looking at maybe fifteen minutes, max. It’s perfect for those evenings when you realize you need a little something sweet but don’t have hours to spend fussing in the kitchen! Mix, pour, bake, done.
Gathering Your Ingredients for Classic Banana Bread
Okay, let’s talk about what you need specifically, because gathering the right stuff upfront makes the whole process feel smooth as silk. For this classic banana bread, we keep the ingredient list short and sweet. I’ve written out the exact measurements next to each item further down, but trust me, having them ready before you even turn the oven on is half the battle won!
You’ll need our three hero ingredients ready to go: three very ripe, spotty bananas mashed up nicely, about a third of a cup of melted butter—not oil, but real butter—and precisely one large egg, beaten well. Everything else falls right into place after that.
If you want to check out how I use bananas in another recipe, these banana oatmeal cookies are fantastic too, but they use slightly less ripe fruit!
Ingredient Notes and Substitutions for Banana Bread
This is where our expertise really comes into play with this simple banana bread! My number one, cannot-stress-this-enough tip? Do not, under any circumstances, use yellow or green bananas. They taste harsh and they just don’t mash down into the sweetness we need. I mean, they should look like they are about to leave the fruit bowl entirely—almost black skin! That is your cue.
Also, if you’re feeling adventurous, chop up about a half cup of walnuts or pecans and fold them in with the flour. The crunch against the soft bread is phenomenal. Just remember, nuts are strictly optional; they won’t change the required moisture level one bit, so don’t worry if you have an allergy or just don’t like ‘em!
Essential Equipment for Making Banana Bread
We don’t need a whole arsenal of fancy gadgets for this straightforward banana bread; that’s part of its charm! Honestly, I’ve made this with nothing more than a couple of bowls and a wooden spoon when I was first starting out. But if you want things to go smoothly, having these basics ready is important.
- A standard loaf pan—mine is around 9×5 inches, but check the volume; this recipe fills it just right.
- Two mixing bowls: one larger one for mixing the wet ingredients and a medium one for your dry items.
- A whisk or a solid sturdy spoon for combining everything without overworking the batter.
- A rubber spatula is great for scraping down the sides. You want every last bit of that sweet batter in the pan!
- Of course, you’ll need your measuring cups and spoons. Precision matters, even in simple banana bread.
That’s honestly it! No electric mixers required, which means way less cleanup, and trust me, that’s always a win in my book. Enjoy how quick setup is before we dive into the actual baking steps!
Step-by-Step Instructions for Perfect Banana Bread
Alright, let’s get baking! Following these steps ensures that your simple banana bread comes out perfectly textured, not heavy or tough. It’s all about timing and knowing when to stop stirring. If you’ve ever made a quick bread that turned out chewy, I’m going to show you the exact moment to put your spoon down. Before you even look at your mashed bananas, you need to get the oven humming!
I always love how fast this comes together after preheating. If you’re looking for another easy quick bread that uses up summer produce, you might want to check out my zucchini bread with apples recipe next. But for now, focus here!
Prepping the Pan and Oven for Banana Bread
First things first: get that oven heated up to 350 degrees F, which is 175 degrees C. Don’t let it warm up while the batter sits around! While that’s heating, grab your standard loaf pan. You need to grease it well and then dust it lightly with flour. Seriously, don’t skip the flouring step, or you’ll be fighting your beautiful banana bread later!
Mixing the Wet and Dry Components of Banana Bread
In your bigger bowl, mix up all the wet things first: your mashed bananas, the melted butter, that tiny pinch of salt, and the baking soda. Whisk that around until it looks mostly happy. Then, stir in your sugar, the beaten egg, and the vanilla extract. Once that’s combined, switch to a spatula and gently fold in your measured flour. I mean gently! You are aiming for *just combined*; see those last little white streaks? That’s fine, let them be! Overmixing the flour is the number one way to turn this gorgeous quick bread into something you could use as a doorstop.
Baking and Cooling Your Banana Bread
Pour that slightly lumpy batter into your prepared pan, smoothing the top gently. It needs to bake for about 50 to 60 minutes in that hot oven. You know it’s done when you stick a wooden pick—a toothpick works too—right into the center, and it slides out clean without any wet batter clinging to it. Let it sit patiently in the pan for ten minutes. Resist the urge to pull it out sooner! After that short rest, carefully turn it out onto a wire rack so it can cool completely. This resting stage is crucial for setting that perfect moist crumb.
Tips for Success with Your Banana Bread Batter
I know I stress this constantly, but I have to repeat it because it’s the secret weapon for this simple banana bread: stop mixing once the flour disappears! Seriously, put the spoon down. If you keep churning that batter after the flour is incorporated, you’re waking up the gluten, and that’s what gives you that tough, elastic texture instead of soft, melt-in-your-mouth banana bread.
Think about it this way: the wet ingredients—bananas, butter, egg—create a beautiful, creamy base. We only want to introduce the flour long enough for the dry bits to get damp. If you see little ribbons of flour while pouring it into the pan, that’s totally fine! They’ll disappear during the bake and you’ll be rewarded with superior tenderness. I learned this the hard way after making one batch so chewy I thought it was actually rubber!
Another thing that trips people up is the banana ripeness, but we covered that, right? If you want more tips on keeping things moist—even slightly fussier bakes like a dense banana cake—I’ve got some great pointers over here regarding batter structure when you check out my post on moist banana cake.
When it comes to deciding on add-ins like those optional nuts, always toss them with about a teaspoon of your flour measurement before folding them in. This little trick keeps them suspended throughout the batter instead of sinking straight to the bottom of the pan where they just clump together. Nobody wants a sad, bare top layer on otherwise perfect banana bread!
Serving Suggestions for Delicious Banana Bread
Now that you have this beautiful, fragrant loaf of simple banana bread cooling—or maybe you’re just sneaking a tiny warm corner slice (I won’t tell!)—the next joy is deciding how to eat it. Honestly, the flavor is so rich and perfectly balanced that it truly shines all on its own. But if you want to elevate that experience just a touch, I have a few go-to ways I serve it up to my family.
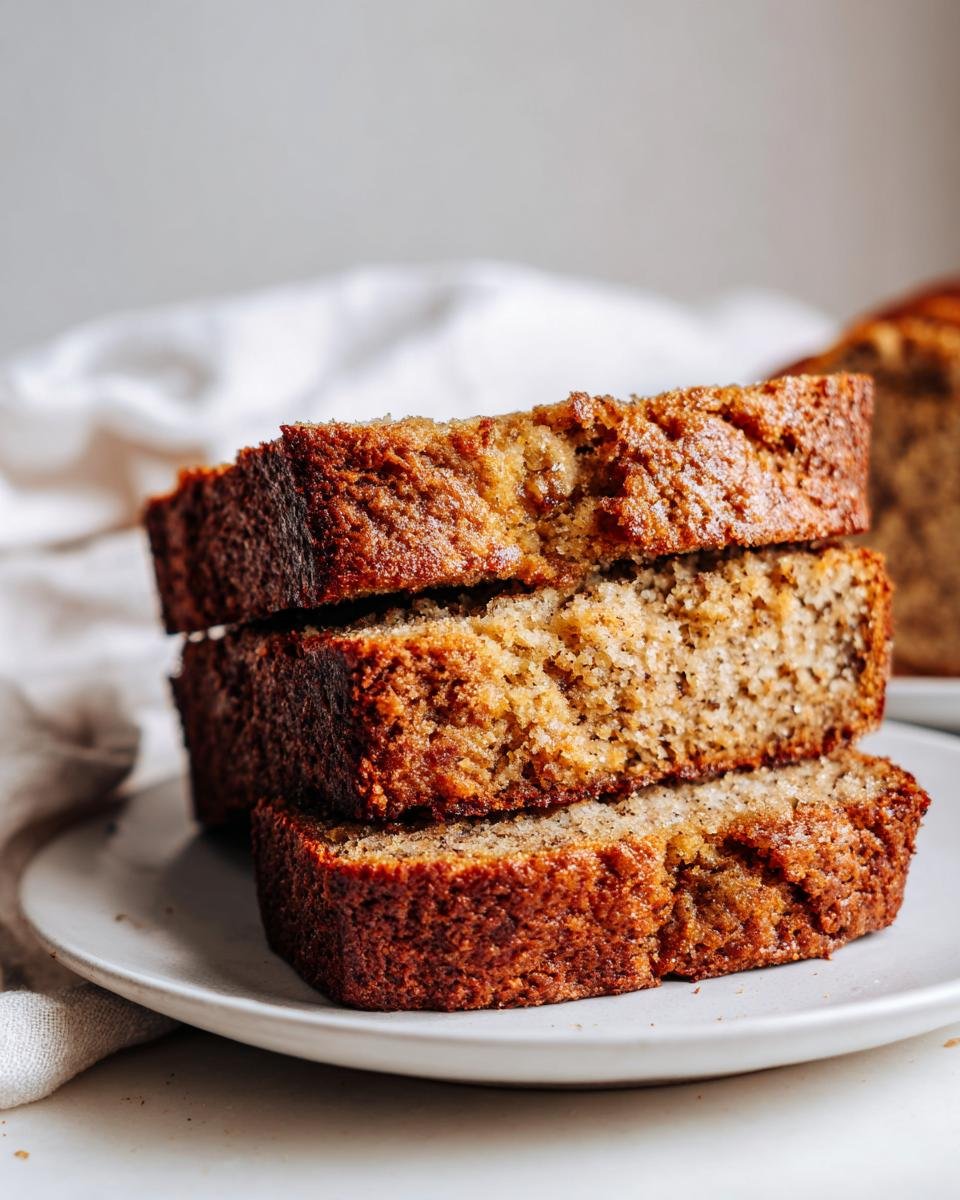
For breakfast or a simple snack, you can’t beat a thick slice toasted just slightly. Spread a smear of good quality, salted butter on it while it’s still warm. That salty-sweet contrast? Perfection. It melts right into the crumbs!
If you are serving this as a dessert, even though it’s basically a quick bread, a little something creamy on top goes a long way. Cream cheese, softened slightly and spread thinly, is always a hit. It brings a nice little tang that cuts through the sweetness of the banana cake.
If you’re feeling fancy—maybe it’s a weekend morning—try topping it with some homemade sweetened whipped cream. I have a killer recipe for coffee whipped cream that introduces a lovely mocha note to the classic banana flavor. It turns this simple quick bread into something a little more special, don’t you think?
And of course, the best pairing of all? A giant, steaming mug of strong coffee. That’s how I generally enjoy my first slice, standing right by the cooling rack before anyone else wakes up. Shhh!
Storage and Reheating Instructions for Banana Bread
The real beauty of this simple banana bread is that it actually tastes better the next day! The flavors have time to meld together, making the overall quick bread taste even richer. But you definitely want to store it correctly so you don’t lose that moisture we worked so hard to achieve.
If you plan on finishing the loaf within two or three days—which, let’s be honest, I usually do—leave it right on the counter, covered loosely with aluminum foil or plastic wrap. Don’t seal it airtight right away, though! If you wrap it while it’s still even slightly warm, you trap steam, and then you end up with a slightly soggy crust, which is a tragedy.
If you know the loaf is going to last longer than three days, or if your kitchen is really warm, it’s time to use the freezer. Wrapping it tightly in plastic wrap first, and then maybe tucking that into a Ziploc bag, works wonders. It keeps beautifully frozen for up to three months. I usually slice the bread first, so I can just take out what I need!
Reviving Your Banana Bread Slices
When it comes time to eat that leftover, perfectly preserved banana bread, you have a couple of easy options. My favorite way, especially if you’re just enjoying one slice, is the microwave. Pop the slice on a plate for about 15 to 20 seconds. It warms up gently, softens the butter slightly, and it feels like it just came out of the oven—so comforting!
If you’re reheating a bigger piece or want to crisp the edges up again, the oven works best. Wrap the slice loosely in foil—this keeps it from drying out from the direct heat—and pop it into a 300-degree oven for about 10 minutes. It warms all the way through while keeping the inside wonderfully soft. You honestly won’t believe it was sitting in your freezer!
No matter how you store it, it’s worth the little effort, because this banana bread is magic the second time around, too!
Frequently Asked Questions About Banana Bread
I get so many questions about this recipe once people start baking it, which just goes to show how popular a good, reliable banana bread is! I’ve gathered the most common things folks ask me below. Don’t worry if you mess up on your first try; learning to bake this quick bread is part of the fun, though I bet you won’t even have a chance to worry about storing leftovers!
Can I use less sugar in this Banana Bread recipe?
You absolutely *can* reduce the sugar, but you have to be careful! Sugar does more than just sweeten; it actually helps keep the bread incredibly moist and tender by holding onto water during the baking process. If you cut it down too much—say, by more than a quarter cup—you might find your simple banana bread comes out a little drier or a bit denser than what we are aiming for. If you want to try, swap maybe two tablespoons of sugar for brown sugar instead, which adds richness without making it overly sweet. I’d be cautious about cutting too much more than that, though!
What is the best way to ripen bananas quickly for Banana Bread?
We all get those moments where we realize we want banana bread *now*, but our bananas look decidedly yellow. Don’t fret! I have a super quick trick for speeding up the ripening process. Take your slightly yellow bananas, keep them in their skins, and pop them onto a baking sheet. Bake them at 300 degrees F (about 150 C) for about 15 to 20 minutes. They will turn completely black and soft inside, releasing all that sugary banana flavor we need for the best banana cake texture. Just let them cool before you mash them up!
Can this Banana Bread be frozen?
Yes, and I highly recommend it if you manage to have any left over! Freezing is the best way to keep this quick bread tasting fresh. The absolute best way is to cool the loaf completely, slice it into individual servings, and then wrap each slice tightly in plastic wrap. After that, gather all your wrapped slices and put them into a heavy-duty freezer bag. This prevents freezer burn and makes it so easy to grab just one slice whenever that craving hits! They thaw out wonderfully on the counter in about an hour, or you can reheat them quickly.
By the way, if you’re looking for another fantastic use for ripe bananas, you should check out my recipe for Father’s Day Banana Muffins!
Estimated Nutritional Information for Banana Bread
So, here’s a little snapshot of what’s estimated to be in one slice of this simple banana bread. Remember, this is just an estimate! If you load up on nuts or decide to add a thick layer of frosting (which I totally support, by the way!), those numbers will change. This calculation is based on dividing the whole loaf into the standard yield amount we talked about earlier.
- Serving Size: 1 slice
- Calories: Around 220
- Sugar: Roughly 15 grams
- Total Fat: About 10 grams (Watch that saturated fat!)
- Carbohydrates: About 34 grams
- Protein: A nice little bump of 3 grams
- Sodium: Mostly from the added salt, keeping it around 150mg
It’s a lovely treat, definitely leaning more toward dessert territory than a feather-light breakfast bread, but that’s why it tastes so good, right? Enjoy every bite!
Print
Simple Banana Bread
- Total Time: 75 min
- Yield: 1 loaf 1x
- Diet: Vegetarian
Description
A straightforward recipe for moist banana bread.
Ingredients
- 3 ripe bananas, mashed
- 1/3 cup melted butter
- 1 teaspoon baking soda
- Pinch of salt
- 3/4 cup white sugar
- 1 large egg, beaten
- 1 teaspoon vanilla extract
- 1 1/2 cups all-purpose flour
Instructions
- Preheat your oven to 350 degrees F (175 degrees C). Grease and flour a standard loaf pan.
- In a large bowl, mix the mashed bananas, melted butter, baking soda, and salt.
- Stir in the sugar, beaten egg, and vanilla extract.
- Mix in the flour until just combined. Do not overmix.
- Pour the batter into the prepared loaf pan.
- Bake for 50 to 60 minutes, or until a wooden pick inserted into the center comes out clean.
- Let the bread cool in the pan for 10 minutes before removing it to a wire rack to cool completely.
Notes
- Use bananas that are very ripe for the best flavor.
- You can add 1/2 cup of chopped nuts if desired.
- Prep Time: 15 min
- Cook Time: 60 min
- Category: Dessert
- Method: Baking
- Cuisine: American
Nutrition
- Serving Size: 1 slice
- Calories: 220
- Sugar: 15
- Sodium: 150
- Fat: 10
- Saturated Fat: 6
- Unsaturated Fat: 4
- Trans Fat: 0
- Carbohydrates: 34
- Fiber: 1
- Protein: 3
- Cholesterol: 35
Keywords: banana bread, quick bread, sweet bread, banana cake