
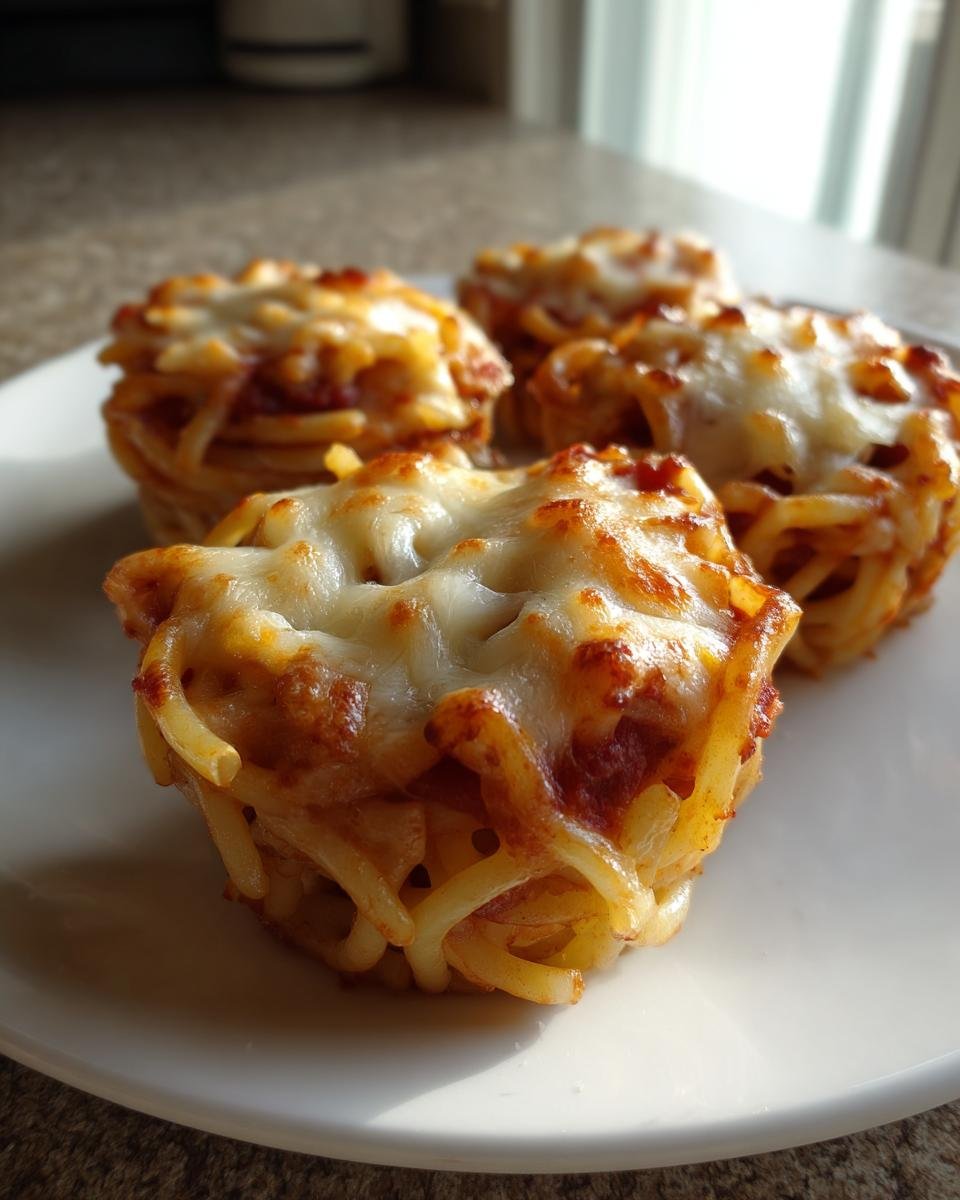
Let’s be honest, sometimes you just want pasta, but you don’t want the mess, the giant casserole dish, or the argument over serving sizes! That’s why I am absolutely obsessed with individual portions, and these take the cake—or, well, the spaghetti. Introducing my absolute favorite weeknight savior: the incredible Spaghetti Worm Cups. These aren’t just baked spaghetti; they are perfectly portioned, little edible nests of saucy goodness baked right in a muffin tin.
Trust me, after a long day, being able to grab two or three perfectly formed cups right out of the tin feels like cheating. They are so convenient for packing lunches later, too! They hold their shape beautifully and they feature those slightly crispy, cheesy edges that make eating pasta out of a cup totally superior. You are going to need this recipe!

Why You Will Love These Spaghetti Worm Cups (Experience & Authority)
I can honestly say this recipe changed how I handle pasta leftovers! Seriously, forget reheating sloppy servings from a giant pan. Here is why these cups are a total game-changer:
- Perfect Portions, Every Time: No more scooping guesses! Each person gets one beautiful, self-contained serving.
- Meal Prep Superstar: Assemble them on Sunday, and you’ve got grab-and-go lunches or quick dinners ready for days.
- Meal Planning Made Easy: Because they bake individually, cleanup is nearly zero. Just pop the tin out when you’re done! You can find tons of other great inspiration for easy meals like this one over here.
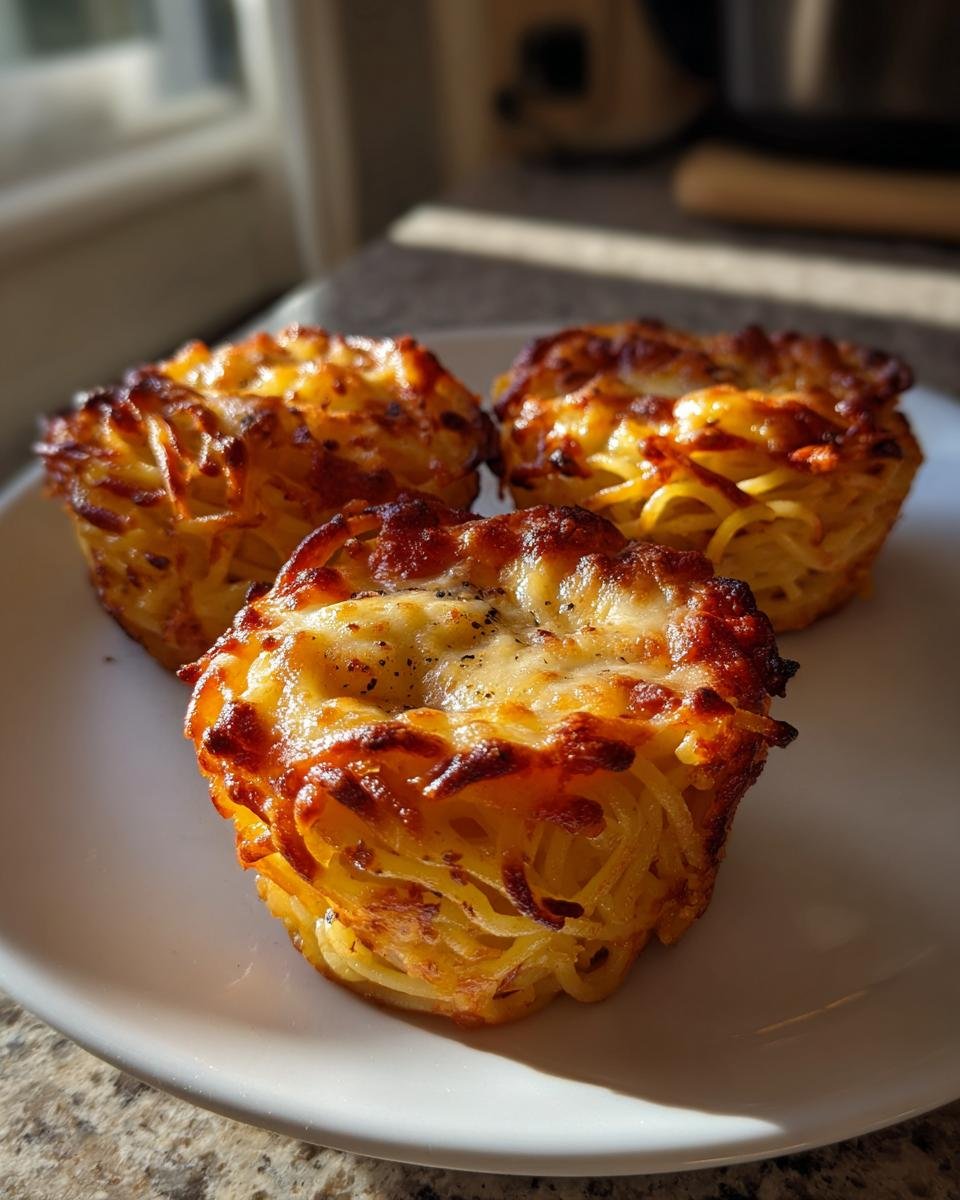
My little expert insight? Baking them in the muffin tin forces the spaghetti edges that touch the metal to caramelize just a bit. That glorious, slight crispness is the secret to the best texture!
Essential Ingredients for Perfect Spaghetti Worm Cups
When we’re making something this simple and good, you absolutely have to nail the ingredients list. Trust me, grabbing the right stuff upfront makes the assembly process fly by like nothing else. We’re keeping this classic Italian-American inspired, but feel free to swap that sauce you love!
Here is exactly what you’ll need for 12 perfect little cups. I’ve seen too many people try to wing the amounts, so measure carefully!
- The pasta part: 12 ounces of spaghetti, and this must be uncooked straight from the box!
- For the sauté: 1 tablespoon of olive oil, 1/2 cup of onion that is finely chopped, and just one clove of minced garlic. Yum!
- The binder and flavor: 1 1/2 cups of your favorite marinara sauce, and you can add 1/2 cup of ground beef or turkey if you want that hearty version.
- The cheese power: We need 1/2 cup of mozzarella cheese, and make sure it is shredded, plus 1/4 cup of grated Parmesan cheese for that salty finish.
- Lastly, the magic glue: 1 large egg. This keeps the whole cup structure from collapsing!
If you’re looking to batch cook ahead of time, I often use sauces that are already slow-cooked to perfection, like the ones you can find methods for right here.
Expert Tips for Assembling Your Spaghetti Worm Cups
Putting these cups together is where the fun begins, but a few crucial steps separate a sturdy cup from a messy pile of noodles! First, and I cannot stress this enough: grease that muffin tin like your life depends on it! I use a generous spray of non-stick, followed by a quick swipe of softened butter in every cup. If you use ground meat, make sure you check out some hearty inspiration here, but always drain off every bit of excess grease before mixing it with the sauce.
The egg you see on the ingredient list is your structural engineer here. It really is what locks all those cooked noodles together. Don’t skip it! Without that binder, your little cups will just crumble when you try to serve them. Once everything is mixed, you have to be gentle forming the cups.
Prepping the Pasta and Sauce Base for Spaghetti Worm Cups
You want your spaghetti cooked al dente—just a little resistance left. If you overcook it, it turns mushy, and we are aiming for texture here! Over the years, I learned the hard way that draining the pasta needs to be extra thorough. Use a colander and let it sit for a minute or two. While it cools slightly, sauté your chopped onion until it’s totally soft, then toss in the garlic and meat. Once that’s all browned and delicious, stir in the marinara and let it simmer just long enough to get happy.
Forming and Topping the Individual Spaghetti Worm Cups
Now, get that cooked, drained spaghetti into a big bowl. Pour your sauce mixture over top, add the egg, and sprinkle in about half of that mozzarella. Mix it all gently—we don’t want to break the strands too much! Then, spoon the mixture evenly into your prepared muffin cups. Here’s my trick for pressing: use the back of a small spoon or the bottom of a clean drinking glass to gently press the pasta against the bottom and up the sides. Don’t smash it down hard, or you lose that airy texture! Top each one with the rest of the mozzarella and all that grated Parmesan for a golden crown.
Baking Instructions for Crispy-Edged Spaghetti Worm Cups
Alright, we’ve assembled these little beauties, and now it’s time for the oven to do its magic! Remember, we are aiming for that gorgeous, bubbly, slightly crunchy exterior we talked about. First things first: crank that oven up to 375 degrees Fahrenheit. Make sure the rack is set in the middle so the heat circulates evenly around our muffin tin.
Once they are nestled in there, set your timer for 15 minutes. Keep a close eye on them after that point. You are looking for two main things: the cheese on top should be totally melted, gooey, and golden brown, and those little noodle edges poking out around the rim should look slightly toasted. If they’re looking good, pull them out! For more baked dinner ideas that are just as satisfying, check out this chicken parmesan bake.
Resting and Serving Your Baked Spaghetti Worm Cups
This is the hardest part, I know—they smell so good right out of the oven! But you can’t rush perfection here. You absolutely have to let your Spaghetti Worm Cups rest right there in the muffin tin for a good 5 minutes after you pull them out. If you try to pop them immediately, the structure hasn’t fully set, and I promise you’ll end up with a messy noodle puddle instead of a cup.
Once they’ve taken a little breath, you can usually just turn the tin upside down onto a cutting board and they should slide right out. If one is being stubborn, don’t panic or try to pry it! Just take a very thin, flexible knife—the kind you use for spreading butter works great—and gently run it around the edge between the pasta and the tin wall. That little wiggle helps release it so you can serve up those perfect, individual servings!
Ingredient Notes and Substitutions for Spaghetti Worm Cups
We love to adapt, don’t we? That’s what makes cooking fun! While the recipe calls for classic marinara, please feel free to swap in whatever jarred sauce makes your heart sing. Spicy arrabbiata? Go for it! A rich Bolognese that you happen to have around? Perfect!
If you are ditching the ground meat, remember the veggie substitution note! Adding 1/2 cup of cooked mushrooms or lentils during the mixing stage gives you that perfect bite structure back, so the whole thing doesn’t feel too loose. For meatless magic, check out some other great pasta ideas here.
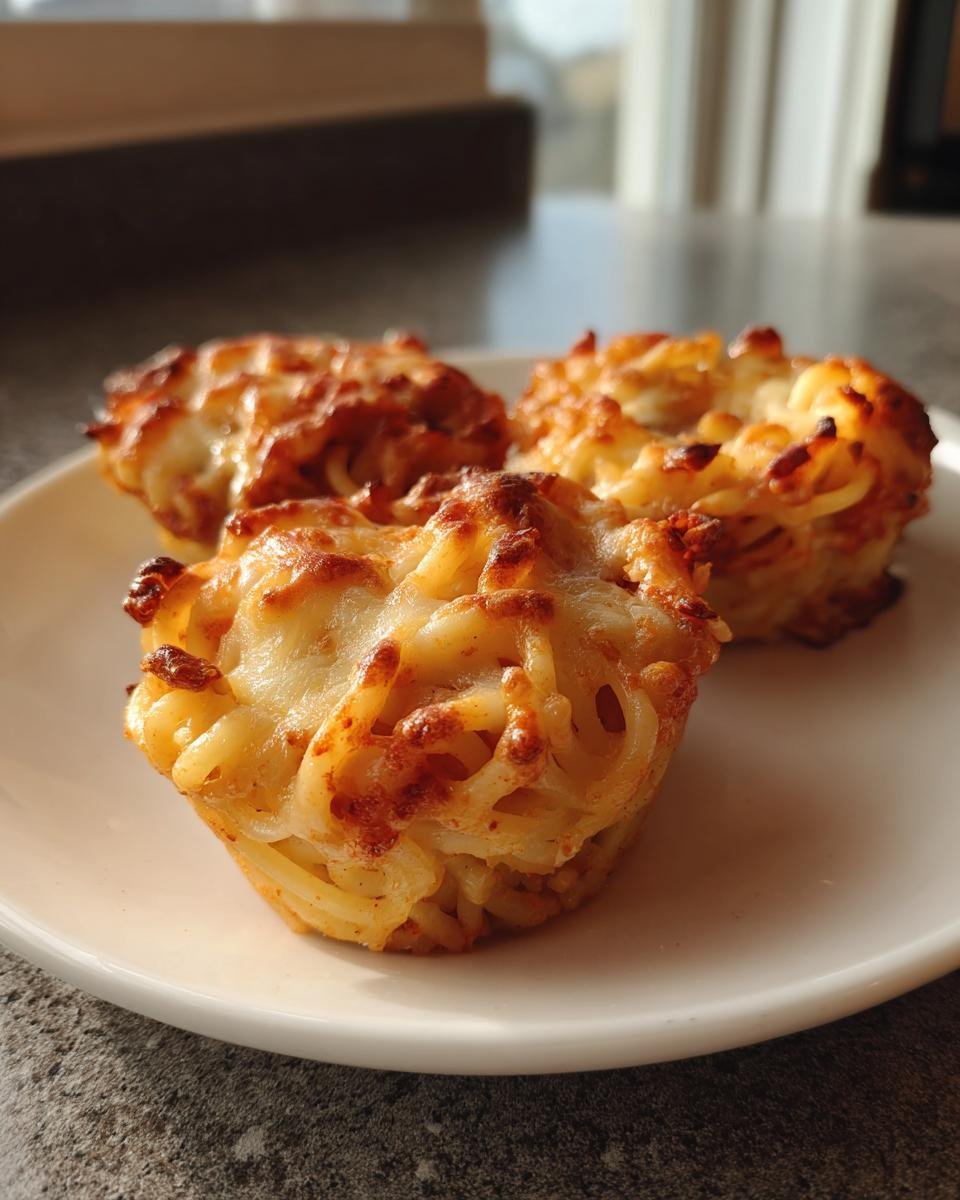
Now, about the pasta shape. We call them Worm Cups for a reason—spaghetti works best because it weaves those little nests nicely. But if you only have penne or ziti? Use them! Just know they won’t have that signature ‘worm’ look. They’ll still taste amazing, though!
Storage and Reheating Instructions for Leftover Spaghetti Worm Cups
The best part about these cups is that they taste fantastic the next day! If you have any leftovers—which is rare in my house, by the way—the key is storage. Make sure they are completely cool, and then tuck them into an airtight container. They’ll keep perfectly well in the fridge for about three or four days, no problem at all.
Now, reheating is where people often mess up! If you throw them in the microwave, you’ll lose that wonderful crisp edge we worked so hard to create. Don’t do it! For the best results, pop them in a toaster oven or a regular oven set to 350 degrees for about ten minutes. If you have an air fryer, even better! That gets them crispy again in just five minutes flat, bringing them right back to life.
Serving Suggestions to Complete Your Spaghetti Worm Cups Meal
Even the most perfect baked portion needs a buddy, right? These Spaghetti Worm Cups are satisfying on their own, but they really shine when paired with something fresh and crunchy to cut through that rich sauce and cheese. I always keep it super simple because honestly, the cups are the main event!
My go-to side is always, always a vibrant green salad. It just balances everything out. I toss together some crisp romaine, maybe a few shaved carrots, and top it with my favorite homemade dressing. If you want the recipe for the dressing that brings salads to life, you can grab it right here—it’s amazing!
If you’re feeling extra hungry or serving kids, you can never go wrong with a few garlic breadsticks on the side for dipping up any rogue sauce left on the plate. Easy peasy!
Frequently Asked Questions About Making Spaghetti Worm Cups
I always get so many questions when I share photos of these online—people are usually worried about sogginess or sticking! It’s totally normal when dealing with a baked spaghetti muffin tin recipe. Let’s bust through those final concerns so you can get baking with total confidence!
These are fantastic for meal prep, which is why so many of you ask about getting ahead of the game. Do I want to have everything ready to go on a busy Tuesday night? Yes, please! If you’d like to preview other super simple make-ahead ideas, I highly recommend skimming through some of the tasty options here.
Can I prepare the Spaghetti Worm Cups mixture ahead of time?
You absolutely can prep components ahead—that’s smart cooking! You can cook the spaghetti and make the whole meat sauce mixture a day in advance and keep them covered in the fridge. When you’re ready to bake, just combine the cooled spaghetti, sauce, egg, and half the cheese, press into your cups, and bake as directed. I wouldn’t assemble them completely and then refrigerate them for more than a few hours, though, because the egg will start to set the pasta too firmly before it even hits the oven!
What is the best way to ensure my Spaghetti Worm Cups don’t stick?
Sticking is the enemy of a perfect cup! If you missed my main tip earlier, listen up: grease is your best friend here until you bake them. Don’t just use a quick spritz of cooking spray. I recommend coating every inch of the tin with soft butter or shortening, getting it right up the sides. If you are still worried—maybe you’re using an older, well-loved pan—use those little parchment paper circles they sell for the bottom of cupcakes only in the very bottom of the well. That little extra step guarantees they slide right out!
Print
Spaghetti Worm Cups
- Total Time: 35 min
- Yield: 12 cups 1x
- Diet: Vegetarian
Description
Individual servings of spaghetti baked in a cup shape with sauce and cheese.
Ingredients
- 12 ounces spaghetti, uncooked
- 1 tablespoon olive oil
- 1/2 cup onion, chopped
- 1 clove garlic, minced
- 1 1/2 cups marinara sauce
- 1/2 cup ground beef or turkey (optional)
- 1/2 cup mozzarella cheese, shredded
- 1/4 cup Parmesan cheese, grated
- 1 large egg
Instructions
- Preheat your oven to 375 degrees Fahrenheit. Grease a standard 12-cup muffin tin.
- Cook the spaghetti according to package directions until al dente. Drain well.
- While the pasta cooks, heat the olive oil in a skillet over medium heat. Add the onion and cook until soft, about 5 minutes.
- Add the garlic and ground meat (if using) to the skillet. Cook the meat until browned. Drain any excess fat.
- Stir the marinara sauce into the meat mixture. Simmer for 5 minutes.
- In a large bowl, combine the cooked spaghetti, the meat sauce mixture, the egg, and half of the mozzarella cheese. Mix until everything is coated.
- Divide the spaghetti mixture evenly among the 12 muffin cups, pressing the pasta against the bottom and sides to form a cup shape.
- Top each cup with the remaining mozzarella cheese and the grated Parmesan cheese.
- Bake for 15 to 20 minutes, or until the cheese is melted and bubbly and the edges of the spaghetti are slightly crisp.
- Let the cups cool in the tin for 5 minutes before carefully removing them.
Notes
- You can substitute your favorite pasta sauce for marinara.
- For a vegetarian version, omit the ground meat and add 1/2 cup of cooked mushrooms or lentils to the sauce mixture.
- If the cups stick, run a thin knife around the edge before lifting.
- Prep Time: 15 min
- Cook Time: 20 min
- Category: Dinner
- Method: Baking
- Cuisine: Italian-American
Nutrition
- Serving Size: 1 cup
- Calories: 250
- Sugar: 5
- Sodium: 450
- Fat: 9
- Saturated Fat: 4
- Unsaturated Fat: 5
- Trans Fat: 0
- Carbohydrates: 32
- Fiber: 2
- Protein: 12
- Cholesterol: 35
Keywords: spaghetti, pasta cups, muffin tin recipe, baked spaghetti, individual servings, easy dinner