
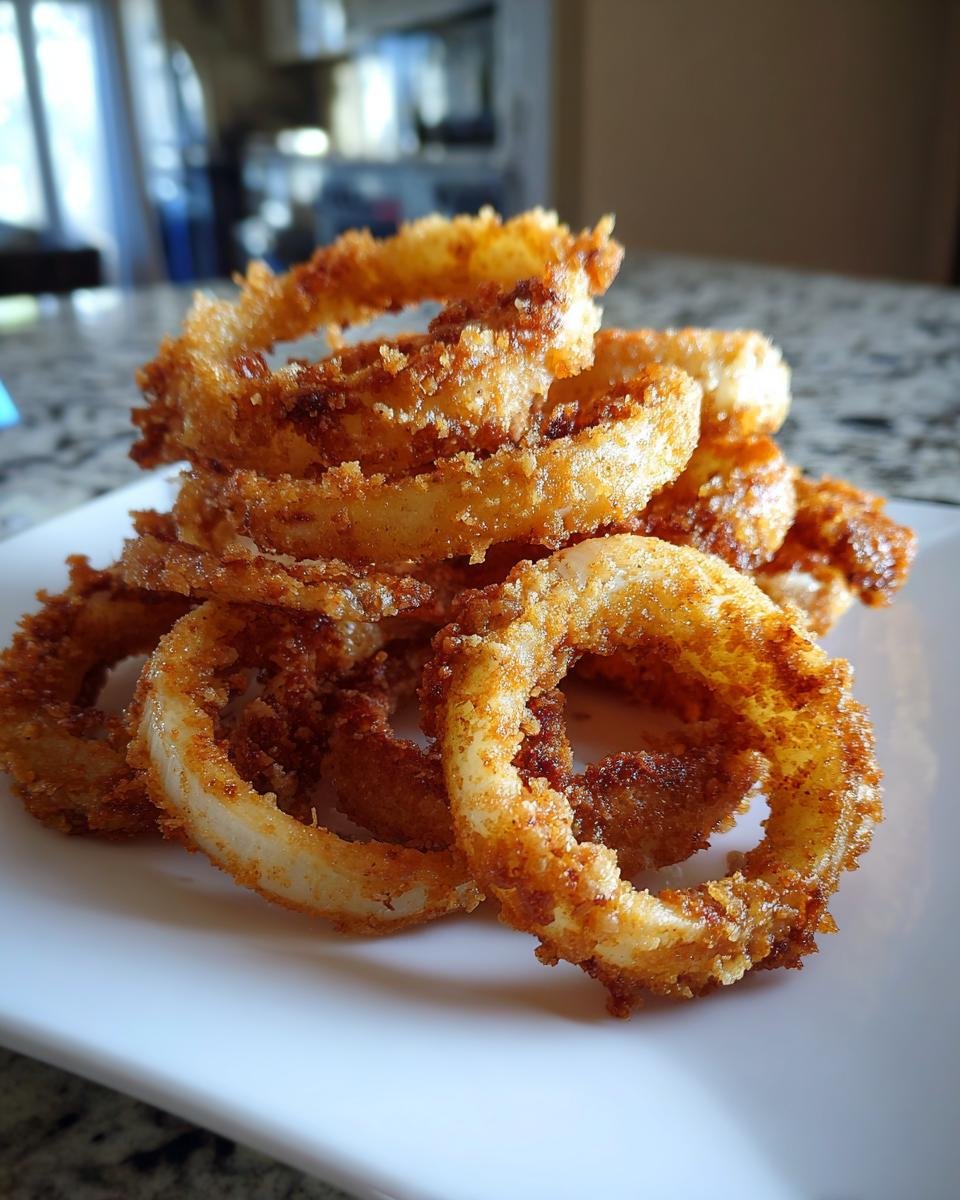
Forget those soggy, sad attempts at fried goodness you might have had elsewhere because I cracked the code! You won’t believe how easy it is to get that unbelievable, crunchy, restaurant-quality texture right in your own kitchen. Trust me, these homemade **Onion Rings** are the simplest, crispiest batch you’ll ever make, hands down. I used to struggle with runny batter, but once I figured out the dry-to-wet ratio—it was a game-changer! We’re talking about a three-step coating process that locks in the crunch perfectly. Get your oil ready; these go fast!
Why You Will Crave These Crispy Onion Rings
Honestly, the main reason I keep coming back to this recipe is pure texture. Who doesn’t want that satisfying sound when you bite into something golden? Here’s what makes these stand out:
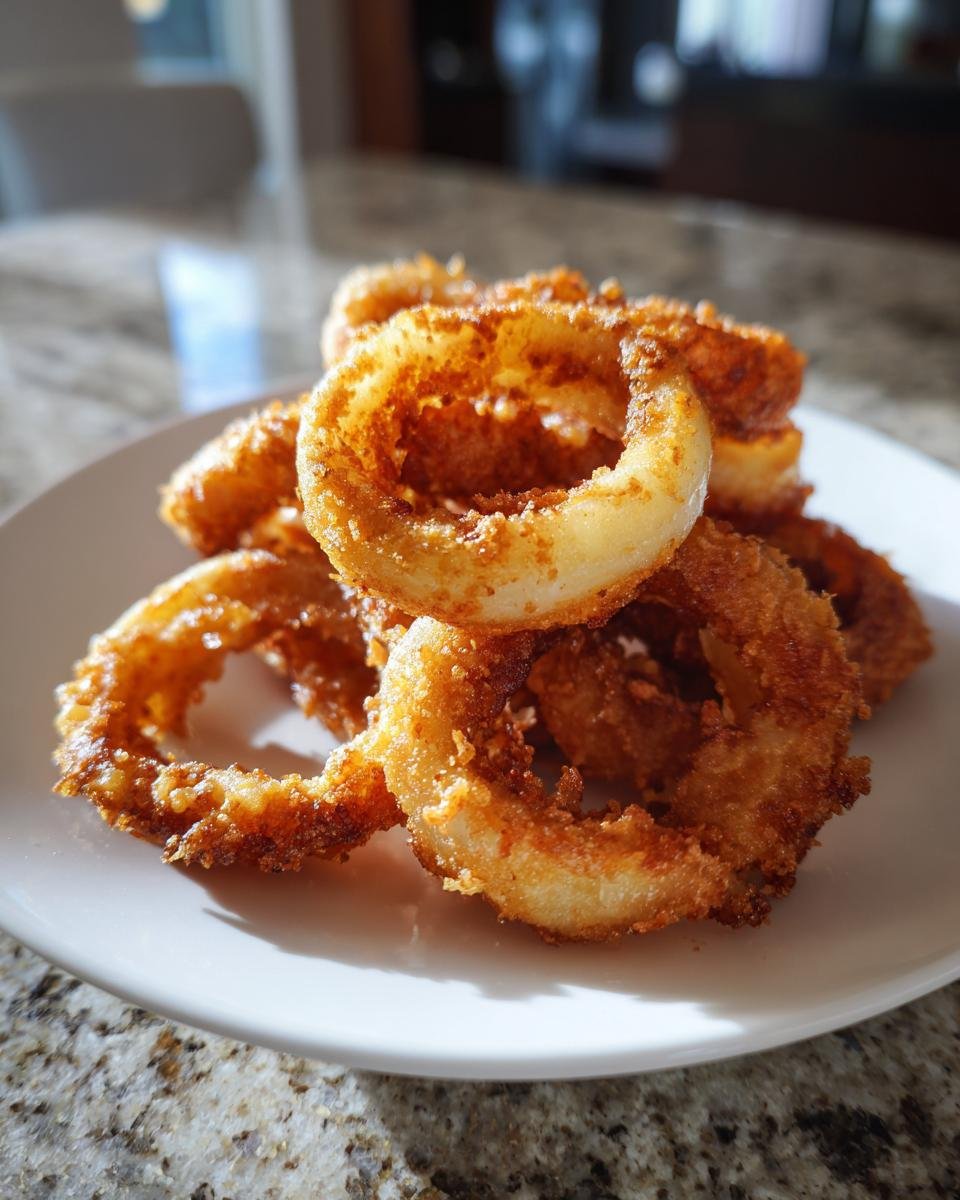
- Maximum Crunch: Thanks to the double dredge and a little chilling trick, these stay incredibly crispy right out of the oil.
- So Fast to Make: From slicing onions to serving them hot, we’re looking at under 40 minutes total time. Perfect for last-minute snacks!
- Simple Ingredients: Everything used here is probably already sitting in your pantry. No weird flours or expensive additives needed.
Essential Ingredients for Perfect Onion Rings
Okay, let’s talk about what you need! I laid out the full ingredient list for you because getting these basics right is honestly half the battle. Don’t try substituting the onions—yellow onions are the absolute sweet spot for flavor and structure here.
- Two big yellow onions, peeled and sliced right into 1/4-inch thick rings. Make sure you separate those rings gently!
- One cup of all-purpose flour for that first light dusting.
- One teaspoon of salt and half a teaspoon of pepper for seasoning the flour mix.
- Half a teaspoon of paprika—it just gives a lovely color, nothing too spicy.
- One cup of regular milk mixed with two large eggs for our wet bath.
- One full cup of simple breadcrumbs for that final crunchy layer.
- Plenty of vegetable oil, because we are deep frying, baby!
Equipment Needed for Making Onion Rings
Listen, frying food can feel a little intimidating if you don’t have the right tools. Don’t worry, you don’t need a giant industrial fryer, but we do need a few specific items to keep things safe and make sure those beautiful onion rings come out perfectly golden, not burned or greasy.
First up, you absolutely must have a heavy-bottomed pot or a deep fryer. I personally use a heavy Dutch oven because it holds heat so well, which is key. You need enough room for at least two inches of oil, remember that!
The most crucial thing that people skip? A candy or deep-fry thermometer. Seriously, eyeball-testing hot oil just isn’t safe, and your rings will suffer for it. You need to hold that temperature steady at 375°F (190°C). If it drops too low, the batter soaks up oil. Too high, and the crumb burns before the onion inside gets soft.
For dredging, you need three shallow dishes—cereal bowls work perfectly for setting up your flour, wet mix, and breadcrumbs stations. Finally, you’ll want a slotted spoon or spider strainer for easy removal, and a wire rack set over a paper towel-lined baking sheet. That draining step is essential for crunch!
Step-by-Step Instructions to Make the Best Onion Rings
Putting this all together is the fun part, but you have to follow the order of operations perfectly, especially when you are coating them. Get your stations ready before you even think about heating the oil. Once that oil is hot, it’s go time! Remember that if you are making a dipping sauce, you can check out my amazing copycat blooming onion sauce recipe while you wait for things to heat up.
Preparing the Onions and Dredging Stations
First things first, peel those onions and use a sharp knife to slice them into clean 1/4-inch rings. I can’t stress uniform thickness enough—if you have thick ones and thin ones, they won’t cook at the same speed! Once sliced, gently separate the individual rings; some will be little singles, others might be double hoops, and that’s fine. Then, set up your assembly line: one shallow dish with your seasoned flour mix (flour, salt, pepper, paprika), one dish with the whisked milk and eggs, and the third dish with plain breadcrumbs. Keep them organized!
Coating the Onion Rings for Maximum Crunch
This is where the magic happens for that satisfying crunch! Take one onion ring at a time and go through the three dips. First, dredge it well in the flour mix and shake off the dusty excess. Then, dunk it completely into the egg and milk mixture. Finally, roll it heavily in the breadcrumbs, pressing lightly so the breadcrumbs really adhere everywhere. Once done, lay those coated rings gently onto a clean plate. Now, here is my secret weapon for next-level crispiness: pop that whole plate into the fridge for about 30 minutes to chill. This lets the coating set, so it won’t fall off in the hot oil.

Deep Frying Your Golden Onion Rings
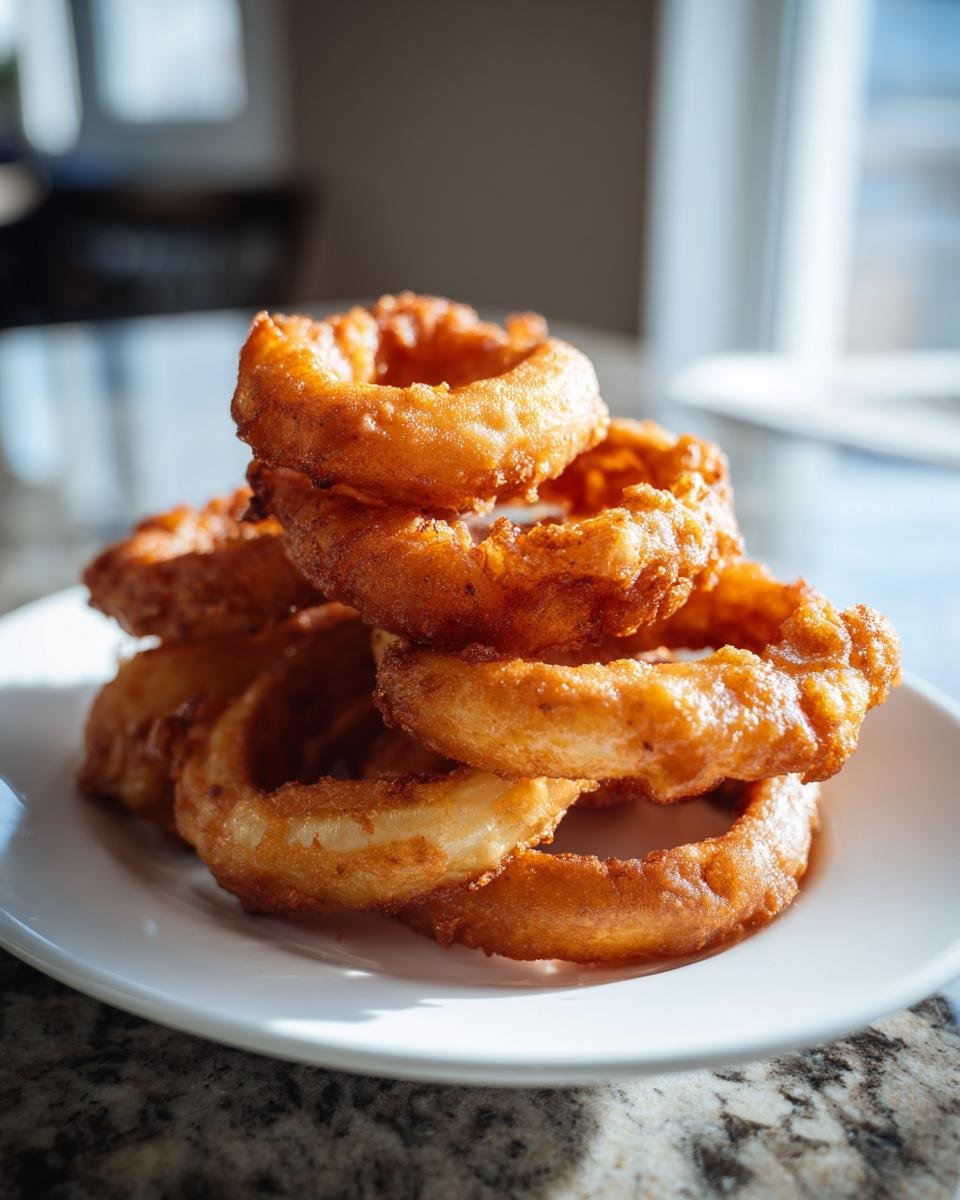
Heat about two inches of vegetable oil in your Dutch oven until that thermometer reads exactly 375°F (190°C). Once it’s steady, carefully lower a small batch of your chilled onion rings into the oil using tongs or a spider strainer. Please, never overcrowd the pot; that cools the oil down instantly and makes them greasy! Fry them for about 2 to 3 minutes per side, watching until they turn that perfect golden brown color. When they look ready, lift them out gently and place them straight onto your wire rack to drain. That rack lets the air circulate underneath, keeping the bottoms crisp too!
Tips for Achieving Ultra-Crispy Onion Rings
So you’ve coated them, you’ve chilled them—now let’s talk about the final frontier: making sure they stay shatteringly crisp! If you follow my steps for the batter, you’re already halfway there, but the frying environment is where you take these from good to absolutely legendary. It’s all about heat management and draining.
First, the oil quality really matters. Use fresh vegetable oil, or maybe canola oil, and change it out if it starts looking dark or smoky. Old, used oil transfers strange flavors and doesn’t heat as evenly. You want a clean slate for that golden fry. I feel like I’m constantly testing the temp, but seriously, keep that thermometer in the pot. If you find the temperature dipping below 360°F while you’re frying batches, pull the current batch out and give the oil a full minute or two to climb back up to 375°F before you drop the next set in. Soggy rings are almost always the result of oil that was too cool.
And please, please, don’t skip the draining step I mentioned earlier! Don’t dump them straight onto a stack of paper towels on a plate. That traps the steam underneath, and steam is the enemy of crispness. You need your onion rings resting on a wire rack set over towels. This allows the air to circulate underneath them, letting every single bit of excess oil drip away and allowing the crisp coating to fully set up and dry out. It makes such a difference!
If you want to explore other amazing fried sides, you have to check out how I get the perfect texture on my homemade french fries; the principles for crispiness are almost identical!
Variations for Your Homemade Onion Rings
I called this recipe ‘Simple Onion Rings’ for a reason—it uses basic stuff! But once you nail the technique and get that perfect, non-soggy shell, you can absolutely start playing around with the flavor profiles. It’s so easy to customize these without messing up the structure. Remember, the only places we are adding flavor are in the dry flour mix or the final breadcrumb coat. Keep whatever you add dry, and you’re golden.
Spice Variations for Onion Rings
If you like a little kick with your golden fried goodness, the flour mixture is your best friend. I usually keep the main batch super plain, but if I’m serving them straight up without a sauce, I’ll sneak a little heat into that initial flour dredge. Trust me, it hits perfectly.
You can easily get creative by adding things like:
- A quarter teaspoon of cayenne pepper to the flour mixture if you like a subtle warmth that blooms after you bite in.
- Dried herbs work wonders too. Try mixing in a teaspoon of dried oregano or even a tiny bit of dried thyme with your salt and pepper. That little bit of herbaceous flavor is so unexpected but totally delicious with sweet onions!
- For something tangier, you could stir in a half teaspoon of garlic powder right into the breadcrumbs. It coats nicely and gives a savory punch when you dip them in ketchup.
Just keep it dry, keep it mixed well into one of the coating layers, and you’ll have amazing, customized onion rings without turning this simple recipe into a complicated ordeal!
Serving Suggestions for Your Onion Rings
These crispy onion rings are fantastic flying solo, honestly. They barely make it to the table before they disappear! But they are even better when paired with the right dips and sides. Think about what you usually crave when you order them at a diner—that’s your starting point!
Of course, ketchup is the classic, and I’m not going to tell you not to use it! But if you’re kicking it up a notch, you need a creamy, tangy dip to cut through that savory fried batter. I love making a simple spicy aioli by mixing mayonnaise, a squeeze of lemon juice, and a dollop of sriracha. It’s honestly so much better than anything you buy in a plastic jar.
If you’re planning to make a whole spread, you know I always anchor my eating experience around a great salad. We are talking hearty onion rings served alongside something fresh and bright. When I make these, I often pair them with a big batch of Caesar salad. You should check out my recipe for the ultimate Caesar dressing; the salty Parmesan and crispy croutons are the perfect contrast to the sweet, hot onion rings.
They are also incredible alongside a juicy burger, obviously, or even crumbled up on top of a chili cheese dog if you’re feeling really decadent. Just make sure you have plenty of napkins ready!
Storage and Reheating Instructions for Leftover Onion Rings
Oh, leftovers! If you are lucky enough to have any of these beauties left over—which I highly doubt, because they are addictive—you need to treat them right. The number one sin you can commit here is letting them get sad and soft in the fridge, and definitely, absolutely, never—ever—try to reheat them in the microwave. That is what turns something crunchy into a rubbery nightmare. We want to bring those golden crumbs back to life!
For storage, scoop up any remaining onion rings and put them into a container that isn’t totally airtight. You can line the container with a paper towel first, but the key is making sure they aren’t packed tightly together. If they touch too much, they steam each other, and that steam ruins the crispness we worked so hard to achieve. An old Tupperware container with the lid slightly ajar, or just a Ziploc bag left partially open, works wonders overnight in the fridge.
The best way to reheat them, in my humble opinion, is the oven or, if you have one, the air fryer. If you use the oven, set it to about 400°F (200°C). Lay the rings out in a single layer on a baking sheet—and I prefer putting them on a wire rack inside the baking sheet if I can manage it, just like we did when draining them. Bake them for maybe 6 to 8 minutes. You’ll see the coating firm up again, and they’ll taste fresh-fried!
If you’re using an air fryer, that’s even faster! Set it around 375°F (190°C) and blast them for just 4 minutes, shaking the basket halfway through. They get super crisp, super fast. Seriously, a quick trip back to high heat is the only way to truly enjoy leftover crispy fried onions!
Frequently Asked Questions About Onion Rings
I know you have questions! Deep frying seems straightforward, but the science behind keeping those coatings attached and perfectly golden can be tricky. I’ve gathered the most common things people ask me when they try to recreate these simple onion rings at home. Don’t worry if you hit a snag the first time; we all have slightly burnt or soggy batches when we start out!
Can I make these Onion Rings ahead of time?
Yes, you absolutely can—and I actually recommend this for parties! You can’t make the batter ahead of time, though; it tends to thicken weirdly if it sits too long. What you *should* do is prep the onion rings completely. That means slicing, dipping in flour, dipping in the egg wash, and coating them thoroughly in the breadcrumbs. Once they are fully coated, lay them out on a parchment-lined tray and pop them in the freezer for about an hour until they are completely frozen solid. Then you can transfer them to a freezer bag! When you’re ready to cook, skip the chilling step and fry them straight from frozen—you’ll just need to add an extra minute or two per side to make sure the onion cooks through.
What is the best oil temperature for crispy Onion Rings?
If you take one thing away from this whole guide, please let it be the temperature reading! The magic number for getting those **crispy fried onions** you crave is exactly 375°F (190°C). If your oil is too cool—say, under 360°F—the coating is going to absorb oil like a sponge before it ever crisps up, resulting in soggy, greasy rings. That’s the worst! On the flip side, if the oil gets too hot, above 385°F, the breading will scorch and look beautiful brown on the outside, but the sweet onion inside will still be raw and hard. Keep that thermometer handy and adjust your burner setting constantly!
Why did my breading fall off my Onion Rings?
This is such a common frustration, and it almost always comes down to one of three things. First, did you shake off the excess flour after the first dip? If that first layer is too thick, the wet mixture won’t stick properly to the next layer. Second, you need to press firmly into the breadcrumbs—don’t just roll them; really make sure that last layer is adhering everywhere. The third, and probably most common reason, is temperature shock. If you drop cold, room-temperature rings into oil that is too cool, the batter separates immediately before it has a chance to set. That’s why I preach chilling those coated rings beforehand, even if it’s just for 20 minutes in the fridge. It just buys that coating a few seconds longer to seal itself up in the hot oil!
Nutritional Estimate for Simple Onion Rings
Now, I know when you’re making something this delicious and fried, you aren’t exactly sitting down trying to count every single calorie, but I know a lot of you are curious about what’s in your favorite snacks! So, I pulled the numbers from my standard batch size to give you a general idea of what you’re looking at if you split this recipe evenly into four servings.
Everything below is just an estimate, mind you. How much oil these glorious onion rings actually soak up can change the numbers wildly, so take this as a ballpark guide, not a strict dietary chart. You are really eating these for joy, right?
- Serving Size: About 4 golden rings
- Calories: Roughly 250
- Total Fat: Around 15 grams
- Saturated Fat: About 3 grams (that’s mostly from the frying oil, naturally)
- Carbohydrates: Roughly 25 grams
- Sugar: About 5 grams (mostly from the natural sweetness of the onion!)
- Protein: Around 5 grams
The main variable here is, like I said, the oil. If you drain them really well on that wire rack, you keep the fat content lower than if they sit steaming on a plate! Either way, they are worth every bite of that crispy, savory goodness!
Share Your Crispy Onion Rings Experience
Well, that’s it! You’ve got your onions sliced, your batter is coated, and those golden beauties are fried to perfection. Now, the best part: I absolutely love hearing about your kitchen victories! Did you nail the 375°F temperature on your first try? Were your kids fighting over the last crispy ring? Tell me everything!
I really want to see your results! Snap a picture of your perfectly golden onion rings—maybe sitting next to that amazing dipping sauce you made—and tag me on social media. Seriously, seeing your success makes my day, and it helps other cooks see that they can totally conquer deep frying at home too. If you’re looking for more appetizer ideas for your next party or game day snack session, be sure to browse through my full collection of appetizer recipes. There’s always something good cooking!
If this simple onion rings recipe worked like a charm for your family, please take just a quick minute to leave a star rating and drop a comment below. Your feedback is so helpful for me and for everyone else planning to make these crispy treats next. Happy cooking, and don’t forget to pass the dipping sauce!
Print
Simple Onion Rings
- Total Time: 35 min
- Yield: 4 servings 1x
- Diet: Vegetarian
Description
A recipe for making classic, crispy onion rings at home.
Ingredients
- 2 large yellow onions
- 1 cup all-purpose flour
- 1 teaspoon salt
- 1/2 teaspoon black pepper
- 1/2 teaspoon paprika
- 1 cup milk
- 2 large eggs
- 1 cup breadcrumbs
- Vegetable oil for frying
Instructions
- Peel and slice the onions into 1/4-inch thick rings. Separate the rings.
- In a shallow dish, whisk together the flour, salt, pepper, and paprika.
- In a second shallow dish, whisk the milk and eggs together.
- In a third shallow dish, place the breadcrumbs.
- Dip each onion ring first into the flour mixture, shaking off excess.
- Next, dip the floured ring into the milk and egg mixture.
- Finally, coat the ring thoroughly in the breadcrumbs. Place coated rings on a plate.
- Heat about 2 inches of vegetable oil in a deep pot or fryer to 375°F (190°C).
- Carefully place a few onion rings into the hot oil, avoiding overcrowding.
- Fry for 2 to 3 minutes per side, until golden brown and crisp.
- Remove the rings with a slotted spoon and place them on a wire rack lined with paper towels to drain excess oil.
- Serve immediately.
Notes
- For extra crispiness, chill the coated rings for 30 minutes before frying.
- Adjust the oil temperature as needed to maintain 375°F (190°C) during frying.
- Prep Time: 20 min
- Cook Time: 15 min
- Category: Appetizer
- Method: Deep Frying
- Cuisine: American
Nutrition
- Serving Size: 4 rings
- Calories: 250
- Sugar: 5
- Sodium: 300
- Fat: 15
- Saturated Fat: 3
- Unsaturated Fat: 12
- Trans Fat: 0
- Carbohydrates: 25
- Fiber: 2
- Protein: 5
- Cholesterol: 40
Keywords: onion rings, fried onions, appetizer, crispy, snack