
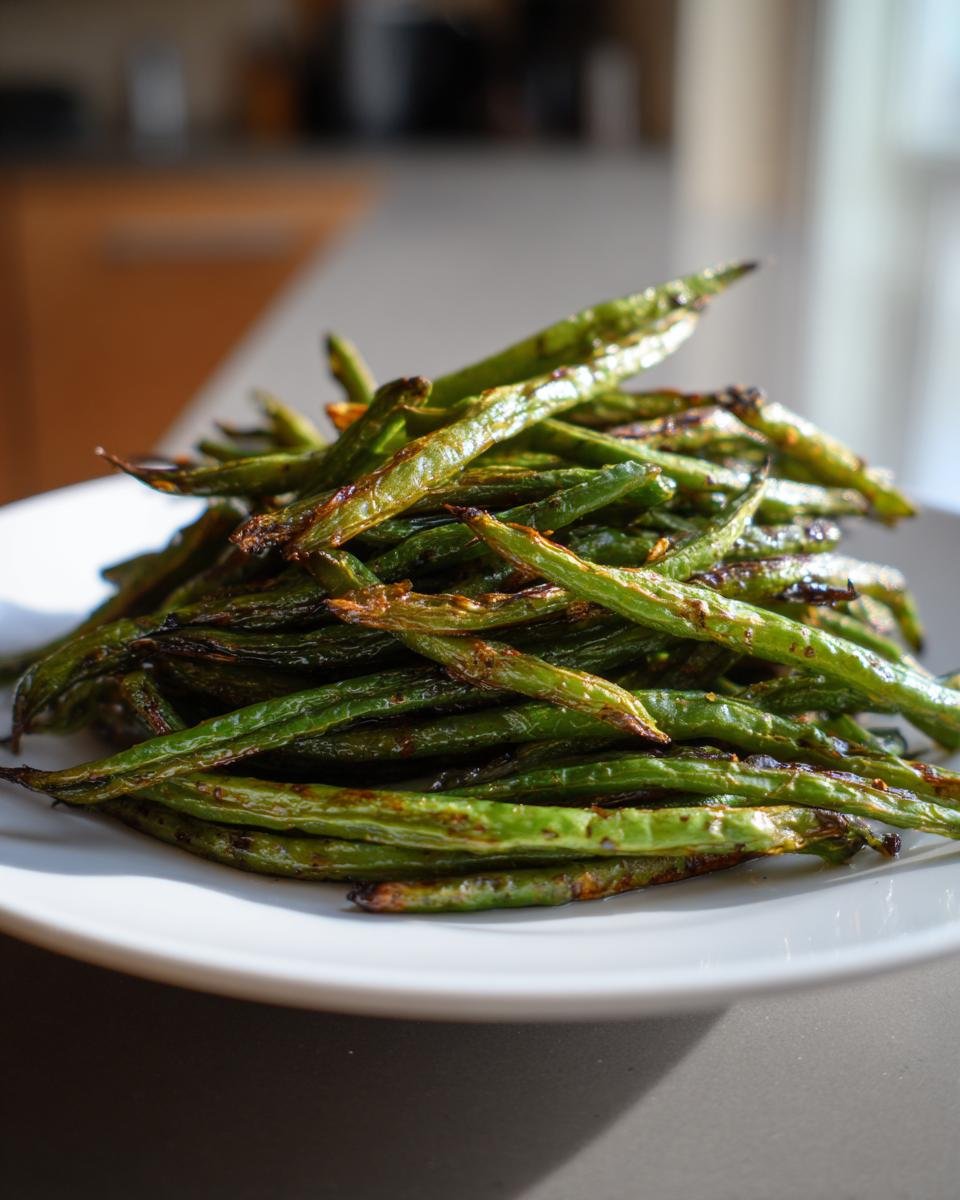
Okay, let’s be honest, who has time for fussy vegetables during the week? I used to dread the sight of sad, steamed green beans—you know the kind, floppy and flavorless. But I figured out the secret to transforming them into something truly addictive: high heat and zero fuss! Trust me when I say that once you try these roasted green beans, you’ll never go back to boiling them again. This recipe is my go-to side dish for everything, from quick Tuesday night dinners to big holiday spreads. It requires almost no attention after the initial prep, and the final result is exactly what you want: crispy edges, tender centers, and that incredible caramelized flavor. It’s seriously my favorite culinary trick for making vegetables exciting!
Why Our Simple Roasted Green Beans Recipe Works Best
The beauty of roasting is that it concentrates the flavor and gets rid of all that excess water that makes boiled vegetables soggy. This method guarantees you get that perfect balance every time. Seriously, cleanup is a breeze, too!
- It’s lightning fast—we’re talking 25 minutes total, including preheating.
- You just need one baking sheet, so dishes are practically non-existent!
- The texture is unmatched: crisp on the outside, perfectly tender inside, never mushy.
If you’re looking to pair these with something hearty, check out my Lemon Garlic Butter Chicken for a complete weeknight meal.
Gathering Ingredients for Perfect Roasted Green Beans
This recipe is so simple, which is why ingredient quality really sings through! You don’t need a million things, but what you do need must be fresh. I always lay everything out on the counter before I even think about turning on the oven. It keeps me organized and makes sure I don’t forget that crucial little clove of garlic!
Essential Components for Roasted Green Beans
You absolutely must use fresh green beans here, folks. Frozen just won’t give you that signature crispiness! You’ll need:
- 1 pound fresh green beans, trimmed (Don’t skip the trimming!)
- 2 tablespoons olive oil
- 1/2 teaspoon salt
- 1/4 teaspoon black pepper
- 1 clove garlic, minced (only if you love garlic as much as I do!)
Step-by-Step Instructions for Amazing Roasted Green Beans
This is where the magic happens! Honestly, if you can preheat an oven and toss something with oil, you’ve already mastered 90% of this recipe. The most important thing, and I mean the absolute most important thing, is making sure those beans get direct heat exposure. No piling them up like a little green mountain!
If you want more ideas for roasting veggies, definitely peek at my general guide for delicious roasted vegetables; it covers all the basics!
Preheating and Preparation
First thing, crank that oven up to 400 degrees Fahrenheit (or 200 Celsius if you’re being fancy). While it’s heating up, make sure every single one of your green beans is trimmed. Nobody wants those tough little ends! Once they are ready, spread them out onto your baking sheet. I mean it—a single, beautiful, airy layer. If they are overlapping, they steam, and we are aiming for roasted and crispy, not steamed and sad!

Coating and Roasting Technique for Roasted Green Beans
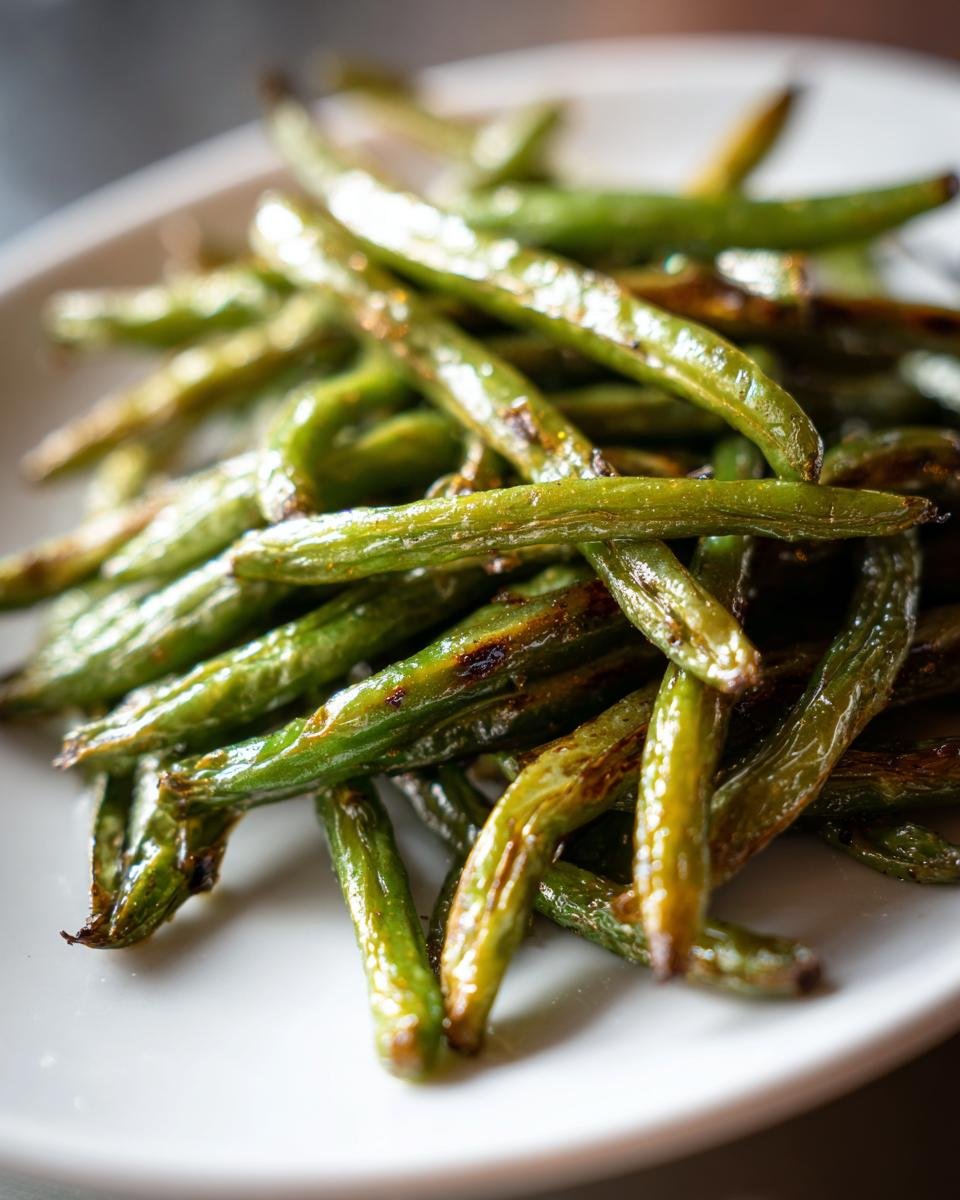
Now grab your olive oil and drizzle it everywhere. Then sprinkle on that salt, pepper, and minced garlic, if you’re using it—don’t be shy! Toss everything together right on the sheet pan until every bean is shiny. Pop that sheet into the hot oven for about 15 to 20 minutes total. You must remember to stir them halfway through, probably around the 10-minute mark. That stirring is what ensures all sides get that gorgeous browning. Pull them out when they look tender-crisp and just starting to get those little wrinkly, browned spots. Serve them immediately!
Expert Tips for Achieving the Best Roasted Green Beans Texture
Getting that perfect texture is what separates a casual side dish from one people actually talk about! If you follow the basic steps, they’ll be good. But if you follow *my* tips? They’ll be amazing. The biggest enemy here is moisture, so we fight it with heat and space.
I once forgot to stir them halfway through. Big mistake! They came out looking almost boiled on the bottom side, totally soft, and only crispy on top. Lesson learned: halfway stir is non-negotiable!
To guarantee maximum crispness, I always use the biggest baking sheet I own. You want every bean separated. If you’re struggling to get them evenly cooked, try using two sheets instead of cramming them onto one. I found this out the hard way when I tried to roast four pounds on a small sheet pan—it was just a steaming mass, honestly.
For an extra expert touch that really helps them crisp up without burning the oil, you can check out my little trick for getting veggies perfectly cooked using the oven; it’s just a quick read but makes all the difference when working with high heat, especially if you’re using my guide on how to roast veggies.
Also, don’t overcrowd them when you add your seasonings! If you pour the oil over a giant pile, the seasonings get trapped underneath and don’t adhere properly. You want that direct contact between the oil/salt combo and the hot metal of the baking sheet!
Ingredient Notes and Flavor Variations for Roasted Green Beans
The base recipe is spectacular because it’s so simple, but sometimes we need to jazz things up a bit, right? After all, a good cook knows how to build on a perfect foundation. I always jot down ideas for making these again later, just so I don’t forget the combinations that work!
Remember that little footnote about the lemon juice? That’s my top secret for making these taste bright and restaurant-quality. You have to squeeze it fresh right as they come out of the oven. The residual heat brightens up the earthiness of the green beans and the oil. Don’t skip it!
Simple Flavor Boosts
The lemon juice is mandatory, but if you’re feeling adventurous, try these subtle swaps. They don’t change the roasting time at all because they are added right at the end or mixed in with the initial oil toss.
- Smoked Paprika Power: Instead of just pepper in the initial toss, swap in about half a teaspoon of smoked paprika. It gives the beans this savory, almost bacon-like depth without adding any meat. It’s fantastic!
- Balsamic Drizzle: If you prefer tangy over bright citrus, drizzle a tiny bit of good quality balsamic vinegar over the hot beans right before serving. You only need a teaspoon or two because balsamic is strong.
- Nuts for Crunch: For texture lovers (like me!), toss in some slivered almonds or toasted pecans during the last five minutes of roasting. Just watch them closely so they don’t burn, since they cook way faster than the beans do.
Serving Suggestions for Your Roasted Green Beans Side Dish
Now that you have the most perfect, crispy side dish on hand, what are you going to pile them next to? That’s the fun part! Because these roasted green beans are so versatile—not too heavy, not too fancy—they basically go with everything on my dinner rotation. They add that necessary pop of green and some serious toothsome crunch that always makes a meal feel more complete.
They are especially great when you need something quick on a busy night. Forget about complicated sides! They roast right alongside your main protein, making dinner assembly a dream. If you need main course inspiration, I have a whole list of easy weeknight meals that would pair beautifully with these beans. You can check out my 10 Irresistible Ground Beef Recipes if you’re looking for something satisfying but simple!
Here are my top three ways to serve these:
- Grilled or Seared Steak: Nothing beats a juicy, charred steak with a pile of salty, crispy green beans on the side. The texture contrast is brilliant.
- Lemon Herb Chicken Breast: If you finish the beans with that fresh lemon zest I mentioned, they pair magically with simple roasted or grilled chicken seasoned with rosemary and thyme. It just tastes like summer.
- Creamy Pasta Dishes: This might sound weird, but trust me! If you make something like a creamy salmon pasta or even a simple mac and cheese, tossing in a handful of these roasted beans right before serving adds a much-needed savory snap that cuts through the richness. It stops the whole plate from feeling too heavy, which I love.
Storage and Reheating Instructions
Oh, leftovers! Sometimes I make a double batch of these roasted green beans just so I can have them for lunch the next day. The tricky part is making sure they don’t turn soggy overnight in the fridge. If you just toss them into a regular container, they steam themselves silly and lose all that beautiful crispness we worked so hard to achieve!
Store any extras in a standard airtight container, but here’s the key: don’t pack them too tightly. They can hang out in the fridge for about three to four days. If you see obvious condensation building up around the sides, just open the lid for a little while before sealing it shut again. That seems to help manage things.
Now, when it comes to reheating? Forget the microwave unless you absolutely have no other choice. The microwave is the enemy of crispness; it just turns everything soft and damp. If you want to bring back a little bit of that glorious roasted texture, you have two fantastic options.
First, the oven works beautifully. Spread the beans back out on a clean baking sheet—again, single layer, this is important!—and pop them back into a 350-degree oven for maybe five to seven minutes. You just want them warmed through and slightly crisped up on the edges again. They’ll taste almost freshly made!
My new favorite way, though, is using the air fryer if you have one. It’s even faster than the oven! I toss them in the air fryer basket and run it on medium heat—say, 350 degrees—for just three minutes. They come out snappy again. It’s a total game-changer for saving any remaining crispy veggies!
Frequently Asked Questions About Roasted Green Beans
I get so many questions about this super easy side dish, and honestly, it’s because everyone struggles with green beans until they realize roasting is the answer! I wanted to tackle the most common hurdles I hear about, especially when folks are new to roasting vegetables. It generally comes down to moisture control, so listen up—I’ve got the answers that’ll make you a roasting expert!
Can I use frozen green beans for this recipe?
Oh, this is the big one! You *can*, but I really don’t recommend it if you are aiming for crispy, restaurant-quality roasted green beans. Frozen vegetables come packed with extra water to prevent freezer burn, and when you heat them up, that water has to go somewhere. If you use them, they tend to steam instead of roast properly, especially if you follow the 400-degree rule. If you absolutely must use frozen beans, you need to thaw them completely first, pat them bone-dry with paper towels, and then maybe add an extra five minutes to the roasting time just to ensure that surface moisture cooks off. But honestly, fresh beans are worth the two extra minutes of trimming!
What temperature is best for roasting green beans?
For the perfect texture—that tender-crisp bite with lots of nice browned spots—you need high heat, period. I swear by 400 degrees Fahrenheit (or 200 Celsius). Anything lower, and you risk them just kind of softening up without developing that essential outer char. If your oven runs hot, you can nudge it down to 375, but 400 degrees blasts away the moisture fast enough to guarantee crispness. Make sure your oven is fully preheated before those beans even think about hitting the pan!
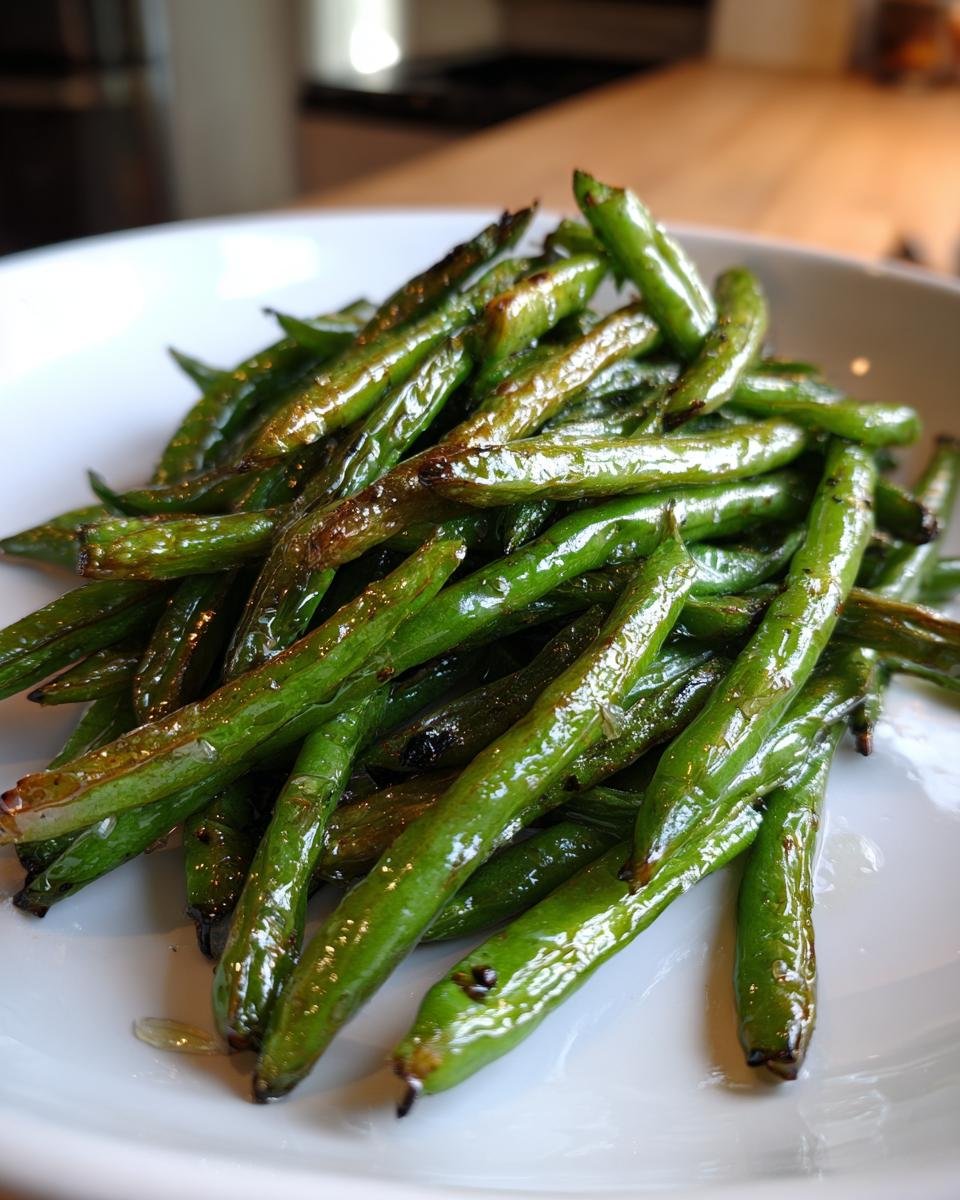
Here’s another small question I always get: How do I know when they are done? You’re looking for that slight wrinkling on the skin and maybe a little bit of browning around the tips. If you see significant blackening, pull them out fast! It’s better to pull them out a minute early than burn them, especially if you’re making a big batch.
Understanding the Nutritional Profile
Listen, while these roasted green beans taste like a treat, they are genuinely good for you, which makes me even happier to pile them high on my plate! Because we are using just a little olive oil and sticking to fresh vegetables, the numbers stay delightfully low. You get a great boost of fiber and protein too, which is always a win for feeling satisfied.
Just remember, these numbers are my best guess based on standard measurements and the ingredients listed in the recipe. When I calculate things like this, I always expect a little bit of variation depending on the exact size of my olive oil pour or how much salt I sprinkled on—you know how it is!
- Serving Size: 1/4 of recipe
- Calories: 70
- Fat: 4g
- Carbohydrates: 7g
- Protein: 2g
See? Super light! They are a fantastic way to bulk up a meal without adding unnecessary calories or sugars. Pair these with something rich, and you’ve got a perfectly balanced plate!
Share Your Perfect Roasted Green Beans Experience
I just love knowing that you’re out there making these simple, perfect roasted green beans! They are the bedrock of a good weeknight meal in my house, and I hope they become that for you too.
Whenever you make them, please come back and tell me how you liked them! Drop a rating below—did you go for the full lemon zing or try adding paprika? Your feedback helps me tweak things! And if you’re looking for another easy side to master, I just posted my guide for making Traeger Pizza Meatloaf, which pairs surprisingly well with crisp veggies!
Print
Simple Roasted Green Beans
- Total Time: 25 min
- Yield: 4 servings 1x
- Diet: Vegan
Description
A straightforward recipe for preparing crispy, flavorful roasted green beans.
Ingredients
- 1 pound fresh green beans, trimmed
- 2 tablespoons olive oil
- 1/2 teaspoon salt
- 1/4 teaspoon black pepper
- 1 clove garlic, minced (optional)
Instructions
- Preheat your oven to 400 degrees Fahrenheit (200 degrees Celsius).
- Place the trimmed green beans on a baking sheet.
- Drizzle the green beans with olive oil.
- Sprinkle with salt, pepper, and minced garlic, if using.
- Toss the beans until they are evenly coated.
- Spread the green beans in a single layer on the baking sheet.
- Roast for 15 to 20 minutes, stirring halfway through, until the beans are tender-crisp and slightly browned.
- Remove from the oven and serve immediately.
Notes
- For extra flavor, squeeze fresh lemon juice over the beans after roasting.
- If you prefer softer beans, increase the roasting time by 5 minutes.
- Prep Time: 5 min
- Cook Time: 20 min
- Category: Side Dish
- Method: Roasting
- Cuisine: American
Nutrition
- Serving Size: 1/4 of recipe
- Calories: 70
- Sugar: 2
- Sodium: 290
- Fat: 4
- Saturated Fat: 0.5
- Unsaturated Fat: 3.5
- Trans Fat: 0
- Carbohydrates: 7
- Fiber: 3
- Protein: 2
- Cholesterol: 0
Keywords: roasted green beans, green beans, side dish, easy vegetable, roasted vegetables