
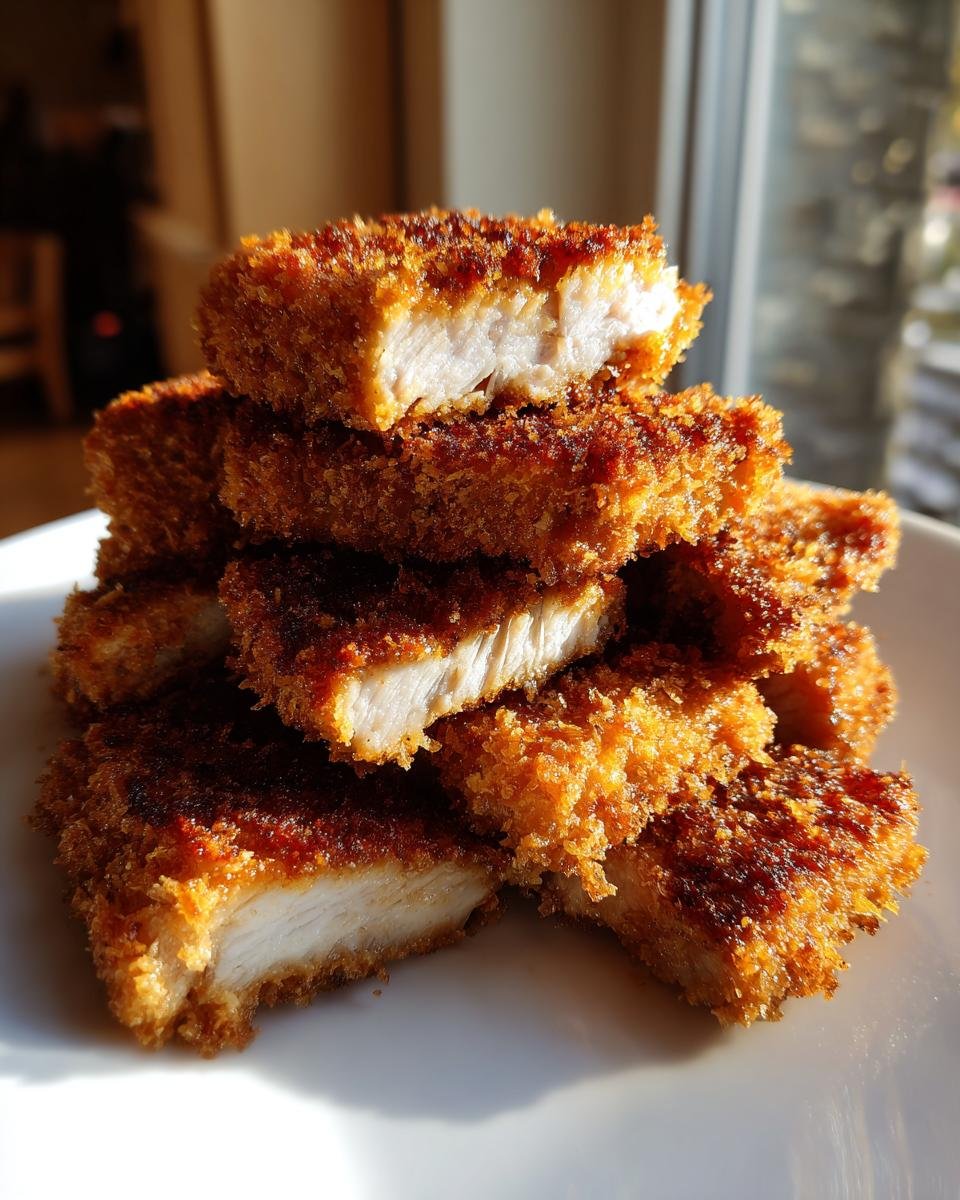
Oh, Japanese comfort food just hits different, doesn’t it? When I want that perfect crunch that sings when you bite into it, I’m making Pork Katsu. Forget complicated marinades or tricky double-frying methods you see online; this is my fail-safe recipe that gets you truly authentic Japanese fried pork cutlet perfection right on your home stovetop. I spent ages trying to replicate the Katsu I ate near Kyoto once—the secret wasn’t fancy ingredients, but getting the basics ridiculously right, and fast! This method is simple enough for a weeknight but delivers that unbelievable texture every single time. You’re going to love how quickly we get this golden beauty on the table.
Why This Simple Pork Katsu Recipe Works (Expert Tips)
Honestly, with deep-fried food, the success is all about preparation, not complicated sauces. I see so many people skip the prep steps for their Pork Katsu, and then they wonder why their cutlets turn out chewy or unevenly cooked. We are focusing on two things here: making sure the meat cooks quickly and evenly, and guaranteeing that crust stays impossibly crunchy.
These couple of quick actions are what elevate this from just a breaded piece of pork to real Tonkatsu. If you’re looking for other ways to tenderize pork without the frying fuss, check out my tips for simple fried pork chops, because the science of tenderizing meat is always fascinating!
Achieving the Perfect Thickness for Your Pork Katsu
Don’t skip the pounding—it’s non-negotiable! You want these chops to go from half an inch down to a uniform quarter-inch thickness. Why? Because thin pork cooks fast and stays incredibly tender inside. If they are thick on one end and thin on the other, you end up with dry edges and a raw center. Oof! I always lay the chop between two sheets of plastic wrap before I start hitting it with my meat mallet. This stops the meat from tearing and keeps the juices right where they belong. Just gentle, firm taps all over until it’s even.
The Secret to Ultra-Crispy Pork Katsu Coating
Here is where you absolutely cannot cheat: you must use Panko breadcrumbs. Regular breadcrumbs absorb too much oil and get soggy really fast. Panko, those lovely airy Japanese flakes, absorbs just a little oil and puffs up, creating a crisp, light shell that stays crunchy forever—or at least until you finish eating it! The flour dredge is just there to give the egg something to stick to, and then the egg is the glue for the Panko. It’s a simple three-step dance that locks in the flavor.
Essential Ingredients for Authentic Pork Katsu
Okay, let’s talk groceries! Since this recipe is so straightforward—it’s barely five major steps—the quality of your ingredients really shines through. You can’t hide shaky ingredients when you keep the coating this simple. You need two chops, that flour, two eggs, and of course, the glorious Panko. Don’t skimp on the oil, either; we need enough to get a nice deep fry going for that signature crunch.
Ingredient Notes and Substitutions for Pork Katsu
For the pork, go for boneless loin chops, nice and lean, about half an inch thick before you start pounding them down. Make sure you’re using a neutral oil with a high smoke point, like canola or vegetable oil—we need that heat to be reliable! Now, about substitutions: you could try regular breadcrumbs, but honestly, it won’t be real Pork Katsu. Panko is the game-changer here; it’s what makes the crust light and airy instead of heavy and greasy. Trust me on the Panko!
Step-by-Step Instructions to Make Perfect Pork Katsu
Now that we’ve got our ingredients prepped and the meat pounded thin, it’s time for the assembly line—the breading station! This is where you either win or lose the crunch battle, so pay attention. Since we’re dealing with raw pork and wet batter, hygiene and technique matter here. We want zero cross-contamination and maximum Panko adhesion. If you want to check out how I get my crispy fries perfect, the technique is actually very similar!
Setting Up Your Breading Station for Pork Katsu
Get three shallow dishes ready in a row, just like a production line. Dish one is your flour, seasoned generously with salt and pepper. Dish two holds your beaten eggs, and dish three is piled high with those amazing Panko breadcrumbs. The trick to keeping things neat? Designate one hand for dry duties and the other for wet duties. You’ll want to dredge your pounded pork first in the flour—shake off the extra excess! Then, dip it completely into the egg bath, letting the extra drip back in. Finally, press it firmly into the Panko until every inch is coated. Rotate your hands so your dry hand never touches the egg, and your wet hand never touches the flour!
Frying Techniques for Golden Brown Pork Katsu
Heat up about an inch of oil in a heavy skillet to exactly 340°F (170°C). This temperature is crucial; too cool, and the **Pork Katsu** gets greasy; too hot, and the outside burns before the pork is cooked through. You’ll know the oil is ready if you drop one stray breadcrumb in and it sizzles immediately but doesn’t burn up instantly. Carefully place your breaded cutlets in—don’t drop them if you can help it, or you’ll get oil splatter! Cook them for a solid 3 to 4 minutes on each side until they are this gorgeous deep golden brown color and hit an internal temp of 145°F (63°C). As soon as they come out, move them straight onto a wire rack to drain. That rack lets air circulate so the bottom doesn’t steam and get soggy. Perfection!

Serving Suggestions for Your Homemade Pork Katsu
You finally have that perfect, sizzling brown Pork Katsu in front of you. Congratulations! But now, what do you serve it with? A great Katsu experience isn’t just about the meat; it’s the whole presentation. The absolute classic way to eat Tonkatsu is piled high alongside a massive mound of super-thinly shredded raw cabbage. I know, I know, just cabbage, but it’s the clean, cool crunch that balances the rich fried pork so perfectly. It’s almost like an edible palate cleanser with every bite!
For something creamy alongside, maybe try a sharp dressing for that cabbage? It brightens up a heavy dish beautifully. I sometimes serve mine with a light Caesar drizzle—totally non-traditional, but so delicious! Check out my go-to recipe for ultimate Caesar dressing if you want to mix things up!
The Essential Tonkatsu Sauce Pairing for Pork Katsu
You just can’t eat this without a proper sauce! The required dipping companion is Tonkatsu sauce. It’s complex—kind of sweet, a little tangy, and savory all at once. You can certainly buy lovely bottled versions, and I recommend that if you’re in a hurry. But if you want the real magic, making a quick homemade version is surprisingly easy with ketchup, Worcestershire sauce, soy sauce, and a touch of sugar. That sauce cuts through the richness of the fried cutlet like nothing else. Make sure you slice the Katsu into strips right before serving so the crust stays pristine when it hits that sauce!
Storage and Reheating Pork Katsu Leftovers
So, you managed to have leftovers? That’s rare in my house, but I have figured out the best way to handle them! The enemy here is steam, which instantly kills that beautiful Panko crispness. You absolutely must let any leftover Pork Katsu cool completely on the counter first. Then, you store it in a container lined completely with paper towels in the fridge. Don’t seal it airtight immediately!
When it comes time to reheat, please, I beg you, skip the microwave unless you enjoy soggy meat—it traps the moisture. Your best bet is either a toaster oven or an air fryer set to about 375°F. It only takes about 6 to 8 minutes, and that Panko shell gets surprisingly close to its original glory. It’s worth the couple of extra minutes for the crunch factor, trust me!
Frequently Asked Questions About Making Pork Katsu
I know when I first started messing around with these kinds of breaded recipes, I had about a million questions churning in my head. It’s not always obvious what works and what just ends up being a greasy mess! That’s why I pulled together the ones I hear most often about getting that perfect Pork Katsu. If you’re looking for other fascinating Japanese recipes to master, you should totally check out my guide on Japanese Clear Soup—it’s pure soul food!
Can I make Pork Katsu in an air fryer instead of deep frying?
Yes, you absolutely can, especially if you’re reheating leftovers, but for the initial cook, deep frying gives you that unmistakable, all-the-way-around crunch. If you must air fry raw cutlets, you need to give them a light spritz—a good, generous spray—with oil before they go in. Air fry at about 380°F (195°C) for 10 to 12 minutes total, flipping halfway. It won’t be 100% identical to deep-fried Tonkatsu, but it’s a fantastic, lighter option!
What is the best cut of meat for Pork Katsu?
We rely on boneless pork chops or pork loin for this recipe. The key isn’t just the cut, but the thickness we achieve! Remember, you need to pound that meat down to about a quarter-inch uniform size. This ensures that the quick, high heat of the oil cooks the meat through to a safe temperature—145°F—without burning that gorgeous, crispy Panko shell to charcoal. Thin and even is the mantra for perfect Japanese fried pork!
Estimated Nutritional Snapshot for Pork Katsu
I always feel a little guilty looking at the numbers after frying up something this delicious, but this is the data we’re working with for two servings. This estimate suggests that one cutlet clocks in around 450 calories, which isn’t bad for a breaded and fried treat! It’s got a nice punch of protein at about 32 grams, but watch out for the fat, which is naturally higher because of the deep-frying process.
Please remember, these values are just estimates based on my ingredient measurements in the recipe above, and yours might shift slightly depending on how much oil your Panko soaks up! It’s always best to treat this as a guideline rather than an exact science for your daily tracking.
Print
Simple Pork Katsu
- Total Time: 25 min
- Yield: 2 servings 1x
- Diet: Low Calorie
Description
A recipe for making classic Japanese breaded and deep-fried pork cutlets.
Ingredients
- 2 boneless pork chops (about 1/2 inch thick)
- 1/2 cup all-purpose flour
- 2 large eggs, beaten
- 1 1/2 cups Panko breadcrumbs
- Salt and black pepper to taste
- Vegetable oil for frying
Instructions
- Pound the pork chops lightly to an even thickness, about 1/4 inch. Season both sides with salt and pepper.
- Set up a standard breading station: one shallow dish with flour, one with beaten eggs, and one with Panko breadcrumbs.
- Dredge each pork cutlet first in the flour, shaking off excess.
- Dip the floured cutlet into the egg mixture, letting excess drip off.
- Coat the cutlet thoroughly in the Panko breadcrumbs, pressing gently so the crumbs adhere well.
- Heat about 1 inch of vegetable oil in a deep skillet to 340°F (170°C).
- Carefully place the breaded cutlets into the hot oil, ensuring not to overcrowd the pan.
- Fry for 3 to 4 minutes per side, until golden brown and cooked through (internal temperature reaches 145°F or 63°C).
- Remove the katsu from the oil and place it on a wire rack or paper towel-lined plate to drain excess oil.
- Slice the katsu into strips before serving.
Notes
- Serve immediately with Tonkatsu sauce and shredded cabbage for the best texture.
- You can adjust the oil temperature slightly to control the browning speed.
- If you do not have a thermometer, the oil is ready when a dropped breadcrumb sizzles immediately.
- Prep Time: 15 min
- Cook Time: 10 min
- Category: Main Course
- Method: Frying
- Cuisine: Japanese
Nutrition
- Serving Size: 1 cutlet
- Calories: 450
- Sugar: 2
- Sodium: 350
- Fat: 25
- Saturated Fat: 6
- Unsaturated Fat: 19
- Trans Fat: 0
- Carbohydrates: 25
- Fiber: 1
- Protein: 32
- Cholesterol: 100
Keywords: Pork Katsu, Tonkatsu, Japanese fried pork, breaded pork cutlet, deep fry