
Is there anything better than the simple sunshine and the crunch of grass under your blanket when you’re finally outside? I live for picnic season! I remember one time, years ago, my friend Sarah and I almost ruined a perfect afternoon because our sandwiches dissolved into soggy messes halfway through the hike. Never again! That’s why I make these classic ham and cheese Picnic Sandwiches now. Seriously, these are the easiest, no-fuss sandwiches you will ever assemble. Ten minutes, zero cooking, and they travel like a dream. Trust me, these are your new go-to for any outdoor adventure!

Why These Picnic Sandwiches Are Perfect for Your Next Outing
When you’re spreading out that blanket, the last thing you want is a complicated cleanup or a lunch that falls apart before you take the first bite. I’ve taken these classic ham and cheese babies on car trips and long hikes, and they hold up beautifully. They are the definition of reliable outdoor food.
- They assemble in under 10 minutes. Who has time for fuss when the sun is shining?
- The Dijon-mayo spread acts like a little moisture shield, keeping the bread from getting instantly soggy.
- They pack down flat and tight, taking up hardly any room in the basket.
- Zero chance of messy sauces dripping everywhere—I promise! These are tested and true for travel. If you need another speedy option for your basket, check out my recipe for amazing cucumber tea sandwiches, too!
Essential Ingredients for Classic Picnic Sandwiches
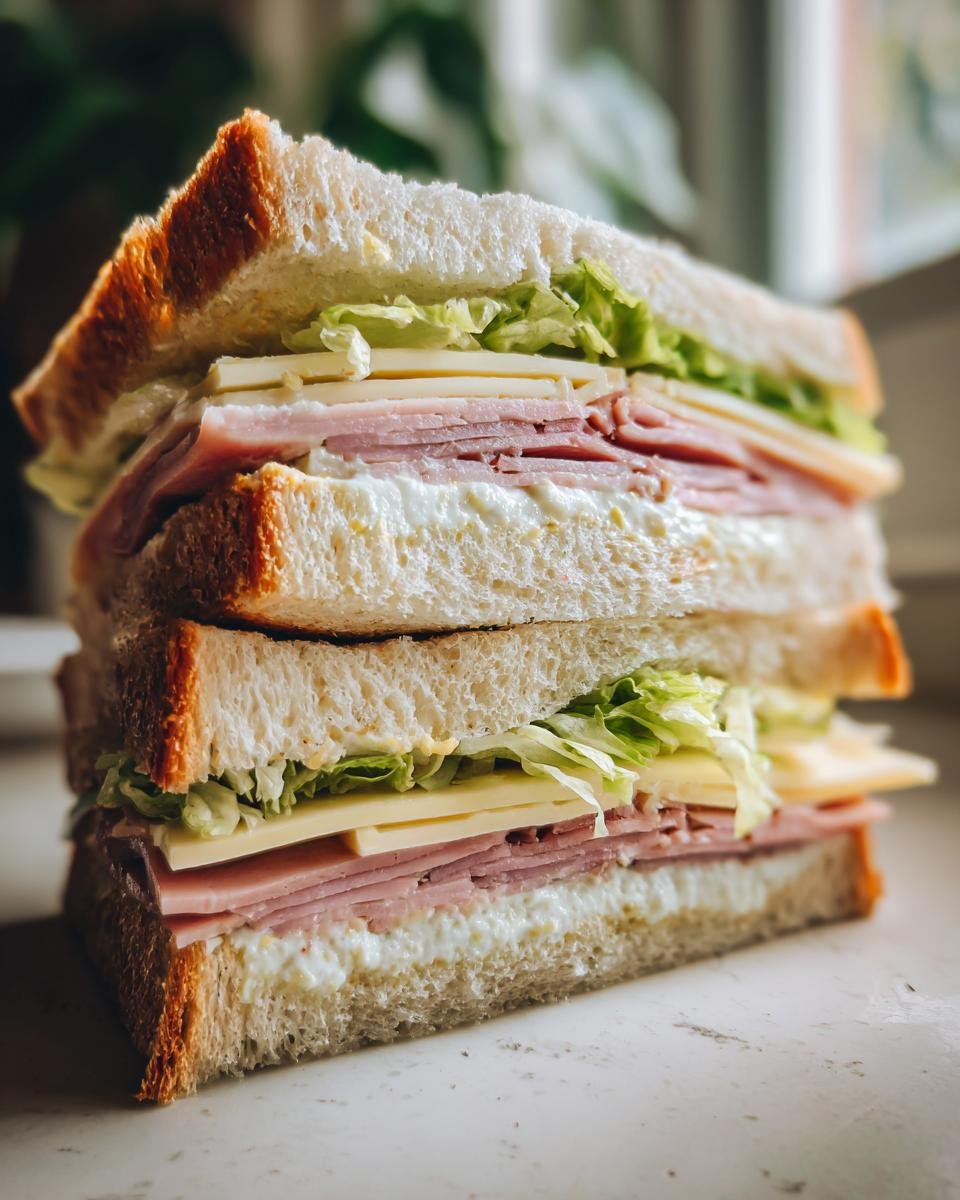
Okay, so these sandwiches are simple, but that means we really have to pay attention to the quality—and the preparation—of what goes into them. We are using eight slices of your favorite bread; I usually grab a nice, slightly heartier white or sourdough because it holds up best. You need eight delicate slices of good cooked ham and just as many slices of that nutty Swiss cheese. Don’t forget those four crisp, large lettuce leaves to keep things fresh!
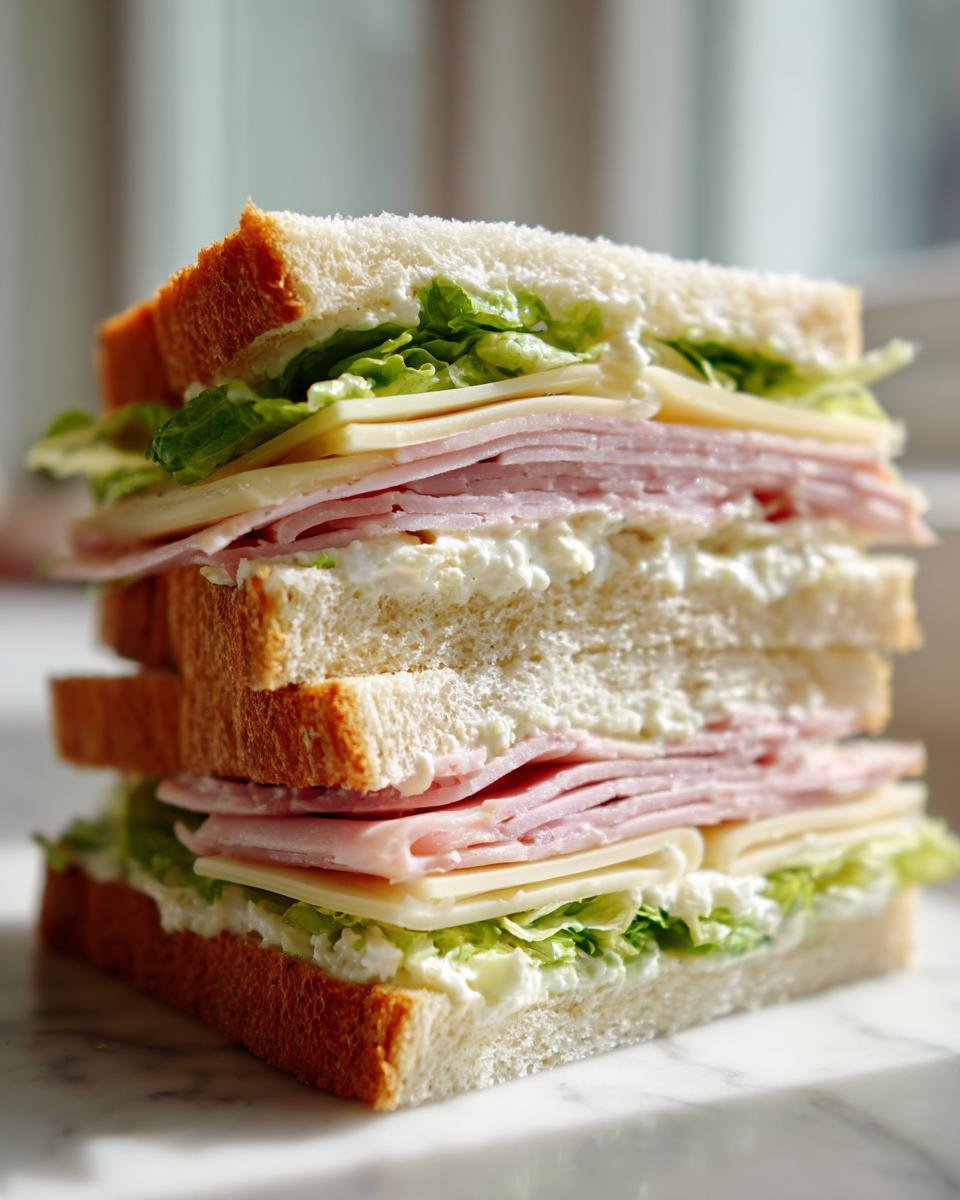
The real magic here comes from what you smear on the bread first. We aren’t just throwing plain mayo on there, oh no. That spread is crucial for keeping the bread happy during its journey in the cooler.
The Spread: Flavor Base for Your Picnic Sandwiches
This is my little secret weapon against sandwich sadness! You’re going to take four tablespoons of mayonnaise, which is nice and rich, and mix in just one tiny teaspoon of Dijon mustard. The Dijon adds a beautiful little tang that cuts through the ham and cheese. More importantly, because the mustard emulsifies with the mayo, it creates a slightly thicker, more effective barrier against any moisture trying to make your bread soggy. Trust me, you want that protective layer!
Step-by-Step Assembly of Perfect Picnic Sandwiches
Now that you’ve got your beautiful mustard-mayo spread ready, putting these together is faster than finding a good parking spot at the beach! Lay out all eight slices of bread. Take that spread we just made and be generous—you need to coat one side of every single slice evenly. Don’t skimp here; this is the glue and the shield, remember? Make sure you get the corners, too. This initial spreading job is what keeps everything looking neat.
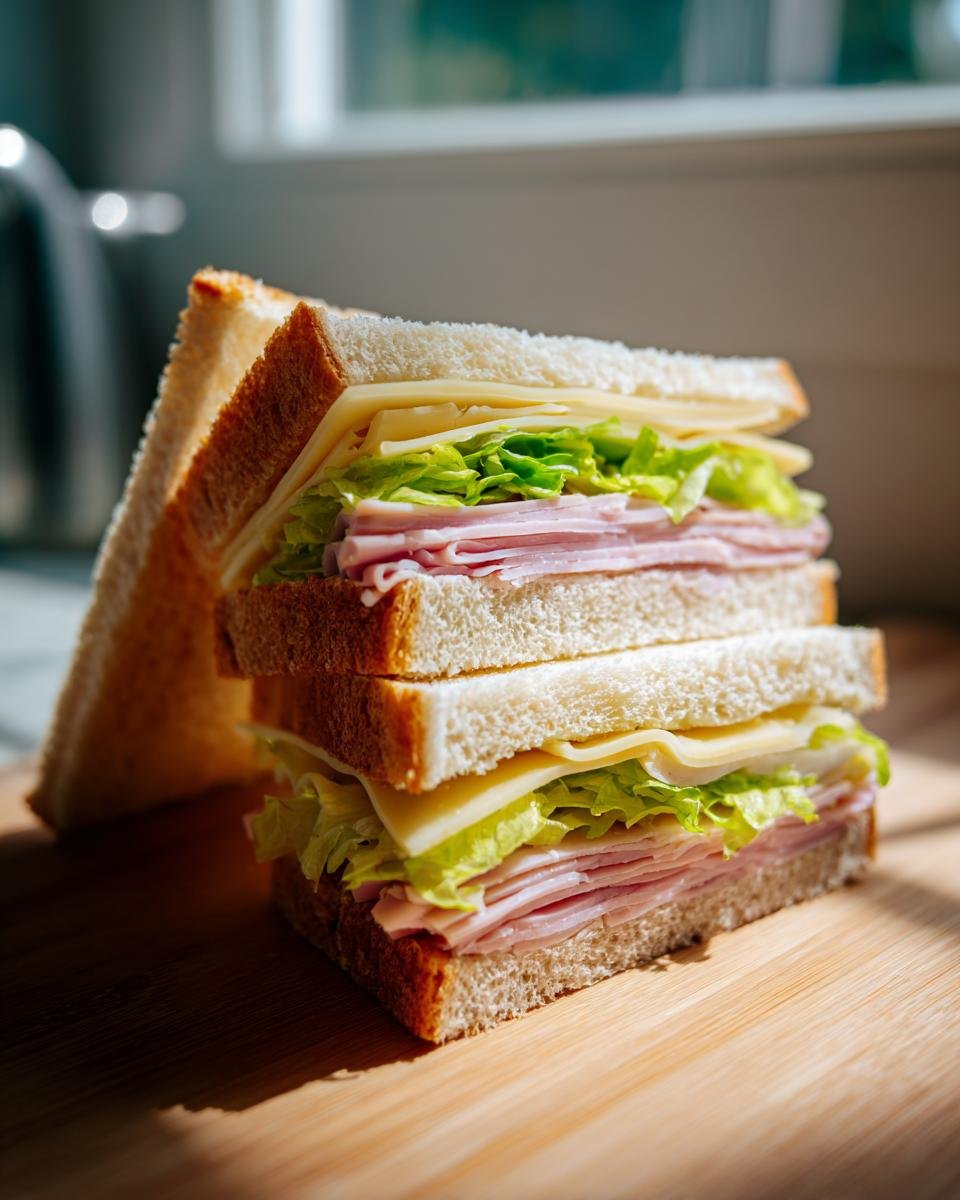
Next, we move to construction. You’ll use four of those bread slices as the bases. On each one, pile on two thin slices of ham. Then, top that ham with two slices of Swiss cheese. This simple three-part stack is the foundation for happy eating later. If you want to see another fast, travel-friendly recipe, take a peek at my instructions for fatal ham turkey pinwheels; it uses a similar philosophy!
Once the meat and cheese are nestled, it’s time for the greens. Place one big, crisp lettuce leaf right on top of the cheese on each sandwich half. This is a crucial step for keeping that structure solid. After that, it’s just topping them off with the remaining bread slices, making sure the spread-side faces down against the lettuce. Give the tops a gentle, loving press all over, and then slice them diagonally. That diagonal cut just makes everything taste better, doesn’t it?
Layering Technique for Stable Picnic Sandwiches
When building these Picnic Sandwiches, the order really matters for transportation. By putting the denser ham down first, followed by the cheese, you create a stable, cohesive middle layer that won’t slide around. The lettuce acts as a slight cushion between the melting cheese and the top piece of bread. This layering structure ensures that when you pull them out of the basket, they are still perfectly stacked and ready to eat, not looking like a jumbled mess!
Expert Tips for Making Your Picnic Sandwiches Last
The assembly is done, but the battle against the dreaded picnic sog hasn’t been fully won yet! If you’re planning on being out enjoying nature for a few hours, you have to wrap these babies like they are priceless jewels. The most important thing I do is wrap them up tight, tight, tight. You need to use plastic wrap or parchment paper for this step, and I mean *tightly* wrap each individual sandwich to minimize air exposure.
I learned the hard way that leaving them loose just invites disaster! Also, if your bread is super soft, try lightly toasting it first—just until it’s pale gold. That extra layer of dryness helps immensely against the wet ingredients. The absolute key, though, is keeping them chilled until you are ready to eat. Pack them in a cooler with an ice pack right up until serving time. This keeps the cheese firm and the lettuce snappy. If you love these kinds of effortless recipes, you might also enjoy my tips on amazing cucumber tea sandwiches for an even lighter bite!
Variations to Customize Your Picnic Sandwiches
While the classic ham and Swiss is my ultimate favorite because it never lets me down, I totally understand wanting to switch things up depending on what you have in the fridge! The beauty of this simple assembly method is that it welcomes swaps so easily. Think about what travels well and doesn’t get slimy when it’s cool.
If you’re tired of ham, swap it out for thinly sliced roast turkey and use provolone instead of Swiss—that combination is just so satisfyingly savory. Or go for roast beef and sharp cheddar. Those firmer cheeses handle the road trip like champs! I tried making irresistible Italian sandwiches once, but they got a bit heavy for a light park lunch.
For a vegetarian option that’s still super sturdy, ditch the meat entirely! I love using a good layer of creamy hummus and stacking on some crisp cucumber slices instead of the ham. That’s refreshing and filling! Another great plant-based swap, especially if you’re feeling fancy or making something like an irresistible chicken pesto sandwich (minus the chicken, of course!), is using sliced Havarti and thinly sliced bell peppers. Just remember the spread goes on every slice to protect the bread, no matter what fillings you choose!
Serving Suggestions for Your Picnic Sandwiches Spread
A great picnic isn’t just about the main event; it’s about the whole spread! These ham and cheese sandwiches are pretty filling on their own, but you always need a few little extras to make the meal feel complete. Since we are packing everything up and heading out, we need sides that can handle a little time outside without going sad on us.
First up, you absolutely need something sweet and refreshing. My go-to is always a big bowl of vibrant fresh fruit salad—melon, grapes, and berries are my favorites because they stay crisp. For something salty and crunchy, you can never argue with a big bag of plain, ridged potato chips. They offer the perfect textural contrast to the soft bread.
If you want one more substantial side, a small container of creamy potato salad with egg is fantastic, PROVIDED you keep it packed tightly on ice in the cooler right up till serving time. That way, your whole picnic lunch is balanced and delicious!
Storing Leftover Picnic Sandwiches
If, by some small miracle, you have any of these amazing Picnic Sandwiches left over after your adventure, the key is separating them from any components that might go soggy.
If the sandwiches were tightly wrapped immediately after assembly, they should last fine wrapped in the fridge for about a day. But honestly, they are best the day you make them! If you have extra bread, ham, or cheese, just wrap them separately in foil or plastic wrap. Keep any leftover mustard spread in an airtight container in the fridge—it should be good for about a week!
Frequently Asked Questions About Picnic Sandwiches
I know you might have a few last-minute questions before you load up that basket. Packing food for a road trip or park day always requires a little extra thought, right? I’ve gathered the ones folks ask me most often about making and traveling with these easy lunch heroes.
Can I make these picnic sandwiches the night before?
Here’s the honest truth: for the best crunch and texture, you should assemble these no more than four hours before you plan to eat them. That mustard-mayo spread buys you time, but if you make them the night before, the bread can start to compress and get a bit dense overnight. If you MUST make them ahead, wrap them *individually and tightly* and keep them in the coldest part of your fridge, but try to assemble them the morning of your outing!
What if I really don’t have Swiss cheese?
Don’t sweat that! Swiss cheese is great because it’s flavorful but fairly mild, and it holds its shape. If you’re out, Provolone is an excellent substitute; it melts slightly better, which is nice when your sandwich warms up a bit. You could also use mild Cheddar or Monterey Jack. We are keeping this simple, so whatever firm cheese you have on hand will work just fine for these cold sandwich staples!
What’s the absolute best way to stop them from getting soggy?
It’s a multi-step defense, honestly! First, use sturdy bread, even if you lightly toast it for 30 seconds. Second, use that Dijon spread edge-to-edge to create a barrier. Third, keep that crisp lettuce leaf right between the cheese and the top slice of bread. The lettuce absorbs any slight condensation from the cheese before it hits the bread. Finally, keep them cool in an insulated bag!
Are these ham and cheese picnic sandwiches safe to leave out for a few hours?
Safety first, always! Because we have dairy (cheese) and cured meat (ham), you really shouldn’t leave them unrefrigerated for more than two hours total, or just one hour if it’s super hot outside (over 90°F). Always pack them with an ice pack in a good cooler until you are ready to sit down and enjoy your easy lunch!
Nutritional Snapshot for These Picnic Sandwiches
For those of you who like knowing what you’re fueling up with before you hit the trail—here’s a quick look! Based on my recipe measurements, each sandwich half comes in around 320 calories, which is a fantastic, balanced count for a full meal. We’ve got about 18 grams of protein to keep you energized, which is great for an active afternoon.
Just remember, these numbers are estimates based on standard slices of ham and Swiss, of course. If you load up on extra cheese or switch to a thicker bread, those numbers will shift a little! But for a simple, classic ham and cheese, this is a wonderfully reliable and tasty option.
Print
Classic Ham and Cheese Picnic Sandwiches
- Total Time: 10 min
- Yield: 4 servings 1x
- Diet: Low Calorie
Description
Simple ham and cheese sandwiches suitable for packing for a picnic.
Ingredients
- 8 slices bread
- 4 tablespoons mayonnaise
- 1 teaspoon Dijon mustard
- 8 thin slices cooked ham
- 8 slices Swiss cheese
- 4 large lettuce leaves
Instructions
- Mix mayonnaise and Dijon mustard in a small bowl.
- Spread the mustard-mayonnaise mixture evenly on one side of each slice of bread.
- On four slices of bread, layer two slices of ham and two slices of Swiss cheese.
- Place one lettuce leaf on top of the cheese on each sandwich half.
- Top with the remaining four slices of bread, spread-side down.
- Cut each sandwich in half diagonally.
Notes
- Wrap sandwiches tightly in plastic wrap or parchment paper before packing.
- Keep sandwiches cool until serving time.
- Prep Time: 10 min
- Cook Time: 0 min
- Category: Lunch
- Method: Assembly
- Cuisine: American
Nutrition
- Serving Size: 1 sandwich half
- Calories: 320
- Sugar: 3
- Sodium: 750
- Fat: 16
- Saturated Fat: 7
- Unsaturated Fat: 9
- Trans Fat: 0
- Carbohydrates: 28
- Fiber: 1
- Protein: 18
- Cholesterol: 45
Keywords: picnic sandwiches, ham and cheese, easy lunch, cold sandwich