
Oh, that craving for a certain chocolate-covered peanut butter cookie hits hard, right? Store-bought versions are fine, but they never quite capture the magic of that thick, soft peanut butter center, do they? Well, stop worrying because I have cracked the code! We are making the absolute best Homemade Tagalong Cookies you’ll ever taste. Seriously, these are the ultimate copycat recipe. My whole focus when developing this was nailing that perfect ratio—that sweet, salty peanut butter cookie base just begging to be dipped into a rich, shiny bath of chocolate. Trust me, once you try this batch, you won’t look back!

Why You Will Love These Homemade Tagalong Cookies
Look, I’m not going to lie to you—I’ve tested at least ten versions of this recipe to get it perfect. But these right here? These are winners. They’re everything you want in a perfect peanut butter cookie, only better because you made them yourself! You’ll want to keep these on hand all year, not just when the Girl Scouts are selling.
- The cookie base bakes up beautifully thick and soft. They never spread out into those sad, thin wafers!
- That amazing peanut butter flavor really shines through the vanilla and brown sugar.
- The chocolate coating sets up perfectly smooth—no weird streaks or dull color.
- You can whip up the dough in under 30 minutes, which is wild for something this delicious.
- They hold up wonderfully, making them perfect for freezing or packing in lunch boxes.
- Best of all, you get to control the chocolate-to-cookie ratio. Dip them shyly, or go all in!
If you love a good sweet and salty combo, you absolutely have to try these. They are so satisfying you might end up grabbing a fresh batch of chocolate chip cookies right after you finish dipping these, just to compare! But honestly, you won’t need to compare for long.
Essential Ingredients for Perfect Homemade Tagalong Cookies
You know I always preach that the best baking starts with great ingredients, and this is doubly true for our Homemade Tagalong Cookies. If you use the right stuff, you barely have to think about the process. We’re making about three dozen of these beauties, and it breezes along! You’ll spend about 25 minutes prepping, 11 minutes actually baking them, which puts our total time at just over half an hour. Now that’s efficiency!
If you’ve got these items on hand, you’re basically ready to bake. If you’re trying to be extra quick or want to fuel up before moving onto the rest of the recipe, maybe whip up one of my five-minute mug cakes while the oven heats up!
For the Peanut Butter Cookie Base
This is where the magic starts! Don’t even think about trying to substitute! The texture of the cookie base depends entirely on these specific items.
- 1 cup (2 sticks) unsalted butter, make sure it’s softened!
- 1 cup granulated sugar
- 1 cup packed light brown sugar (packed firmly, that’s important!)
- 2 large eggs
- 1 teaspoon vanilla extract
- 2 1/2 cups all-purpose flour
- 1 teaspoon baking soda
- 1/2 teaspoon salt
- 1 1/2 cups creamy peanut butter. I used creamy because crunchy throws off the dough structure, remember, we want that smooth center!
For the Chocolate Coating
This is the coating that makes them legendary. The secret here isn’t just the chocolate itself—it’s that little bit of shortening we add, which keeps the chocolate glossy and soft enough to bite into without snapping off in chunks.
- 12 ounces semi-sweet chocolate chips (I use chips because they melt predictably)
- 2 tablespoons vegetable shortening (This is non-negotiable if you want a dip that sets right!)
Step-by-Step Instructions for Homemade Tagalong Cookies
Okay, buckle up! Now that we have all those gorgeous ingredients ready, it’s time to put them to work. I promise this process is easier than you think, especially since we aren’t messing around with complicated chilling times. We are going straight from mixing to baking, which is how I like to win the dessert game! If you’re looking for something savory after this sugar rush, you can check out my recipe for amazing one-pan Texas chicken later.
Preparing and Baking the Homemade Tagalong Cookies Dough
First things first: get that oven humming at 350 degrees F (175 degrees C) and grab your parchment paper to line those baking sheets. Now, in your big bowl, we start with the creaming. Beat that softened butter, granulated sugar, and brown sugar together until it gets light and fluffy—it should look noticeably paler than when you started. Beat in your eggs one by one, making sure each is mixed in before adding the next, followed by the vanilla. In another bowl, whisk your dry stuff: flour, baking soda, and salt. Slowly add the dry mixture into the wet, mixing until it’s *just* combined. Seriously, stop mixing when you still see a tiny hint of flour! Then, stir in all that peanut butter until it disappears into a beautiful, thick dough.
Scoop your dough into rounded tablespoons and set them about two inches apart on the sheet. Gently flatten them a bit with the bottom of a glass—don’t press too hard! Bake these beauties for just 9 to 11 minutes, or until you see those edges just start to turn golden brown. Crucially, let them sit on that hot pan for a full 5 minutes before you even *think* about touching them. If you move them too soon, they’ll crumble, and nobody wants that! Then, transfer them to a wire rack to cool completely.
Melting the Chocolate Coating for Homemade Tagalong Cookies
While those cookies are chilling out on the rack, we get our chocolate bath ready. Take your semi-sweet chips and the vegetable shortening and put them in a microwave-safe bowl. This shortening is the key to a smooth dip, so don’t skip it! Microwave on high for 30 seconds. Pull it out, stir vigorously—even if it doesn’t look melted yet! Repeat this 30-second warming process, stirring well every time, until it’s totally smooth and glossy. You want zero lumps when you dip, so be patient here!
Dipping and Setting Your Homemade Tagalong Cookies
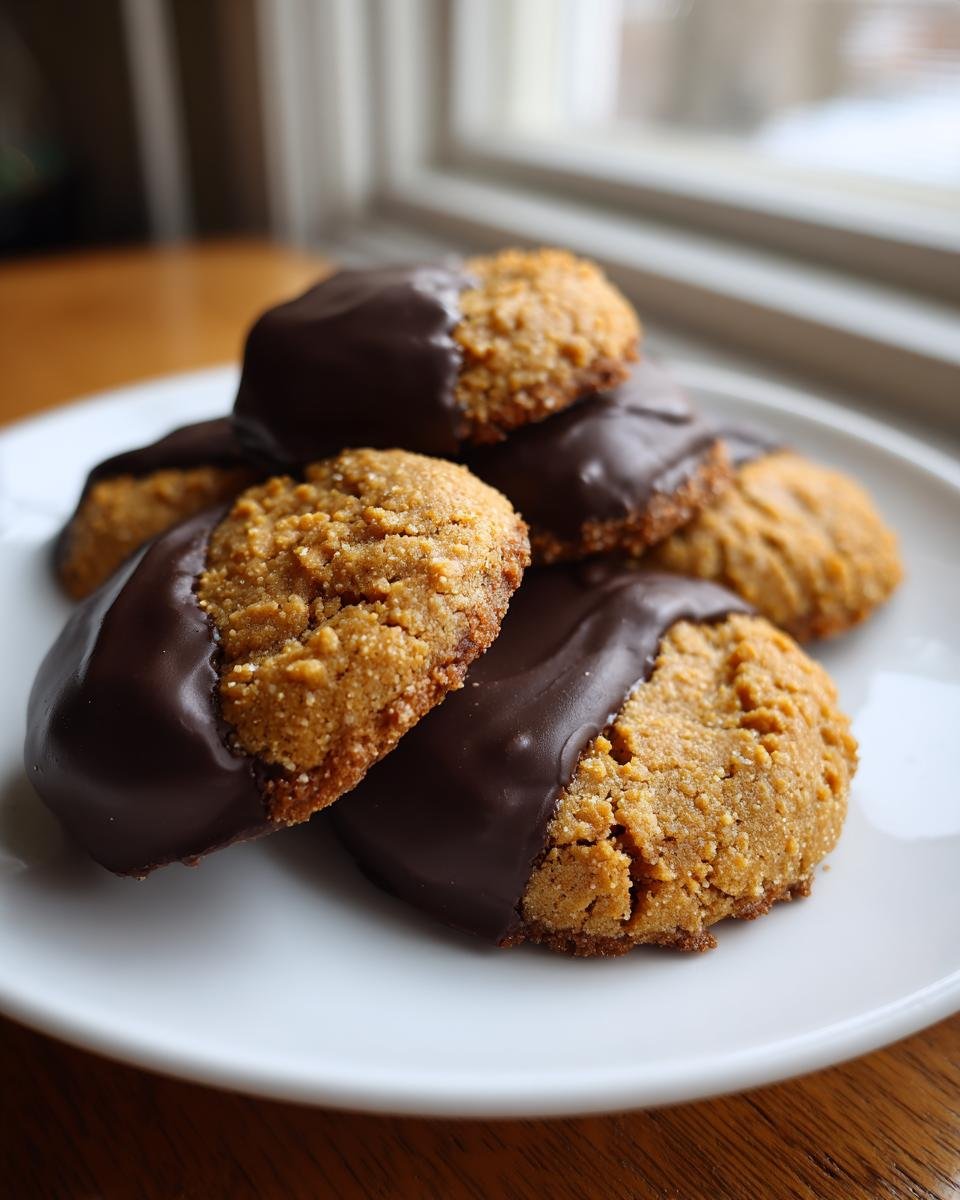
Once the cookies are completely, totally cool (warm cookies = soup chocolate, and we hate soup chocolate!), it’s dipping time! Hold the cookie upright and dip it about halfway into your smooth chocolate mixture. I like to tilt the bowl slightly to get a nice clean line. Carefully lift it out, letting any excess drip back into the bowl. Then, place it back on that wire rack, making sure the rack is sitting over parchment paper. This catches the drips perfectly and makes cleanup a breeze when the chocolate hardens up!
Expert Tips for Making the Best Homemade Tagalong Cookies
Honestly, once you follow the basic recipe, these Homemade Tagalong Cookies are sturdy little things, but I have a few tricks up my sleeve that take them from really good to ‘Wait, are these from that famous cookie place?’ These tips saved me a lot of heartache early on!
My biggest rookie mistake when I first tried this recipe? I got impatient with the dough mixing. I thought, “It’s just peanut butter cookies, how delicate can it be?” Wrong! I mixed the flour in too long, and when they came out of the oven, they tasted fine, but they were tough! They had no real give when you bit into them. They cracked when I dipped them in the chocolate because they were too rigid.
So, here is my golden rule for perfect texture:
- Stop Mixing Early (Seriously!): When you add the flour, mix only until the streaks disappear. That dough should still look a little shaggy. The cookies will firm up during baking, and this little under-mix ensures you get that signature soft, melt-in-your-mouth texture.
- Chilling the Bottom: Before dipping, if your cookies feel warm at all, pop the tray they are cooling on into the fridge for ten minutes. If the cookie is warm when it hits the warm melted chocolate, the chocolate melts too quickly and you end up with a messy bottom edge or the cookie breaking apart as you lift it. Cold cookies mean clean dips every single time!
- The Wax Trick for Shine: If you ever worry about your chocolate coating looking dull or cracking as it dries, try adding a half teaspoon of pure beeswax or an extra half tablespoon of shortening to your mixture. That extra fat helps stabilize the chocolate, giving you that beautiful, high-gloss finish that just screams professional bakery quality.
Once you stop overmixing the dough, you’ll find these cookies are almost foolproof. Try setting some aside to dip later after they’ve completely cooled overnight—the texture of the peanut butter center gets even more defined! If you end up with extra chocolate, you can always drizzle it over a slice of that amazing one-bowl peanut butter cream pie I posted last month!
Ingredient Notes and Substitutions for Homemade Tagalong Cookies
So, you’re halfway through prepping for these amazing Homemade Tagalong Cookies and realize you’re missing one tiny thing? Don’t sweat it! Baking is usually about following directions exactly, especially when you’re trying to copy a classic, but sometimes life happens. I’ve played around with substitutions over the years, sometimes out of necessity, sometimes just because I was curious. This whole process is about learning to trust your intuition after you master the basics, like how to mix up those wonderful powerful homemade cleaning sprays!
Here are the few swaps I’ve tested when going for the best peanut butter cookies:
Can I use crunchy peanut butter instead of creamy?
You *can*, but I’m going to tell you right now, the texture isn’t going to be the same as the classic. Creamy peanut butter blends seamlessly into the dough, giving you that uniformly soft, dense cookie that melts on your tongue. If you use crunchy, you’ll end up with little islands of nut bits throughout the cookie. It’s not bad—it’s just different! If you want to try it, go for it, but be prepared for a slightly less smooth final product in your Homemade Tagalong Cookies.
What about swapping the vegetable shortening in the chocolate dip?
This is the ingredient I get asked about the most! The shortening does two things: it helps the chocolate melt smoothly without seizing up, and it keeps the finished coating softer so it doesn’t crack when you bite into it. If you are completely out of vegetable shortening, you can try using coconut oil instead. Coconut oil melts beautifully, but a heads-up—it tends to make the chocolate coating set up a little harder and possibly even bloom (get that slightly greyish haze) faster.
If you’re planning to eat these cookies the same day, coconut oil is fine. If you want them to stay perfect on the counter for a week, stick to the shortening! I tried using butter once, and honestly, the texture was just too greasy once it cooled down.
Can I use different kinds of chocolate chips?
Absolutely! Semi-sweet is my go-to because it balances the sweetness of the peanut butter perfectly. If you like things richer and less sweet, you can definitely substitute the semi-sweet chips with dark chocolate chips. Keep in mind that dark chocolate is already a bit harder when it sets, so you might need an extra touch more shortening (maybe a teaspoon extra) if you notice the dip seems too thick when you start coating the cookies.
The main thing to remember with these substitutions is temperature! If you swap out fat sources—like using coconut oil for shortening—the melting temperature changes slightly, so always test that dip consistency gently before committing to dipping the entire batch!
Storage and Make-Ahead Tips for Homemade Tagalong Cookies
I always bake too many of these Homemade Tagalong Cookies because they are just too good to stop at one batch! That’s why I’ve gotten really good at keeping them fresh, even though they usually disappear within two days. The hardest part is resisting eating them all right away, but trust me, they’re even better the next day once the chocolate has fully set and everything has settled.
The key to longevity here is keeping the air out. You want to store your finished cookies in a sturdy, airtight container. I just use my big Tupperware bins, but any good container works! Keep them at room temperature, not in the fridge. Putting them in the cold actually messes with the chocolate coating texture and can make the peanut butter cookie part a bit too hard for my taste.
If you store them right, they stay perfectly soft and delicious for at least a week. We often have a nearly full container sitting on the counter until the weekend is over, and they are always fantastic!
Freezing Dough for Future Cookie Cravings
This is my favorite trick for when I want fresh cookies but don’t want to commit to a full afternoon of baking. You can totally freeze the dough balls! Once you’ve scooped your dough (remember, rounded tablespoons!) and flattened them slightly with the glass, just place the whole tray of dough balls into the freezer. Let them freeze solid—this usually takes about an hour or two.
Once they are rock solid, you can pop them off the tray and toss them into a freezer-safe bag. Just make sure you get as much air out as possible to prevent freezer burn. You can keep these frozen dough balls ready to go for up to three months. When the craving hits, just pull out what you need, preheat your oven to 350 degrees F, and bake them straight from frozen. You just need to add about 2 to 4 minutes to the total baking time. So easy!
Speaking of freezing things, if you ever have extra fresh summer ingredients you don’t want to waste, you should check out how I like to freeze fresh herbs in olive oil to lock in that bright flavor. It’s a game-changer!
Preventing That Chocolate Bloom
I mentioned it briefly before, but it’s worth repeating in the cooling section: the biggest enemy of a beautifully dipped Homemade Tagalong Cookie is humidity or temperature shock, which causes cocoa butter to rise to the surface and make the chocolate look dusty or foggy—we call that ‘bloom.’
To fight bloom:
- Make sure the cookies are completely cool before dipping.
- Make sure the chocolate coating isn’t too hot when dipping.
- Avoid storing them in humid spots, like directly next to the dishwasher!
If you see a slight haze develop after a few days, don’t worry! It’s just cosmetic; the taste is still 100% perfect peanut butter and chocolate goodness. But if you want to avoid it entirely, using that bit of shortening is absolutely the best insurance policy you can buy!
Variations on Classic Homemade Tagalong Cookies
While my heart belongs to the classic, perfectly balanced Homemade Tagalong Cookies, I absolutely encourage a little adventure in the kitchen once you’ve nailed the original batch! Baking is all about personalizing the treats you love, right? Once you see how wonderfully sturdy these peanut butter bases are, you’ll realize they are the perfect canvas for some fun little twists!
I’ve got a few ideas that have become family favorites for holidays when we want to shake things up a bit. Imagine these with a little extra something! If you like that sweet heat combination, you might have to try making both a batch of these cookies and some of my irresistible hot honey Chex mix!
Dark Chocolate Decadence
If semi-sweet just isn’t cutting it for you, switching up the chocolate is the easiest way to transform these cookies completely. You can absolutely use high-quality dark chocolate chips, say 60% or 70% cacao. I recommend going this route if you like your sweets a little less sweet overall. Dark chocolate has a beautiful, slightly bitter note that cuts through the richness of all that peanut butter dough.
A quick note on dipping: dark chocolate can sometimes set up a little harder than milk or semi-sweet when melted with shortening, so when you’re melting it down, just stir it extra well towards the end to ensure it’s silky smooth before you dip your cookies in!
The Salty Crunch Finish
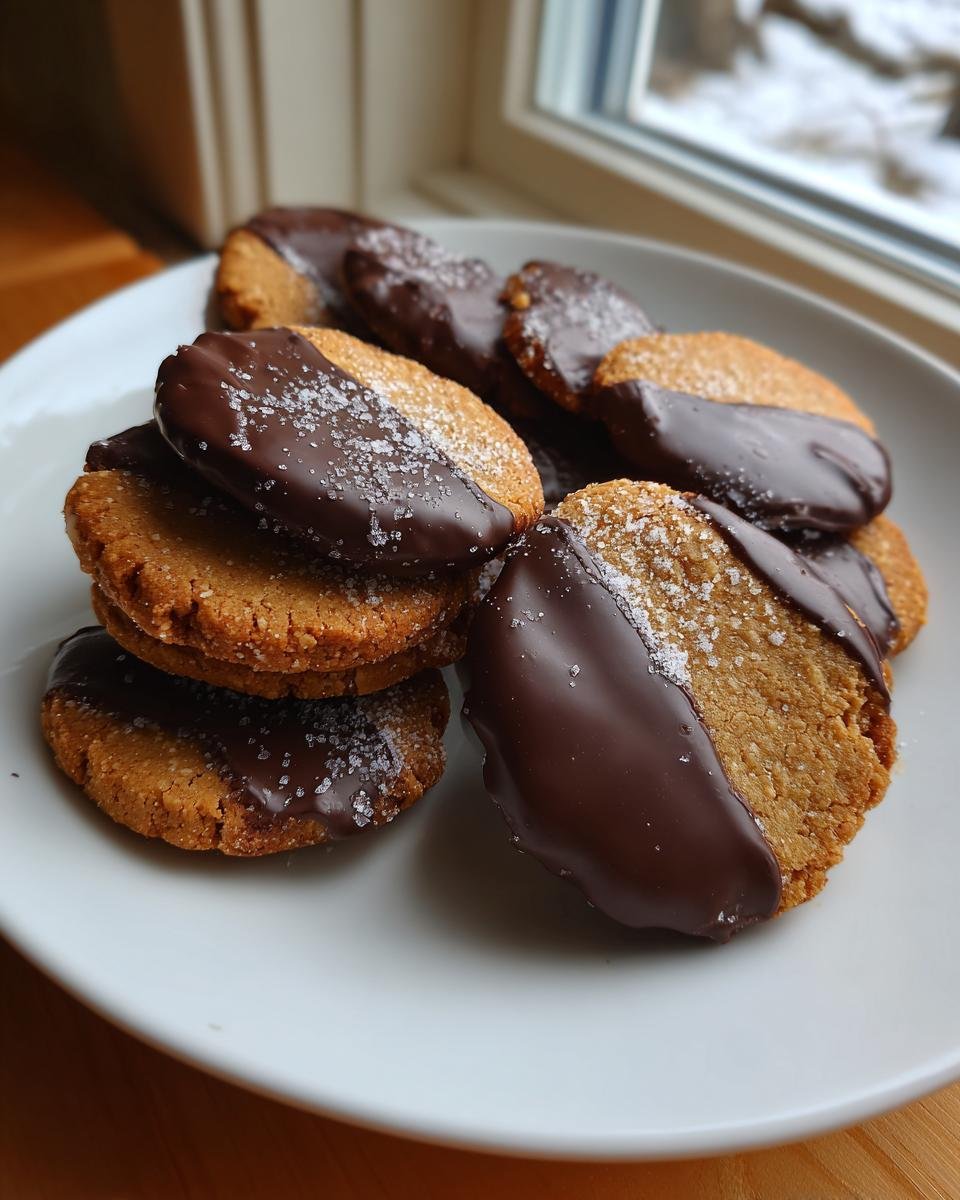
Okay, this one is my favorite modification for parties. It’s so simple, but it adds such a fantastic textural element! Right after you dip the cookie halfway into the melted chocolate (while the chocolate is still wet, obviously!), immediately grab a tiny sprinkle of coarse sea salt—like Maldon flakes—and sprinkle just a few flakes over the wet chocolate top.
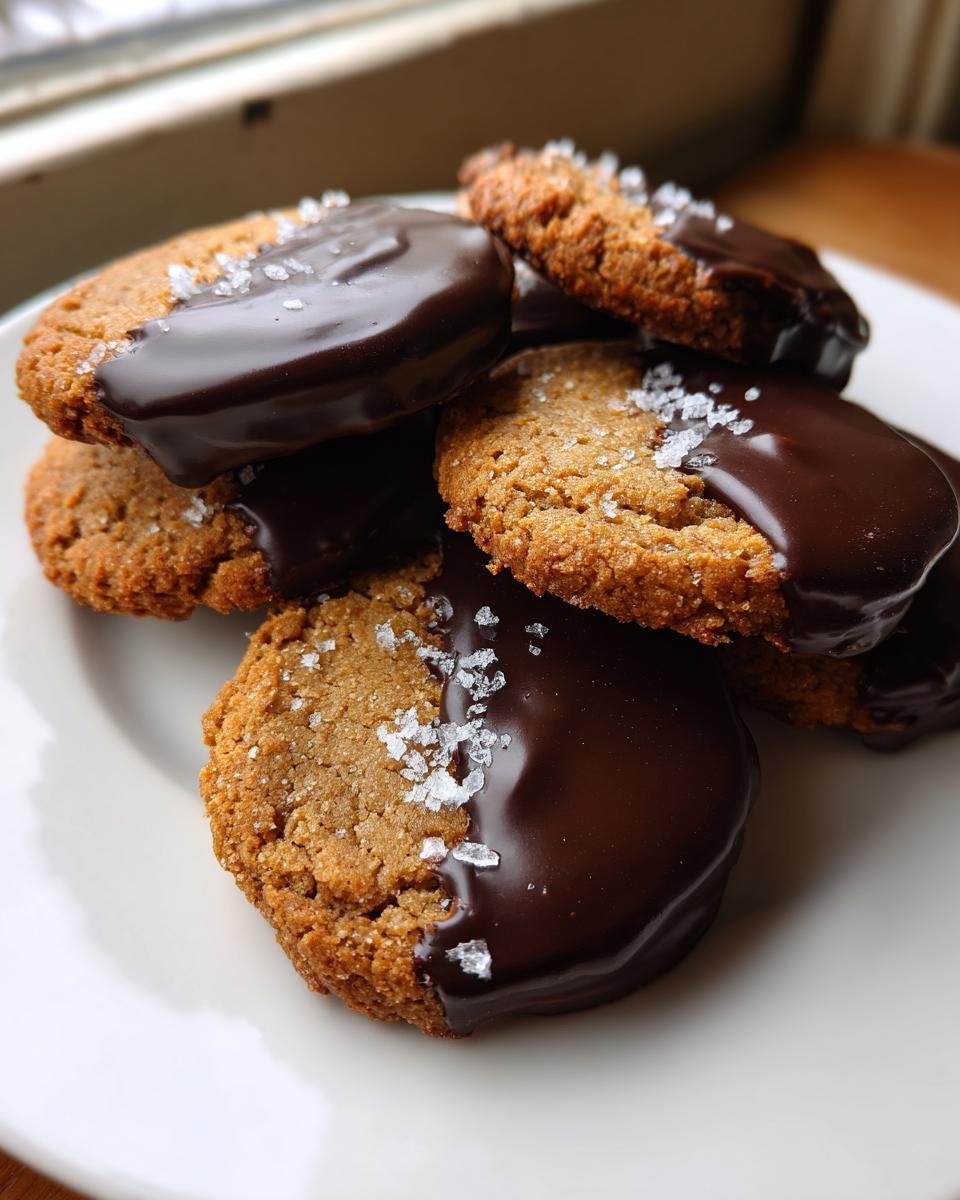
The salt doesn’t just taste amazing with the chocolate; it gives your Homemade Tagalong Cookies that gourmet, bakery-quality look. It elevates the whole presentation, and honestly, that little pop of salt against the smooth, sweet peanut butter is just heavenly. Don’t overdo it, though; a light dusting is all you need!
Spice Up the Dough
Since we are dealing with a flavor powerhouse like peanut butter, you might think adding more spice is unnecessary, but trust me on this one! If you love warm spices, try adding about half a teaspoon of ground cinnamon directly into your dry ingredients (the flour mixture). Cinnamon doesn’t overpower the peanut butter; it actually deepens it, giving the cookie a richer, almost savory undertone that is incredible.
I even experimented once by adding just a whisper—maybe a quarter teaspoon—of ground cardamom to the dough for a lighter, almost floral hint. It surprised everyone! These spiced versions make the best cookies for serving alongside a strong cup of coffee in the afternoon.
Serving Suggestions for Homemade Tagalong Cookies
So, you’ve got about three dozen flawless, dipped, and set Homemade Tagalong Cookies staring back at you. Congrats! Now comes the important part: how do you make eating them an even bigger event? These cookies are already flavor superstars—rich peanut butter meeting decadent chocolate—so we don’t need much to complete the picture, just the right drink!
I usually have a few go-to pairings that I keep stocked because I know these cookies won’t last long once they hit the counter. If you’re looking for something fun, you have to try making my recipe for the ultimate chocolate milkshake. Dipping one of these cookies into that thick, cold shake? Honestly, it’s next-level indulgence!
But if you need something a little faster or less dessert-heavy, here are my favorite ways to serve these beauties:
- Ice Cold Milk: This is the classic for a reason. Whole milk or 2% milk cuts through the richness of the chocolate and cleanses the palate for the next peanut butter bite. Don’t even try to pretend you aren’t dipping these!
- Strong Black Coffee: If you’re having these as an afternoon treat, the bitterness of a really strong coffee is the perfect foil for the sweetness. It just makes the chocolate flavor pop more intensely.
- Simple Glass of Water: Sometimes, you just need to enjoy the pure, unadulterated flavor of the cookie itself without any interference. Keep a glass of ice water nearby to refresh your mouth between cookies!
- Raspberry or Cherry Tea: For a slightly fancier feel, a tart, fruity iced tea cuts the richness beautifully. The slight acidity makes the peanut butter taste even nuttier.
That’s all there is to it! These Homemade Tagalong Cookies are perfect all on their own, but having the right beverage nearby definitely makes the experience better. Enjoy every single bite!
Frequently Asked Questions About Homemade Tagalong Cookies
It happens! When you’re making something as iconic as the Homemade Tagalong Cookies, you’re going to have questions pop up. I hear from folks all the time wondering about minor adjustments or how to troubleshoot when things don’t look quite like mine. Don’t worry; that’s what this section is for! We want every batch of these peanut butter cookies to be perfect when they come out of your kitchen!
If you’re looking for another quick peanut butter fix while you wait for these to cool, you have to check out my recipe for amazing peanut butter fudge. It satisfies that craving in about five minutes!
Can I use natural peanut butter in this Homemade Tagalong Cookies recipe?
This is a big one! My strong recommendation is to stick with conventional, creamy peanut butter for these Homemade Tagalong Cookies. Natural peanut butter, the kind where the oil separates on top, has way too much liquid oil mixed in. When you add that to the dough, it throws off the balance we worked so hard to achieve between the flour and the fats. If you *must* use it, make sure you stir that jar until it’s completely uniform and thick before measuring, and maybe add an extra tablespoon of flour just in case.
How do I prevent the chocolate coating from cracking when dipping?
Ah, cracking chocolate—the bane of every chocolate-dipped cookie maker! This almost always happens for one of two reasons: the cookie was too warm, or the chocolate mixture was too hot when you dipped it. Remember, we added that crucial vegetable shortening to our chocolate chips, which helps keep it smooth, but temperature is huge.
The best fix is to make sure your peanut butter cookies are fully cooled, maybe even slightly chilled in the fridge for 10 minutes before dipping. Also, when melting the chocolate, you want it smooth, but you don’t want it piping hot. If it seems overly thin, let it sit on the counter for five minutes off the heat before you start dipping. That slight reduction in heat prevents thermal shock when it hits the cookie surface, which stops cracking!
How long do Homemade Tagalong Cookies last?
These Homemade Tagalong Cookies actually last quite well because of the dense cookie and the hardened chocolate shell protecting them! As I mentioned, I usually store them in an airtight container right on the counter at room temperature. If you keep them sealed up tight, they stay fresh and soft for about a full week. Seriously, they taste just as good on day seven as they do on day one, provided your container is truly airtight!
Nutritional Snapshot of Homemade Tagalong Cookies
Look, I won’t pretend these Homemade Tagalong Cookies are a health food. They are a treat, plain and simple! But, hey, knowledge is power, right? I always gather up the estimated nutritional info that our serving size yields so you know exactly what you are enjoying. This recipe makes about three dozen cookies, and these numbers are based on one cookie serving.
Take these figures with a grain of salt, though! I am not a certified nutritionist, and the exact values really depend on the brand of peanut butter you use and the specific percentage of cacao in the chocolate chips you choose for dipping.
- Serving Size: 1 cookie
- Calories: 250
- Sugar: 20g (Yes, it’s a treat!)
- Fat: 15g (That glorious mix of butter and peanut butter!)
- Saturated Fat: 7g
- Carbohydrates: 28g
- Protein: 4g
- Cholesterol: 40mg
It’s a balanced indulgence, if you ask me! You get a solid punch of protein from the peanut butter, but yeah, you’re definitely getting sugar and fat from the butter and chocolate. That’s what makes them taste amazing! Just bake them, share them, and enjoy them!
Share Your Homemade Tagalong Cookies Creations
Okay, that’s it! You’ve made the cookies, you’ve dipped them, and now they are cooling perfectly on the rack. I really, truly hope you love these Homemade Tagalong Cookies as much as my family does. I can’t wait to hear what you think once you finally sit down with a glass of milk and take that first bite!
This is the part where I beg you to tell me how it went! Did you try the sea salt variation? Did your chocolate coating stay perfectly glossy? Leave a comment down below! Even one star or five stars—just tell me your experience making these peanut butter cookies. My favorite way to see your baking success is when you tag me on social media with a picture of your beautiful, dipped cookies. It seriously makes my whole week!
If you try this recipe and it becomes your new go-to dessert, please consider leaving a rating on the recipe card above the introduction. It helps other bakers find this copycat recipe, and honestly, it encourages me to keep developing and sharing all these tried-and-true family favorites.
If you ever have questions that just can’t wait for a comment reply, or maybe you just want to send me a note, you can always reach out via my contact page. Happy baking, and enjoy those perfect Homemade Tagalong Cookies!
Print
Homemade Tagalong Cookies
- Total Time: 36 min
- Yield: About 3 dozen 1x
- Diet: Vegetarian
Description
Recipe for making peanut butter cookies dipped in chocolate coating, similar to Tagalong Girl Scout cookies.
Ingredients
- 1 cup (2 sticks) unsalted butter, softened
- 1 cup granulated sugar
- 1 cup packed light brown sugar
- 2 large eggs
- 1 teaspoon vanilla extract
- 2 1/2 cups all-purpose flour
- 1 teaspoon baking soda
- 1/2 teaspoon salt
- 1 1/2 cups creamy peanut butter
- 12 ounces semi-sweet chocolate chips
- 2 tablespoons vegetable shortening
Instructions
- Preheat your oven to 350 degrees F (175 degrees C). Line baking sheets with parchment paper.
- In a large bowl, cream together the softened butter, granulated sugar, and brown sugar until light and fluffy.
- Beat in the eggs one at a time, then stir in the vanilla extract.
- In a separate bowl, whisk together the flour, baking soda, and salt. Gradually add the dry ingredients to the wet ingredients, mixing until just combined.
- Stir in the peanut butter until fully incorporated into the dough.
- Drop rounded tablespoons of dough onto the prepared baking sheets, about 2 inches apart. Flatten each cookie slightly with the bottom of a glass.
- Bake for 9 to 11 minutes, or until the edges are lightly golden. Let the cookies cool on the baking sheet for 5 minutes before transferring them to a wire rack to cool completely.
- Prepare the chocolate coating: In a microwave-safe bowl, combine the chocolate chips and vegetable shortening. Microwave in 30-second intervals, stirring well after each interval, until the chocolate is smooth and melted.
- Dip the cooled peanut butter cookies halfway into the melted chocolate. Place them back on the wire rack set over parchment paper to allow the chocolate to set.
- Once the chocolate is firm, the cookies are ready to serve.
Notes
- For easier dipping, you can use a fork to coat the cookies in chocolate.
- Store the finished cookies in an airtight container at room temperature.
- Prep Time: 25 min
- Cook Time: 11 min
- Category: Dessert
- Method: Baking
- Cuisine: American
Nutrition
- Serving Size: 1 cookie
- Calories: 250
- Sugar: 20
- Sodium: 150
- Fat: 15
- Saturated Fat: 7
- Unsaturated Fat: 8
- Trans Fat: 0
- Carbohydrates: 28
- Fiber: 1
- Protein: 4
- Cholesterol: 40
Keywords: peanut butter cookies, chocolate dipped cookies, homemade tagalongs, girl scout cookies copycat, baked dessert