
When October rolls around, I swear my kitchen turns into a very amateur haunted house! Forget fussy layered cakes or complicated candies; my absolute favorite thing to make when the mood strikes—whether it’s Halloween or just a Tuesday—is the classic, ridiculously fun Graveyard Dirt Cake. Seriously, this is the easiest, most satisfying no-bake dessert you will ever make. You just need a few supermarket staples, zero effort in the oven department, and a willingness to get a little messy. I remember making a giant batch of this for my nephew’s seventh birthday party last year; he insisted he wanted a cake that looked like my garden looked after a heavy frost! We layered it up in a big glass dish, and honestly, the look on the kids’ faces when they saw the gummy worms poking out was worth every single crushed cookie. It’s pure, edible fun, and trust me, you’re going to love how simple it is.

Why This Graveyard Dirt Cake is a Must-Make Dessert
When I’m trying to get a crowd-pleaser on the table fast, especially one that doesn’t require me turning on the oven when it’s still too hot, this dirt cake is my first call. It’s just so brilliantly simple! You don’t need fancy techniques or five hours of your day to get this thing ready to chill. It’s the perfect dessert for letting the kids help because the assembly is just so tactile and fun.
Honestly, you should make this because:
- It is completely no-bake, so you don’t have to worry about oven times or checking for doneness.
- Kids adore being the decorators; they handle the worms and the tombstones perfectly! Check out my recipe for a similar no-bake funfetti cake if you want another easy win.
- You can tailor the theme! It doesn’t just have to be a graveyard; it can be a monster mud puddle, anything!
- Assembly is lightning fast—we’re talking under twenty minutes before it goes into the fridge. It rivals my favorite simple Oreo icebox cake for speed.
Gathering the Components for Your Graveyard Dirt Cake
You know, the beauty of this dirt cake—besides how terrifyingly easy it is—is that you probably have most of this stuff lurking in your pantry already! We are keeping this super simple, relying on creamy pudding and rich cookie crumbs to do all the heavy lifting. Just make sure you grab the *instant* pudding mix; we don’t have time for the cook-and-stir stuff here! And remember that whipped topping needs to be fully thawed before we start folding things together, otherwise, you’ll get lumps, and lumps are not very graveyard-y, if you know what I mean.
Ingredients for the Graveyard Dirt Cake Base
Here’s your shopping list for the filling and the foundation. The chocolate sandwich cookies are the star—you want the ones that come pre-filled. Don’t worry too much about scraping out the filling; that cream just adds flavor to our edible mud!
- 1 package (3.4 oz) instant chocolate pudding mix
- 2 cups cold milk (Oh! Try using chocolate milk if you have it for extra depth of flavor!)
- 1 container (8 oz) frozen whipped topping, fully thawed
- 1 package (14.3 oz) chocolate sandwich cookies (think Oreos—you’ll need a lot!)
Essential Decorations for the Graveyard Dirt Cake
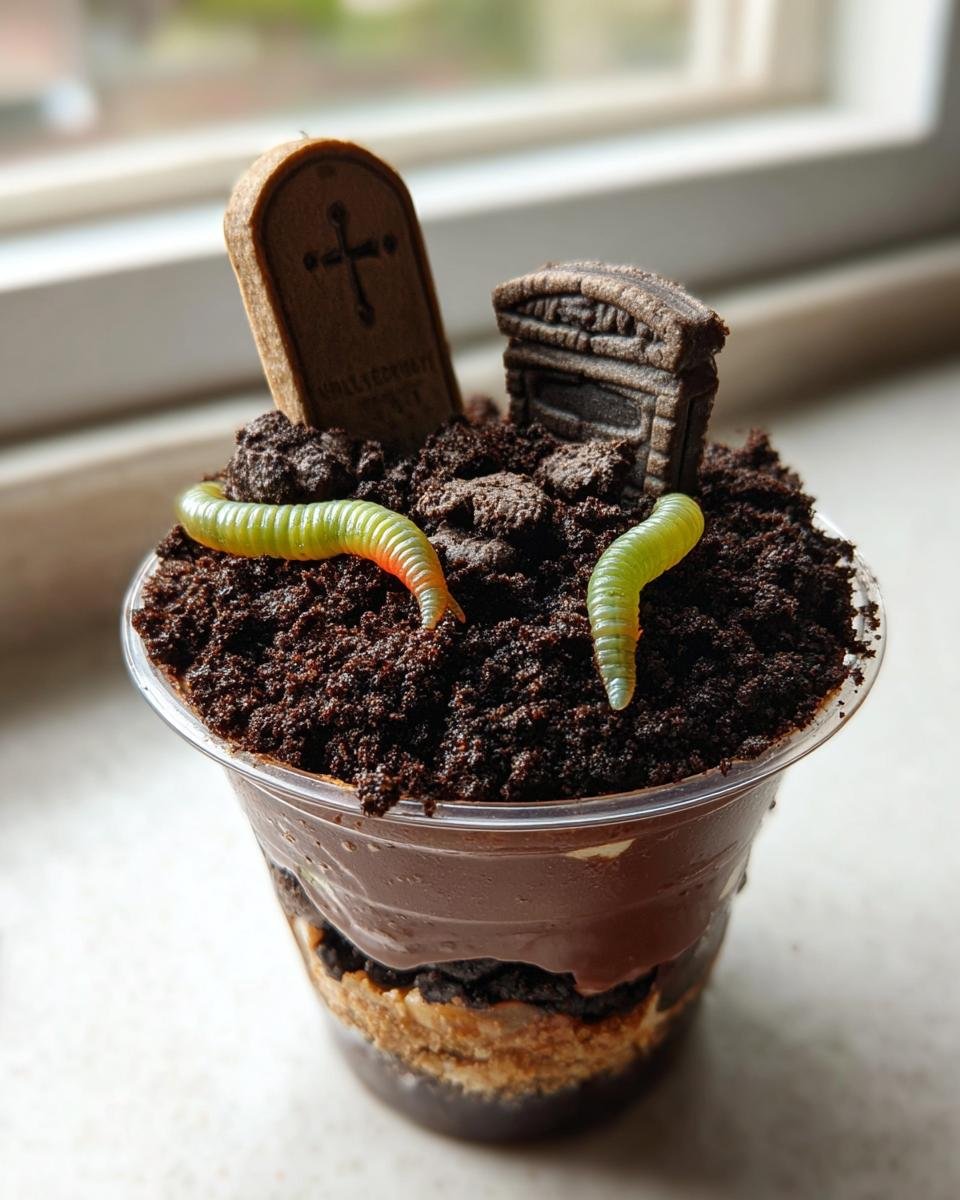
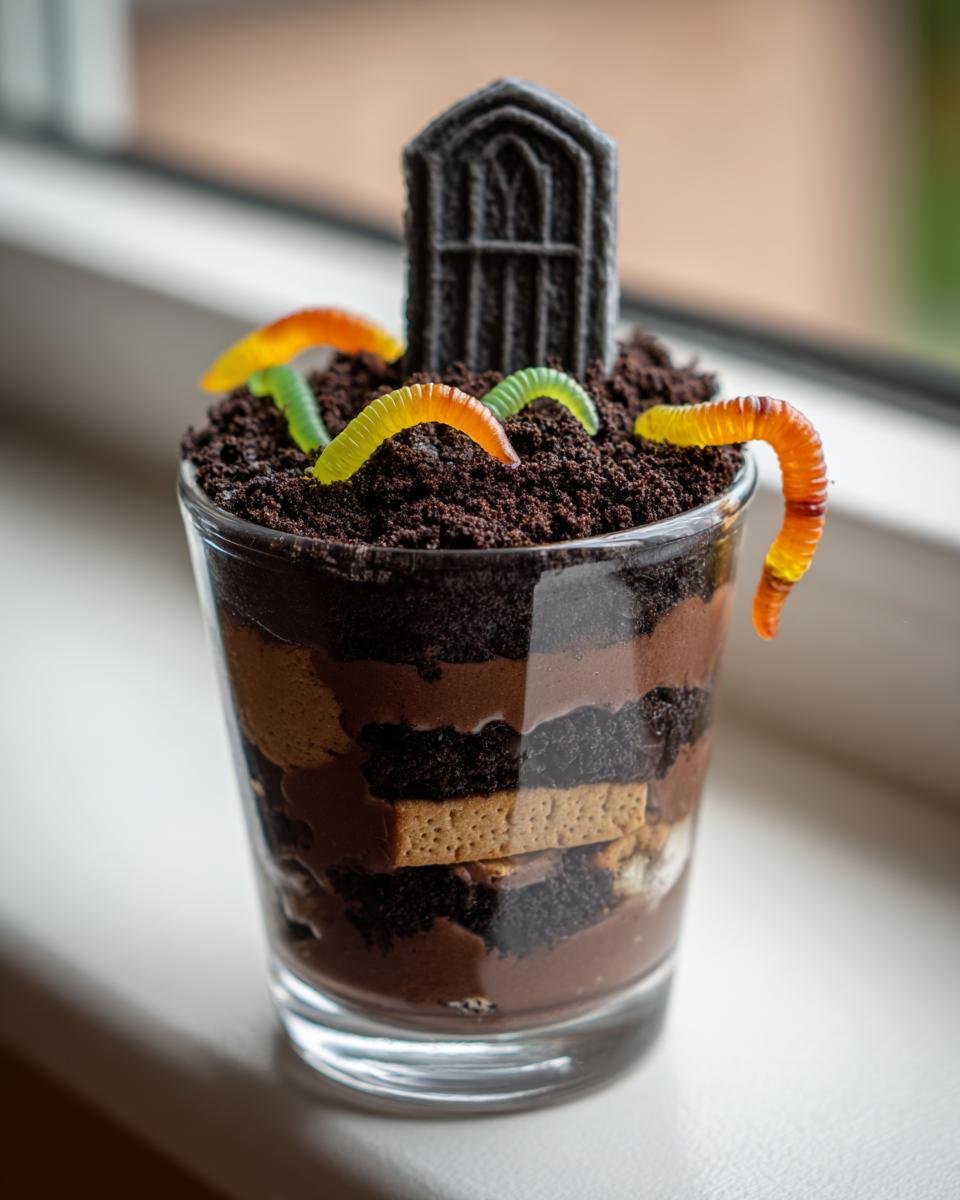
This is where the fun really starts, and where you get to be a miniature landscape artist! You need things for planting and things for marking graves. I always grab the brightest green or red gummy worms I can find—the weirder they look sticking out of the cookie crumbs, the better. For the tombstones, the Milano cookies are perfect because they’re flat, but you can use any plain, sturdy shortbread cookie you have on hand.
If you’re feeling ambitious, use a tube of black writing icing or just melt a little bit of dark chocolate and use a toothpick to write “RIP” or draw a little cross on each cookie before you stick them in. It takes five seconds but makes such a huge difference!
Expert Tips for Perfecting Your Graveyard Dirt Cake Layers
Listen, this dirt cake is incredibly forgiving, but there are two little secrets that take it from ‘good’ to ‘OMG, I need that recipe’ status. It all comes down to the texture of those amazing chocolate sandwich cookies. You can’t just crush them all the same way! For the layers *inside* the dish, you want that fine, beautiful ‘dirt’ texture—almost like dark brown sugar. I toss half my cookies into the food processor and run it until they look like dust. This fine stuff mixes beautifully with the pudding for texture.
But for the top layer, don’t be shy about those crumbs being a little coarser! A few slightly bigger chunks make it look way more realistic, like dug-up earth. See how I make my favorite chocolate sandwich cookies? It’s all about the contrast. Also, when you fold that whipped topping into the pudding, go easy! You want it light and airy; don’t stir it until it’s totally uniform. A few streaks of white left in there keep the filling fluffy, which is key when you’re layering this Graveyard Dirt Cake.
Step-by-Step Instructions for Assembling the Graveyard Dirt Cake
Okay, this is the fun part where everything comes together! You’ve got your crumb textures ready, your pudding is mixed, and your whipped topping is waiting patiently. We’re building this masterpiece in layers, creating that beautiful contrast between dark earth and creamy filling. Before anything else, make sure your pudding has had those crucial 5 minutes to start setting up—if it’s too runny, it will just soak into the first cookie layer, and we don’t want a swamp, we want a cake!
First things first: pudding time. Mix that instant chocolate pudding powder with your cold milk right away until it starts thickening up. That’s often step one, but don’t forget to give it that short five-minute rest mentioned on the box. Once it has that initial set, take your thawed whipped topping and gently fold it in. I mean gently! You want to keep all that lovely air you just whipped in there. If you beat it hard, your filling will collapse into a dense sludge, similar to what happens when you overmix pie filling projects, like when I tried to rush my no-bake chocolate pie once.
Now we layer! Grab your clear dish—I love using clear glass so you can see the layers working, but if you have individual cups, use those! Start with a nice, even layer of your finely crushed ‘dirt’ cookies on the very bottom. Then, spoon about half of your pudding-and-whipped-topping mixture right over the top. Try to spread it without digging into the cookie layer beneath.
Repeat that process: another layer of the fine cookie crumbs, followed by the rest of your creamy pudding mixture. You should end with a layer of pudding on top, ready for the final touches. Now, you can take those slightly coarser cookie crumbs you set aside earlier and sprinkle them liberally over the entire top. This is your surface layer of ‘dirt’!
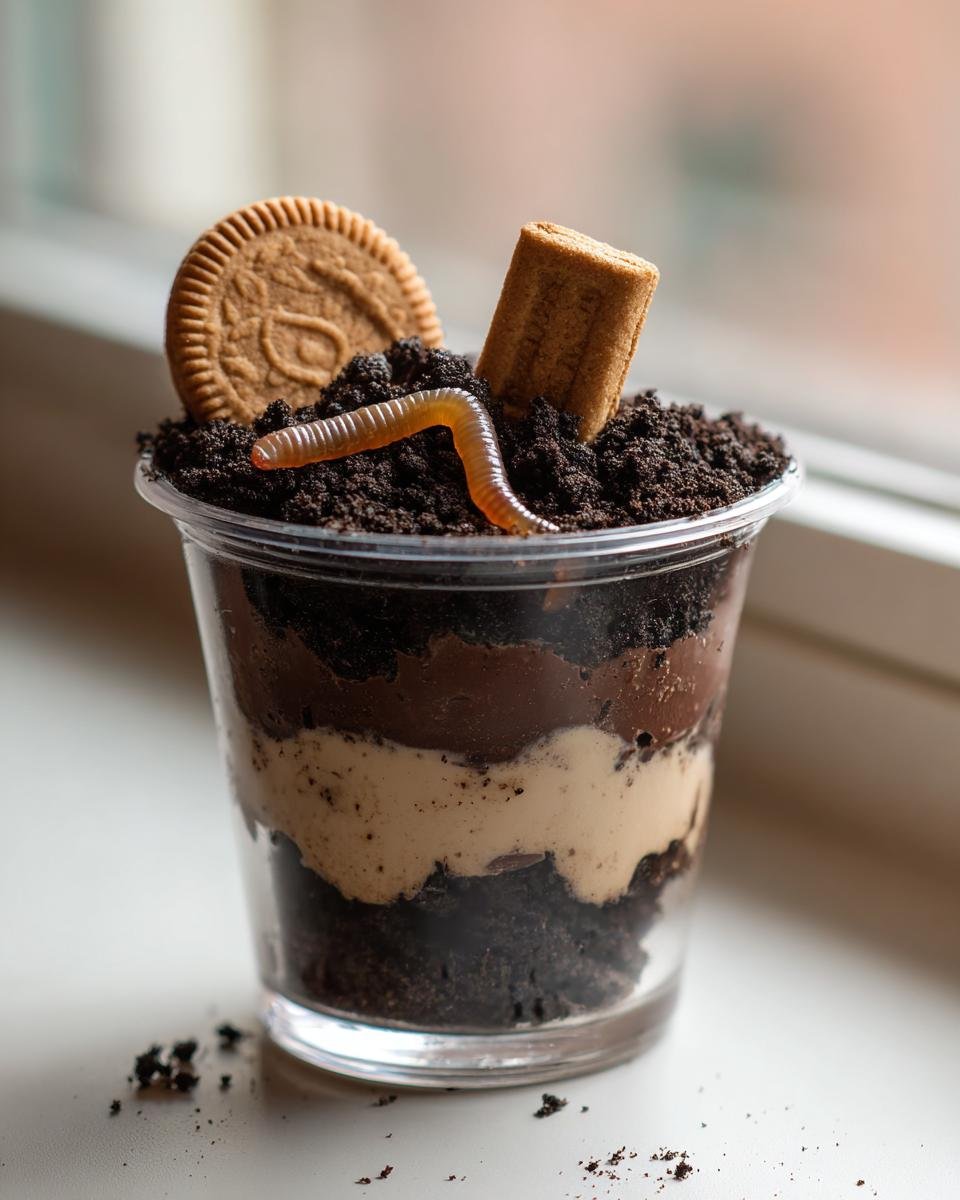
Time for the creatures! Take your gummy worms and stick them in at odd angles. Make a few look like they are trying to escape, and a couple just dangling halfway out. Then, grab those Milano tombstones you decorated. Carefully stand them up in the dirt layer. Don’t push them in too far, or they’ll break or sink! Finally, wrap the whole thing up tight and let it chill for at least one hour. That hour is non-negotiable; it lets those layers firm up properly so you can actually slice it without everything dissolving into chaos!
Customizing Your Graveyard Dirt Cake Decorations
I love that this Graveyard Dirt Cake is such a blank canvas for creativity! While the gummy worms and Milano tombstones are my go-to, there are so many ways you can ramp up the spooky factor without adding any extra cooking time. If you don’t have Milano cookies, crushed graham crackers actually work great for tombstones, too—they are a lighter color, which makes the “RIP” writing pop even more, especially if you use black gel icing.
For the dirt itself, if you happen to have some plain chocolate wafer cookies lying around—not the cream-filled sandwich kind—those crush up beautifully and mimic that dark, rich soil texture perfectly. You can even mix in a tiny bit of crushed green cookie or a sprinkle of green sanding sugar near the edges to look like moss creeping over the graves. You don’t have to stick to exactly what I do; just look at what you have under the sink and get those creative juices flowing. Because honestly, half the fun of this no-bake dessert is how silly and specific you can make your little cemetery scene!
Storage and Make-Ahead Instructions for Graveyard Dirt Cake
Since this is a no-bake recipe, it holds up really well in the fridge, which is great news for party planning! I usually assemble the whole thing a day ahead—you know, pudding, dirt, worms, the works—cover it tightly with plastic wrap, and pop it in the cold. When you make it ahead, the pudding gets firmer, which I actually prefer for serving.
The only thing I watch out for is condensation. If you cover it too tightly right away, moisture can build up on the inside of your wrap and make that top layer of cookie crumble a little soggy. I usually place a sheet of plastic wrap gently *on top* of the cake before covering the edges of the dish tight. It keeps fresh longer than a day, but honestly, this dirt cake never lasts that long in my house!
Frequently Asked Questions About Graveyard Dirt Cake
I get so many questions about this dessert—it’s just one of those recipes people make over and over! It’s simple, but sometimes the details can trip you up. Here are the things folks ask me most often when they’re diving into making their own spooky scene.
Can I use vanilla pudding in the Graveyard Dirt Cake?
Oh, you could! But then it wouldn’t be quite the same gooey, rich, chocolatey mud we’re aiming for, would it? I really stick to vanilla pudding only if I’m making something totally different, like maybe a banana pudding version. For the classic graveyard look, the dark pudding is essential to look like rich earth. Also, if you use vanilla, you might want to crush a few more cookies into the mix just so the color isn’t too pale against those dark cookie tombstones!
Do I have to use the filling inside the chocolate sandwich cookies?
Absolutely not, or yes, absolutely! It’s up to you! If you use the whole cookie, that cream filling melts slightly when mixed with the pudding and whipped topping, which actually gives the filling a richer, more decadent texture. If you have a sensitive stomach or want a slightly less sweet filling, you can peel the cookies apart and only crush the dark chocolate wafers. It just means you might need a little extra milk to keep the pudding mix the right consistency underneath all that cookie goodness. I usually leave the filling in because why waste flavor?
Can this Graveyard Dirt Cake be made in a 9×13 inch pan?
Yes, that’s my favorite way to make it for bigger parties! The recipe notes say you can use a 9×13 pan, and it works perfectly for serving a crowd. If you do use the large rectangular pan, make absolutely sure you have at least two, maybe three, layers of cookies and pudding. In a wide pan, you need that depth to look like a real, tall mound of dirt. You can even make a whole ‘cemetery scene’ across the top instead of just piling it high. For smaller portions, I love using individual clear cups—you can see every layer! It’s just as good as my dirt dessert dump cake when made wide and shallow!
Can I substitute the whipped topping in the Graveyard Dirt Cake?
That’s a good question about substitutions! The recipe specifically calls for thawed frozen whipped topping because it’s stable and holds its structure really well once you fold it into the pudding, which keeps the filling light against the heavy cookies. If you want to switch it out, you can certainly make your own homemade whipped cream and add a stabilizer—maybe a tablespoon of powdered sugar mixed with a tiny bit of gelatin dissolved in hot water, then cooled before folding in. Just be warned: homemade cream might deflate faster than the store-bought stuff, so you need to work quickly when assembling.
How do I get the best ‘dirt’ texture for my Graveyard Dirt Cake?
This is my favorite pro-tip! As I mentioned earlier when we talked about expert assembly, texture is everything for realistic dirt. For the layers *inside* the dish, you want that super-fine powder—run those cookies through the processor until they look like flour. This fine dust mixes seamlessly into the pudding. But for the **topping** layer, the dirt you sprinkle on top to cover the cake? You want variation! Crush those remaining cookies by hand, maybe in a sturdy plastic bag with a rolling pin. You want small pebbles and irregular chunks on top to imitate real, unevenly dug earth. That contrast between the smooth interior and the rugged top is what makes the decoration look so convincing!
Nutritional Estimate for Graveyard Dirt Cake
Now, look, I’m not a registered dietitian, okay? I bake for love and smiles, not for calorie counting! This is meant to be an indulgent, fun holiday treat, probably one you make once a year when you’re feeling spooky. That said, if you’re curious about what you’re dipping into that delicious cookie mud, here’s a rough idea of what we are looking at per serving, based on the estimates I used.
Don’t take these numbers as gospel, though! If you use a different brand of sandwich cookies or skip the sugar in your homemade whipped cream, these numbers will shift around. This is just a rough guide for what you are getting with one slice of this beautiful, no-bake masterpiece.
- Serving Size: 1 serving
- Calories: 350
- Sugar: 35g
- Sodium: 300mg
- Fat: 18g
- Saturated Fat: 8g
- Unsaturated Fat: 10g
- Trans Fat: 0g
- Carbohydrates: 45g
- Fiber: 2g
- Protein: 5g
- Cholesterol: 15mg
See? A lovely, indulgent little package of fun. It’s dessert! We only make this when we want to celebrate, so don’t worry too much about the sugar content—just save room for extra gummy worms!
Share Your Spooky Creations
Alright, now that you have the full guide to making the most terrifyingly delicious dessert on the block, I absolutely need to see what you all come up with! The beauty of the Graveyard Dirt Cake is that everyone’s cemetery looks a little different—some people go hyper-realistic, and others just pile as many gummy creatures in as humanly possible, which I fully support.
Once you have yours chilled and ready to dig into, please come back here and give this recipe a quick rating. Five stars if it scared your in-laws! More importantly, leave a comment below telling me the wildest decorating idea you tried. Did you use crushed peppermint for snow? Did you make a tiny, edible fence? I’m always looking for new ways to dress up my next batch. You can also reach out to me directly if you have any tricky questions over at my contact page.
Seriously, snap a photo if you can and share it so we can all admire your impressive, creepy culinary skills. Happy digging!
Print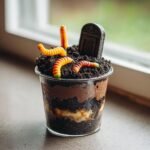
Graveyard Dirt Cake
- Total Time: 80 min
- Yield: 8 servings 1x
- Diet: Vegetarian
Description
A simple, no-bake dessert resembling a graveyard scene, made with crushed cookies and pudding.
Ingredients
- 1 package (3.4 oz) instant chocolate pudding mix
- 2 cups cold milk
- 1 container (8 oz) frozen whipped topping, thawed
- 1 package (14.3 oz) chocolate sandwich cookies (like Oreos)
- 6–8 gummy worms
- 4–6 Milano cookies or plain shortbread cookies for tombstones
Instructions
- Prepare the pudding according to package directions using the cold milk. Let it set for 5 minutes.
- Gently fold the thawed whipped topping into the prepared pudding until combined.
- Place about half of the chocolate sandwich cookies into a food processor or a large plastic bag and crush them until they resemble dirt. Set aside.
- Crush the remaining cookies slightly more coarsely for texture.
- In a clear glass serving dish or individual cups, layer the ingredients. Start with a layer of crushed cookies, followed by a layer of the pudding mixture. Repeat the layers, ending with a layer of pudding.
- Sprinkle the finely crushed cookies over the top layer of pudding to create the ‘dirt’ effect.
- Insert the gummy worms so they appear to be crawling out of the dirt.
- Write ‘RIP’ or a simple design on the Milano cookies using black icing or melted chocolate, if desired, and stick them into the ‘dirt’ as tombstones.
- Chill the cake for at least 1 hour before serving.
Notes
- You can use a 9×13 inch pan for a large cake or individual clear cups for single servings.
- For a richer flavor, use chocolate milk instead of regular milk when making the pudding.
- If you do not have a food processor, place cookies in a sturdy bag and crush them with a rolling pin.
- Prep Time: 20 min
- Cook Time: 0 min
- Category: Dessert
- Method: No-Bake
- Cuisine: American
Nutrition
- Serving Size: 1 serving
- Calories: 350
- Sugar: 35
- Sodium: 300
- Fat: 18
- Saturated Fat: 8
- Unsaturated Fat: 10
- Trans Fat: 0
- Carbohydrates: 45
- Fiber: 2
- Protein: 5
- Cholesterol: 15
Keywords: graveyard cake, dirt pudding, no-bake dessert, chocolate pudding, halloween dessert, cookie crumbs