
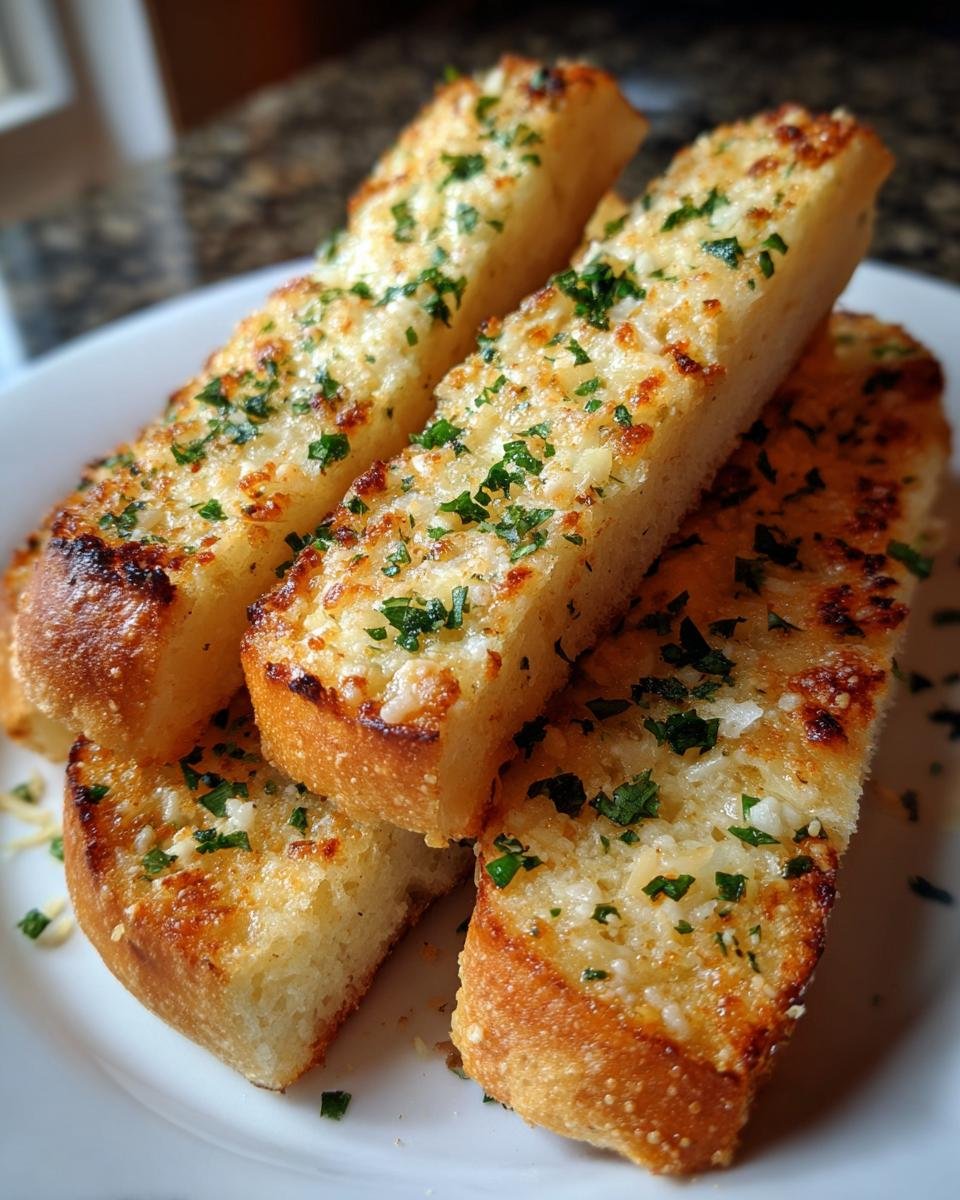
Oh, the smell of freshly baked bread! There’s just nothing like it, is there? And when it comes to comfort food, my absolutely favorite thing to pull out of the oven has got to be warm, soft, and gloriously buttery garlic breadsticks. Seriously, if you’ve ever had those days where you just need something *good*, something that feels like a hug from the inside, you NEED to try making these. They’re exactly what you’d hope for: wonderfully tender, packed with that irresistible garlic flavor, and just dripping with buttery goodness. I remember making these for the first time for a family dinner, and you should have seen the smiles! It’s amazing how simple ingredients can transform into something so special. Trust me, these aren’t just breadsticks; they’re little pieces of pure joy, and you’ll be so proud of yourself when you pull them out of the oven!
Why You’ll Love These Delicious Garlic Breadsticks
Friends, let me tell you why these breadsticks are about to become your new obsession:
- Super Easy to Make: Seriously, even if you’re new to baking, you can totally nail these!
- Incredible Flavor: That perfect combo of soft, buttery dough with tons of garlic? Dreamy!
- The BEST Texture: They come out wonderfully soft and a little chewy, just like they’re supposed to be.
- So Versatile: Perfect for dipping, alongside pasta, or just eating straight from the pan (I won’t tell!).
Gather Your Ingredients for Soft Buttery Garlic Breadsticks
Alright, let’s get our mise en place ready! To make these dreamy, soft, and buttery garlic breadsticks, you’ll want to have these goodies on hand. Don’t worry if you don’t have everything; we’ll chat about those later!
- Warm Water: You’ll need 1 cup. Make sure it’s not too hot, just warm to the touch, about 105-115°F, like a comfy bath.
- Active Dry Yeast: Just 2 ¼ teaspoons to get our dough all puffed up.
- Sugar: A tiny teaspoon of sugar helps wake up that yeast!
- All-Purpose Flour: Grab 3 ½ cups, plus a little extra for dusting when we roll things out.
- Salt: 1 teaspoon will do the trick to make sure our breadsticks have great flavor.
- Unsalted Butter: We need ¼ cup melted for the dough itself, plus more for brushing later. Gotta have that buttery goodness!
- Garlic: Two cloves, nice and finely minced. Fresh is best here, trust me!
- Fresh Parsley: A tablespoon, finely chopped, for a little pop of freshness and color.
- Grated Parmesan Cheese: This is totally optional, but if you have a tablespoon handy, it adds a lovely savory note.
Step-by-Step Guide to Making Delicious Garlic Breadsticks
Alright, my friends, get ready to roll up your sleeves because we’re about to embark on a delicious journey! Making these soft, buttery garlic breadsticks from scratch is surprisingly easy and SO worth it. Follow along, and you’ll have a pan of absolute heaven in no time. It’s a process that’s really satisfying, honestly.
Activating the Yeast: The First Step to Soft Buttery Garlic Breadsticks
First things first, let’s get our yeast partying! Grab a big bowl – I mean, *really* big. Pour in your warm water, then sprinkle over the yeast and your pinch of sugar. Give it a gentle stir. Now, let it hang out for about 5 to 10 minutes. You’re looking for it to get all foamy and bubbly on top. That’s your sign the yeast is alive and ready to make some magic for our delicious garlic breadsticks!
Mixing and Kneading the Dough for Perfect Breadsticks
Once your yeast is frothy, it’s time to add the flour and salt right into that same bowl. Start mixing it all up with a spoon or your hands until it’s just a shaggy, kinda messy dough. Don’t overthink it! Now, turn that dough out onto a lightly floured surface. Get ready to knead! You’ll want to work it for about 5 to 7 minutes. Push, fold, turn – repeat! You’re aiming for a dough that feels smooth and elastic, like it’s got a good spring to it. If it feels a *little* sticky, just add a tiny bit more flour, but go easy!
The First Rise: Allowing Your Dough to Double
Now, find a lightly oiled bowl. Plop your kneaded dough in there and give it a little roll so the whole thing is coated in oil. Pop a lid or some plastic wrap over the bowl and find a nice warm spot in your kitchen. Let it rest and rise for about an hour, or until it’s basically doubled in size. It’s like watching a little bit of baking magic happen right before your eyes!

Shaping Your Delicious Garlic Breadsticks
Okay, dough’s risen? Awesome! Gently punch it down to release all that air. Now, divide the dough into about 8 to 10 equal pieces. You just want them to be about the same size so they bake evenly. Take each piece and gently roll it out into a long rope, about 10 to 12 inches long. Think of a relaxed, slightly wiggly rope, not a super tight string. These will become our delicious garlic breadsticks – so exciting!
The Second Rise and Oven Preparation
Lay your shaped breadsticks onto a baking sheet that’s lined with parchment paper. This is a lifesaver for cleanup, trust me. Cover them loosely with plastic wrap or a clean kitchen towel. Let them take another little nap for about 30 minutes. While they’re doing their second rise, go ahead and preheat your oven to 375°F (190°C). It’s important to get that oven nice and hot!
Baking to Golden Perfection
Once they’ve had their second rise, it’s time for the oven! Pop those breadsticks in and bake them for about 12 to 15 minutes. You’re looking for them to be beautifully golden brown. Keep an eye on them in the last few minutes, as ovens can be a little sassy. If they look done, they probably are!
Crafting the Buttery Garlic Topping
While those beauties are baking, let’s get that glorious topping ready. In a small bowl, mix together your melted butter, that finely minced fresh garlic, and your chopped parsley. If you’re feeling fancy and using the Parmesan cheese, stir that in too. Give it all a good whisk until it’s combined. The kitchen should be starting to smell amazing right about now!
Finishing Touches: Brushing with Garlic Butter
This is the BEST part, hands down! As SOON as the breadsticks come out of the oven, grab that amazing garlic butter mixture. Brush it generously all over the hot breadsticks. You want them to be nice and coated! Doing this while they’re still warm lets all that deliciousness soak right in. It’s the secret to seriously irresistible, soft, buttery garlic breadsticks. You can even try some other bread ideas here too!
Tips for Achieving Soft Buttery Garlic Breadstick Perfection
You know, making amazing bread isn’t just about following a recipe. It’s really about a few little tricks that make all the difference between “good” and “OMG, I NEEEED MORE!” for these soft, buttery garlic breadsticks. Here are my go-to tips to make sure yours turn out absolutely perfect every single time!
- Ingredient Love: Use good quality ingredients! Fresh yeast makes a difference, and real unsalted butter is a must for that rich flavor. Seriously, don’t skimp on the butter for brushing – it’s worth every calorie!
- Dough Handling is Key: When you’re kneading, don’t overdo it. Just knead until it’s smooth and elastic like the instructions say. Too much kneading can make them tough. Also, gentle with that dough when you’re shaping! Rough handling can deflate all those lovely air bubbles we worked so hard to create.
- Warmth is Your Friend: Your dough needs a cozy place to rise. Forget the cold kitchen counter if it’s chilly. I sometimes pop my bowl in a slightly warmed (and turned off!) oven, or even near a sunny window. That warmth is crucial for a good rise, making them super soft.
- Oven Smarts: Ovens can be quirky! Keep an eye on your breadsticks, especially towards the end of baking. They can go from golden to burnt really fast. If your oven tends to have hot spots, try rotating the baking sheet halfway through. Also, remember that parchment paper is your best friend for easy lifting and less sticking! You can check out other bread ideas that use similar techniques!
- The Garlic Butter Magic: Brush on that garlic butter *immediately* after they come out of the oven. The residual heat will help it melt and soak in, making every bite incredibly flavorful and, of course, buttery. Don’t be shy with that brush!
Ingredient Notes and Substitutions for Your Garlic Breadsticks
You know, sometimes folks ask if they can make little tweaks, and honestly, I love that! For these soft, buttery garlic breadsticks, most ingredients are pretty straightforward. If you’re out of active dry yeast, instant yeast usually works too, just toss it right in with the flour – no need to “proof” it first. As for flour, all-purpose is my go-to for that perfect chew, but if you’re feeling adventurous, a bread flour could give you an even chewier texture. And hey, if fresh parsley isn’t in your fridge, a little dried parsley works in a pinch, just use about a third of the amount!
Serving and Storing Your Delicious Garlic Breadsticks
Okay, so you’ve made these absolutely divine, soft, buttery garlic breadsticks! Now what? Well, the moment they come out of the oven, slathered in that garlicky goodness, is honestly the best time to enjoy them. They are *phenomenal* served warm, maybe with a big bowl of marinara sauce – you can find an amazing recipe for homemade marinara right here! They also make the perfect sidekick to pretty much any Italian meal, or honestly, just for snacking anytime. If you happen to have any leftovers (which is rare in my house!), store them in an airtight container at room temperature for about a day. To reheat, just pop them in a warm oven for a few minutes until they’re soft and cozy again.
Frequently Asked Questions About Soft Buttery Garlic Breadsticks
Got questions about these delicious garlic breadsticks? I’ve got answers! People often ask me a few things about making them just right, so let’s dive in.
Can I make these soft buttery garlic breadsticks ahead of time?
You’re in luck! Yes, you can totally make the dough ahead of time. After the first rise, just pop the oiled bowl of dough into the fridge. It can hang out there for up to 24 hours. When you’re ready to bake, let it sit at room temperature for about 30 minutes to an hour before shaping and proceeding with the recipe as usual. Just remember they might need a little extra time to bake if they’re coming straight from the fridge!
What if my dough isn’t rising? What do I do?
Oh no, the dreaded non-rising dough! Don’t fret. First, double-check that your yeast wasn’t expired and that your water was the right warm temperature – too hot or too cold can kill the yeast. If it’s a chilly day, your dough might just need a warmer spot. Try putting it in a slightly warmed (and then turned off!) oven or near a sunny window. Sometimes it just takes a little longer! If all else fails, it might be time for some fresh yeast.
Can I use different herbs or spices in the garlic butter?
Absolutely! That’s the beauty of homemade. While I adore the classic garlic and parsley combo for that soft, buttery magic, feel free to mix it up. A pinch of dried oregano or a little bit of finely chopped chives would be delicious. Some people even love a tiny pinch of red pepper flakes for a little kick. Just remember fresh herbs are generally more potent than dried, so use less dried if that’s what you have!
How can I get my breadsticks extra soft and buttery?
The key to extra soft and buttery breadsticks is really in two places: the dough itself and that glorious garlic butter brushing! Make sure you don’t over-flour when kneading – the dough should be soft and a little tacky, not stiff. Also, for the brushing, don’t be shy! Brush on that melted butter generously right after they come out of the oven. The heat will help it soak in beautifully, making every bite pure buttery perfection.
Estimated Nutritional Information
Alright, friends, let’s talk about what you’re getting with these amazing soft, buttery garlic breadsticks! Keep in mind, these numbers are estimates (since every kitchen and ingredient brand is a little different, you know!). This is based on roughly 1 breadstick, and honestly, who can eat just one?
- Serving Size: 1 breadstick
- Calories: About 180
- Fat: Around 7g
- Saturated Fat: About 4g
- Carbohydrates: Roughly 25g
- Protein: Near 4g
- Sodium: Approximately 250mg
- Sugar: Just about 2g
So, enjoy them knowing they’re delicious *and* not totally over the top. They’re perfect for sharing… or not!
Print
Soft Buttery Garlic Breadsticks
- Total Time: 1 hour 35 minutes
- Yield: 8-10 breadsticks 1x
- Diet: Vegetarian
Description
Easy recipe for soft, buttery, and flavorful garlic breadsticks.
Ingredients
- 1 cup warm water (105-115°F)
- 2 ¼ teaspoons active dry yeast
- 1 teaspoon sugar
- 3 ½ cups all-purpose flour, plus more for dusting
- 1 teaspoon salt
- ¼ cup unsalted butter, melted, plus more for brushing
- 2 cloves garlic, minced
- 1 tablespoon chopped fresh parsley
- 1 tablespoon grated Parmesan cheese (optional)
Instructions
- In a large bowl, combine warm water, yeast, and sugar. Let stand for 5-10 minutes until foamy.
- Add flour and salt to the yeast mixture. Mix until a shaggy dough forms.
- Turn dough out onto a lightly floured surface and knead for 5-7 minutes until smooth and elastic.
- Place dough in a lightly oiled bowl, cover, and let rise in a warm place for 1 hour, or until doubled in size.
- Punch down dough and divide into 8-10 equal pieces. Roll each piece into a rope about 10-12 inches long.
- Place breadsticks on a baking sheet lined with parchment paper. Cover and let rise for 30 minutes.
- Preheat oven to 375°F (190°C).
- Bake for 12-15 minutes, or until golden brown.
- While breadsticks are baking, mix melted butter, minced garlic, parsley, and Parmesan cheese (if using).
- Brush the warm breadsticks generously with the garlic butter mixture immediately after removing them from the oven.
Notes
- For extra flavor, you can add a pinch of red pepper flakes to the garlic butter.
- Serve warm with your favorite marinara sauce or as a side to any meal.
- Prep Time: 20 minutes
- Cook Time: 15 minutes
- Category: Appetizer
- Method: Baking
- Cuisine: American
Nutrition
- Serving Size: 1 breadstick
- Calories: 180
- Sugar: 2g
- Sodium: 250mg
- Fat: 7g
- Saturated Fat: 4g
- Unsaturated Fat: 3g
- Trans Fat: 0g
- Carbohydrates: 25g
- Fiber: 1g
- Protein: 4g
- Cholesterol: 15mg
Keywords: garlic breadsticks, soft breadsticks, buttery breadsticks, easy breadsticks, homemade breadsticks, appetizer recipe