
Oh my goodness, have you ever presented a dessert that looked stunning but felt like it was missing that little *spark*? I know I have! I once made this absolutely gorgeous chocolate mousse, and it looked so sad. Seriously, people asked if I forgot the topping! Then I remembered the secret weapon: perfect **curled chocolate shavings**. Trust me, adding those delicate ribbons instantly takes your homemade treat from ‘nice attempt’ to ‘look what I bought at the fancy bakery!’
I’m going to show you the absolute easiest way to make these decorations. Forget those expensive store-bought tubs. My method using dark chocolate means you, yes YOU, can whip up beautiful, airy chocolate curls in under ten minutes. It requires almost nothing, and I promise, even if you usually struggle with chocolate work, these are foolproof.
Why You Need Perfect Curled Chocolate Shavings for Your Desserts
Seriously, why bother making a gorgeous dessert if you don’t give it the finishing touch it deserves? These little bits of chocolate aren’t just decoration; they are a requirement! They elevate everything. Suddenly, that simple bowl of pudding looks like it belongs in a magazine shoot.
The magic of using crisp **curled chocolate shavings** is how they transform the whole experience. They give you three huge payoffs:
- They add undeniable visual appeal—that beautiful texture is just so inviting!
- You get an instant professional finish, making it look like you spent hours slaving away when really, it took five minutes.
- They are incredibly versatile. You can use them on everything from ice cream to pie crusts.
The Role of Texture and Appearance in Dessert Presentation
Think about eating a slice of soft cheesecake or a creamy tart. What’s missing? That delightful *snap*. When you sprinkle on perfectly formed chocolate curls, you introduce a crisp texture that plays against the soft base. It makes the whole bite more interesting, don’t you think?
I learned early on that the better the chocolate, the better the curls. If the chocolate is cheap, the texture is waxy, and your **curled chocolate shavings** will look dull. We want that rich, slight sheen only high-quality chocolate can give. It makes all the difference!

Essential Ingredients for Making Curled Chocolate Shavings
Okay, get ready, because this is where people get nervous, but honestly, it’s the easiest part! You only need one main thing, but that one thing has to be good. We aren’t playing around with substitutes here, nope!
For this whole process, you are going to need about 100 grams of dark chocolate. Just one block! I always splurge a little on the chocolate here because if the base quality isn’t right, your final **curled chocolate shavings** will taste…meh. I aim for something around 60% or 70% cocoa content if I can find it in bar form.
Ingredient Notes and Quality Selection
This is non-negotiable for me: stick to good quality dark chocolate. It has the right snap and fat content to peel nicely without crumbling into dust. If the chocolate has too many stabilizers or waxes in it, it won’t set right on the surface.
While the chocolate is the star, your background element matters too! You need a flat surface that is cool—but crucially, not cold—room temperature. If you put warm melted chocolate directly onto a frozen marble slab, it seizes up instantly, and you’ll get shards, not pretty curls. We want the chocolate to set slowly enough that it stays pliable for scraping. That slight give is what allows you to get those gorgeous, intact **curled chocolate shavings**.
Equipment Needed to Achieve Beautiful Curled Chocolate Shavings
The best part about decorating with these gorgeous **curled chocolate shavings**? You don’t need any fancy pastry tools! Seriously, raid your kitchen drawers. I find that the simpler the tools, the better my results are, because I’m not messing around with complicated contraptions.
You’re only going to need three things to get started. It’s honestly so easy, you’ll wonder why you ever bought them pre-made:
- A flat, room-temperature setting surface—parchment paper on a cool counter works great for me!
- A vegetable peeler. Yes, the one you use for potatoes! Or, if you have a very steady hand, a sharp paring knife.
- A small offset spatula or bench scraper to help you gather them up later.
See? Preparation is so simple you can get this done while your chocolate is cooling down just a touch. It proves you don’t need a professional kitchen to create professional-looking garnishes!
Step-by-Step Guide to Creating Flawless Curled Chocolate Shavings
Alright, this is the main event! We’ve got our ingredients, we’ve got our tools, and now we turn that humble bar of chocolate into elegant décor. Don’t rush this part; the magic is all in the timing between melted and solid. If you’re making decorations for something special, like that amazing milkshake we talked about in this recipe, you want these curls to look perfect.
Melting and Spreading the Chocolate for Curled Chocolate Shavings
First things first, chop that chocolate up. You want small, sort of even pieces. This helps everything melt smoothly. I melt mine slowly over a double boiler—I just set a glass bowl over a pot of barely simmering water. If you’re using the microwave, remember: short bursts only! We are aiming for silky smooth, not scorched, chocolate. Overheating is the death of good **curled chocolate shavings**!
Once it’s totally smooth, it’s time to spread. Take your parchment paper or your clean, cool countertop and pour the melted chocolate right onto it. Now, using an offset spatula or the back of a spoon, spread it out thin—and I mean thin! Aim for about an eighth of an inch thick. We want a nice, even layer so it sets uniformly. Remember that surface temperature we talked about? If your counter feels cold but not frosty, you’re in the sweet spot.
The Technique for Scraping Perfect Curled Chocolate Shavings
This is where patience pays off. You have to wait! The chocolate can’t be runny, but it absolutely cannot be rock hard either. It needs that slight resistance, that little bit of pliability. If you touch it and it feels firm but leaves a faint smudge on your finger, you’re ready to scrape.
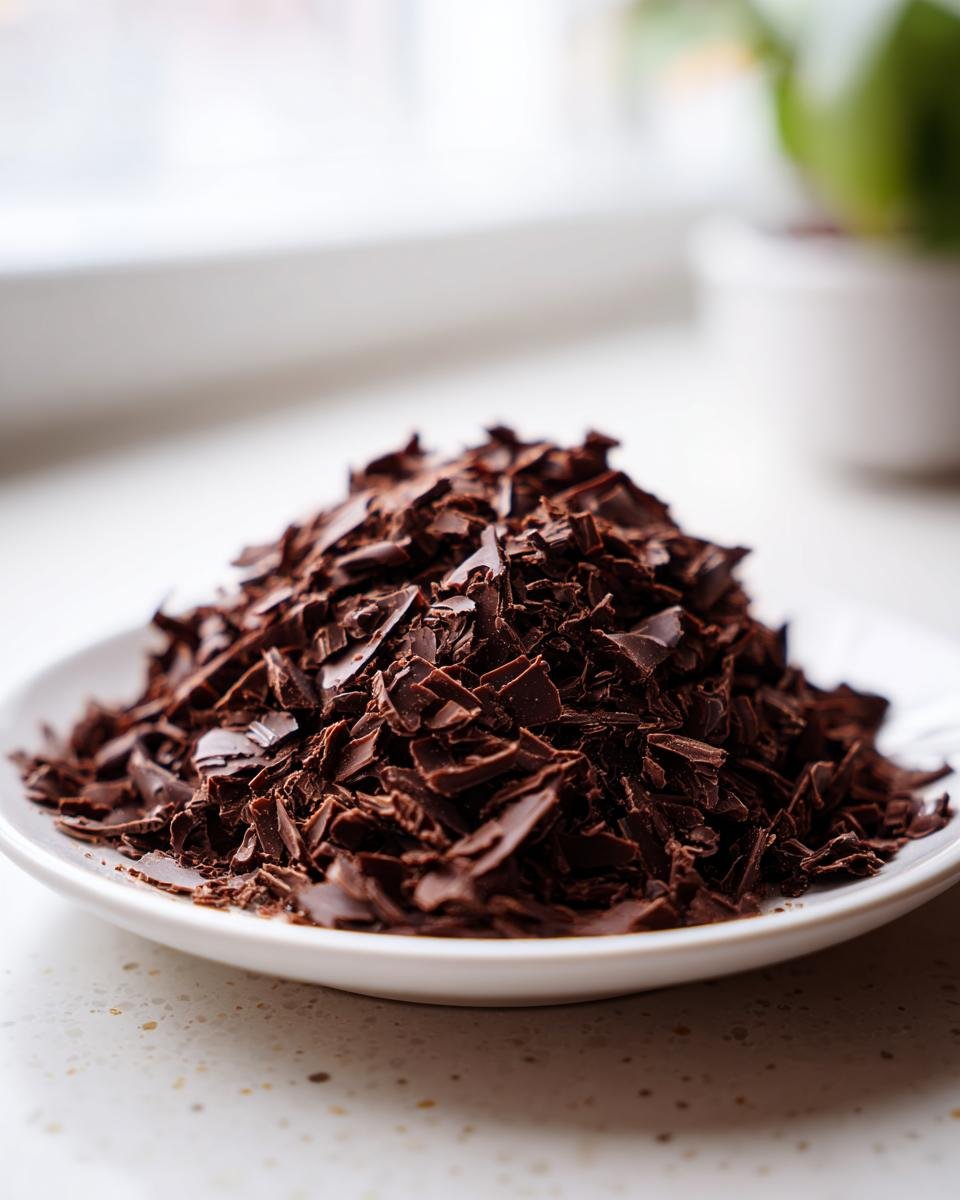
Grab your vegetable peeler. Hold it at a very shallow angle, almost parallel to the chocolate surface. You aren’t trying to carve deep; you are just grazing the surface ever so slightly. Push the peeler forward firmly. As the chocolate scrapes off, the friction and the angle cause it to spontaneously lift up into a perfect, delicate curl. If the chocolate is too hard, it will break off into flakes—just gently warm the surface underneath with your hand for a moment and try again.
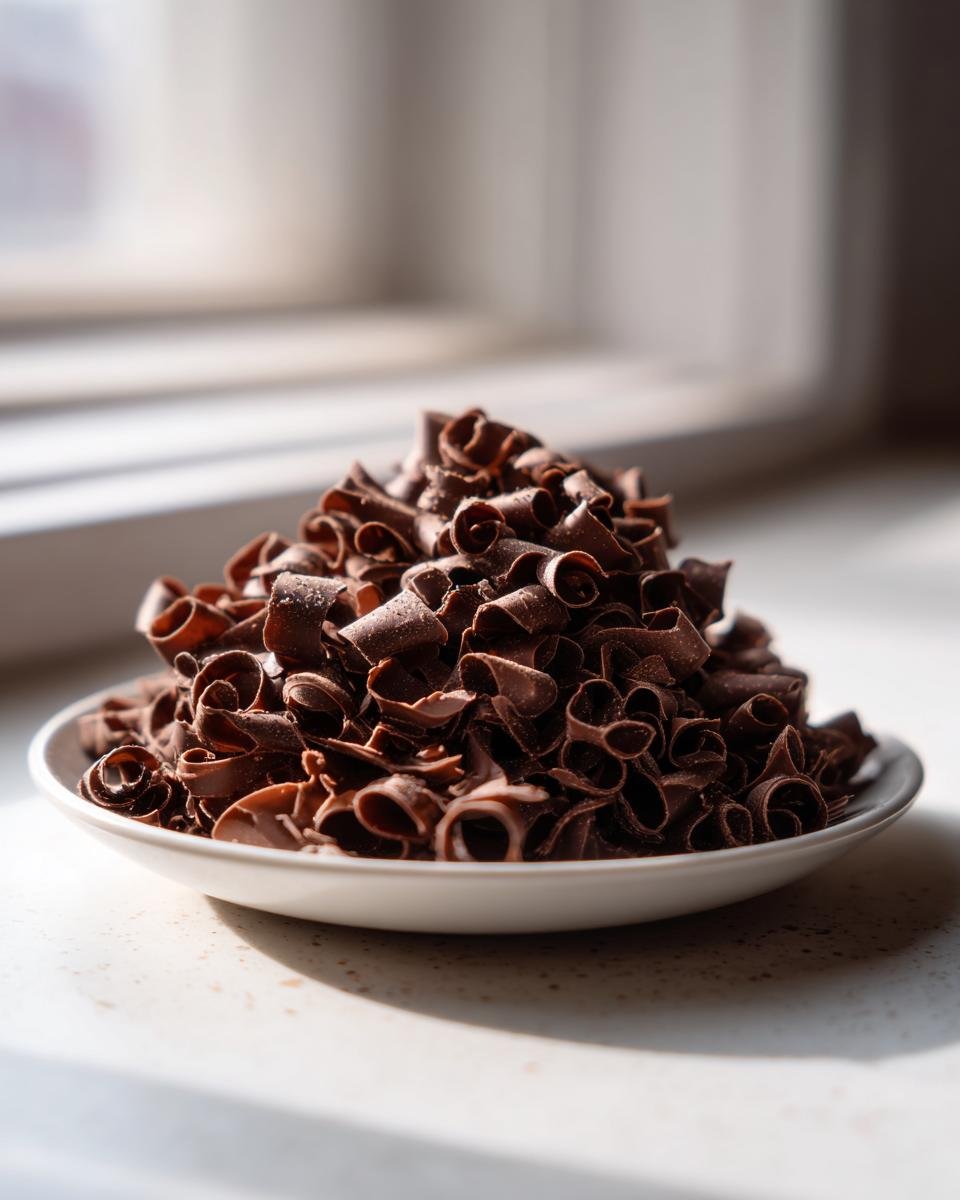
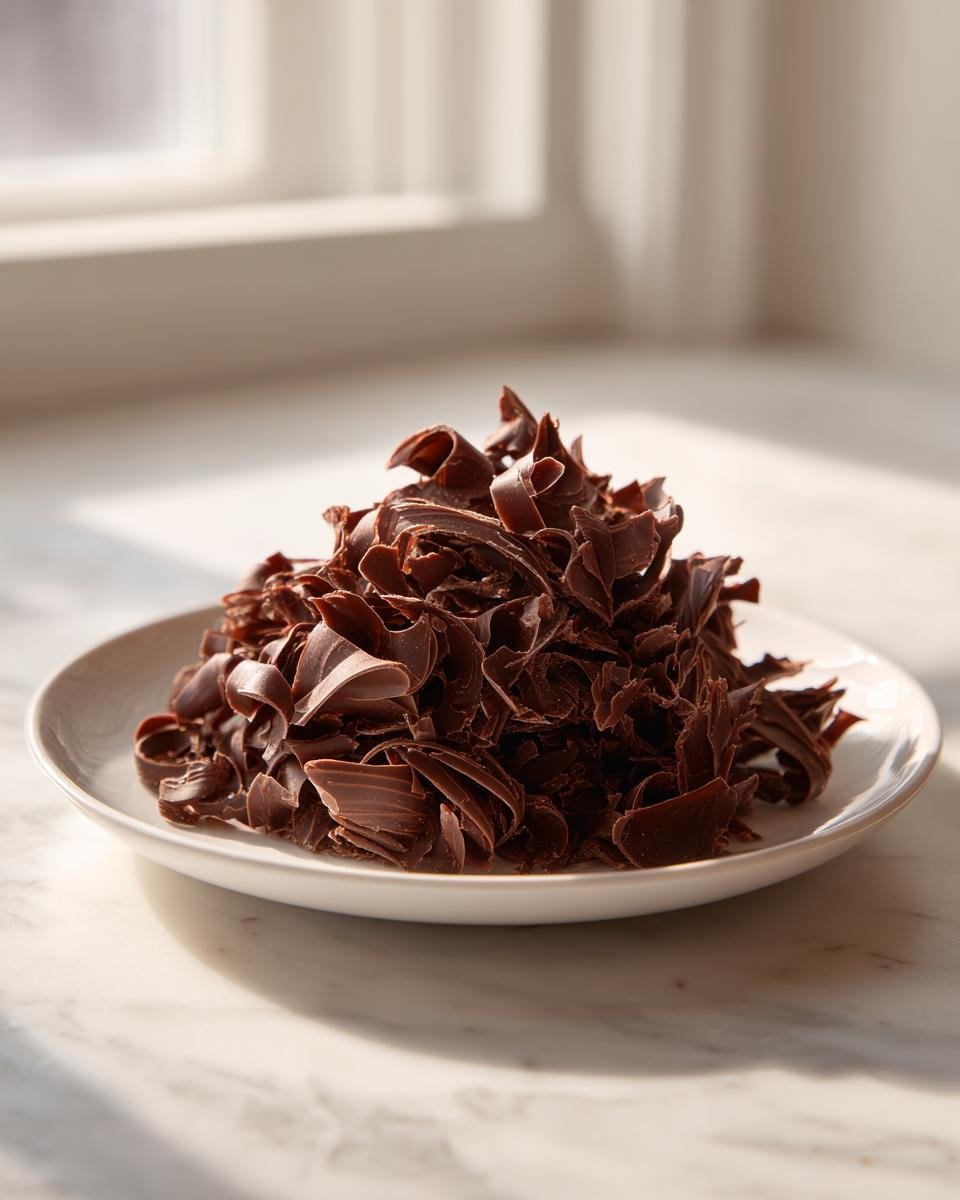
If you see it snapping instead of coiling, you waited too long! If it’s mushy and gloppy, give it another minute to cool down. Once you get a few nice ribbons, gently gather them up with your spatula. Don’t press them down, or they’ll flatten out. We want airy, beautiful structures for our final **curled chocolate shavings**!
Tips for Success When Making Curled Chocolate Shavings
I’ve messed up batches of these **curled chocolate shavings** more times than I care to admit when I was learning! Luckily, Grandma taught me that details are everything, especially when dealing with something as temperature-sensitive as chocolate. Listen to these quick tips, and you’ll save yourself a headache.
First off, always use high-quality chocolate. I can’t stress this enough. If you use cheap stuff, the texture will be waxy, and your curls won’t set properly. Stick to a good bar for the best possible flavor when they melt in your mouth.
You absolutely must keep the chocolate cool while you are working on the scraping phase. If your hands are warm or the kitchen is too hot, the curls start softening immediately. If you notice them wilting, pop the whole surface into the fridge for just a minute or two to firm everything up before you try scraping again. A warm kitchen in the summer is the arch-nemesis of perfect chocolate garnish!
Also, don’t forget that if you are worried about sticking, a little parchment paper goes a long way! If the chocolate decides it wants to hold on for dear life to the counter, you can often gently warm the *back* of the parchment paper with your warm hands just under the chocolate—that tiny heat transfer helps release them without warming the chocolate on top. This trick is a lifesaver when you’re trying to get those last few perfect bits for your ultimate chocolate masterpiece!
Storage and Keeping Your Curled Chocolate Shavings Fresh
So, you’ve made a beautiful batch of **curled chocolate shavings**! Now we have to protect them. They are delicate little things, and they absolutely cannot take an accidental heat surge. If you leave them out on the counter, they will quickly go soft and merge into one sad puddle of chocolate. We don’t want that disaster!
The key here is airtight and cool. Pop those curls gently into a container with a tight lid right away. Use something sturdy, maybe even line the bottom with a tiny piece of waxed paper just so they don’t shift too much. Keep them in a cool, dry pantry or inside the fridge if your house is really warm. Just remember, if you fridge them, let them warm up just a tiny bit before you use them, otherwise, they might stick together!
Variations on Curled Chocolate Shavings: White and Milk Chocolate
Everyone assumes we are only talking about dark chocolate here, but nope! These techniques work beautifully for milk chocolate and even white chocolate, though you need to treat them a tiny bit differently. Because milk and white chocolates have higher sugar and milk solids, they are often softer than dark chocolate.
When you are working on getting those perfect **curled chocolate shavings** with milk chocolate, let it set just a touch longer. It might take an extra minute or two on the counter because it won’t firm up as quickly as the 70% stuff. White chocolate is the trickiest! It’s very soft, so you might need to chill your spread chocolate for a few minutes—but be careful not to let it get too hard, or it’ll just snap! It’s great for topping things like a rich chocolate mug cake for a softer visual effect.
Serving Suggestions for Your Homemade Curled Chocolate Shavings
Now that you have these gorgeous piles of **curled chocolate shavings**, what on earth do you do with them? Don’t just stare! These work on almost anything that needs a little textural lift. I’m obsessed with sprinkling them over a rich, dark chocolate olive oil cake—that recipe really lets the chocolate flavor shine through, and the curls add that perfect finish.
They are wonderful piled high on top of vanilla ice cream, of course, or floating lightly on top of a homemade hot cocoa. For a really fancy presentation, use them to dust the edges of a tart shell before you fill it, or gently press a few against the sides of a layered cake for decoration. They are so light; they truly look like soft shavings of dark wood confetti!
If you haven’t tried a slice of moist chocolate olive oil cake yet, I highly recommend making one just so you have the perfect canvas to show off these homemade decorations!
Frequently Asked Questions About Curled Chocolate Shavings
I get asked all the time about the best ways to handle these decorations, so I thought I’d address the most common things folks run into when making their own **chocolate curls** and garnish.
Can I make Curled Chocolate Shavings ahead of time?
Absolutely, you can! That’s half the fun! Just like I mentioned before, the key is protection. Once you’ve got your beautiful **curled chocolate shavings**, you need to seal them up tight in an airtight container. If your kitchen is warm, pop them in the fridge. But if you keep them super cool and dry, they’ll last for weeks. Just try not to stack them too heavily, or the ones on the bottom might get slightly squished.
Why are my chocolate pieces breaking instead of curling?
This is almost always a temperature and pliability issue, trust me! If your chocolate is breaking into hard, sharp shards, that means it set up too fast and got too brittle. You need that sweet spot where the chocolate is firm enough to hold its shape but still slightly soft to the touch. If it’s too hard, gently warm the surface underneath it for just a few seconds—a little heat goes a long way to getting those satisfying coils!
What is the best surface for spreading chocolate to make curls?
Oh, this is good! People rave about marble slabs, and yeah, they work fantastically because they wick heat away evenly. But honestly, my favorite surface for making the best **chocolate curls** is simple parchment paper placed right on a cool, sturdy countertop. Why? Because when the chocolate is ready to scrape, you can gently lift the parchment paper instead of trying to pry the chocolate off the counter. It makes gathering the finished garnish so much easier and keeps them looking pristine!
What to Do Next with Your Chocolate Decorations
Whew! We did it! You now have a beautiful supply of homemade **curled chocolate shavings** just begging to be spooned over something delicious. I really hope you get a chance to try this out this week. It’s such a simple victory in the kitchen, and that little feeling of accomplishment when you see those perfect ribbons makes all five minutes of effort worth it!
Don’t just let them sit around in that airtight container, though! Grab a batch and go decorate something right now. Dust those **chocolate curls** over your morning yogurt, or—even better—make that amazing chocolate olive oil cake we talked about because those curls truly shine as a garnish on moist chocolate olive oil cake. Go see what happens when you take your best dessert and give it the gorgeous, professional finish it deserves!
I want to hear all about your results! Did they curl perfectly? What dessert did you use them on first? Drop a comment down below and let me know your success story (or even what challenges you ran into—we can solve them together!). And hey, if you loved how easy this was, give the post a quick rating so other home bakers know they can master this too!
Print
Simple Curled Chocolate Shavings
- Total Time: 10 min
- Yield: Enough for one cake decoration 1x
- Diet: Vegetarian
Description
A guide to making basic chocolate curls for decorating desserts.
Ingredients
- 100 g dark chocolate
Instructions
- Chop the chocolate into small, even pieces.
- Melt the chocolate slowly over a double boiler or in short bursts in the microwave until smooth. Do not overheat.
- Spread the melted chocolate thinly and evenly onto a flat, room-temperature surface, such as a marble slab or a sheet of parchment paper placed on a cool counter. The layer should be about 1/8 inch thick.
- Allow the chocolate to set slightly until it is firm but not completely hard (it should still be slightly pliable).
- Use a vegetable peeler or a sharp knife held at a low angle to scrape across the surface of the chocolate, creating curls.
- If the chocolate is too hard, warm the surface slightly. If it is too soft, let it cool more.
- Gather the curls gently and store them in an airtight container.
Notes
- Use high-quality chocolate for the best flavor and texture.
- Keep the chocolate cool while working to maintain the curl shape.
- If using parchment paper, you can gently warm the back of the paper with your hands to help the chocolate release.
- Prep Time: 5 min
- Cook Time: 5 min
- Category: Baking Component
- Method: Spreading and Scraping
- Cuisine: General
Nutrition
- Serving Size: 10 g
- Calories: 550
- Sugar: 25
- Sodium: 5
- Fat: 38
- Saturated Fat: 23
- Unsaturated Fat: 15
- Trans Fat: 0
- Carbohydrates: 50
- Fiber: 5
- Protein: 6
- Cholesterol: 10
Keywords: chocolate curls, chocolate shavings, garnish, dessert decoration, dark chocolate