
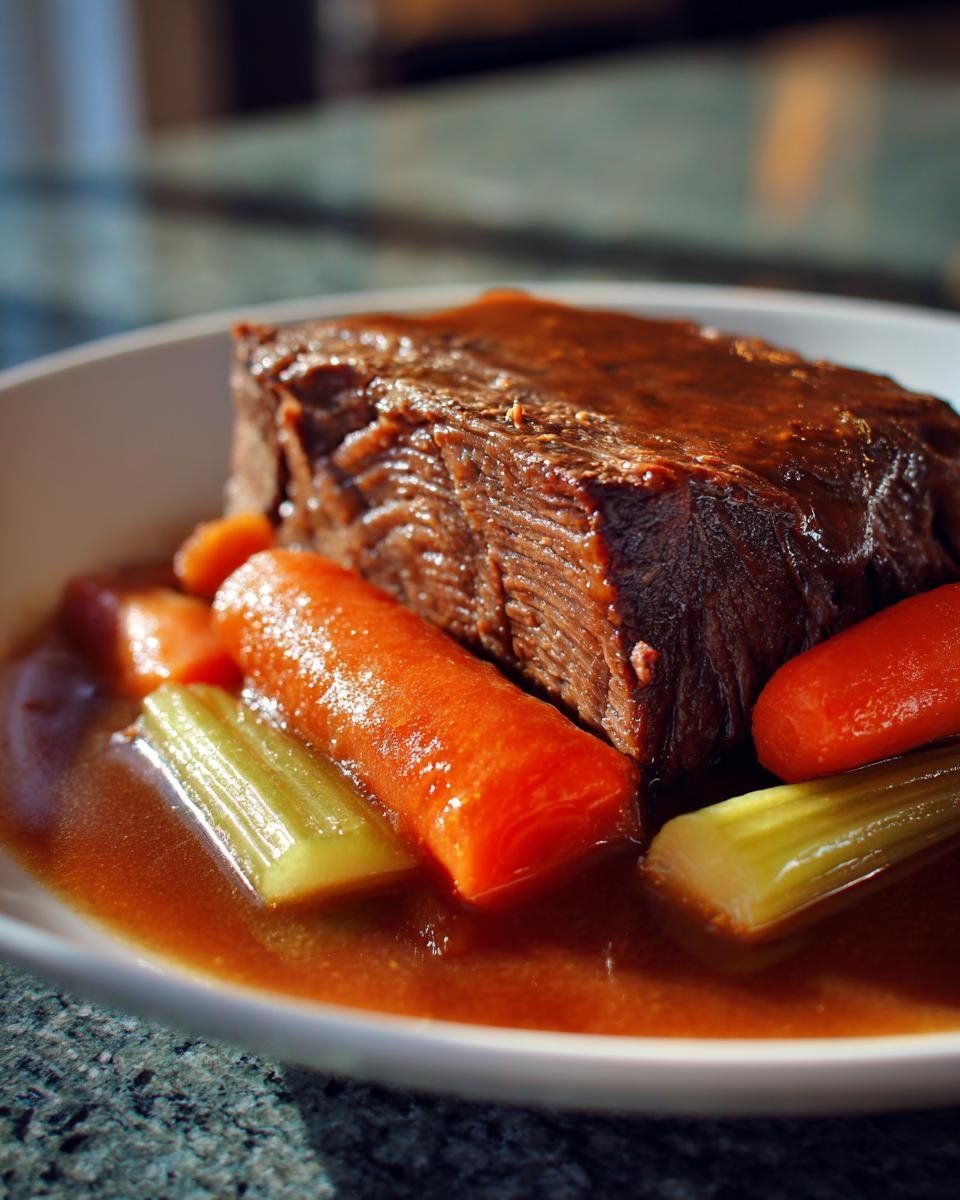
Listen, when the weather turns chilly, nothing—and I mean *nothing*—hits the spot quite like a deep, savory hug in a bowl. That’s what my **Classic Pot Roast** is. Forget those dry, stringy roasts you might have endured; we are going for melt-in-your-mouth perfection here. It took me years of trial and error (and way too much beef broth down the drain!) to nail the technique for getting meat this tender in the oven, but wow, did I figure it out.
This slow-cooked wonder is everything comfort food promises to be: easy to assemble but deeply flavorful. Seriously, you just brown it, dump in the basics, and let time do the heavy lifting. My goal today is to finally share the most reliable, can’t-mess-it-up **Classic Pot Roast** recipe that my family now demands every single month. Get ready for happy sighs around your dinner table!
Why This Classic Pot Roast Recipe Stands Out
Okay, so you’ve tried pot roast before and ended up with shoe leather, right? I’ve been there, promise. But this recipe? It’s different. It’s forgiving, which is what I love most about it.
- The sear on the chuck roast locks in unbelievable flavor that lasts all four hours.
- It’s virtually foolproof, even if you’re new to braising!
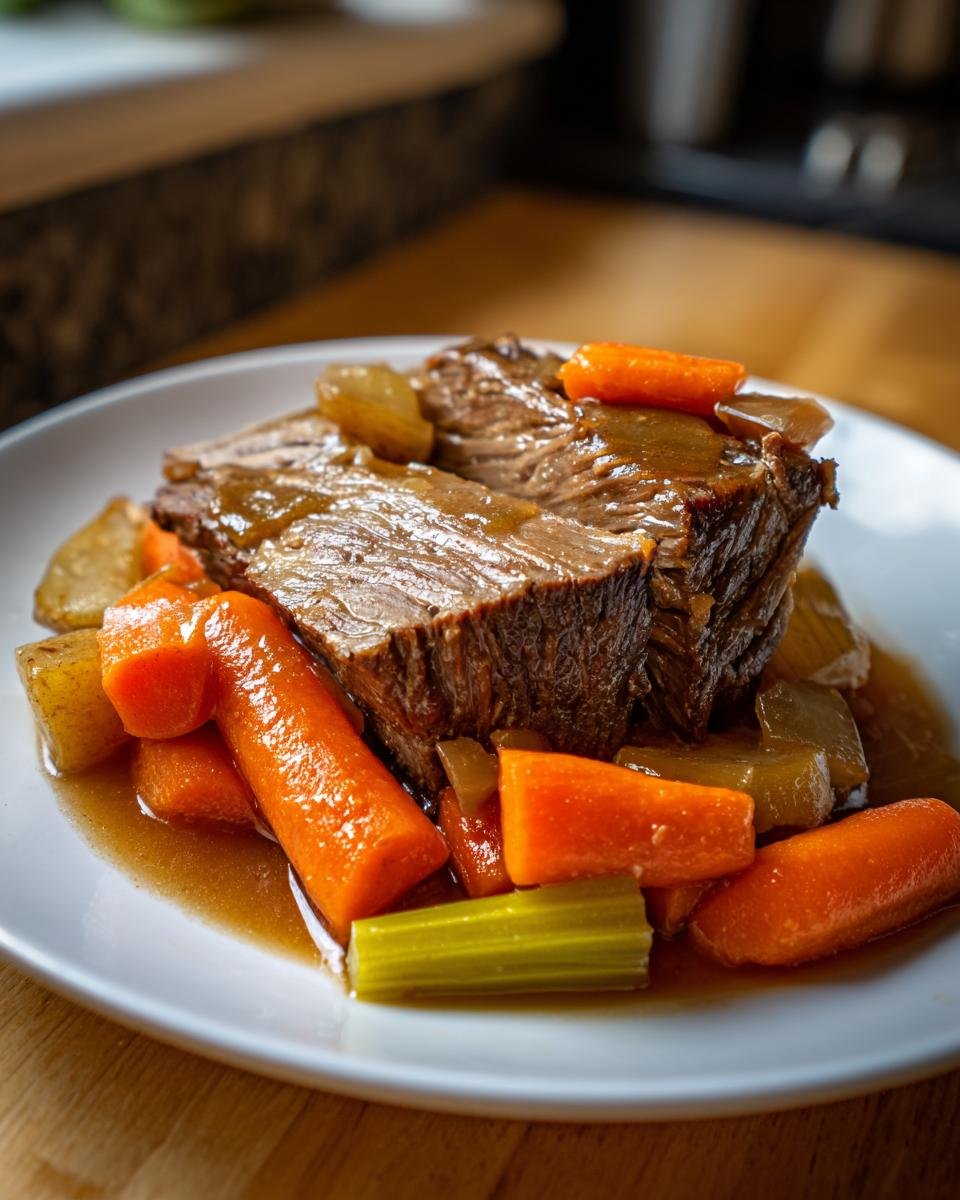
- The vegetables cook right with the beef, soaking up all that savory broth goodness.
- It’s the ultimate make-ahead meal because it’s honestly better the next day.
If you want truly fork-tender meat every single time, you have to check out my method. It’s so easy, it almost feels like cheating—you can get fantastic results just like the ones I get when I make my slow cooker beef stroganoff!
Essential Ingredients for Your Classic Pot Roast
You only need a handful of things, which is why I love this recipe so much. It lets simple, good ingredients shine, really. You don’t need fancy specialty herbs or a dozen different vegetables to make this magic happen.
First thing’s first: the meat. You absolutely must grab a 3 lb beef chuck roast. This cut might seem tough, but trust me, after hours of low, slow heat, it just falls apart beautifully. That marbling is what gives you that incredible texture in the end. For those worried about finding the right cut, always look for good marbling; forget the dry sirloin cuts! If you liked my thoughts on sirloin tip roast, remember that chuck is king for pot roast.
Then we keep things classic:
- 2 tablespoons of olive oil – for that important first sear!
- 1 large onion, just roughly chopped—no fussy dicing needed.
- 3 carrots, cut into nice, hearty 1-inch chunks.
- 3 celery stalks, also in 1-inch chunks—they bring essential background flavor.
- 4 cups of beef broth—use the best quality you can find, it’s the sauce base!
- 1 teaspoon of dried thyme and 1 single bay leaf for that warm, earthy note.
- And of course, plenty of salt and black pepper for seasoning. That’s it!
Step-by-Step Instructions for the Perfect Classic Pot Roast
This is where the magic really starts, but don’t panic! It looks like a lot of steps, but honestly, it’s just layering flavors. The key to a fantastic **Classic Pot Roast** isn’t rushing; it’s all about what you do *before* it even goes into the oven. We’re going to build up that deep, restaurant-quality base right in the pot.
Remember, we’re using the stove first, then the oven. Make sure your Dutch oven is good and heavy—it handles heat so much better than flimsy pots!
Preparing and Searing the Beef for the Classic Pot Roast
First things first: season that chuck roast like you mean it! Don’t be shy with the salt and pepper; this is the main flavor layer. Get your olive oil screaming hot in that Dutch oven—medium-high heat. You want the pan hot enough that the oil shimmers a little. Carefully nestle that seasoned beef in there and let it sit! We’re searing for about 3 to 4 minutes per side. This deep brown crust is crucial; it’s where all that amazing, hearty roast flavor comes from. Don’t poke it while it’s searing, or you won’t get that perfect crust for your **Classic Pot Roast**.

Building the Braising Liquid and Oven Timing
Once the roast is beautifully browned on all sides, pull it out onto a plate. Now, toss in your chopped onion, carrots, and celery right into that flavorful oil left behind. Cook those veggies for about five minutes until they start smelling sweet. Return the beef to the pot, then pour in all four cups of beef broth. Toss in your thyme and that single bay leaf. Bring it just to a gentle simmer on the stovetop, cover it tightly, and march that whole pot straight into an oven preheated to 325°F (160°C).
Now, just walk away! You need to let it brave the heat for a good 3 to 4 hours. Seriously, set a timer. That low temperature is what breaks down the connective tissue, making this arguably the most tender **Classic Pot Roast** you will ever have. Don’t lift that lid! If you feel like experimenting, you can always try adding some wine during this part, just like in a good slow cooker Italian beef might.
Tips for Success When Making Classic Pot Roast
After all those hours in the oven, the last thing you want is to ruin the tenderness right at the finish line! The biggest rookie move people make with a **Classic Pot Roast** is taking it out too soon or skipping the rest time. That 3-to-4-hour window is non-negotiable if you want that fork-tender result.
When you think it’s done, poke it gently with a fork. If the meat shreds easily without any tugging, it’s ready to come out. If it fights back, tuck it back in for another 30 minutes. This patience is everything! Also, make sure your oven temperature is accurate. I keep an oven thermometer handy because fluctuations can totally dry out the outside before the inside melts.
My absolute must-do step, which I never skip even when I’m rushing, is resting. Take the whole pot out, move the roast to a cutting board, and tent it loosely with foil. Let it sit for at least 15 minutes before you even think about slicing or shredding it! This lets those delicious juices redistribute back into the meat. It’s a game changer, just like my trick for juicy slow cooker meatloaf—resting is power!
Gravy Thickening: Making the Most of Your Classic Pot Roast Juices
You’ve made this gorgeous, tender **Classic Pot Roast**, and now you have this amazing, flavorful liquid—the braising broth—at the bottom of your Dutch oven. Don’t just pour that down the sink! That liquid is pure gold. I know sometimes it looks a little thin, but thickening it up into a rich gravy is super simple. You have two excellent options here, depending on how much time you have left.
First, you can go the patient route and reduce it. Just carefully remove all the roast and vegetables, leaving the liquid behind in the pot. Pop that pot back on the stove over medium-high heat without the lid. Let it bubble away, stirring occasionally, until it coats the back of a spoon. It takes about 10 to 15 minutes to really concentrate that beef flavor.
If you’re starving and need gravy *now*, go for the cornstarch slurry. Whisk 2 tablespoons of cornstarch with about 3 tablespoons of cold water until it’s totally smooth—no lumps! Slowly drizzle this slurry into the simmering broth while whisking constantly. It thickens up almost instantly! It’s shockingly fast. It always works like a charm, much like the way I mix my homemade country gravy mix.
Variations on Your Classic Pot Roast
While my basic **Classic Pot Roast** recipe is truly perfection (if I do say so myself!), sometimes you just want to shake things up a little, right? It’s so easy to customize this foundational braise. Think of the braising liquid as a blank canvas for amazing beef flavor!
If you want something a little more woodsy and rustic, swap out that thyme for a couple of sprigs of fresh rosemary and maybe a little bit of sage. Rosemary and beef are best friends, and it adds a wonderful holiday aroma, even if it’s July. You can find great tips on pairing herbs over at my post about rosemary pork chops!
If you want to deepen the sauce flavor and add a little acidity, go ahead and pour in about half a cup of dry red wine right after you clear out the veggies from the pot—let it bubble for two minutes before adding the broth. Oh, and mushrooms! Sliced cremini mushrooms tossed in with your carrots and celery give you such a rich texture. It turns your **Classic Pot Roast** into something really decadent.
Serving Suggestions for Your Tender Classic Pot Roast
So, the meat is resting, the gravy is bubbling, and now we get to the best part: deciding what amazing things to soak up all those juices with! You don’t want anything too fussy here; this is comfort food defined, so the sides need to be simple workhorses.
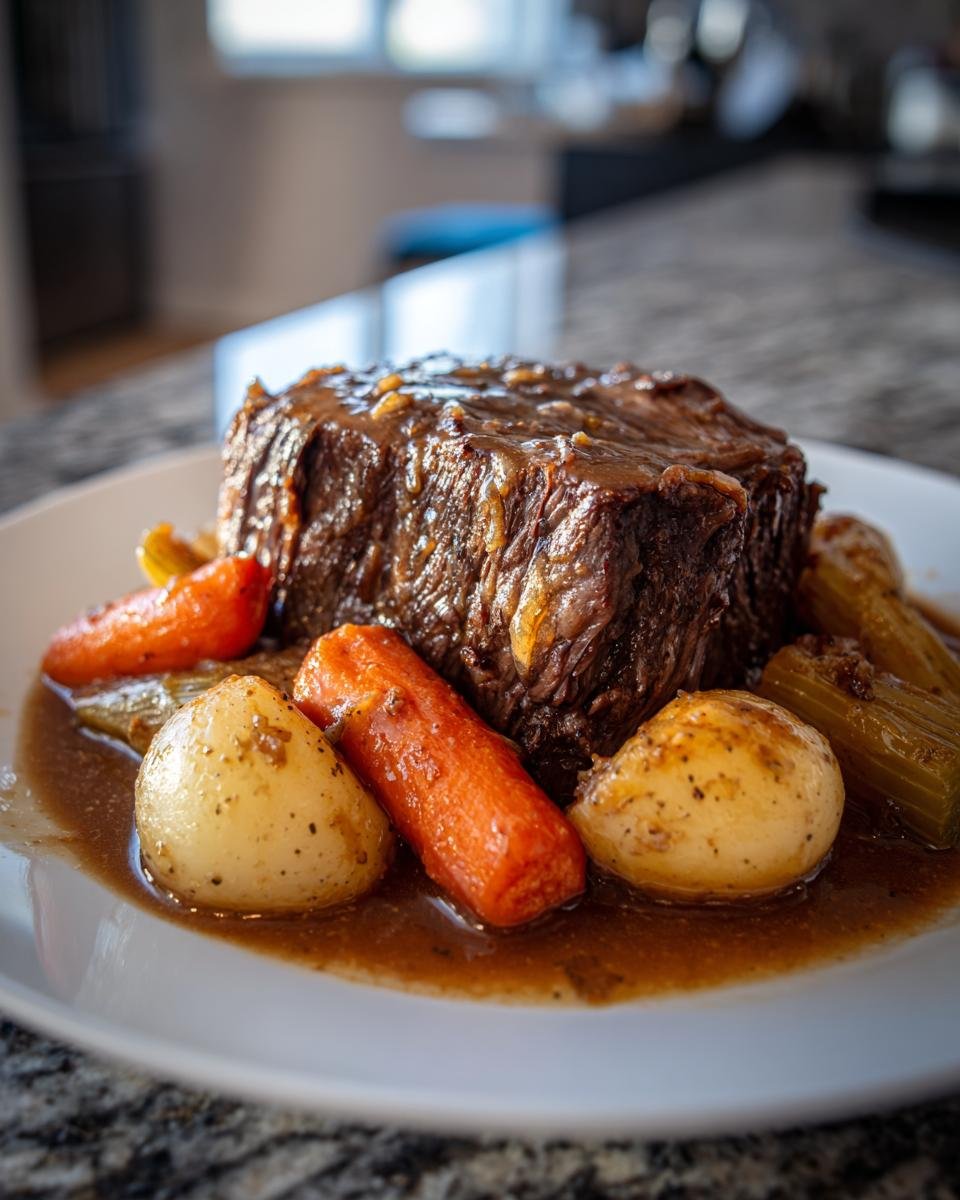
Mashed potatoes are mandatory, of course. They are the ultimate scoop for that rich gravy. I am talking fluffy, buttery mounds, folks. But if potatoes aren’t your jam, I highly recommend some wide egg noodles tossed with a bit of butter. My recipe for roasted garlic potatoes is fantastic if you want to keep that roasted flavor theme going strong.
And please, don’t forget the bread! You need something crusty—maybe even toasted lightly—to mop up every last drop on your plate. A great, crusty piece of sourdough is honestly just as important as the roast itself for a complete **Classic Pot Roast** experience!
Storage and Reheating Instructions for Classic Pot Roast Leftovers
One of the best things about making a big **Classic Pot Roast** is knowing you have incredible leftovers ready to go. Nobody likes mediocre reheated meat, so listen up! To keep things perfect, you’ve got to separate the components. Store the shredded meat and the veggies together in one container, but keep the gravy in its own airtight container.
When reheating, I always recommend adding a splash of extra broth or just a tiny bit of water back into the meat mixture before you heat it up. If using the microwave, do short bursts so it warms evenly. Or, for the absolute best texture, reheat it low and slow in the oven, covered, with a little broth added. It brings that meat right back to life! If you eat leftovers often, check out how I handle leftover turkey meatballs; the same principles of adding moisture apply!
Frequently Asked Questions About Classic Pot Roast
Can I use a slow cooker instead of my Dutch oven?
Oh, absolutely! A slow cooker is fantastic for a **Classic Pot Roast**, especially if you’re busy all day. The method is slightly different, though. You still need to sear the roast on the stovetop first—don’t skip that step, seriously! Then, you place the veggies, broth, and the seared roast right in the slow cooker. You’ll cook it on LOW for 7 to 8 hours, or on HIGH for about 4 hours. It comes out just as tender, but you miss that deep, concentrated flavor you get from a tight Dutch oven lid in the oven. If you want to check out an electric pressure cooker option, my notes on the Instant Pot roast might give you some ideas!
What is the absolute best beef cut for this recipe?
For the super tender, pull-apart texture we are aiming for in a **Classic Pot Roast**, you simply must use **Chuck Roast**. People sometimes worry because it’s inexpensive, but that’s the magic! Chuck is tough, yes, but it has fantastic marbling—that fat melts down over those several hours of cooking, making the meat impossibly moist and flavorful. You want a good amount of connective tissue because that’s what dissolves into gelatin, which gives you that rich mouthfeel. Don’t try to substitute with something lean like a round roast unless you enjoy chewing for an hour!
I’m terrified of drying it out. How do I guarantee moisture?
That fear is real, but we beat it with a three-pronged attack! One: Sear it well to lock in juices initially. Two: Make sure your **Classic Pot Roast** is mostly submerged in that beef broth—it should be at least halfway covered. Three: Never, ever rush the time! If the recipe says 3.5 hours, but it still resists a little when you touch it, give it another 30 minutes. The meat is only truly done when moisture is released, not when the clock hits a certain mark. That low and slow temperature is your best friend here!
Do I really need to chop the vegetables that big?
Yes, you do! Those big, hearty 1-inch chunks aren’t just for looks. If you chop the carrots and celery too small, say, half an inch, they’ll turn to complete mush and disappear into the broth after four hours. We want them to hold their shape a little bit so you have something satisfying to eat alongside the beef. They should soften nicely, but still have some body left when the **Classic Pot Roast** comes out of the oven.
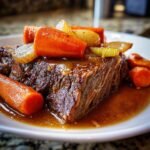
Classic Pot Roast
- Total Time: 260 min
- Yield: 6 servings 1x
- Diet: Low Fat
Description
A simple recipe for tender, slow-cooked beef pot roast with vegetables.
Ingredients
- 3 lb beef chuck roast
- 2 tablespoons olive oil
- 1 large onion, chopped
- 3 carrots, cut into 1-inch pieces
- 3 celery stalks, cut into 1-inch pieces
- 4 cups beef broth
- 1 teaspoon dried thyme
- 1 bay leaf
- Salt and black pepper to taste
Instructions
- Season the beef roast generously with salt and pepper.
- Heat the olive oil in a large Dutch oven over medium-high heat.
- Sear the roast on all sides until browned, about 3-4 minutes per side. Remove the roast and set aside.
- Add the onion, carrots, and celery to the Dutch oven. Cook until softened, about 5 minutes.
- Return the roast to the pot. Pour in the beef broth.
- Add the dried thyme and bay leaf.
- Bring the liquid to a simmer.
- Cover the Dutch oven and transfer it to an oven preheated to 325°F (160°C).
- Braise for 3 to 4 hours, or until the meat is very tender.
- Remove the bay leaf before serving.
Notes
- For thicker gravy, remove the roast and vegetables, then simmer the remaining liquid on the stovetop until reduced, or mix 2 tablespoons of cornstarch with 3 tablespoons of cold water and stir into the simmering liquid until thickened.
- Prep Time: 20 min
- Cook Time: 240 min
- Category: Dinner
- Method: Braising
- Cuisine: American
Nutrition
- Serving Size: 1 serving
- Calories: 450
- Sugar: 5
- Sodium: 550
- Fat: 25
- Saturated Fat: 10
- Unsaturated Fat: 15
- Trans Fat: 0
- Carbohydrates: 15
- Fiber: 3
- Protein: 40
- Cholesterol: 120
Keywords: pot roast, beef, slow cooker, oven roast, comfort food, chuck roast