
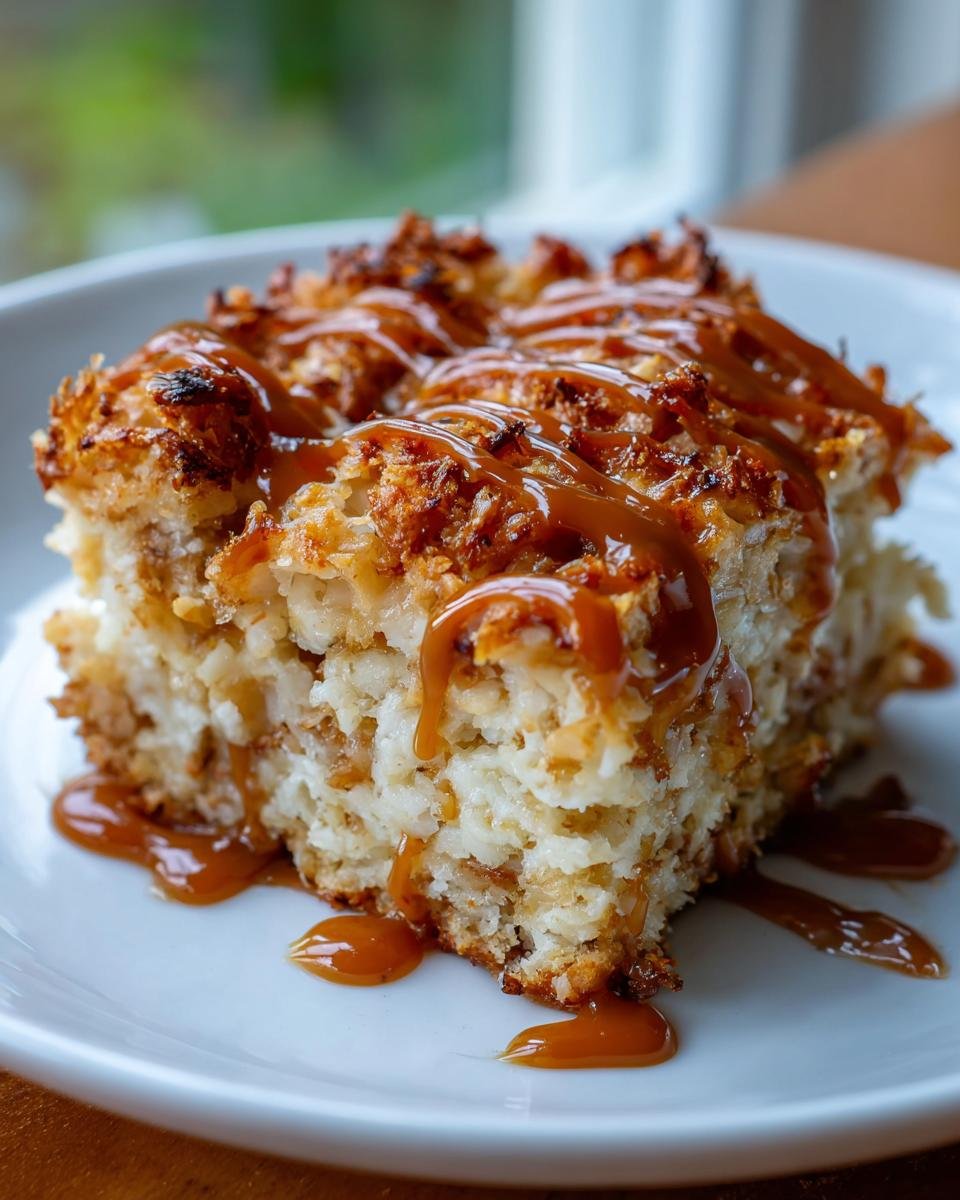
Sometimes you just need a dessert that hits all the right spots—chewy, sweet, and utterly satisfying—without demanding your entire afternoon. I spent ages trying to nail that perfect layered bar, and trust me, I failed a few times with things getting too dry or too sticky! But I finally cracked the code on these divine Caramel Coconut Bars. They are my absolute go-to when I need a little something special, fast. Forget complicated rolling or chilling; this recipe is gloriously straightforward. It’s all about that buttery, crumbly base meeting the luscious, dairy-rich coconut layer. If you’re looking for that ultimate no-fuss chewy treat, you’ve found your match. You might also want to check out my recipe for seven-layer bars if you love this style of layered dessert!
Gathering Ingredients for Your Caramel Coconut Bars
The beauty of these bars is that they rely on pantry staples! You probably have most of this stuff sitting in your cabinets right now. We aren’t dealing with complicated extracts or sourcing fancy flours here, which is why I love pulling these together on a whim. Remember, the recipe calls for an 8×8 inch pan, so make sure you have that ready to go. Also, and this is key for convenience, we use store-bought caramel sauce for the final drizzle. Don’t feel like you need to make homemade caramel—that’s what takes time! We want this quick, remember? If you’re looking for other quick sweet treats, you should peek at my recipe for irresistible caramel popcorn balls.
Crust Ingredients for Caramel Coconut Bars
This base layer is just a simple, buttery shortbread texture. It holds everything together beautifully. Make sure your butter has been out on the counter for a little while so it’s properly softened; mixing cold butter into the flour just won’t achieve that sandy, perfect crumble we need.
- 1 cup all-purpose flour
- 1/2 cup unsalted butter, softened just right
- 1/4 cup granulated sugar
- 1/4 teaspoon salt
Coconut Topping Ingredients for Caramel Coconut Bars
This is where all the magic moisture comes from! We use sweetened condensed milk here—just the regular can we all know and love. That milk is what keeps the coconut layer gooey and helps it bake up to that light golden color we’re aiming for.
- 1 (14 ounce) can sweetened condensed milk (don’t use evaporated milk, that’s a totally different beast!)
- 1 cup shredded coconut (I usually grab the sweetened kind, but use what you have!)
- 1 teaspoon vanilla extract
Caramel Drizzle for Caramel Coconut Bars
For the grand finale, you only need one ingredient here, but how you use it makes a difference! I always take my caramel sauce and pop it in the microwave for about 10 seconds before I pull the bars out of the oven. It makes it warm and loose, which lets you get those beautiful, thin ribbons across the top instead of big gloppy piles.
- 1/2 cup caramel sauce
Step-by-Step Instructions to Make Perfect Caramel Coconut Bars
Alright, rolling up the sleeves! This is where the magic happens, and trust me, it moves fast, so make sure your oven is ready to go. We’re building these bars in layers, and timing is everything—especially that moment right before you cut them. If you’ve ever made layered bars before, you know that partial baking stages are key to keeping that crust from getting soggy underneath all that gooey topping. Also, while you are here, if you are looking for the secrets to getting great, chewy texture, you should check out my favorite seven-layer bar recipe next!
Preparing the Crust for Caramel Coconut Bars
First things first, get that oven running at 350 degrees F (175 degrees C right?). Grab your 8×8 inch pan and give it a good grease and flour treatment. I sometimes cheat and use parchment paper lining, leaving an overhang on two sides, which makes lifting the whole finished block out so easy later on! Now for the crust mix. In a bowl, you want to combine the flour, softened butter, granulated sugar, and that little pinch of salt. You aren’t looking for a smooth dough; you want it crumbly, like coarse sand. Mix it with a fork or your hands until it starts holding together when you squeeze a batch. Press this sandy mixture down into the bottom of your prepared pan. I use the bottom of a flat measuring cup to really pack it in there firmly—that firmness is important for holding the next layer steady. Pop this base into the hot oven and let it pre-bake for 15 minutes exactly. You want it just starting to turn pale gold.
Assembling and Baking the Coconut Layer of Caramel Coconut Bars
While that crust is firming up, you can whip up the coconut topping. In a separate bowl—no need to wash the first one, honestly!—just dump in that whole can of sweetened condensed milk, the shredded coconut, and the vanilla extract. Stir it until everything is nicely coated and looks thick and glossy. When the 15 minutes are up, pull the crust out, but don’t turn the oven off! Carefully spread that thick coconut mixture right over the warm crust. Try to make it even so you don’t have super thick spots that stay raw. Back into the oven it goes for another 15 to 20 minutes. You’re watching for the topping to look lightly golden brown around the edges, not dark brown, just settled and slightly set.

Finishing and Cooling Your Caramel Coconut Bars
This next step is non-negotiable for getting the best look—don’t wait for them to cool! As soon as you slide that pan out of the oven, grab your warmed caramel sauce and drizzle it all over the hot coconut layer. The warmth helps the caramel flow nicely. Now comes the hardest part, but hear me out: you have to let these bars cool COMPLETELY before you even *think* about cutting them. If you cut them warm, the layers will slide apart, and you’ll just end up with caramel coconut mush. I usually let mine come completely to room temperature, then pop them in the fridge for an hour. That chilling firms up that caramel beautifully, giving you those super clean squares. If you want to see how I get my homemade pretzels so neat, you can check that recipe out too!
Expert Tips for the Best Caramel Coconut Bars
Listen, these bars are already easy, but if you want them to go from good to legendary, we need to talk technique. It’s not about fancy machinery; it’s just about paying attention during those crucial first 15 minutes of baking. I’ve learned through trial and error that the texture of the crust dictates how chewy the final result is. If you nail the base, the rest is just waiting game!
Achieving the Perfect Crust Texture in Caramel Coconut Bars
When you mix that flour, sugar, butter, and salt together, stop when you think you should stop—and then mix for five more seconds! You absolutely do not want this forming a dough ball. If it starts looking like cookie dough, you’ve gone too far, and your crust will be tough, not tender. We want wet sand that crumbles easily but still holds together when you press it hard between your fingers. Remember that crumbly texture is your friend here!
Preventing Soggy Bottoms in Caramel Coconut Bars
I mentioned this briefly before, but I want to stress it again because peeling a crust stuck to the bottom of the pan is just a heartbreak. My trick, which is a total game-changer for sticky bars like these, is using parchment paper every single time. Cut a strip slightly wider than your pan, lay it in the bottom, and let the ends hang over the sides like little handles. You grease the pan, then lay the paper down, then grease the paper again lightly. When they are cool, you just lift the whole slab right out. It gives you such a clean release, and honestly, it seems to help keep the very bottom layer from getting that gummy texture from sitting directly on the hot metal.
For more baking wisdom that just makes life easier, be sure to check out my guide on making homemade pastry cream—it uses similar balance rules!
Ingredient Notes and Substitutions for Caramel Coconut Bars
You know, people always ask me if they can swap things here and there, and for these bars, I have to draw a line in the sand on a few items. This recipe is so wonderfully simple because the ingredients do double or triple duty. Take the sweetened condensed milk—it’s not just liquid; it’s our sugar, our binder, and the part that makes the coconut layer so unbelievably creamy. If you try to switch it for evaporated milk, you’ll end up with something dry and sad unless you figure out how to add about a cup of sugar, which defeats the purpose!
For other little things, like the caramel? You have more leeway. Speaking of that, if you want to make your own sauce, go for it, but if you grab a jar, just know that a slightly thicker caramel tends to set up nicer after cooling. If you’re feeling savory-sweet, using a salted caramel sauce is actually fantastic here. It cuts through the intense sweetness of the condensed milk just perfectly. Don’t forget to check out my guide on making homemade simple pasta sauce if you need a savory break!
Sweetened Condensed Milk in Caramel Coconut Bars
Seriously, please stick to the sweetened condensed milk here. It’s what gives you that signature chewiness and that gorgeous golden color when baked. Evaporated milk is thinner and doesn’t have the sugar content needed to bind. Using it will result in a topping that just pools or gets watery, and we absolutely do not want that sad scenario when making these delicious bars.
Caramel Sauce Options for Caramel Coconut Bars
The caramel drizzle happens right at the end, so it’s less structural and more about flavor! Store-bought is my favorite busy-day choice. If you use a salted version, it balances out the sweet coconut layer incredibly well. Just make sure whatever you use is easily drizzled—if your caramel is rock hard right out of the fridge, microwave it gently until it flows nicely over the top. It should look like thick ribbons, not clumps!
Storage and Serving Suggestions for Caramel Coconut Bars
Handling leftovers with these bars is easy, which is great because sometimes I bake a batch just to keep around for snacking all week long! The moisture content means they stay soft for days, but proper storage is key to keeping that crust crisp. I always prepare for leftovers, even though they rarely last long enough to need it! If you are tired of leftovers, you might want to check out my recipe for delicious roasted vegetables for a savory twist!
How to Store Leftover Caramel Coconut Bars
Because of that lovely condensed milk layer, these bars don’t love extreme heat or cold, but they also don’t need refrigeration unless your kitchen is super warm. Once they are completely cool and cut—and I mean *completely* cool—stack them in an airtight container. Layering wax paper or parchment sheets between the layers prevents them from sticking together, which is a lifesaver when you try to peel one off later! They should easily stay fresh and chewy at room temperature for about four days. I haven’t actually kept one longer than that, to be honest!
Serving Ideas for Caramel Coconut Bars
These bars are fantastic served at room temperature, offering that perfect balance where the crumbly base snaps slightly and the caramel is soft. But I have two favorite ways to serve them up! First, with a strong, hot cup of coffee in the afternoon—it’s the perfect companion. Second, if you want to make it feel like a real dessert, warm them up *very* slightly in the microwave (maybe 10 seconds) and serve that warm square alongside a scoop of vanilla bean ice cream. The contrast between the warm bar and the cold cream is just dreamy and makes everyone think you worked way harder than you actually did!
Frequently Asked Questions About Caramel Coconut Bars
I always get so many questions once people start baking these! Honestly, that’s the sign of a truly well-loved recipe, right? It means you’re all out there trying to make these chewy treats! I pulled together the most common things folks ask me about after they mix up the crust and get ready for the coconut layer.
Can I freeze homemade Caramel Coconut Bars?
Yes, you absolutely can freeze them, and it’s a great make-ahead option! The trick is making sure they are totally cool and cut first. Wrap the squares tightly—I mean really wrap them, maybe a layer of plastic wrap followed by foil—to keep that sticky caramel from causing trouble in the freezer. They keep well for about two months. Just remember that when you thaw them, they might be a little softer, especially the caramel layer, so let them thaw in the fridge first before bringing them to room temperature.
What size pan is best for these bars?
For this recipe, I always stick to the 8×8 inch pan. That size gives us the perfect thickness for both the shortbread crust and the chewy coconut top. The baking times listed—15 minutes for the base and 15-20 for the top—are calibrated specifically for those dimensions. If you try to put this batter into a 9×13 pan, you’ll end up with bars so thin they barely register as a dessert! If you want to bake a double batch, use a 9×13, but you’ll definitely need to add another 5 to 10 minutes on that second bake time.
Why did my topping sink into the crust?
Ugh, that’s the worst! Usually, this happens for one of two reasons. The main culprit is often that the crust didn’t bake long enough during its initial 15 minutes. If that bottom layer is still too soft or raw when you spread the heavy coconut goo on top, the weight will push the topping right through when you bake it. You want that crust feeling firm and dry when you pull it out the first time. Another tiny possibility is if you let the crust cool down fully before adding the topping—we need that residual heat to help seal it together, remember? Stick to the recipe and bake that crust until it smells nutty!
If you’re looking for other excellent layered bar recipes to master, be sure to check out my guide on making caramel popcorn balls!
Nutritional Snapshot of Caramel Coconut Bars
Okay, so these bars are definitely more “treat” than “health food,” and that’s perfectly fine! We know they are packed with sugary goodness and satisfying richness. But I always like to give a quick heads-up on what you’re digging into, just so you know what to expect. Please remember these numbers are just estimates based on the standard ingredients listed in the recipe. They can swing a little bit depending on the exact brand of caramel sauce or how much milk that can of condensed milk actually has!
Also, since this recipe makes about 16 squares, these numbers reflect just one bar. Here’s a quick look:
- Calories: About 220 per bar. That’s a solid afternoon pick-me-up!
- Sugar: Yep, it’s high, sitting around 20 grams. That’s the condensed milk and caramel doing their job, giving us that perfect chew.
- Fat: We’re looking at around 12 grams of total fat, with about 7 grams coming from saturated fat, mostly from that lovely buttery crust and the coconut.
- Carbohydrates: You’re getting about 28 grams of carbs total.
- Protein: We get a little bump of about 3 grams of protein, mostly from the milk solids in the condensed milk.
It’s a rich bar, so one is usually plenty! Enjoy them in moderation, because they are seriously addictive.
Share Your Success Making Caramel Coconut Bars
I really hope you took the plunge and made these Caramel Coconut Bars! Honestly, when you pull that pan out and the caramel is still warm and glistening, there’s no better feeling in the kitchen. I pour my heart into testing these recipes so you don’t have to end up with a sticky mess, and I just love seeing your results! Now it’s your turn to tell me what you thought.
Did the crust come out perfectly crumbly for you? Did you use salted or unsalted caramel? Did you add extra vanilla—or maybe a tiny sprinkle of sea salt on top like I sometimes do? Don’t be shy; every little modification you try helps all the other bakers who come along after you!
Please take a second to leave a rating for the recipe right here on the page. Five stars if it knocked your socks off, right? And if you snapped a photo of your finished bars—especially those clean-cut squares—I would absolutely love to see them! Tag me on social media when you post your pictures; seeing your baking success is honestly the best part of running this site. If you have detailed questions or want to share how you keep them fresh, you can always reach out via my contact page too!
Print
Caramel Coconut Bars
- Total Time: 50 min
- Yield: 16 servings 1x
- Diet: Vegetarian
Description
Simple recipe for chewy caramel and coconut bars.
Ingredients
- 1 cup all-purpose flour
- 1/2 cup unsalted butter, softened
- 1/4 cup granulated sugar
- 1/4 teaspoon salt
- 1 teaspoon vanilla extract
- 1 (14 ounce) can sweetened condensed milk
- 1 cup shredded coconut
- 1/2 cup caramel sauce
Instructions
- Preheat your oven to 350 degrees F (175 degrees C). Grease and flour an 8×8 inch baking pan.
- In a medium bowl, mix the flour, softened butter, granulated sugar, and salt until crumbly.
- Press the crumb mixture evenly into the bottom of the prepared baking pan.
- Bake the crust for 15 minutes.
- While the crust bakes, mix the sweetened condensed milk, shredded coconut, and vanilla extract in a separate bowl.
- Spread the coconut mixture evenly over the partially baked crust.
- Return the pan to the oven and bake for another 15 to 20 minutes, until the topping is lightly golden.
- Remove from the oven and immediately drizzle the caramel sauce over the top.
- Let the bars cool completely before cutting into squares.
Notes
- Allow the bars to cool completely before slicing for clean cuts.
- You can use store-bought caramel sauce for convenience.
- Prep Time: 15 min
- Cook Time: 35 min
- Category: Dessert
- Method: Baking
- Cuisine: American
Nutrition
- Serving Size: 1 bar
- Calories: 220
- Sugar: 20
- Sodium: 75
- Fat: 12
- Saturated Fat: 7
- Unsaturated Fat: 5
- Trans Fat: 0
- Carbohydrates: 28
- Fiber: 1
- Protein: 3
- Cholesterol: 25
Keywords: caramel, coconut, bars, dessert, sweet, baked good