
Oh, you know those nights, right? It’s 10 PM, you’ve just finished *that* chore you were dreading, and suddenly, your brain whispers, “Chocolate. Now.” Trying to bake a full pan of brownies feels like planning a weekend trip—way too much effort! But trust me, I have the absolute lifesaver for those emergency cravings: my ridiculously fast Brownie In A Mug recipe.
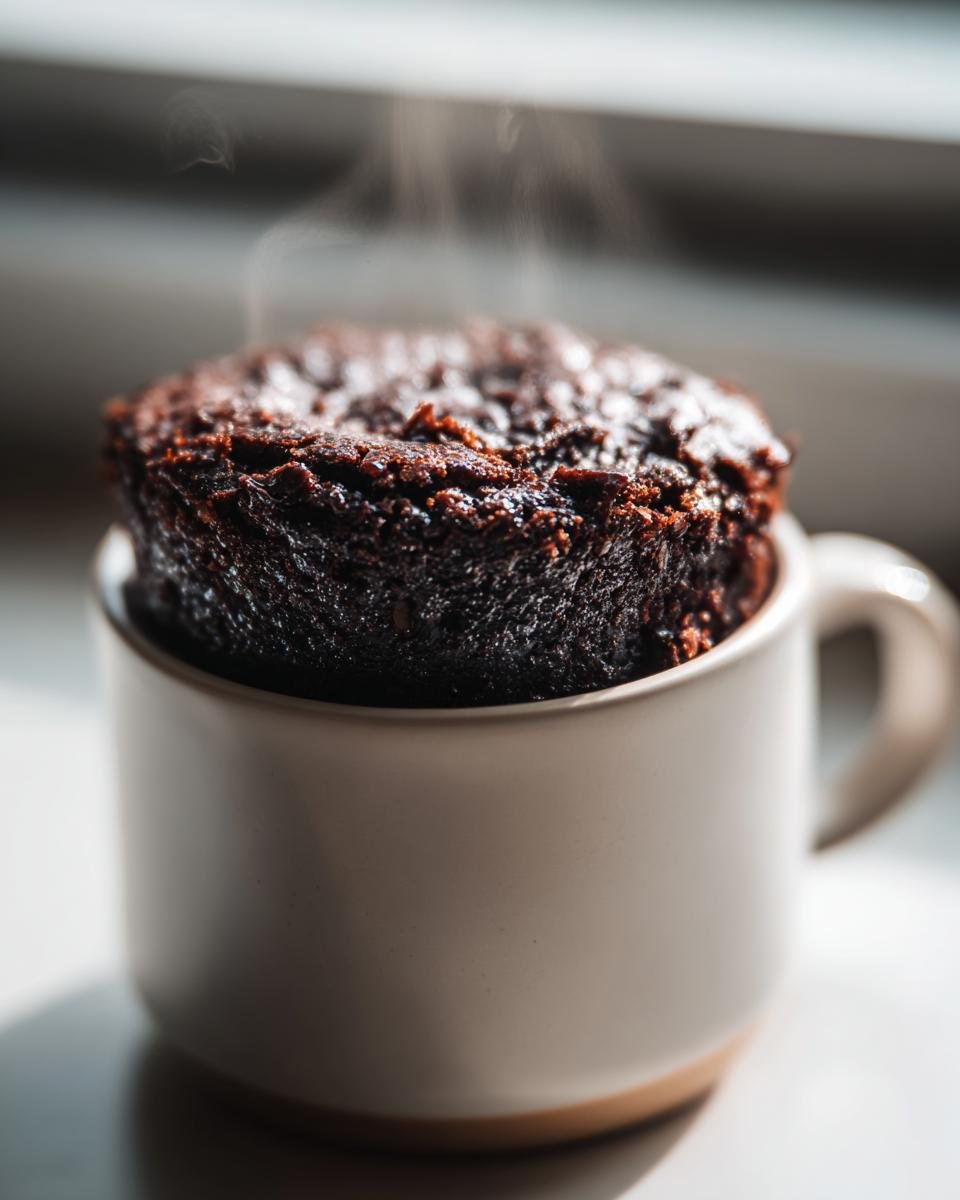
This isn’t some sad, cakey disappointment; this is a rich, fudgy, single-serving miracle cooked almost instantly in the microwave. Seriously, from craving to first bite takes less than ten minutes. This specific method uses just pantry staples and I perfected it after sneaking chocolate chips into my mug during a particularly grueling study session back in college. It saved me more times than I can count. You’re going to adore how easy cleanup is!

Why This Brownie In A Mug Recipe Works So Fast
The whole philosophy behind this recipe is pure, unadulterated speed. Why wait an hour for an oven to preheat when you have a microwave sitting right there ready to go? Honestly, I think the longest part of the whole process is deciding what flavor topping to use!
Here is exactly why this little gem is your best friend for instant gratification:
- It’s a true microwave dessert, meaning zero preheating time.
- Cleanup is unbelievably easy—you mix and eat right out of the mug!
- It uses basic pantry staples, so you often don’t even need to run to the store.
If you want another lightning-fast treat, you should check out my quick chocolate mug cake guide, too!
Essential Ingredients for Your Perfect Brownie In A Mug
Look, this recipe is so short, you really can’t mess up the ingredients, but precision is key when working on this tiny scale. Since we’re only making one single-serving chocolate explosion, every gram counts! The best part is I always have everything on hand anyway.
Remember that you need a good, sturdy mug—think 10 to 12 ounces—so your batter has room to puff up after microwaving. If you use anything smaller, you’re inviting a chocolate eruption, and nobody wants to clean that mess up!
Dry Ingredients for the Brownie In A Mug
We start with the dry stuff right inside the mug. Whisking these first is crucial so we don’t end up with hidden pockets of baking powder later on. You’ll need:
- Four tablespoons of all-purpose flour.
- Four tablespoons of good old granulated sugar.
- Two tablespoons of unsweetened cocoa powder—don’t try using sweetened hot cocoa mix here, it gets too weird!
- A quarter teaspoon of baking powder—that’s what gives it that little bit of lift.
- And just a tiny pinch of salt to really make the chocolate pop!
Wet Ingredients and Mix-ins for the Brownie In A Mug
Once the dry ingredients are happy, we move to the liquids. These need to be mixed in gently. Have your milk, oil, and vanilla ready to go right by your mixing mug.
- Three tablespoons of plain milk. Any kind works for this!
- One tablespoon of vegetable oil. If you want to make it richer, melted butter is amazing, too!
- A quarter teaspoon of vanilla extract—don’t skip this; it rounds out the chocolate flavor beautifully.
- Finally, one tablespoon of chocolate chips, if you’re feeling extra decadent. They melt into gooey pockets of joy.
Step-by-Step Instructions for Making Your Brownie In A Mug
Okay, we have our ingredients gathered, and the mug is waiting. This is where the magic happens. Because this cooks so fast, you need to have all your measuring spoons lined up. Don’t worry about washing two bowls—we do everything right here in the mug!
I also have another great little trick up my sleeve for super fast desserts, which you can find when you need a cake instead of a brownie.
Combining Dry Ingredients for the Brownie In A Mug
First things first: grab a sturdy fork or a tiny whisk and tackle those dry components we just measured out. You absolutely have to smash those cocoa clumps against the side of the mug until everything is totally uniform. Seriously, do a good job here, because if you don’t mix the cocoa well, you’ll get a mouthful of gritty powder later. Whisk until it looks like smooth, brown sand.
Mixing Wet Ingredients into the Brownie In A Mug Batter
Now, pour in the milk, the oil, and that splash of vanilla extract. Use your fork to gently bring everything together. And listen to me right now: DO NOT OVERMIX. You just want to mix until those streaks of flour disappear. Overmixing this batter is the number one way to turn your fudgy brownie in a mug into a rubbery hockey puck. Seriously, stop mixing when it looks slightly lumpy but mostly combined.
Microwaving Your Brownie In A Mug
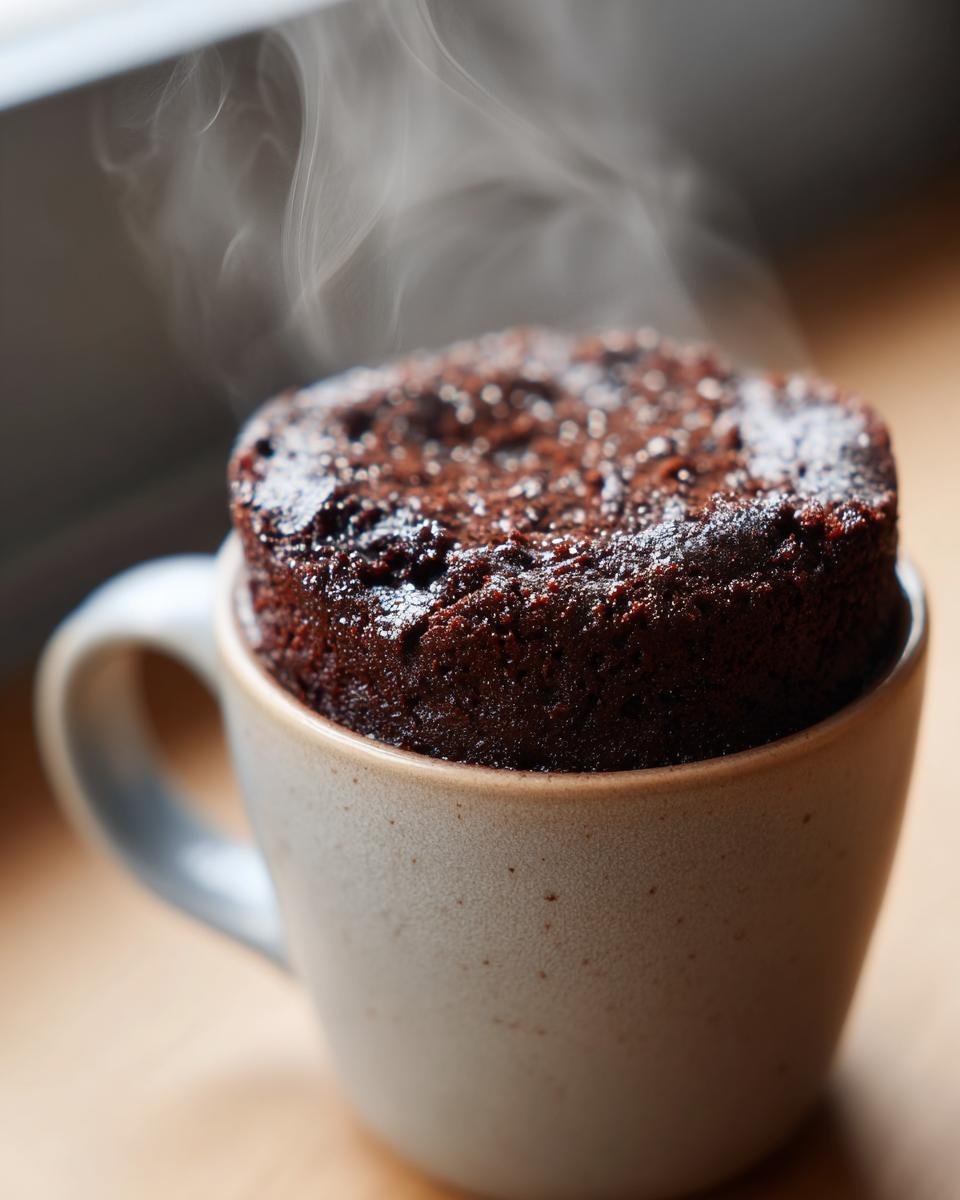
If you’re using those optional chocolate chips, give them a quick stir in right before the mug goes into the microwave. Now, the cooking time is tricky because every microwave is its own little universe! Start by zapping it on high power for 60 seconds. At that 60-second mark, peek inside. The top should look mostly set, maybe a little shiny in the very center.
If it still looks totally liquidy, pop it back in for 10-second intervals. My microwave needs a full 90 seconds, but yours might not! If you see it looking way too dry or tough on the edges but wet in the center, you probably know what to do: 10-second bursts are your best friend. If you overcook it by even five seconds, the texture changes!
Tips for the Ultimate Brownie In A Mug Experience
Okay, so you made your first batch and you’re already hooked, I knew it! Now that you master the basic 7-minute treat, we can talk about how to really elevate this thing. Because it’s so wonderfully basic, it takes substitutions like a champ. You can easily turn this from a good late-night snack into a truly decadent dessert experience with just one or two small tweaks. Trust me, once you try melting butter instead of using oil, you’ll never look back for your special mug brownies!
If you’re looking for something amazing to drink alongside this chocolate goodness, check out my ultimate chocolate milkshake recipe—it pairs perfectly!
Ingredient Swaps for a Richer Brownie In A Mug
The recipe calls for vegetable oil, which is fast and works great, but if you want that deep, buttery flavor that screams ‘real bakery brownie,’ swap it out! Melt one tablespoon of real, good-quality butter and use that in place of the oil. The flavor complexity it adds is huge, though it might make the top a tiny bit shinier—which I personally think is a bonus.
You can also add a tiny pinch more cocoa powder if you use higher-fat milk, just to keep that fudgy texture and stop it from getting too cakey on top.
Serving Suggestions for Your Brownie In A Mug
Eating it straight from the mug is classic and totally acceptable (that’s why we washed only one thing, right?). But if you’re serving this for company or just want to go all out, you have two solid options. My absolute favorite is plonking a small scoop of vanilla ice cream right on top while it’s still warm. The scoop melts down the sides, and it’s perfection.
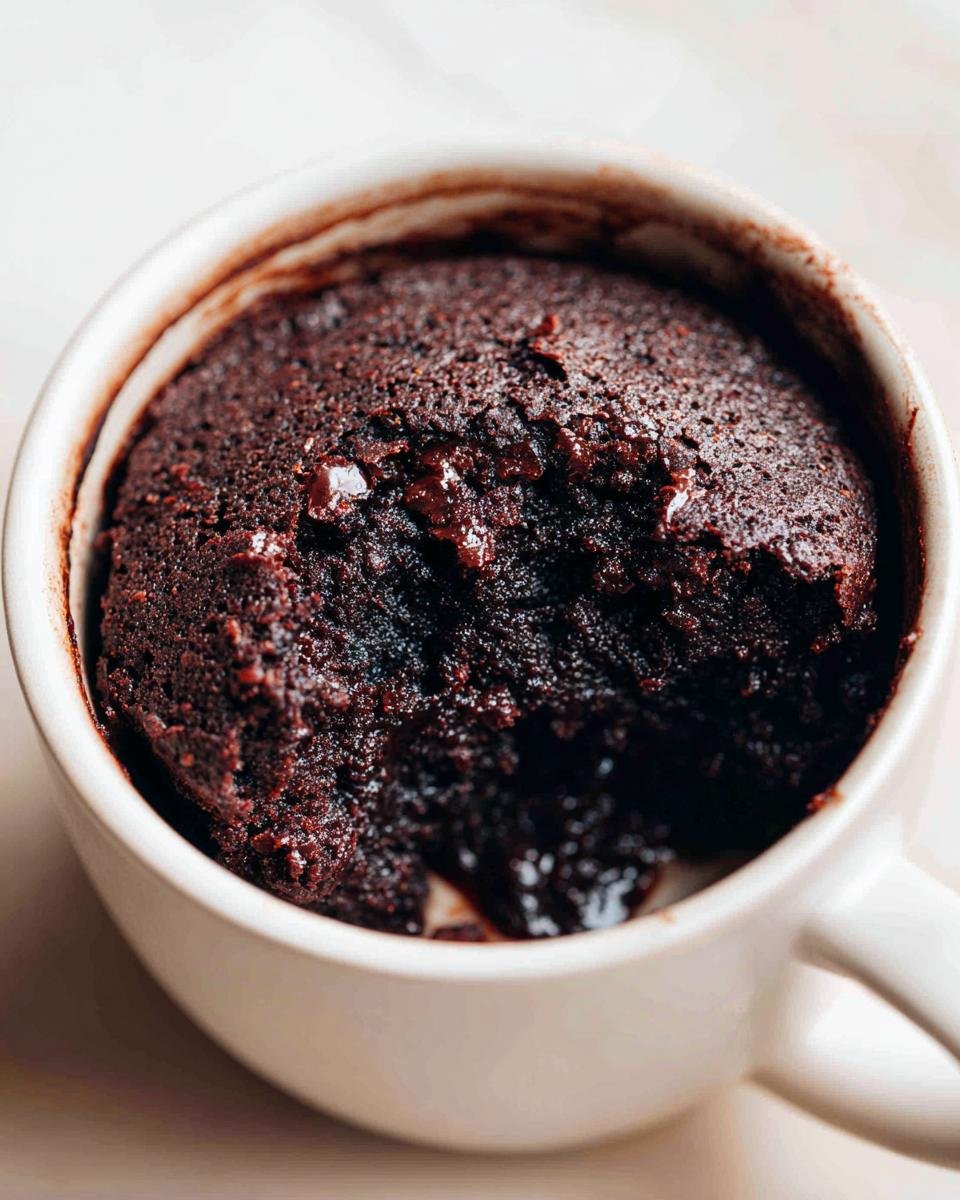
If you don’t have ice cream, a light dusting of powdered sugar makes it look instantly professional, like you labored over this for hours instead of two minutes in the microwave. Either way, enjoy every warm, gooey bite!
Troubleshooting Common Brownie In A Mug Issues
Even with a recipe this simple, sometimes the microwave gods aren’t smiling on us, right? Don’t panic if your first attempt isn’t perfectly fudgy. Most issues boil down to too much heat or a tiny little measurement error.
If you pull it out and it’s strangely dry or looks like actual cake, that usually means you cooked it too long. Microwaves blast heat so fast that even 10 extra seconds can make a difference! Next time, pull it out when the center still looks a little underdone, because it keeps cooking while it cools. That’s the secret to avoiding tough brownies in a mug!
If your brownie in a mug seems wet right in the center after that initial 90 seconds, just pop it back in for 10-second intervals. You’re aiming for that perfect texture where a toothpick comes out with moist crumbs clinging to it, not raw batter. It’s all about finding your machine’s sweet spot!
Storage and Reheating Instructions for Leftover Brownie In A Mug
Honestly, the best part of the Brownie In A Mug is eating it immediately. It’s meant to be a single-serving, piping-hot emergency dessert, so if you have leftovers, you’re asking for trouble!
But if you absolutely must save half for later, cover your mug tightly with plastic wrap or put the whole thing in a small airtight container. You can keep it in the fridge for maybe a day, but it’s going to get denser.
To reheat, just zap it on about 50% power for 15 to 20 seconds. That just warms the chocolate back up without turning the rest of the brownie hard and dry. See? Solved!
Frequently Asked Questions About Making a Brownie In A Mug
Sometimes you just have lingering questions once the chocolate craving hits, and that’s totally fine! I tried to cover everything in the steps above, but I get why people ask these things when working with tiny, fast recipes. The microwave is a powerful tool, but it needs respect, especially when turning batter into a delicious Brownie In A Mug!
If you want to explore another amazing quick fix (though this one is peanut butter flavored!), you should definitely take a peek at my peanut butter mug cake recipe.
Can I bake this Brownie In A Mug in a conventional oven?
You absolutely could try, but honestly, I wouldn’t recommend it for this particular recipe. Since we are making such a small amount of batter, baking it in a conventional oven is tricky! The small volume means it will likely dry out way before it actually bakes properly in the center. This recipe is engineered specifically for the speed and intensity of the microwave. Stick to the mug, trust me on this one!
What is the best mug size for a single-serving Brownie In A Mug?
I always stress using a sturdy, microwave-safe mug that holds about 10 to 12 ounces. If you use a smaller cup—say, an 8-ounce mug—the batter will swell up when it cooks and then spill over onto your microwave plate. That’s the mess we are trying to avoid! A slightly larger mug gives the steam somewhere to go without causing a chocolate flood when you’re making your single serving dessert.
How do I make my Brownie In A Mug fudgier?
Ah, the quest for the perfect fudge factor! When I pull mine out, if it looks just a hair too cakey, I grab an extra square of dark chocolate, break it up, and press it gently into the top center of the warm brownie. As it sits for that minute of cooling time, that extra square melts and sinks down, creating a super gooey pocket.
Another trick I sometimes use is slightly dialing back the milk measurement by just half a teaspoon. Less liquid means a denser, fudgier texture immediately. You still need enough moisture to hydrate the flour, but leaning slightly toward the dry side works wonders for that intense chocolate flavor!
Estimated Nutritional Snapshot for this Brownie In A Mug
I feel it’s only fair to give you a quick peek at the numbers, though let’s be real, when a dessert takes less than ten minutes, calories are just a vague suggestion, right?
Here’s the breakdown based on our standard Brownie In A Mug, assuming no extra toppings. Since we’re using basic things like flour and sugar, these figures are just estimates, so don’t stress over the exact number!
- Calories: Around 300
- Sugar Content: About 35 grams
- Total Fat: Roughly 15 grams
- Carbohydrates: Near 38 grams
This is a treat, so enjoy it knowing that the cleanup was zero, and you satisfied that chocolate craving in record time!
Share Your Quick Chocolate Fix
So, that’s truly all there is to it! You have conquered the late-night chocolate emergency using nothing more than a mug and a few pantry staples. I really hope this recipe becomes a staple in your kitchen whenever you need that instant comfort food fix. Honestly, it’s the quickest single serving dessert I have ever successfully made!
Now, I absolutely need to hear from you! Did it come out fudgy? Did you add raspberries or maybe some salted caramel on top? Don’t keep your spoon-licking successes to yourself. Please head down to the comments section and let me know how your Brownie In A Mug turned out!
If you took a snapshot of that warm, gooey perfection—and you totally should have!—please tag me on social media! Seeing your kitchen creations makes my day, and it keeps me inspired to keep sharing these super fast, reliable recipes. If you have any pressing questions that I didn’t cover, you can always reach out via my contact page too!
Happy baking (or microwaving, as the case may be)!
Print
Quick Brownie in a Mug
- Total Time: 7 min
- Yield: 1 serving 1x
- Diet: Vegetarian
Description
A simple recipe for a single-serving chocolate brownie cooked quickly in a microwave.
Ingredients
- 4 tbsp all-purpose flour
- 4 tbsp granulated sugar
- 2 tbsp unsweetened cocoa powder
- 1/4 tsp baking powder
- Pinch of salt
- 3 tbsp milk
- 1 tbsp vegetable oil
- 1/4 tsp vanilla extract
- 1 tbsp chocolate chips (optional)
Instructions
- In a microwave-safe mug (about 10-12 oz), whisk together the flour, sugar, cocoa powder, baking powder, and salt until combined.
- Add the milk, vegetable oil, and vanilla extract to the dry ingredients. Mix well until just combined; do not overmix.
- Stir in the chocolate chips, if using.
- Microwave on high for 60 to 90 seconds. Cooking time varies by microwave wattage. Check at 60 seconds. The top should look mostly set.
- Let it cool for one minute before eating directly from the mug.
Notes
- If the brownie seems too wet after 90 seconds, microwave in 10-second intervals until done.
- For a richer flavor, substitute vegetable oil with melted butter.
- Serve with a scoop of ice cream or a dusting of powdered sugar.
- Prep Time: 5 min
- Cook Time: 2 min
- Category: Dessert
- Method: Microwave
- Cuisine: American
Nutrition
- Serving Size: 1 mug
- Calories: 300
- Sugar: 35
- Sodium: 150
- Fat: 15
- Saturated Fat: 3
- Unsaturated Fat: 12
- Trans Fat: 0
- Carbohydrates: 38
- Fiber: 2
- Protein: 5
- Cholesterol: 5
Keywords: brownie in a mug, microwave brownie, single serving dessert, quick chocolate recipe