
Oh, nothing beats the smell of meat that’s been lovingly cooking low and slow all day long, right? It just fills the whole house with this incredible, cozy aroma that pulls everyone into the kitchen. That’s why I am absolutely obsessed with this recipe for simple **Braised Pork Shoulder**.
I know there are a million pulled pork recipes out there, but honestly, this one is my absolute go-to because it uses just a handful of things you probably already have, and it never, ever lets me down. The first time I tried this specific combination of vinegar and broth, I just stared into the Dutch oven, waiting for it to be done, and when I pulled that meat out? Wow! It didn’t just shred; it practically dissolved under the pressure of two forks. It’s foolproof, I promise.
If you want that melt-in-your-mouth, deeply flavorful, pull-it-apart tender goodness without a laundry list of specialty items, then you have found your new favorite recipe for **Braised Pork Shoulder**.
Why This Braised Pork Shoulder Recipe Works So Well
I’ve tried fancy rubs and complicated smoker setups, but honestly, for pure, reliable flavor and texture, this simple approach beats everything. I don’t know why people think slow-cooked meat has to be complicated. Trust me, the magic here is in patience, not fancy spice jars!
- It requires almost no active cooking time once it hits the oven.
- The combination of acid (vinegar) and broth really helps break down those tough connective tissues.
- It smells amazing while it cooks—seriously, invite people over!
If you want to see how this recipe compares to another low-and-slow favorite we love, check out this recipe for slow-cooker Italian beef. That one is great too, but this pork shoulder is just pure comfort.
Incredibly Tender Results Every Time
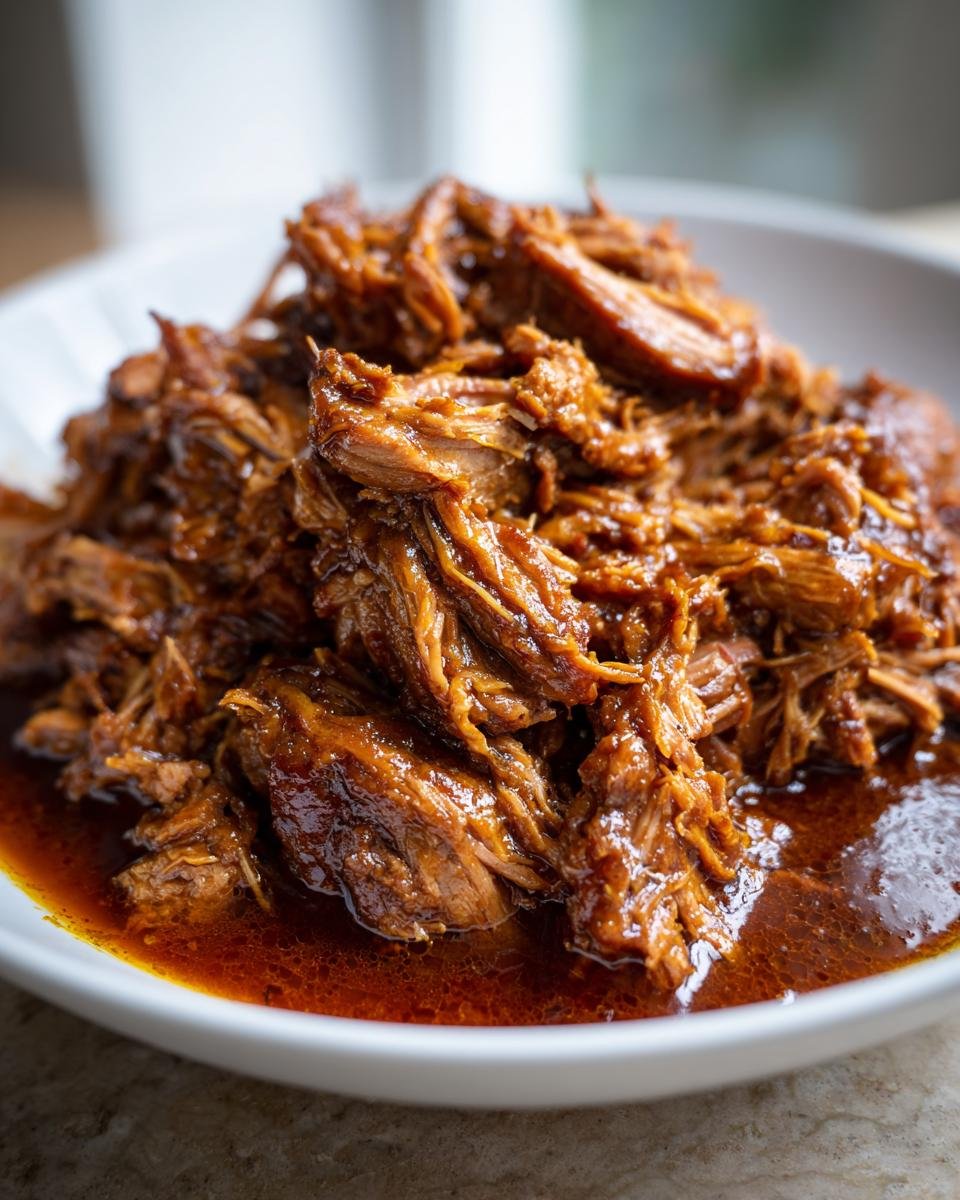
The texture of this **Braised Pork Shoulder** is what keeps me coming back. I’m talking about meat so tender you barely touch it and it just falls apart. That’s the absolute beauty of the braising technique here. We sear it hard first to lock in those deep roasted flavors, and then the moist, low heat in the oven does all the heavy lifting over those four hours. It’s like magic, but it’s actually science!
Simple Ingredients for Maximum Flavor in Your Braised Pork Shoulder
You see that ingredient list? It’s short, right? That’s the best part. We don’t need a dozen obscure powders to make this **Braised Pork Shoulder** taste incredible. We use good broth, sharp vinegar, and just a touch of brown sugar to balance it out. It showcases the pork itself beautifully. Sometimes the simplest recipes are the ones you keep forever because they are just so reliable.
Essential Ingredients for Perfect Braised Pork Shoulder
Okay, let’s talk about what you actually need to bring this gorgeous **Braised Pork Shoulder** to life. If you look at the ingredient list, you’ll see we aren’t messing around with complicated, hard-to-find items. We are focusing on building deep flavor with pantry staples. I always get everything ready on the counter before I even turn on the stove—we call that getting your *mise en place* ready!
Also, here’s a little secret I learned: toss one bay leaf right into the pot with the broth and vinegar. It adds this subtle, earthy background note that just elevates the whole dish. Don’t forget it, even if it’s not on the main list; it’s one of those trust-me moments that makes this **Braised Pork Shoulder** really special.
Pork and Searing Basics for Your Braised Pork Shoulder
You have two choices here: bone-in or boneless pork shoulder, about 3 pounds. The bone-in version cooks up juicy and you get a tiny bit of extra flavor from the bone, but boneless cooks a little faster. Either way, you absolutely must season it thoroughly all over with salt and pepper before it hits the heat. Then, grab about two tablespoons of good olive oil. We need that oil hot—I mean *hot*—so the pork gets a really deep, dark crust when we sear it. That crust is flavor, folks, don’t skip that searing step for your **Braised Pork Shoulder**!
The Braising Liquid Components
This is where the tenderness happens. We’re using a cup of beef broth—just good regular broth works fine—and half a cup of tart apple cider vinegar. That vinegar cuts through the richness of the pork perfectly. Then we balance it all out with just one tablespoon of brown sugar; it’s not really for sweetness, it’s for depth. Don’t forget your seasonings: one teaspoon of salt and just half a teaspoon of black pepper. Keep it simple, and the pork shines!
Step-by-Step Instructions for Amazing Braised Pork Shoulder
Look, I’m going to walk you through this so clearly that even if you’ve never touched a Dutch oven before, you’ll end up with the best **Braised Pork Shoulder** of your life. The key is making sure you take your time during the searing and the deglazing steps. Trust me, those little pockets of browned flavor at the bottom of your pot are pure gold dust for the final sauce!
If you want to check out another great pot preparation, I have a magic recipe for pork roast that uses similar techniques but swaps out some flavors—you can see it right here for when you want a change!
Preparing and Searing the Pork Shoulder
First things first: season that pork shoulder generously all over with your salt and pepper mix. Get your biggest Dutch oven—the heavy one—on the stove over medium-high heat and add two tablespoons of olive oil. You want that oil shimmering! Place the pork in carefully—it might sputter a little, that’s fine, just watch the splatter! Sear it for about three to four minutes on every single side until you have a really nice, deep brown crust going on. Once it’s beautifully colored on all sides, take it out and set it on a plate nearby. Don’t wipe out the pot!
Building the Braising Liquid for the Braised Pork Shoulder
Now, toss in your chopped onion right into that hot, flavorful fat left behind. Cook those down until they start to look soft and sweet, maybe five minutes. Add your minced garlic and cook for just one more minute until you can really smell it—don’t let it burn! Now for the magic: pour in the beef broth and the apple cider vinegar. Take a wooden spoon and scratch around the bottom of the pot vigorously. You need to scrape up every single one of those browned bits; that’s where the deep, savory flavor comes from for our **Braised Pork Shoulder**.
Stir in that teaspoon of brown sugar, give it a quick swirl, and then nestle the seared pork shoulder right back into the liquid. You want the liquid to come about halfway up the side of the meat. Bring it all up to a nice simmer right there on the stove, put that lid on tight, and get it ready for the oven!
The Slow Braise: Oven Time for Your Braised Pork Shoulder
This is the hard part: waiting! Set your oven to 325°F (160°C). You absolutely must remember to preheat it! Place the tightly covered Dutch oven inside and just let it be for three to four hours. I usually start checking around the three-hour mark. You’ll know it’s done when you poke it, and it offers zero resistance or when it shreds apart easily with just two forks. That’s the visual cue—tender enough to fall apart! Once it’s shredded, pull out the meat, skim that fat off the sauce, and you are ready to eat that incredible **Braised Pork Shoulder**!

Expert Tips for the Best Braised Pork Shoulder Texture
Now that you’ve got your perfectly tender **Braised Pork Shoulder**, let’s talk about optimizing the rest of the experience! The sauce part is often overlooked, but it makes everything so much better. When you pull that meat out, scoop off any excess fat floating on top of the braising liquid before you start reducing it. If you don’t skim, you end up with a greasy sauce, which nobody wants!
Also, here’s a fun idea if you want to switch things up next time: if you are trying to get a little bit of that crispy, almost pulled-pork-bark texture? Once you shred the meat, toss it back into a hot skillet with just a tablespoon of that rich sauce and let it crisp up for a minute or two before serving. It adds such great texture!
For those of you who loved the meat but want to check out other ways to keep your leftovers juicy, I have a famous tip for juicy slow-cooker meatloaf that works for anything that gets reheated. It’s all about retaining moisture!
Serving Suggestions for Your Flavorful Braised Pork Shoulder
So you have this incredible, fall-apart **Braised Pork Shoulder** that’s swimming in the most flavorful sauce imaginable. What do you serve it with? You need something simple to soak up all those savory juices! Potatoes are always a winner, whether you mash them up like fluffy clouds or do simple roasted ones, but I think creamy polenta is really the ultimate fancy choice here.
You also want something bright to cut through the richness. A crisp, tangy slaw is perfect, or honestly, just some simple roasted veggies. If you need some ideas for quick, delicious sides, I always lean on my recipe for delicious roasted vegetables. They cook while the pork rests, and they make a complete, comforting meal!

Storage and Reheating Your Braised Pork Shoulder Leftovers
Look, I know this recipe makes a ton because a big cut of pork shoulder is hard to find, but seriously, leftovers are sometimes even better the next day! The flavors have time to mingle and deepen overnight. Storing this **Braised Pork Shoulder** is super simple, but you need to keep the meat and the sauce separate.
Always put the shredded pork into one airtight container and the delicious braising liquid (that rich sauce!) into another. If you store them together, the meat can get a bit soggy sitting in the liquid for too long, and we want to avoid that mushy texture!
For freezing, this meat is fantastic. Put the pork and the sauce into separate heavy-duty freezer bags, push all the air out, and lay them flat in the freezer. They’ll keep great for about three months. I’ve got a great trick for freezing herbs in olive oil that works perfectly for saving up any leftover sauce if you won’t use it in a week or two; you can check out my tip on freezing fresh herbs in olive oil!
The Best Way to Reheat Shredded Pork
When you’re ready to eat your **Braised Pork Shoulder** leftovers, don’t just throw them in the microwave naked! That dries the meat right out, and we worked hard for that tenderness!
Instead, when reheating on the stovetop, pour just enough of that reserved sauce into a skillet to coat the bottom generously. Add your shredded pork and heat it slowly over medium-low heat, stirring gently until it is warmed all the way through. The moisture from the sauce keeps every piece succulent and tender, just like it was fresh out of the Dutch oven.
Maximizing Juiciness in Reheated Braised Pork Shoulder
If you need to reheat a bigger batch, the oven is your friend. Put the shredded pork in a baking dish, pour some sauce over it—not too much, just enough to make it wet, not swimming—cover it tightly with foil, and let it warm up in a low oven, maybe 300°F (150°C), for about 15 to 20 minutes. That gentle, steamy heat brings back all that beautiful texture your **Braised Pork Shoulder** had when it first came out of the oven!
Frequently Asked Questions About Braised Pork Shoulder
I get so many questions about this recipe, which just tells me how much everyone loves making a big, comforting pot of **Braised Pork Shoulder**! It’s a fantastic base recipe, and usually, the questions are all about adapting it to fit different schedules or pantry situations. Here are the things I hear most often when people are getting ready to make this **slow cooked pork**.
Can I make this Braised Pork Shoulder in a slow cooker?
Oh, absolutely! This is probably the most common query. You can definitely use your slow cooker, and it works like a charm for getting that pulled pork consistency. The main difference is the liquid. Since the slow cooker holds in steam so much better than a Dutch oven, you’ll want to cut back on the beef broth and vinegar by about a third—maybe just a half cup of each, max. Cook it on low for 7 to 8 hours, instead of the oven time. It’s even easier, but I still think the initial searing step is important for flavor!
What is the best way to thicken the sauce for the Braised Pork Shoulder?
That sauce is liquid gold, right? It’s naturally a bit thin because we use all that wonderful broth and vinegar. If you cook the pork and shred it, then remove it from the pot, you can take the remaining braising liquid and put it right on the stovetop burner. Just bring it to a rolling boil over medium-high heat and let it simmer uncovered. It’ll bubble away, and as the water evaporates, the sauce naturally concentrates and thickens up beautifully. Keep tasting it as you go, though, because you don’t want to reduce it too much! If you’ve got extra sauce you can’t use immediately, you should check out my guide on how to save and store leftover sauces from slow-cooked meats!
Can I use dry spices instead of fresh aromatics?
You can, but I really, really hope you don’t! The fresh onion and garlic you sauté at the beginning are critical because cooking them in the oil releases their flavor compounds—that’s called blooming, and you can’t quite replicate that with garlic powder. If you absolutely must substitute, use maybe half a teaspoon of onion powder and a quarter teaspoon of garlic powder only after you’ve added the liquids. But honestly, grating that tiny bit of fresh onion makes all the difference in the final depth of the **Braised Pork Shoulder**!
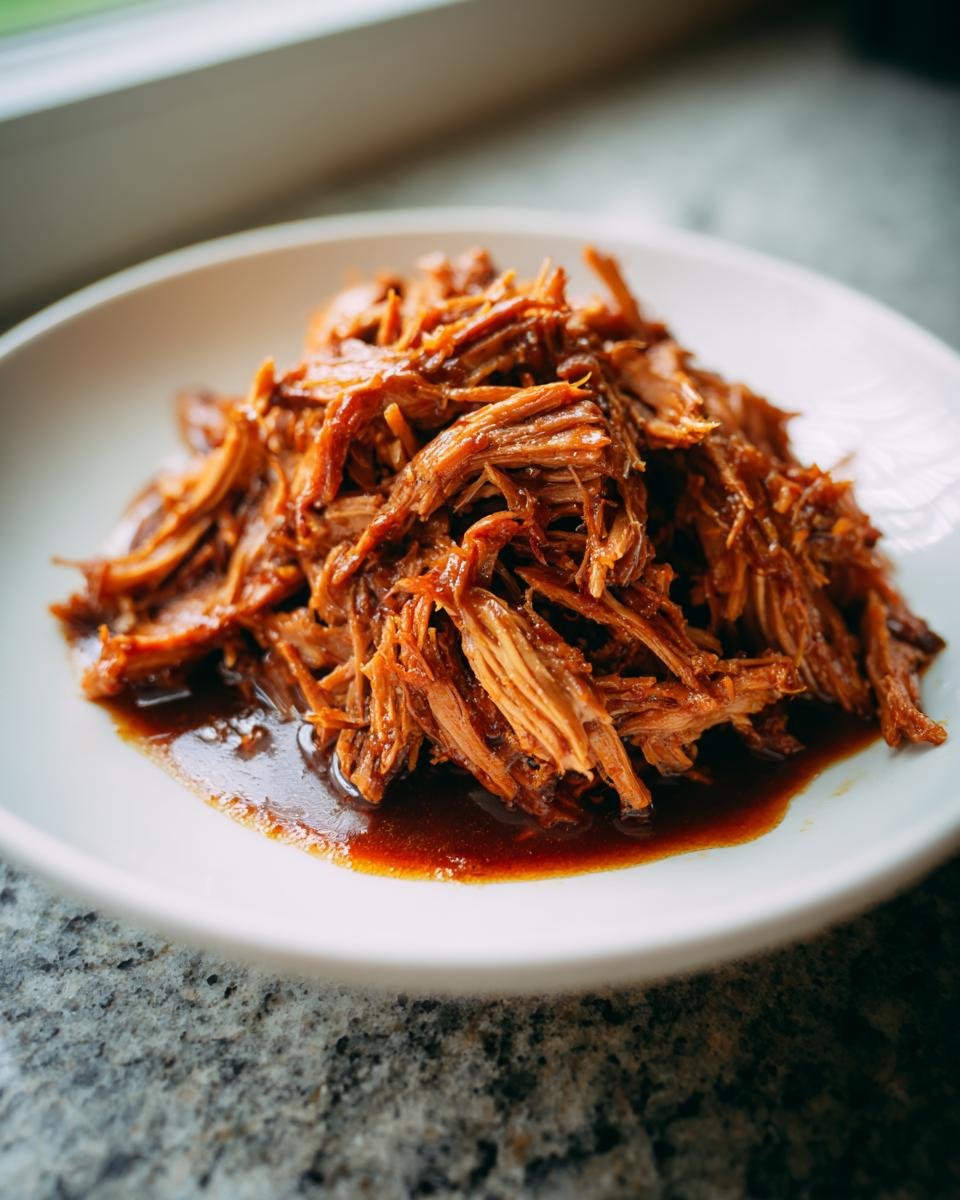
How do I get that classic pulled pork texture?
The texture for this **slow cooked pork** is achieved through the low temperature and time. You keep it covered in the oven—that’s the braise. When it’s done, the meat should literally resist being picked up with tongs. Use two forks to shred it right in the pot, making sure to mix it thoroughly with the sauce. The natural collagen turns to gelatin during those long hours, which is what gives pulled pork that incredible, shreddable, juicy quality. That’s the goal!
Nutritional Estimates for Simple Braised Pork Shoulder
Listen, I try my best to keep things honest here because my entire goal is making sure you have a delicious meal, not stressing over every single macro! Since this **Braised Pork Shoulder** uses a big cut of meat and we are using mostly broth and vinegar for the sauce, it ends up being surprisingly reasonable for how rich it tastes.
These numbers below are just my best guess, calculated based on dividing the entire cooked dish (and the sauce) into six good servings—and remember, everybody eats a different amount! This is just a guide, so don’t panic if your plate looks a little different than this breakdown.
- Serving Size: About 6 oz cooked meat
- Calories: Roughly 450 per serving
- Total Fat: Around 28g (with 10g being saturated fat—that’s where the richness comes from!)
- Protein Power: A whopping 45g of protein! Great for feeling full.
- Carbohydrates: Very minimal, about 4g, since we aren’t adding heavy sugars or flour.
We kept the sugar very low in this recipe, just that one tablespoon of brown sugar to balance the vinegar, so you see the total sugar content is only around 3g. It just proves that simple, slow-cooked food can be both incredibly satisfying and straightforward to track nutritionally. Enjoy knowing you’re eating real food!
Share Your Perfect Braised Pork Shoulder Experience
So there you have it! My absolute favorite, no-fuss way to get that phenomenal, juicy **Braised Pork Shoulder** that everyone always asks me about. I truly hope this recipe brings as much cozy, delicious comfort to your kitchen as it does to mine!
Now, I want to see what you made! Did you keep it simple, or did you add in a spicy kick? Did you serve it over creamy polenta like I suggested? Don’t keep those fantastic results to yourself!
Please, take a moment to leave a rating right below this section—five stars if it melted your fork, or whatever feels right! And if you have a photo of your masterpiece, please tag me on social media or send me a message through the contact page. I absolutely love seeing your creations! Happy cooking, friends!
Print
Simple Braised Pork Shoulder
- Total Time: 4 hours 15 min
- Yield: 6 servings 1x
- Diet: Low Calorie
Description
A straightforward recipe for tender, slow-cooked pork shoulder.
Ingredients
- 3 lb pork shoulder, bone-in or boneless
- 2 tbsp olive oil
- 1 large onion, chopped
- 3 cloves garlic, minced
- 1 cup beef broth
- 1/2 cup apple cider vinegar
- 1 tbsp brown sugar
- 1 tsp salt
- 1/2 tsp black pepper
Instructions
- Season the pork shoulder all over with salt and pepper.
- Heat olive oil in a large Dutch oven over medium-high heat.
- Sear the pork shoulder on all sides until browned, about 3-4 minutes per side. Remove the pork and set aside.
- Add the chopped onion to the pot and cook until softened, about 5 minutes.
- Add the minced garlic and cook for 1 minute more until fragrant.
- Pour in the beef broth and apple cider vinegar. Scrape up any browned bits from the bottom of the pot.
- Stir in the brown sugar.
- Return the pork shoulder to the pot. The liquid should come about halfway up the side of the meat.
- Bring the liquid to a simmer, then cover the Dutch oven tightly.
- Transfer the pot to a preheated oven at 325°F (160°C).
- Braise for 3 to 4 hours, or until the pork is very tender and easily shreds with a fork.
- Remove the pork from the liquid and shred it using two forks. Skim any excess fat from the braising liquid and serve the shredded pork with the sauce.
Notes
- For extra flavor, add one bay leaf to the braising liquid.
- If you prefer a thicker sauce, remove the liquid after cooking and simmer it on the stovetop until reduced.
- Prep Time: 15 min
- Cook Time: 4 hours
- Category: Main Course
- Method: Braising
- Cuisine: American
Nutrition
- Serving Size: 6 oz cooked meat
- Calories: 450
- Sugar: 3
- Sodium: 450
- Fat: 28
- Saturated Fat: 10
- Unsaturated Fat: 18
- Trans Fat: 0
- Carbohydrates: 4
- Fiber: 0
- Protein: 45
- Cholesterol: 130
Keywords: braised pork shoulder, slow cooked pork, pulled pork, pot roast, easy pork recipe