
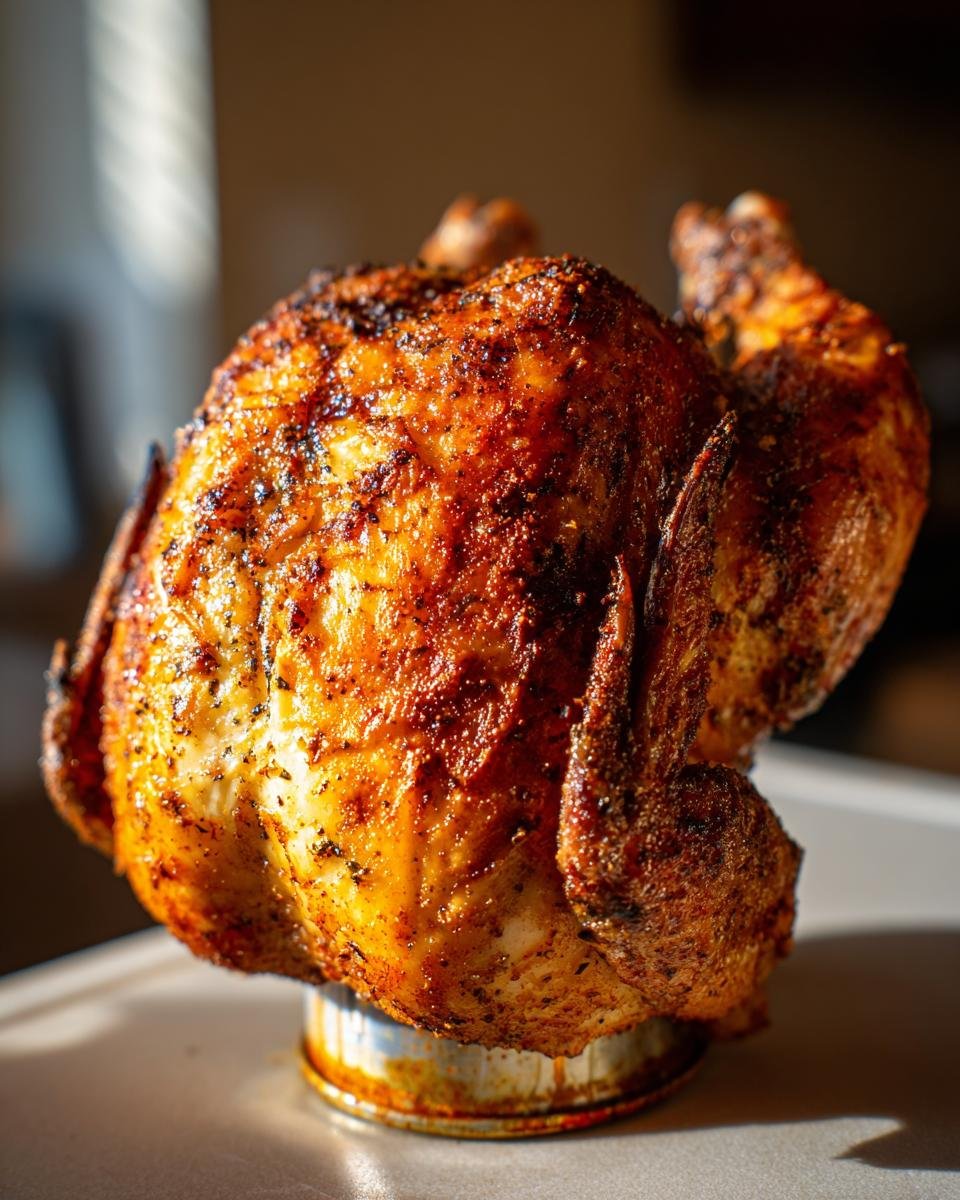
If you’ve ever struggled with dry, lackluster grilled chicken, I’m about to change your life! Seriously. I used to think getting perfectly moist meat off the grill was some kind of grilling wizardry, but then I discovered the glorious simplicity of the Beer Can Chicken method. This technique is my absolute favorite because it guarantees succulent, fall-off-the-bone results every single time, even on the notoriously tricky chicken breast.
It sounds a little wild, standing a whole bird up on a can of beer, but trust me, this Beer Can Chicken trick is pure magic when it comes to keeping things tender inside while getting that beautiful, smoky char outside. It’s the easiest whole chicken recipe you’ll ever make, I promise!

Why This Beer Can Chicken Recipe Delivers Juicy Results
You have to understand, this isn’t just about novelty; this is about physics making your barbecue better! When I first tried the Beer Can Chicken method, I was skeptical, but the results spoke for themselves. This method helps us avoid the usual dry breast problem that plagues everyone roasting a whole bird.
It’s an incredibly reliable way to grill a whole chicken, and incorporating flavor into your technique is always a win. If you want to see how to add even more flavor before you hit the heat, check out my favorite flavorful chicken marinade guide!
The Secret Moisture Mechanism of Beer Can Chicken
The magic is all the steam! As that beer heats up inside the can, it turns into vapor. This hot steam escapes up through the chicken cavity, bathing the meat—especially that notoriously dry breast—in continuous moisture while it cooks. The legs and dark meat cook perfectly on the outside heat, but the inside stays impossibly juicy because of that little steamy bath the bird is taking.
Achieving Crispy Skin on Your Beer Can Chicken
Don’t let the steam fool you into thinking you’ll end up with soggy skin! Before you even think about setting up the can, you must pat that chicken absolutely dry with paper towels. That’s rule number one! Then, making sure your spice rub covers every inch of the exterior ensures that the dry heat of the grill transforms that skin into a beautiful, crisp golden shell.
Essential Ingredients for Perfect Beer Can Chicken
Okay, so this recipe is fantastic because you probably have most of what you need sitting in your pantry already! We are keeping things super simple here because the beer is doing most of the heavy lifting. Remember, preparation matters, so make sure that chicken is ready to go!
When you’re grabbing ingredients, don’t forget that the flavor comes from a simple, robust rub. If you like to experiment with herbaceous flavors on poultry, you might want to check out my garlic herb chicken thighs recipe for some inspiration!
Here is exactly what you need for the ultimate Beer Can Chicken:
- One whole chicken, aiming for about 4 pounds. Make sure you remove those giblets first!
- One 12-ounce can of your favorite beer—and yes, it needs to be partially consumed (drink half, save the rest for the bird!).
- 2 tablespoons of simple olive oil.
- For the rub: 1 tablespoon salt, 1 teaspoon black pepper, 1 teaspoon paprika for color, and 1 teaspoon of garlic powder. That’s it!
Step-by-Step Instructions for Grilling Beer Can Chicken
This is where the magic really happens, but you have to be methodical! We’re aiming for a steady heat, so preheating is your first step. You want your grill idling around 350°F, which is medium heat for most folks. If you’re looking for an alternative way to grill poultry that skips the standing act but gets you great results, you might enjoy my guide on spatchcock grilled chicken!
Getting the internal temperature right is non-negotiable for food safety, but trust me, the Beer Can Chicken method makes it easy to nail that perfect internal temp while keeping the meat juicy. If you prefer some heavy sauce action, always check out this BBQ chicken recipe for pairing ideas!
Preparing the Chicken and Spice Rub
First things first: pat the chicken religiously dry with paper towels inside and out. Any surface moisture will fight your crispy skin goals later! While that’s drying, mix up your spice blend—that salt, pepper, paprika, and garlic powder. Now, get that spice rub everywhere. I mean it! Make sure you’re rubbing it all over the outside skin because that’s where all the surface flavor lives.
Setting Up for Beer Can Chicken on the Grill
Okay, time for the tricky part. You need to open that beer and drink or pour out about half of it. Be careful when you do this part! Then, you’re going to carefully stand the chicken upright by inserting the open end of the can right into the cavity. It needs to be steady on its legs and the can itself—no wobbly towers allowed on my grill, thank you! Place the setup on the grill over indirect heat only. We are roasting here, not searing!
Grilling Time and Checking for Doneness
Your Beer Can Chicken will usually take between 1 hour and 15 minutes up to an hour and a half. You absolutely must check the internal temperature in the thickest part of the thigh, making sure it hits 165°F (74°C). Once it’s done, you need to be extremely careful removing it from the grill—that can is super hot! Let that glorious whole chicken rest for a full 10 minutes before you carve. Don’t skip the rest, or all that beautiful steam will rush right out!
Expert Tips for Mastering Beer Can Chicken
Now that you know the basic setup for your Beer Can Chicken, let’s talk about tweaking things for absolute perfection. People always ask me about the beer—do I need a super fancy craft brew? Honestly, no! The primary job of the can is to generate steam, not necessarily to flavor the meat heavily. If you’re looking for other ways to inject flavor into your grilling adventures, check out my tips on enhancing your rubs in this flavorful chicken marinade guide.
Beer Substitutions for Beer Can Chicken
If you are serving this to people who don’t like beer, or if you just don’t want the alcohol content, don’t sweat it! You can absolutely substitute the beer with chicken broth or even a dry white wine. Some folks prefer broth because it’s a pure steam environment, while others swear by wine for a slight tanginess. Whatever you choose, just make sure the can is only half full so you have room for that steam action!
Oven Method Adaptation for Beer Can Chicken
Sometimes the weather just doesn’t cooperate, right? If you have to move your incredible setup inside, you can totally use your oven. But listen close: do *not* try to balance the bird directly on the actual beer can inside the oven. It’s wobbly and dangerous! Instead, buy one of those little metal holders—they look like a trivet with a spike for the can. This keeps your whole chicken upright and stable on a solid roasting pan. It still generates that moisture, just in a safer environment!
Serving Suggestions for Your Beer Can Chicken
Now that you have this perfectly moist, smoky bird, you need sides that deserve it! You want things that can either mop up those amazing juices or offer a nice, bright contrast to all that rich grilled flavor. Seriously, don’t just eat it plain!
I always default to something starchy and something green. For potatoes, you absolutely have to try making my roasted garlic potatoes—they soak up every bit of drippings from the cutting board. And you need a little crunch! Toss some broccoli with Parmesan; this garlic parmesan broccoli is quick and tastes amazing next to the grilled chicken.
This Beer Can Chicken is so good, it honestly doesn’t need much, but a crisp summer salad never hurts!
Storage and Reheating Instructions
Once you manage to stop eating all that grilled chicken right off the cutting board, you’ll have leftovers, I hope! Place any remaining Beer Can Chicken pieces into a shallow, airtight container. You can safely store it in the fridge for about three to four days. Never leave cooked chicken out for more than two hours, that’s just basic kitchen smarts.
When you’re ready for round two, skip the microwave if you can! The best trick is to reheat slices in a low oven or even a skillet with just a tiny splash of water or broth. Cover it loosely with foil while reheating; that trapped steam will bring back that original juicy texture in no time. You want that meat warm, not dried out!
Frequently Asked Questions About Beer Can Chicken
When people see a whole chicken standing up on a grill, they always have questions! It’s such an iconic look, but naturally, people worry about safety and execution. I’m here to clear up the most common things I hear about this method for grilling chicken. Also, if you are looking for a truly fantastic grilled side, you absolutely have to check out my recipe for irresistible grilled corn!
Is it safe to cook chicken directly on a beer can?
This is the number one question I get about cooking with a beer can! The beer itself is safe, and the metal cans are generally designed to handle heat. The main thing you need to watch out for is stability—you don’t want that hot chicken tipping over! Also, make sure you’re using an actual aluminum beverage can, not some weird plastic or coated container. Mostly, as long as the can is clean and stable on your grill grates, you are good to go for safely cooking your whole chicken.
What type of beer works best for Beer Can Chicken?
Honestly, don’t stress about the beer too much! Most of the beer turns to steam, so the delicate flavor notes don’t really translate much into the meat itself. I generally grab whatever pale lager or light ale I already have open because they are fizzy and produce good steam. Heavier beers, like stouts, might taste heavier, but the moisture factor is the most important thing here. Just avoid anything super high in sugar, as that can sometimes burn easier on the inside.
Can I use a specialized Beer Can Chicken stand instead of the can?
Oh yes, you absolutely can, and I highly recommend it, especially if you grill often! These specialized stands are usually metal or ceramic cones that cradle the chicken perfectly. They are often much more stable than balancing the bird solely on the can and its legs, which eliminates a major worry for me. You can fill the base of the stand with broth or wine for moistness, just like you would the can. It’s an excellent, reliable alternative for making amazing grilled chicken.
Nutritional Estimate for This Beer Can Chicken
I always put the nutritional breakdown in because, let’s face it, chicken is usually a lighter meal, but we do throw some oil and spices on there! It helps me plan out the rest of my plate. Remember that these numbers are just estimates based on using a standard 4-pound bird and the ingredients listed in the recipe. Your actual results might vary slightly depending on how much skin you eat or if you use a larger chicken!
If you’re counting macros, you’ll be happy to know this is a powerhouse for protein! For about a 4 oz serving of cooked meat, here’s what we’re generally looking at:
- Calories: Around 350 calories
- Protein: A whopping 40 grams!
- Total Fat: About 18 grams
- Saturated Fat: Roughly 5 grams
- Carbohydrates: Almost zero, which is great!
- Sugar: Just about 1 gram
- Cholesterol: Around 120 mg
It’s a low-carb champion, which is why I love serving it with roasted potatoes instead of rice! It balances out the whole meal perfectly. Enjoy knowing you’re eating something delicious and satisfying without overloading on the extras!
Share Your Experience Making Beer Can Chicken
I poured my heart into showing you how to nail this Beer Can Chicken, and now I need to hear from you! Did your grilled chicken come out perfectly moist? Please leave a quick star rating below so I know how your cook went!
It would make my whole week if you snapped a photo and tagged me when you serve up this smoky, delicious main course. If you have any burning questions unanswered, pop them in the comments too—I love connecting about grilling! If you’re already planning your next backyard feast, don’t forget to check out my irresistible BBQ chicken recipe for next time!
Print
Beer Can Chicken
- Total Time: 105 min
- Yield: 4 servings 1x
- Diet: Low Fat
Description
A simple method for cooking a whole chicken using a partially filled can of beer to keep the meat moist.
Ingredients
- 1 whole chicken (about 4 lbs)
- 1 can (12 oz) beer, partially consumed
- 2 tablespoons olive oil
- 1 tablespoon salt
- 1 teaspoon black pepper
- 1 teaspoon paprika
- 1 teaspoon garlic powder
Instructions
- Preheat your grill to medium heat (around 350°F or 175°C).
- Remove giblets and neck from the chicken cavity. Pat the chicken dry with paper towels.
- Mix salt, pepper, paprika, and garlic powder together. Rub this mixture all over the outside of the chicken.
- Open the beer can and pour out or drink about half of the beer.
- Carefully position the chicken upright by inserting the open end of the beer can into the chicken cavity. The chicken should stand stable on the can and its legs.
- Place the chicken assembly on the grill, using indirect heat (not directly over the coals or burner).
- Grill for about 1 hour and 15 minutes to 1 hour and 30 minutes, or until an internal temperature of 165°F (74°C) is reached in the thickest part of the thigh.
- Carefully remove the chicken and the can from the grill. Let the chicken rest for 10 minutes before carving.
Notes
- You can substitute the beer with chicken broth or white wine if you prefer not to use beer.
- If using an oven, place the chicken on a roasting pan with a specialized beer can chicken holder instead of directly on the can.
- Prep Time: 15 min
- Cook Time: 90 min
- Category: Main Course
- Method: Grilling
- Cuisine: American
Nutrition
- Serving Size: 4 oz cooked meat
- Calories: 350
- Sugar: 1
- Sodium: 450
- Fat: 18
- Saturated Fat: 5
- Unsaturated Fat: 13
- Trans Fat: 0
- Carbohydrates: 0
- Fiber: 0
- Protein: 40
- Cholesterol: 120
Keywords: beer can chicken, grilled chicken, whole chicken, easy chicken recipe, moist chicken