
Oh my goodness, if there’s one food that instantly transports me back to my childhood parties, it’s Filipino food—and specifically, the sound of sizzling oil when I’m frying up a fresh batch of spring rolls. Nothing beats it!
So many recipes out there make Lumpia seem complicated, right? All those charts about wrapper moisture and chilling times. Honestly, I don’t have time for that drama. This recipe? This is the simplest, most straightforward way I know to get that perfect, savory pork filling wrapped up securely in a golden, crispy blanket. You are going to be amazed at how quickly you’re serving up these delicious treats.

I remember marathon wrapping sessions with my Tita as a little girl. We’d sit at the kitchen table for hours, the smell of garlic and onion filling the whole house. She always insisted that the best part of making Lumpia was getting that perfect, tight roll that held all that glorious flavor inside. Now, I have to make them every time we have guests because people just expect them! Trust me, once you try this easy method, you’ll be whipping up these fantastic appetizers all the time.
Why You Will Love This Simple Lumpia Recipe
Look, I’m all for fancy cooking, but sometimes you just need something that delivers huge flavor without demanding your entire afternoon. This version of Lumpia is ridiculously reliable. You can make these for a last-minute craving or a huge party. Seriously, what’s not to love?
- Lightning-Fast Prep Time: We’re talking under 25 minutes to mix everything up. I don’t even bother peeling a whole onion; anything simple enough for me to make while watching TV is a winner!
- Authentic, Classic Flavor: This filling uses that perfect savory combination—pork, garlic, and just the right amount of seasoning. It tastes exactly like the ones we grew up eating; no weird modern twists here.
- Beginner-Friendly Rolling: I’ll show you my easy technique for sealing the wrappers so you can get that beautiful, tight roll without any sticky fingers or broken pieces during frying. This recipe is perfect if you’ve never touched a lumpia wrapper before.
- Crowd-Pleaser Guaranteed: If you bring these to any potluck, prepare to give out the recipe. They disappear faster than anything else on the table, so you might want to double the batch!
If you’re looking to really nail the crowd-favorite aspect of these Filipino spring rolls, I’ve shared some extra secrets over in my deep dive on getting that ultimate crispiness without fail. Go check out ultimate crowd favorites Filipino lumpia secret when you have a second!
Essential Ingredients for Perfect Lumpia
Gathering your ingredients first is key, and trust me, with Lumpia, the prep is half the battle! Don’t skip the tiny chopping steps, because every little piece of vegetable needs to cook evenly inside that tiny wrapper. We want no hard bits—just savory heaven. I always lay everything out first, just like you see listed below, so the throwing-it-all-together part goes super fast.
For the Lumpia Filling
This simple filling is fantastic because it uses common veggies you probably already have. Remember, the finer you chop the cabbage and carrots, the better your rolls will look and eat. Nobody wants a giant chunk of raw carrot poking out of their perfectly golden roll, right?
- 1 pound ground pork (You can swap this for ground chicken if you like, but the pork keeps it traditional!)
- 1 cup chopped cabbage
- 1/2 cup chopped carrots
- 1/4 cup chopped green onion
- 2 cloves garlic, minced (Don’t skimp on the garlic, please!)
- 1 small onion, minced
- 1 tablespoon soy sauce
- 1 teaspoon salt
- 1/2 teaspoon black pepper
For Wrapping and Frying Your Lumpia
The wrappers are super delicate, so handle that package with care! A standard package usually gives you about 50, which is why you might end up making five batches—they disappear too fast. For frying, you need a neutral oil that can handle the heat well.
- 1 package (about 50 sheets) lumpia wrappers
- Vegetable oil for frying (I usually use canola or sunflower oil because they don’t have a strong flavor)
Expert Tips for Preparing the Lumpia Filling
Okay, once you have all your chopped veggies and pork ready, mixing them isn’t just about stirring everything together. We’re building flavor here, friend! The most important thing I learned from Tita is to taste the mixture *before* you start rolling. Seriously, before you ruin those delicate wrappers, grab a tiny bit, microwave it for about 30 seconds on a plate, and test the seasoning.
You want it slightly saltier than you think it needs to be, because the saltiness mellows out once the filling is encased in the wrapper and fried. This is my big E-E-A-T tip for you—getting that seasoning balance right makes all the difference!
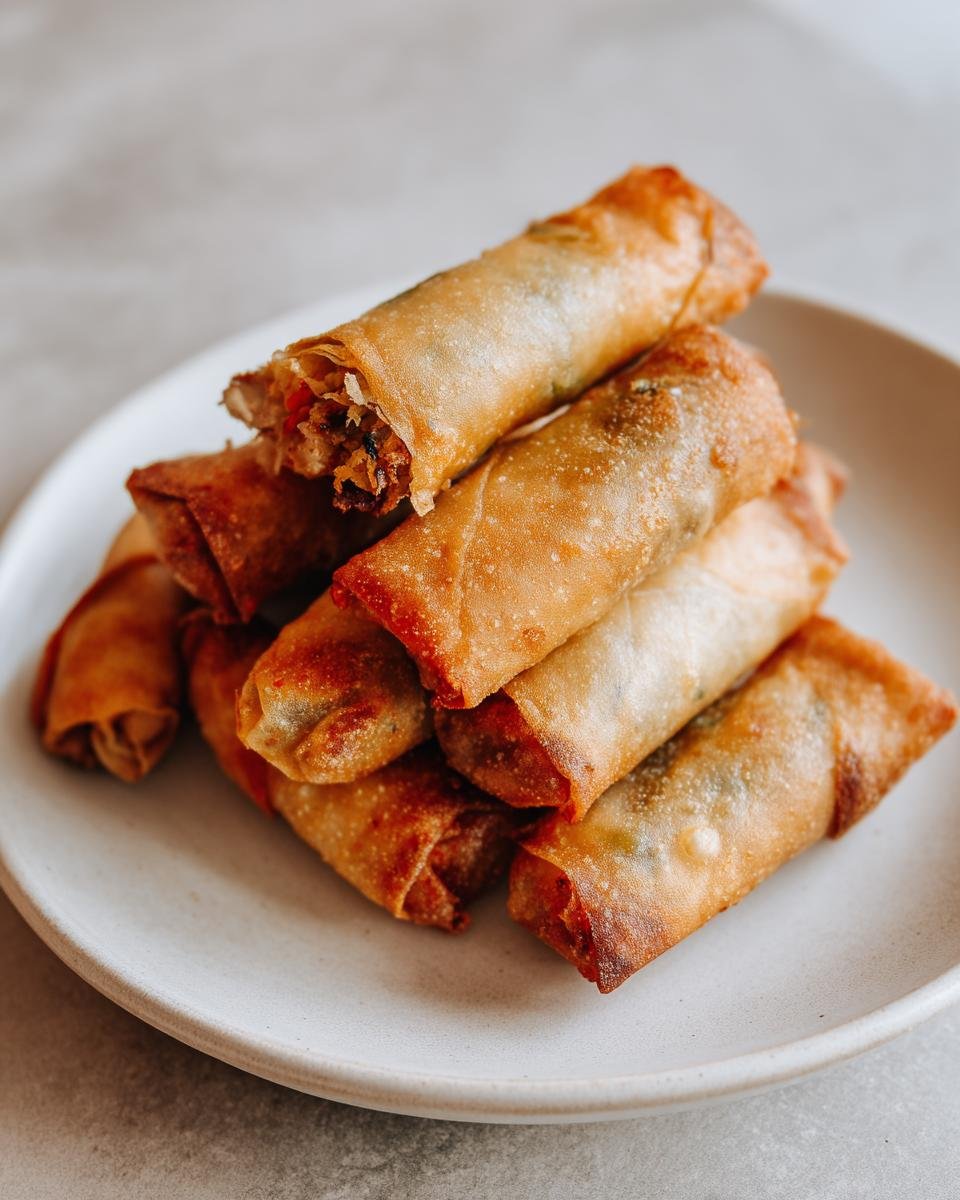
Also, remember that note about crispiness? Do NOT overfill those wrappers. I know it’s tempting to cram as much savory deliciousness as possible into each one, but if you use more than about one tablespoon of filling, the wrapper might burst when it hits the hot oil. A slightly under-filled roll fries up beautifully, yielding that shatteringly crisp exterior we all dream about.
Step-by-Step Instructions: How to Roll Lumpia
This is where the magic happens, and honestly, it’s easier than you think once you get the muscle memory going. We are going for tight rolls—loose lumpia get floppy and soak up oil, which is the enemy of a crisp spring roll!
First, lay one wrapper flat on your countertop so it looks like a diamond shape, with the corner pointing towards you. Drop about one generous tablespoon of that seasoned pork filling near the bottom corner, leaving about an inch or so of space from the edge.
Now, fold that bottom corner up and over the filling. You want to tuck it in tight! Then, take the two side corners—the ones pointing left and right—and fold them inward, meeting in the middle over the filling. This keeps everything snug. Think of it like wrapping a tiny little edible gift.
Keep rolling upward toward the final tip. When you get to the last inch, dab a tiny bit of water onto the edge of the wrapper using your finger. Press down firmly to seal. That water seals it like glue! Repeat this process until all your filling is used up. If you want the secret to incredibly crispy ones, check out my deep dive on ultimate crowd favorites Filipino lumpia secret where I talk about not overstuffing them!
Achieving Crispy Perfection: Frying Your Lumpia
Deep frying can be scary, but I promise you, it’s the secret to that shatteringly crisp crunch every single time. The absolute key here is the oil temperature. If the oil isn’t hot enough—and this is where a lot of people go wrong—your beautiful little rolls will sit there getting greasy instead of instantly sealing up. We need that temperature to be right around 350°F (175°C).
If you are nervous, you can test it by dropping a tiny piece of wrapper edge into the oil—it should start fizzing happily right away, not slowly bubble like it’s taking a bath. Don’t crowd the pan, either! Seriously, just put in what fits comfortably in one layer. Overcrowding drops the oil temperature instantly, leading to soggy Lumpia, and nobody wants soggy Filipino spring rolls.
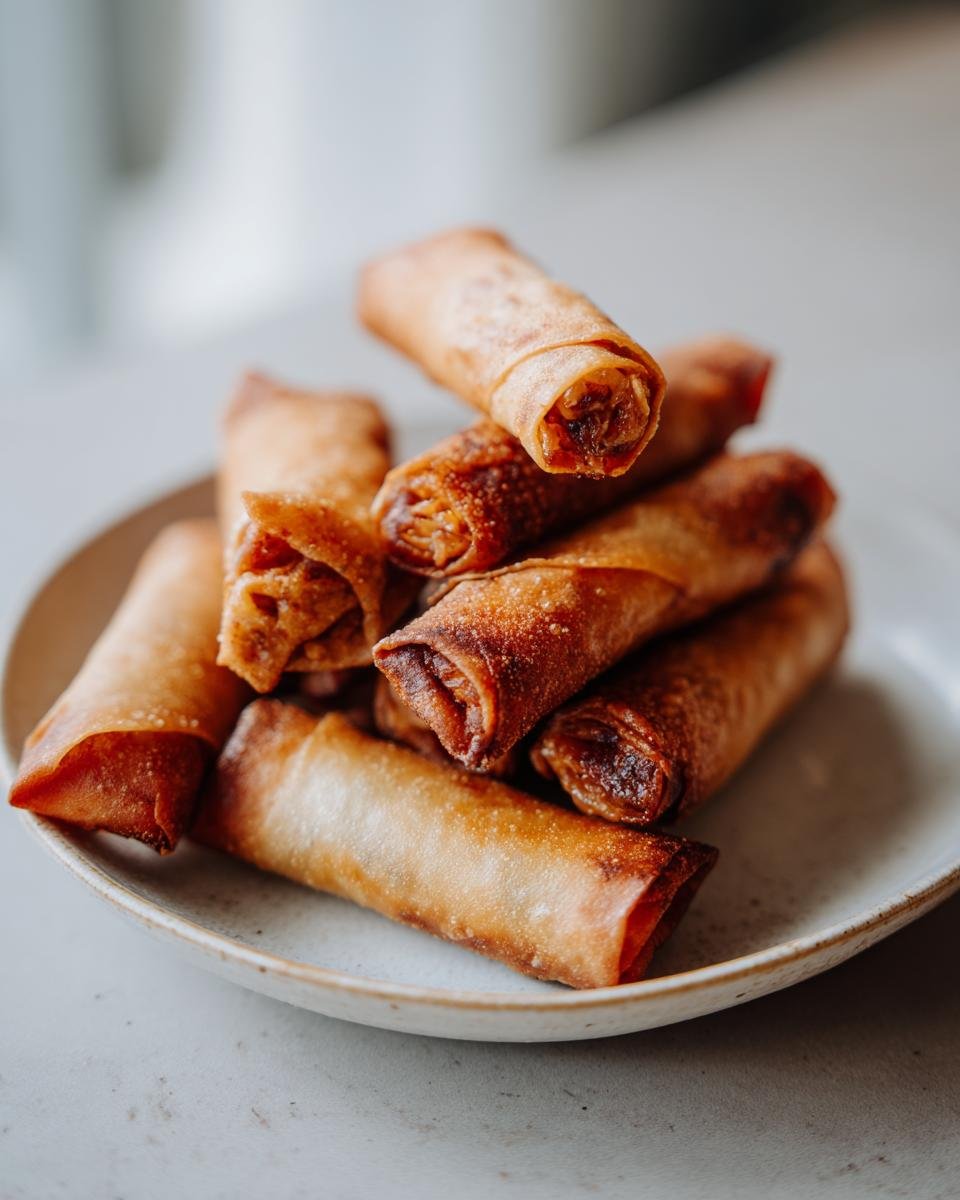
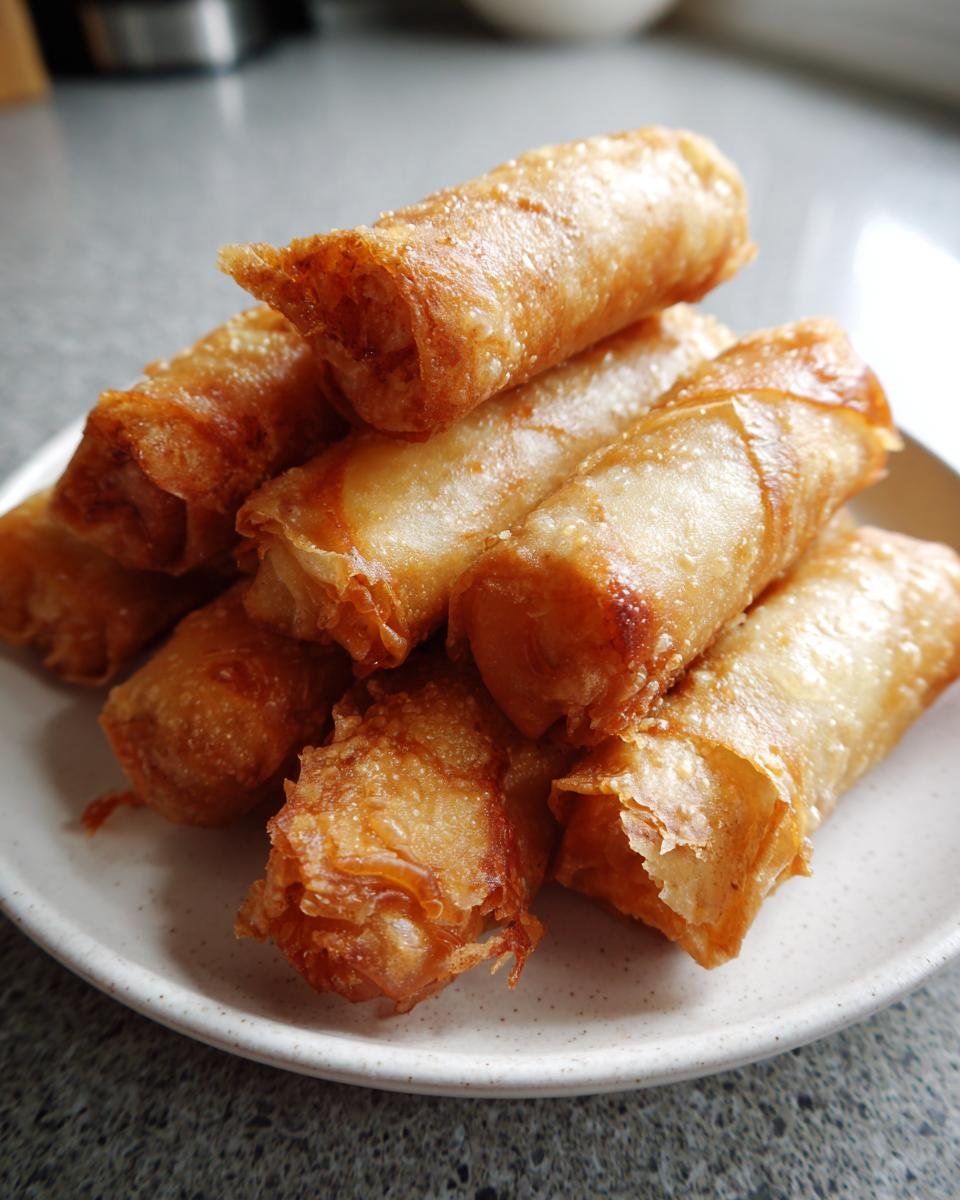
Let them fry for about three to five minutes, turning them gently so they brown evenly on all sides. You are looking for that gorgeous, deep golden-brown color. Use a spider or tongs to take them out and immediately set them on a wire rack—this lets the air circulate underneath while the excess oil drips away. For tips on getting that perfect texture everywhere, even with other fried goods, take a peek at my friend’s guide on making irresistible homemade french fries perfectly crispy recipe; the principles are the same!
Serving Suggestions for Your Homemade Lumpia
Listen, the fried goodness of perfect Lumpia is amazing on its own, but let’s be honest, they are even better with the right dipping sauce! Eating them plain is just missing out on half the fun. I always set out at least two different options because people seem to have strong loyalties to their preferred sauce style.
The absolute classic pairing for these savory Filipino spring rolls is a bright, tangy vinegar dip. I just mix white or cane vinegar with a smashed clove of garlic, a splash of soy sauce, maybe a tiny pinch of black pepper. It cuts right through the richness of the pork and the fried wrapper perfectly.
For the folks who like things sweet, you absolutely need a good sweet chili sauce. If you’re feeling ambitious and want to try making one from scratch that’s better than anything store-bought, you should check out this incredible recipe for irresistible Thai peanut sauce recipe—wait, scratch that, I meant the sweet chili sauce recipe which is often right next to the peanut sauce on that site, but I’m going to stick with store-bought chili sauce for this recipe because we are keeping things simple today!
If you are making a whole feast though, you can’t just serve Lumpia! They are the perfect appetizer before something hearty. They go amazingly well alongside garlic rice, of course, or maybe even tucked next to some Pancit noodles on a big platter. They just make everything feel festive, don’t they?
Making Lumpia Ahead of Time and Storage Tips
Anyone who makes a big batch of Lumpia knows the secret: they always taste better the next day (if there are any left!). But let’s talk about making them ahead of time, because sometimes you just need to prepare for a party days in advance. I often roll about 100 wrappers’ worth on a Saturday morning so I don’t have to stress on party day.
If you’re freezing the uncooked rolls—and this is the best way to do it, trust me—the trick is making sure they don’t stick together in one big clump! Lay out your finished, sealed Lumpia on a baking sheet lined with parchment paper. Make sure they aren’t touching at all. Then, pop that entire tray into the freezer until they are rock hard. Once they’re solid little frozen cylinders, you can transfer them to a heavy-duty Ziploc bag. They’ll keep beautifully for a couple of months!
When you are ready to fry those frozen beauties, don’t thaw them first! Just drop them straight into the hot oil. You’ll need to increase your frying time by just a minute or two to make sure the pork inside gets cooked all the way through. Keep an eye on the temperature, though, so the outside doesn’t burn before the inside thaws.
What about leftovers? Oh, there are never many, but if you manage to have some of these amazing Filipino spring rolls left over, they store okay in the fridge for about three days in an airtight container. But honestly, they lose that incredible crunch. My absolute favorite trick to revive them is popping them straight into an air fryer for about four minutes on medium heat. It brings back about 80% of the original crispiness, and that’s a worthy compromise!
Frequently Asked Questions About Lumpia
I get so many questions about these little jewels! It makes sense, everyone wants their Lumpia to turn out just right, especially when you are serving up something as important as traditional Filipino spring rolls. Here are some of the things I hear most often when people are trying this recipe for the first time.
Can I bake or air fry these Lumpia instead of frying?
Yes, you absolutely can! While deep frying is how we get that totally classic, shatteringly crisp texture that makes Lumpia famous, baking or air frying is definitely a healthier option, which I know is important to a lot of you. If you bake them, you should lightly brush them with oil first and cook them at about 400°F (200°C) until they are golden brown.
If you use the air fryer, the result is usually a bit closer to the fried texture. Just spritz them well with cooking spray and air fry for about 8 to 10 minutes, shaking the basket halfway through. Just be warned: they won’t look identical to the deep-fried ones, but they are still totally delicious, especially if you’re looking for some easy finger foods for a big gathering like the ones listed in my guide on 10 irresistible finger foods for gathering!
What is the best dipping sauce for Lumpia?
This is a matter of huge personal debate, but I stand by the vinegar-garlic combination for cutting through the richness of the pork filling. That sharp, tangy sauce just wakes everything up! However, I always make sure to offer a sweet option too.
Most grocery stores sell a fantastic, readily available sweet chili dipping sauce that pairs perfectly with these Filipino spring rolls. If you’re serving them for picky eaters, having both the acidic vinegar option and the sweet chili option covers all the bases. Honestly, one batch of these amazing Lumpia disappears before people even get to the sauce selection!
Estimated Nutritional Information for Lumpia
Okay, time for the nitty-gritty. Nutritional information is always a little fuzzy when you’re frying things at home, so please take these numbers with a big grain of salt—or maybe a sprinkle of sugar from your dipping sauce!
This chart below is based on consuming two of these deep-fried beauties. Remember, this recipe yields about 50 pieces, so the numbers reflect what’s in two rolls, serving size considered. If you skip frying and go for the air fryer, the fat content will drop quite a bit, which is a nice bonus for those watching their intake!
Since we’re using ground pork in this classic version, we get a great punch of protein, which keeps you full even though these are technically appetizers. I find that knowing this rough breakdown helps me plan the rest of the meal so we stay balanced—after all, we can’t live on just crispy Filipino spring rolls alone! (Though I’ve certainly tried.)
- Serving Size: 2 rolls
- Calories: 150
- Fat: 8g (Keep an eye on that saturated fat, that’s mostly from the frying oil!)
- Carbohydrates: 12g
- Protein: 8g
- Sodium: 250mg (This varies depending on how much soy sauce you used in the filling, so taste testing is important!)
- Sugar: 1g
This breakdown gives you a good ballpark figure for enjoying this awesome appetizer responsibly. Now go make a HUGE batch!
Print
Simple Lumpia Recipe
- Total Time: 40 min
- Yield: About 50 pieces 1x
- Diet: Low Fat
Description
A straightforward recipe for making Filipino spring rolls, known as Lumpia.
Ingredients
- 1 pound ground pork
- 1 cup chopped cabbage
- 1/2 cup chopped carrots
- 1/4 cup chopped green onion
- 2 cloves garlic, minced
- 1 small onion, minced
- 1 tablespoon soy sauce
- 1 teaspoon salt
- 1/2 teaspoon black pepper
- 1 package (about 50 sheets) lumpia wrappers
- Vegetable oil for frying
Instructions
- In a large bowl, combine the ground pork, cabbage, carrots, green onion, garlic, onion, soy sauce, salt, and pepper. Mix well until all ingredients are evenly distributed.
- Lay a lumpia wrapper flat on a clean surface. Place about one tablespoon of the filling near one edge.
- Fold the edge over the filling, tuck in the sides, and roll tightly until you reach the opposite edge. Moisten the final edge with a little water to seal the roll.
- Repeat with the remaining filling and wrappers.
- Heat about two inches of vegetable oil in a deep skillet over medium-high heat.
- Carefully place the lumpia rolls into the hot oil, ensuring not to overcrowd the pan.
- Fry for 3 to 5 minutes, turning occasionally, until golden brown and cooked through.
- Remove the lumpia from the oil and place them on a wire rack or paper towel-lined plate to drain excess oil.
- Serve hot with your preferred dipping sauce.
Notes
- For a crispier texture, do not overfill the wrappers.
- You can substitute ground chicken or turkey for the ground pork.
- Make sure the oil temperature is correct; if too cool, the lumpia will absorb too much oil.
- Prep Time: 25 min
- Cook Time: 15 min
- Category: Appetizer
- Method: Frying
- Cuisine: Filipino
Nutrition
- Serving Size: 2 rolls
- Calories: 150
- Sugar: 1
- Sodium: 250
- Fat: 8
- Saturated Fat: 3
- Unsaturated Fat: 5
- Trans Fat: 0
- Carbohydrates: 12
- Fiber: 1
- Protein: 8
- Cholesterol: 30
Keywords: Lumpia, Filipino spring rolls, fried rolls, pork rolls, appetizer