
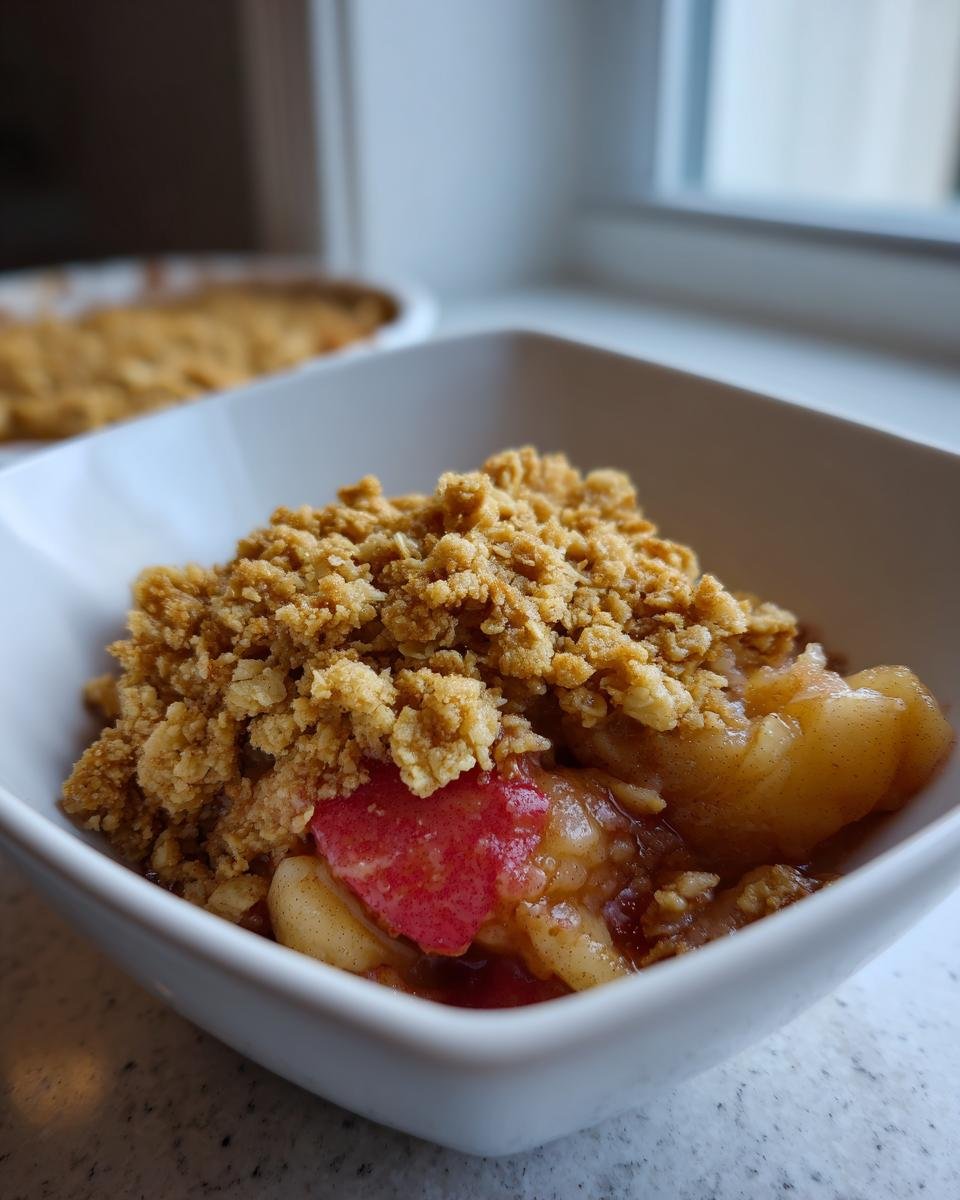
Oh, you know those chilly evenings when all you really need is something warm, bubbly, and smelling like pure nostalgia? I’ve tried every fancy baked fruit dessert under the sun, but nothing beats the simple, straightforward comfort of a truly great dessert. That’s why I’m handing over my absolute favorite recipe today: the easiest, most reliable Apple Crisp you will ever make, period.
I used to struggle with keeping the oat topping from turning into either dusty sand or soggy mush. It was frustrating! I must have wasted ten pounds of butter trying to get it just right for our family gatherings. But after years of testing, I finally nailed the timing and the butter temperature, and trust me, this recipe is foolproof.
Seriously, if you think apple crisp is too fussy, prepare to be amazed. This method takes about fifteen minutes of prep, and the payoff is golden, bubbly, cinnamon-spiced perfection.
Why This Simple Apple Crisp Recipe Works Every Time
Honestly, there are a million ways to make an apple crisp, but if you want that magic combination—apples that hold their shape but melt in your mouth, topped with a buttery crumb that actually stays crisp—you need to pay attention to a couple of details. This recipe isn’t complicated, but those details make all the difference between, well, disappointment and sheer bliss!
We’re aiming for homemade comfort here! The beauty of this one is how balanced it is. And hey, if you love other baked delights, check out my rhubarb crisp when the season hits!
- The Apple Mix is Key: We use a mix of tartness, which keeps the final bite exciting instead of just plain sweet.
- No More Mushy Tops: We use ice-cold butter and make sure not to overwork the topping, which guarantees a lovely, sandy crunch.
- It’s Fast! You honestly can’t beat 55 minutes from start to fork for something that tastes like it took all afternoon.
Perfect Apple Texture and Flavor Balance
I insist on Granny Smith or Honeycrisp, or even a mix of both, for the filling. Why? Because Granny Smiths bring that necessary sour punch. That tartness really cuts through the sweetness of the brown sugar we use in the topping. If you use only sweet apples, you end up with something cloyingly sugary. The lemon juice also helps keep those lovely slices bright white while they hang out waiting for the oven.
The Ideal Crumb Topping for Your Apple Crisp
This is where most people mess up! The topping shouldn’t look like wet sand. It needs to be coarse crumbs—some the size of peas, some smaller. That texture comes 100% from using very cold, cubed butter and working it quickly into the dry mix. Stop mixing when you see those chunks. Those chunks are what bake up golden and shatter beautifully when you scoop it onto your plate.

Gathering Ingredients for the Best Apple Crisp
Okay, pulling together your ingredients is super easy because this recipe keeps things simple—no weird specialty flours or obscure spices needed! We want quality, but we don’t want hassle. The difference between a good crisp and a great one is often just making sure you prepare your fruit right and keep that butter frigid for the top.
Don’t try to substitute the brown sugar in the topping; that molasses flavor is non-negotiable for that deep, caramelized taste we’re aiming for. Gather everything up, maybe put your butter in the freezer for ten minutes just to be safe, and let’s get organized before we start mixing!
For the Apple Filling
First up, the fruit foundation! You need about six medium apples for this, and please, take the time to peel, core, and slice them evenly—no one wants a giant hunk of hard apple in their perfect scoop.
- 6 medium apples (I love a mix of Granny Smith or Honeycrisp), all peeled, cored, and sliced.
- Just 1/4 cup of granulated sugar for the apples—we use the brown sugar mostly for the topping!
- 1 teaspoon of ground cinnamon. That warm smell is so important.
- 1 tablespoon of fresh lemon juice. This is important! It keeps things bright and stops them from turning a sad brown color while you’re messing around with the topping.
For the Crumb Topping of the Apple Crisp
Now for the part that makes this dessert sing: the crumb topping! This is where we bring in texture from the oats and richness from the butter. Make sure your butter is very cold before you start on this section.
- 1 cup of all-purpose flour. This is our backbone.
- 1/2 cup of packed brown sugar—really press it into the cup!
- 1/2 cup of rolled oats. Don’t use instant oats; the old-fashioned rolled ones give the best toothsome crunch.
- 1/4 teaspoon of ground nutmeg. It just pairs so beautifully with the cinnamon and apples, doesn’t it?
- Finally, the star: 1/2 cup (that’s one full stick) of cold unsalted butter, cut into small pieces. Seriously, keep it cold!
Step-by-Step Instructions to Make Apple Crisp
This is where the magic happens quickly! Once your ingredients are prepped, assembling this apple crisp is honestly faster than deciding what movie to watch afterward. We need to get the heat going right away because the apples don’t wait for anyone. If you need some inspiration while this bakes, I’ve got a fantastic one-bowl apple cake recipe you might want to check out later: my 1-bowl apple cake.
Preparing the Apples and Baking Dish
First things first: Crank that oven up to 375 degrees Fahrenheit, or 190 Celsius. While it’s heating, grab your 8×8 inch baking dish and give it a quick grease. Maybe use a dab of butter or a quick spray—we don’t want any sticking! Now, take those beautifully seasoned apples we talked about—the ones tossed with sugar, spice, and lemon—and spread them out in an even layer on the bottom of that prepared dish. Make sure the layer is level so they all cook through nicely.
Creating the Perfect Crumb Topping
Grab a separate medium bowl for the topping. Dump in your flour, brown sugar, oats, and nutmeg. Give those dry bits a quick whisk to make sure they’re acquainted. Now, here’s the important part for a great apple crisp: toss in those cold, diced butter pieces. Use your fingertips or a pastry blender—I prefer my fingers because I can feel it better—and work that butter in. We aren’t making dough here! You’re done when the mixture looks like coarse crumbs, some big, some small. If it starts feeling greasy or sticks together too much, stick the bowl in the fridge for five minutes!
Baking and Resting the Apple Crisp
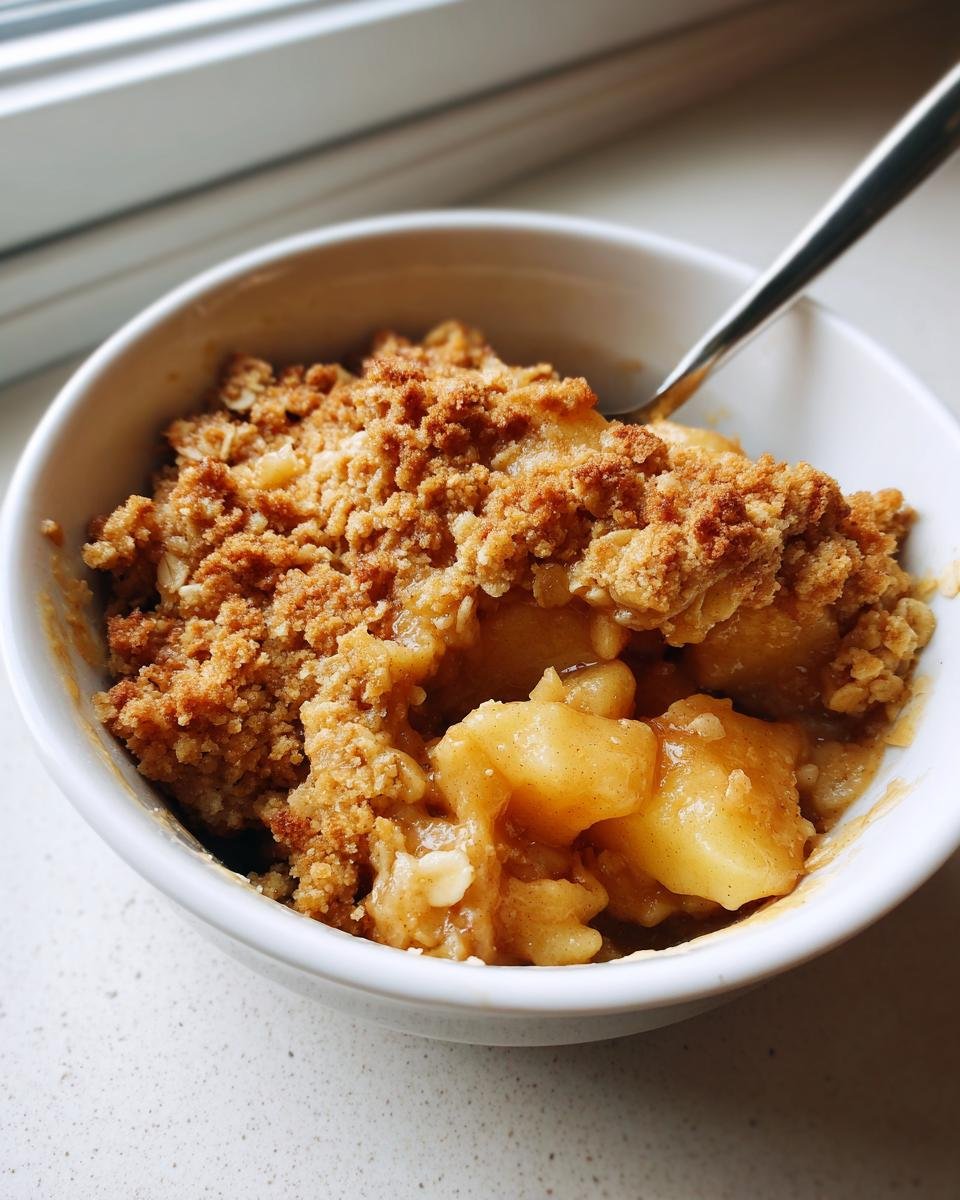
Take that glorious crumb mixture and just sprinkle it right over the top layer of apples. Don’t press it down! Let it be loose and rustic. Pop it into the preheated oven for about 35 to 45 minutes. How do you know when it’s perfect? Listen to the bubbling sounds! You want to see that topping turning a deep, lovely golden brown, and when you poke an apple slice with a fork right through the crust, it should yield easily. It’s essential that you let that delicious mess rest for at least 10 minutes after it comes out of the oven. It firms up slightly and lets the juices settle down so your first scoop isn’t just hot liquid!
Tips for the Ultimate Homemade Apple Crisp
Even though this recipe is designed to be completely foolproof, I’ve picked up a few tricks over my years of making fruit crisps for family events. You want that bottom to be just as good as the top, right? Nobody likes a soupy apple mess at the base of their scoop. Here are a couple of my must-do additions that elevate this simple dessert from great to totally unforgettable.
If you’re looking for more apple spice in your life, you absolutely have to try my apple cinnamon muffins next time you’re baking!
Preventing a Soggy Bottom on Your Apple Crisp
This is the number one fear when baking any kind of fruit crumble! My trick is simple geometry. When you put the dish in the oven, place it on a rack that’s slightly lower than the middle, or better yet, put a flat baking sheet underneath the crisp dish. When those buttery juices start bubbling up and inevitably drip over the side, the sheet catches it all! This also helps cook the bottom slower and more evenly, promoting that little bit of structural crispness right where the apples meet the glass.
Apple Crisp Topping Variations
Feel free to make this topping your own! While I love the pure oat flavor, sometimes I need a little more texture bang. My favorite addition is about a quarter cup of chopped walnuts or pecans tossed in with the dry ingredients. They toast up beautifully and add a great, slightly bitter crunch. And don’t forget a tiny, tiny pinch of salt in the topping mix—it doesn’t make it salty, but it really wakes up all those sweet spices, trust me on that one!
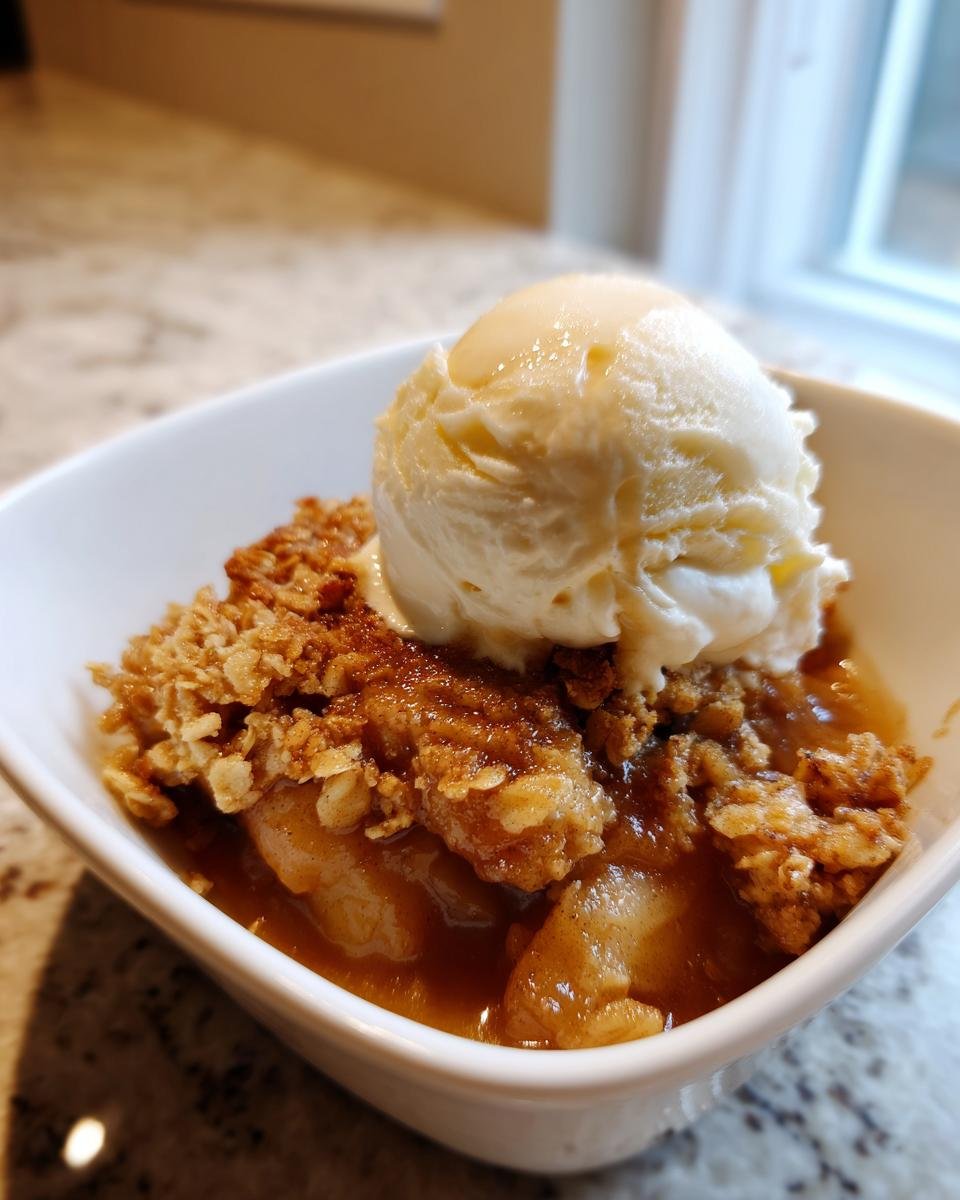
Serving Suggestions for Your Delicious Apple Crisp
You deserve a reward after all that wonderful baking! An apple crisp straight from the oven is just begging for something cold and creamy on top. The classic, of course, is a big scoop of the best vanilla ice cream you can find. That hot-meets-cold contrast is just heavenly, and the ice cream melts right down into those bubbly apple gaps.
But don’t stop there! Whipped heavy cream is fantastic, especially if you sweeten it just a tiny bit. If you’re feeling really decadent, try a drizzle of caramel sauce—it complements the brown sugar in the topping flawlessly. Or, if you’re feeling adventurous and need something equally rich, maybe take a look at how I make my ultimate melted chocolate milkshake; just thin that rich mixture a bit, and it’s a decadent drizzle!
Storage and Reheating Instructions for Apple Crisp
So, if you manage to have any leftover—which is a feat in itself!—you want to store this correctly so the topping doesn’t turn completely soggy overnight. After it has cooled down completely, you should cover the baking dish tightly with plastic wrap or transfer the leftovers to an airtight container.
It will keep great on the counter for about a day, but pop it in the fridge if you need it to last longer; it should stay good for up to four days. To reheat, I just pop a portion onto a small oven-safe dish and bake it at 350°F for about ten minutes. The microwave works too, but honestly, that heat melts the topping right away. A quick blast in the oven gets that buttery crunch back!
Frequently Asked Questions About Apple Crisp
I get so many questions about this recipe—which is great, because it means you all are busy baking! Don’t worry if you have little tweaks you want to make, like swapping out the type of oat or figuring out storage. I try to answer the most common ones right here so your baking goes perfectly the first time.
By the way, if you just love this rustic style of dessert, you absolutely have to try my simple apple crumble recipe next week; it’s even quicker!
Can I make this Apple Crisp ahead of time?
Yes, you totally can! This is a lifesaver when you’re cooking for a crowd. You can assemble the whole thing—apples in the dish, topping sprinkled right on top—and then cover it tightly with plastic wrap. Stick it in the fridge for up to 24 hours. When you’re ready to bake, you just need to add about 5 to 10 extra minutes to the bake time because it’s starting cold, not room temperature.
What is the best way to store leftover baked apples?
Leftover baked apples are the best treat the next morning! Once cooled, keep the leftovers covered either on the counter for about a day, or sealed tightly in the fridge for up to four days. Fair warning though, the great crunchy oatmeal topping will soften up a bit thanks to the steam settling. If you really want to revive the texture, just pop that portion under the broiler for a minute or two!
Estimated Nutritional Information for Apple Crisp
Now, I’m no dietitian, far from it! I just want everyone to enjoy this dessert without stress. But because so many of you ask about the specifics, I ran these numbers through one of those online calculators based on the ingredients list. Remember, this is just a general idea, and where you get your butter or apples from can change things wildly but roughly speaking, here’s what you’re looking at per serving.
We get a lot of good stuff in here from the oats, but yes, the butter and brown sugar mean the fat and carbs are definitely present—that’s what makes it taste so good, right? Do not take these numbers as gospel; they are just estimates based on the recipe card!
- Calories: About 350
- Total Fat: Around 18 grams
- Carbohydrates: Roughly 48 grams
- Protein: About 4 grams
If you are watching sugar, remember that a lot of that sugar is balanced out by the natural tartness of the apples we chose. But gosh, there’s nothing wrong with a little indulgence when it tastes this much like home!
Share Your Perfect Apple Crisp Experience
I hope you loved making this apple crisp as much as I love sharing it with you! Baking is always better when we share the results, so please, don’t be shy.
If you made this recipe, I would be so grateful if you could come back here and leave a quick rating—five stars if you loved that crunchy topping! Also, I always want to know what you decided to use for your fruit base. Did you stick with Granny Smiths, or did you experiment with Fuji or Gala? Drop your favorite apple variety down in the comments below!
And please, snap pictures! If you share your golden, bubbly dessert on social media, tag me so I can see it! You can send any comments or suggestions through my contact page, too. Happy baking, everyone!
Print
Simple Apple Crisp
- Total Time: 55 min
- Yield: 6 servings 1x
- Diet: Vegetarian
Description
A straightforward recipe for a classic baked apple crisp with a crumbly topping.
Ingredients
- 6 medium apples (such as Granny Smith or Honeycrisp), peeled, cored, and sliced
- 1/4 cup granulated sugar (for apples)
- 1 teaspoon ground cinnamon (for apples)
- 1 tablespoon lemon juice
- 1 cup all-purpose flour
- 1/2 cup packed brown sugar (for topping)
- 1/2 cup rolled oats
- 1/4 teaspoon ground nutmeg
- 1/2 cup (1 stick) cold unsalted butter, cut into small pieces
Instructions
- Preheat your oven to 375 degrees Fahrenheit (190 degrees Celsius). Lightly grease an 8×8 inch baking dish.
- In a large bowl, toss the apple slices with 1/4 cup granulated sugar, cinnamon, and lemon juice. Place the seasoned apples evenly in the prepared baking dish.
- In a separate medium bowl, combine the flour, brown sugar, rolled oats, and nutmeg for the topping.
- Cut in the cold butter using a pastry blender or your fingertips until the mixture resembles coarse crumbs.
- Sprinkle the topping mixture evenly over the apples in the baking dish.
- Bake for 35 to 45 minutes, or until the topping is golden brown and the apples are tender when pierced with a fork.
- Let the crisp cool for at least 10 minutes before serving.
Notes
- You can use a mix of apple varieties for more complex flavor.
- Serve warm with vanilla ice cream or whipped cream.
- Prep Time: 15 min
- Cook Time: 40 min
- Category: Dessert
- Method: Baking
- Cuisine: American
Nutrition
- Serving Size: 1 serving
- Calories: 350
- Sugar: 35
- Sodium: 50
- Fat: 18
- Saturated Fat: 11
- Unsaturated Fat: 7
- Trans Fat: 0
- Carbohydrates: 48
- Fiber: 4
- Protein: 4
- Cholesterol: 45
Keywords: apple crisp, baked apples, oatmeal topping, cinnamon dessert, easy dessert