
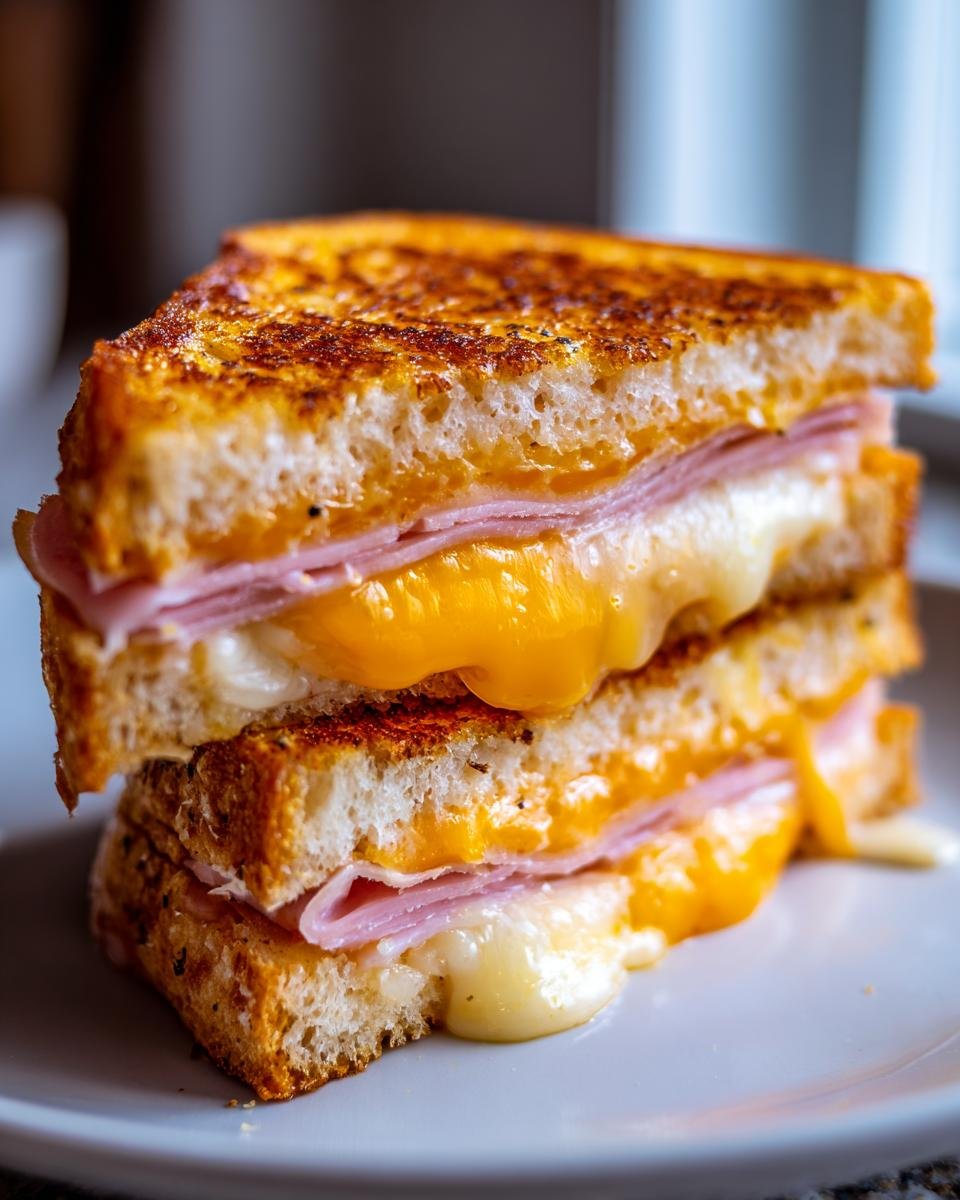
Oh, honey, let’s talk comfort food! Nothing screams ‘I need a hug in food form’ quite like a perfectly golden, oozy sandwich, right? And while fancy casseroles take forever, there’s one champion that always delivers: the Grilled Ham And Cheese Sandwich. I’ve been making these since I was tall enough to reach the stove—probably over twenty years now—and I promise you, I have figured out the absolute best, simplest way to get that crisp crust and totally melted interior.
You don’t need gourmet cheeses or imported bread for this. Honestly, the magic in my version comes down to just two things: the right fat on the outside and patience with the heat. Forget those soggy, undercooked messes you sometimes get. Today, I’m sharing my favorite, time-tested method for creating the ultimate quick lunch that tastes like pure nostalgia.
Why This Grilled Ham And Cheese Sandwich Recipe Stands Out
Look, I’m not going to give you a fifteen-ingredient monster that takes an hour. This recipe is about getting maximum flavor payoff with the least amount of fuss. That’s why I keep coming back to it, especially when I need a serious lunch fix fast. It’s all about efficiency without sacrificing that crispy, gooey perfection we crave.
Here’s what makes this simple classic so reliably amazing:
- It’s ridiculously fast—we’re talking lunch ready in under 12 minutes total. Perfect for those frantic afternoons!
- It relies only on staple ingredients you almost certainly have lying around right now. No special trips required.
- The technique guarantees a golden brown, crackly exterior that holds up against the melted cheese inside. Seriously, that sound when you bite in? Unbeatable.
- It’s infinitely customizable, but it shines even in its most basic form. You can easily whip up a batch for a picnic, just like I used to do for quick trips out to the park. Check out my ideas for savory 8-minute bliss sandwiches sometime!

Gathering Your Ingredients for the Perfect Grilled Ham And Cheese Sandwich
The secret to a fantastic grilled cheese—or in our case, a grilled ham and cheese—is realizing that even simple ingredients deserve respect. You don’t need fancy artisanal bread, but you do need the *right* bread. I always go for a classic, soft white bread. Why? Because it toasts beautifully and gets wonderfully crispy without having giant holes that let all that glorious melted cheese escape! For a little detour adventure, if you ever decide to try my ham and cheese pinwheels, you’ll want a slightly sturdier bread, but for this classic grill, soft is the way to go.
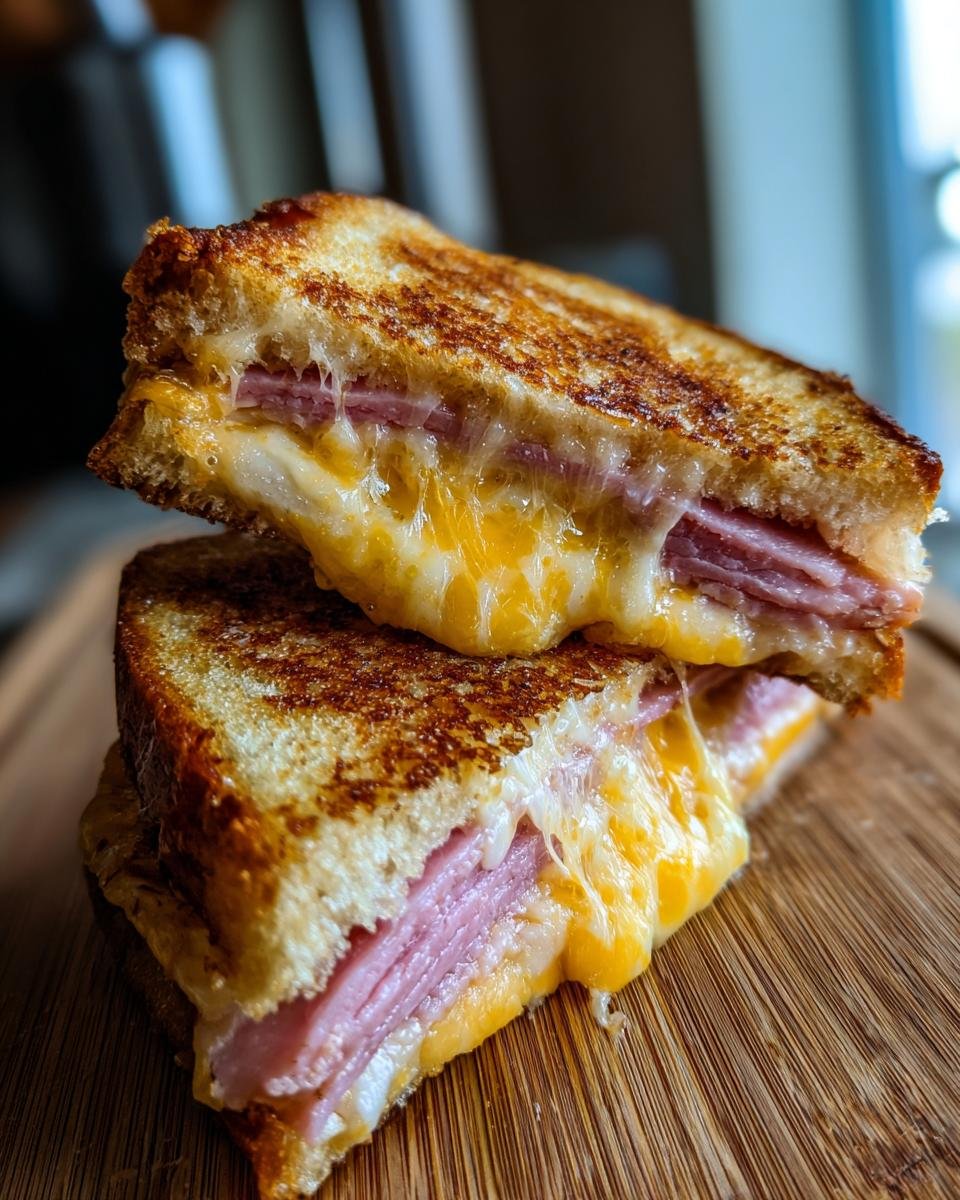
Now, let’s talk cheese and ham. You need two slices of cheese. I highly recommend cheddar—nothing too fresh, though. You want a sharp cheddar for that nice tangy bite that cuts through the richness!
Here’s exactly what you need for one perfect sandwich:
- Exactly 2 slices of your favorite soft bread (like a good bakery white or Pullman loaf).
- 2 slices of ham, cut relatively thin so they heat through quickly. Don’t double-pile it!
- 2 slices of sharp Cheddar cheese—make sure they cover most of the bread area!
- 1 generous tablespoon of real, softened butter. Don’t use it cold; you need to spread it smoothly!
Essential Equipment for Making Your Grilled Ham And Cheese Sandwich
You really don’t need much fancy gear for this sandwich—that’s part of the charm! We’re keeping things super simple here. Seriously, pull out your go-to nonstick skillet. That’s your workhorse right there.
Make sure you have a decent silicone or rubber spatula ready to go for flipping. You don’t want metal scraping up all that beautiful browned butter from the bottom of your pan. A simple knife for spreading your butter will do the trick, too!
Step-by-Step Instructions for the Ultimate Grilled Ham And Cheese Sandwich
Okay, this is where the magic happens, but the key word here, my friend, is TEMPERATURE. If you crank the heat up too high, you’ll end up with burnt bread and cold cheese—a total tragedy. We want everything slow, low, and golden. Honestly, getting the heat just right is my number one tip for any great grilled cheese experience.
Follow these steps exactly, and you’ll have the crispiest, cheesiest sandwich you’ve ever made. It’s not complicated, but it demands attention at the right moments.
Preparing the Bread for Grilling
First things first: we need to get that exterior ready to crisp up! Take your softened butter (remember, soft, not melted!) and spread it evenly, edge-to-edge, on just one side of each slice of bread. You want full coverage so you get that beautiful, uniform golden crust.
A fun little secret from the back of my old recipe cards is that you don’t *have* to use butter. If you want an extra-crispy, slightly tangier shell, you can totally use mayonnaise on the outside instead of butter. Don’t freak out! It browns up perfectly and doesn’t taste like mayo once it’s grilled.
Assembling and Grilling the Grilled Ham And Cheese Sandwich
Number one: Place your skillet over medium heat. Seriously, don’t walk away; medium heat is your best friend here. Place one slice of bread down into the skillet, butter-side facing down onto the warm metal.
Number two: Quickly layer up your fillings onto that waiting slice of bread. Lay down your two slices of ham first, then top it with your two slices of cheese. Make sure the cheese is centered so it melts down nicely without oozing everywhere immediately.
Number three: Top the filling with your second slice of bread, making sure the buttered side is facing UP toward the ceiling. Now, put the lid on the pan if you have one—this helps trap some steam and gets that cheese moving!
Number four: Let it cook undisturbed. You’re looking for about 3 to 4 minutes on this first side. Peek underneath once or twice until the bread is a deep, warm golden brown. Then, slide that spatula underneath, flip it over carefully, and grill the second side for another 3 to 4 minutes. When the second side is perfect and you can see the cheese completely soft and gooey through the bread, pop it out onto your cutting board, slice it in half diagonally—because diagonal is always better—and enjoy your incredible Grilled Ham And Cheese Sandwich!
Tips for Success: Perfecting Your Grilled Ham And Cheese Sandwich Every Time
You’ve got the basic framework down, but if you really want people to ask you for your secret recipe, you have to pay attention to the details. I’ve wasted plenty of slices of bread learning these tricks, so learn from my mistakes!
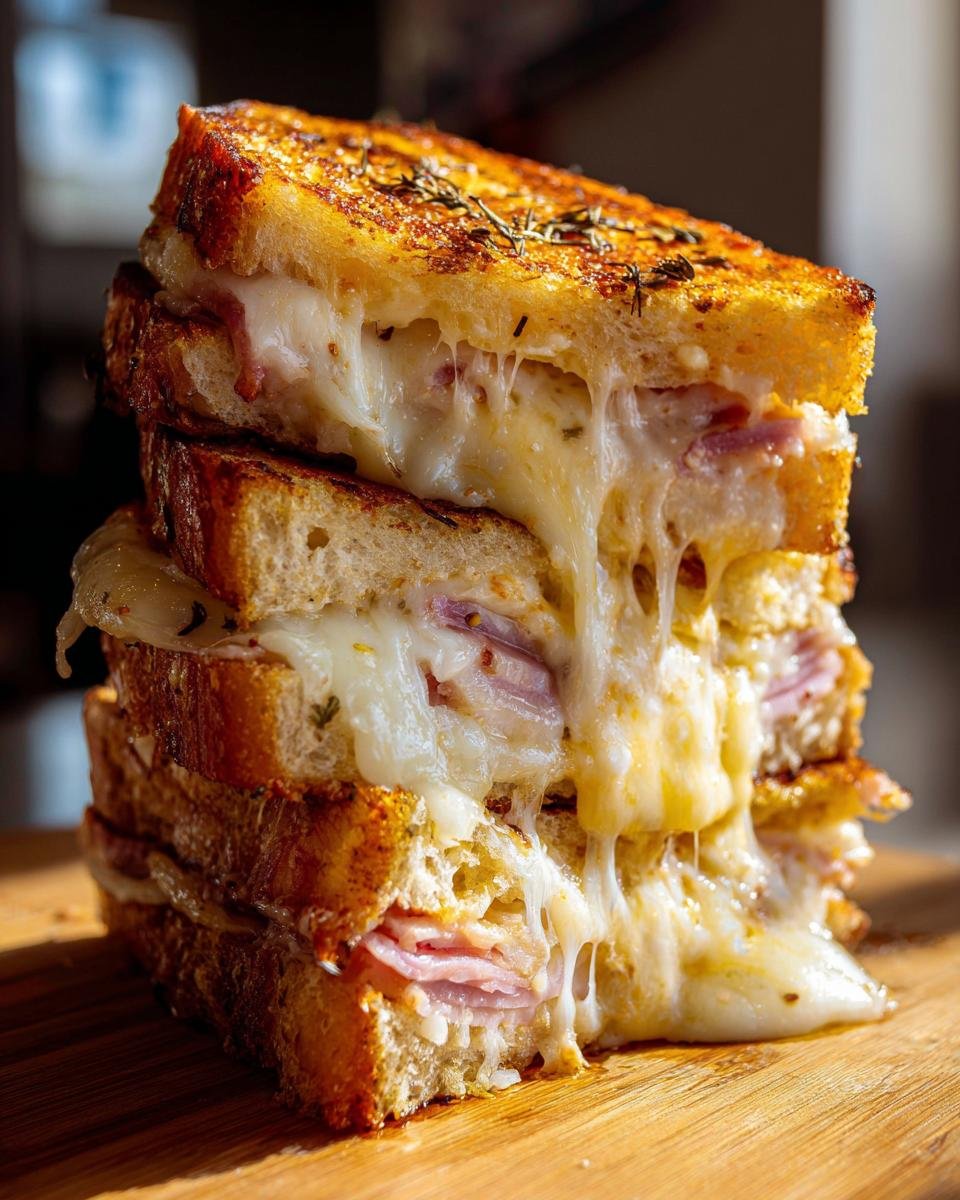
My number one pro-tip involves the cheese blend. While classic cheddar melts beautifully, sometimes it can be a bit oily when fully melted. If you swap out one slice of cheddar for a slice of Swiss or Monterey Jack, you get the flavor payoff from the cheddar but the superior, long, stretchy melt factor from the second cheese. Trust me, blending cheeses makes a huge difference!
To get that flawless golden crust that doesn’t burn, you need to use softened butter, not just shove a cold pat on there. Cold butter cooks unevenly. As soon as you flip the sandwich, gently press down with your spatula just once or twice. You aren’t squishing it flat; you’re just ensuring full contact with the pan surface. This little nudge makes sure the entire bottom surface gets that perfect, even color. If you’re feeling adventurous for future sandwiches, you can even try making some savory pinwheels sometime!
Variations: Taking Your Grilled Ham And Cheese Sandwich to the Next Level
As amazing as the basic classic is, once you master the foundation, you absolutely have to start experimenting! The bread and the fat combination are so reliable that they act like a perfect canvas for extras. I love keeping a jar of grainy Dijon mustard handy just for this purpose.
Try spreading a super thin layer of that mustard on the inside of one slice of bread before you layer the ham and cheese. That little kick cuts through the richness perfectly! Or, if you happen to have some thin-sliced dill pickles, tossing just two or three on top of the cheese before grilling adds a wonderful crunch and tang.
If ham isn’t your absolute favorite protein, don’t sweat it. Swap it out for a nice smoked turkey; it works just as well. Honestly, once you nail the grilling technique, almost any filling combination sings! If you want to go down a totally different sandwich route, check out my recipe for an irresistible Italian sandwich when you’re feeling ambitious!
Storage and Reheating Instructions for Leftover Grilled Ham And Cheese Sandwich
Let’s be real: the moment a grilled ham and cheese comes off the skillet, it should be eaten immediately. That cheesy, buttery goodness doesn’t wait well! If you absolutely must save leftovers (maybe you made too many!), wrap each sandwich tightly in foil or plastic wrap and keep it in the fridge for up to two days.
Reheating is tricky because you need to recapture that crispness! Skip the microwave; it’s the enemy of crispy bread. The very best way is to warm the sandwich in a dry skillet over medium-low heat for a few minutes per side until the crust is re-crisped. If you have a toaster oven, that works wonders too!
Frequently Asked Questions About the Grilled Ham And Cheese Sandwich
I get asked the same few things about this perfect little sandwich constantly, so let’s just clear the air right now! Getting the proportions and ingredients right makes all the difference between a mediocre lunch and something truly exceptional.
What is the best cheese for a Grilled Ham And Cheese Sandwich?
For flavor, you absolutely need something sharp like good quality aged Cheddar. But for that picture-perfect melt, you need blend it! I always suggest mixing the Cheddar with a slice of something that melts like silk, like Monterey Jack or even a mild Provolone. That combination gives you the best of both worlds—great taste and that glorious cheese pull!
Can I make a Grilled Ham And Cheese Sandwich in an air fryer?
You totally can! If you want to try it, spritz the outside of the bread lightly with some cooking spray or brush with mayo. Set your air fryer temperature pretty low, maybe 350°F (175°C), and cook it for about 6 to 8 minutes total, flipping halfway through. It gets crispy, but honestly, I still think the skillet gives you a richer, buttery crust.
If you want to see how I use these classic flavors in a different setting, check out my notes on classic ham and cheese picnic sandwiches—they are excellent for packing up!
Nutritional Estimates for This Classic Sandwich
Now, listen, I’m a cook, not a nutritionist! I’m focused on flavor and love, not counting every single calorie that slides between two pieces of perfectly toasted bread. When you make a classic like this grilled ham and cheese sandwich, the final numbers are going to bounce all over the place depending on what you choose.
For example, the type of bread you grab makes a huge difference—is it a soft white loaf or a dense whole-grain sourdough? And what about that cheese? Are you using low-fat Swiss, or are you going all-out with a fatty sharp cheddar? Those choices affect the fat and sodium content dramatically!
So, while I can’t give you one hard and fast number to write down on your diet chart, just know that since this is a quick lunch made with just a few simple components—bread, ham, cheese, butter—it’s easy to keep in mind when planning your day. If you are watching specific stats like sodium, try sourcing low-sodium ham. If you’re worried about fat, that’s where swapping to mayo or using a lower-fat cheese really pays off for you!
Print
Grilled Ham and Cheese Sandwich
- Total Time: 11 min
- Yield: 1 serving 1x
- Diet: Vegetarian
Description
A simple recipe for a classic grilled ham and cheese sandwich.
Ingredients
- 2 slices bread
- 2 slices ham
- 2 slices cheese (e.g., cheddar or Swiss)
- 1 tablespoon butter
Instructions
- Spread butter evenly on one side of each slice of bread.
- Place one slice of bread, butter-side down, in a skillet over medium heat.
- Layer the ham and cheese on top of the bread in the skillet.
- Place the second slice of bread on top, butter-side up.
- Grill for 3 to 4 minutes per side, until the bread is golden brown and the cheese is melted.
- Remove from skillet and cut in half.
Notes
- You can use mayonnaise instead of butter on the outside of the bread for a different flavor.
- Use your favorite type of cheese.
- Prep Time: 3 min
- Cook Time: 8 min
- Category: Lunch
- Method: Pan Frying
- Cuisine: American
Nutrition
- Serving Size: 1 sandwich
- Calories: 350
- Sugar: 3
- Sodium: 800
- Fat: 20
- Saturated Fat: 10
- Unsaturated Fat: 10
- Trans Fat: 0.5
- Carbohydrates: 25
- Fiber: 1
- Protein: 18
- Cholesterol: 50
Keywords: grilled ham and cheese, ham sandwich, cheese sandwich, grilled sandwich, quick lunch