
Honestly, every magnificent dessert needs a solid foundation. If your base crumbles or tastes bland, the whole show fails! That’s why I guard this recipe for the ultimate simple graham cracker crust with my life. It’s the MVP of my baking rotation, whether I’m whipping up a decadent cheesecake or a light, fruity pie. Seriously, I rely on this simple base for most of my best graham cracker desserts because it’s just fail-proof. It comes together faster than I can decide what filling to make, and the texture? Perfection. Trust me; once you try this, you’ll never buy a pre-made one again!
Why This Simple Graham Cracker Crust is Essential for Graham Cracker Desserts
People think that because this graham cracker crust is so easy, it must be flimsy, but that couldn’t be further from the truth! The magic is in how these three simple things work together to create incredible binding and that satisfying thickness you expect. This base holds up beautifully under thick fillings, never getting soggy between the day you bake it and the day you serve it. It’s the unsung hero of so many of my favorite graham cracker desserts.
- It comes together in under 20 minutes total—prep and bake included!
- It gives you that perfect, sturdy thickness that prevents cracks in your filling.
- It provides a wonderful sweet-salty crunch that contrasts perfectly with creamy fillings.
Key Components of a Perfect Graham Cracker Crust
It really boils down to balance. The crumbs obviously give you the flavor and the texture, and the sugar helps with necessary sweetness and browning a bit. But the real heavy lifter here is the butter, and you absolutely must use it melted. When the butter is melted, it coats every little crumb evenly, creating a solid structure when it cools down. If you use softened butter, you end up with little chunks that crumble apart later. Don’t risk it; melt that butter!
If you’re looking for other fantastic bases for your holiday spreads, you have to check out my recipe for the no-bake funfetti Oreo icebox cake—it uses a similar press-and-chill method!
Gathering Ingredients for Your Graham Cracker Crust
Okay, now for the easiest part! Gathering what you need is almost faster than the actual mixing. Because this is such a foundational recipe, using quality ingredients, even for something as simple as a crumb crust, really makes a difference. You only need three things, but precision counts, so grab your measuring cups!
For a standard 9-inch pie plate, you’ll need exactly one and a half cups of graham cracker crumbs. I know it sounds specific, but packing them in too tightly can mean you end up with way too much crust mixture. Then, we add a quarter cup of regular granulated sugar—no need for fancy kinds here, just the white stuff. This little bit of sugar helps it melt just right during that quick bake.
The real star, as always in baking, is the fat. You need precisely six tablespoons of unsalted butter, and this is non-negotiable—it must be melted! Seriously, I usually melt mine in the microwave while I’m getting the crumbs measured out. Just a quick 20-second zap, stir, and it’s ready to go to hold everything together beautifully.
Step-by-Step Instructions for the Best Graham Cracker Crust
Alright, this is where the fun starts—turning those dry ingredients into a solid base! First things first, you need to get your oven ready because this crust bakes ridiculously fast. Set that dial to 350 degrees Fahrenheit. I usually do this right before I start mixing so it’s hot and ready when my crust mixture is perfect.
Mixing the Graham Cracker Crust Base
Grab a medium bowl—nothing fancy needed here. Toss in your graham cracker crumbs and the sugar. Give those a quick whisk together just to make sure the sugar is distributed before we introduce the liquid. Now, slowly pour in that melted butter. Don’t just dump it all in and stir wildly! Use a fork or a sturdy spoon and work it in gently. You are looking for one specific thing: every single crumb needs to look subtly damp, like wet sand. If you see dry pockets, keep mixing until it’s totally, evenly moistened. That little bit of moisture from the butter is the glue!

Pressing the Graham Cracker Crust Firmly
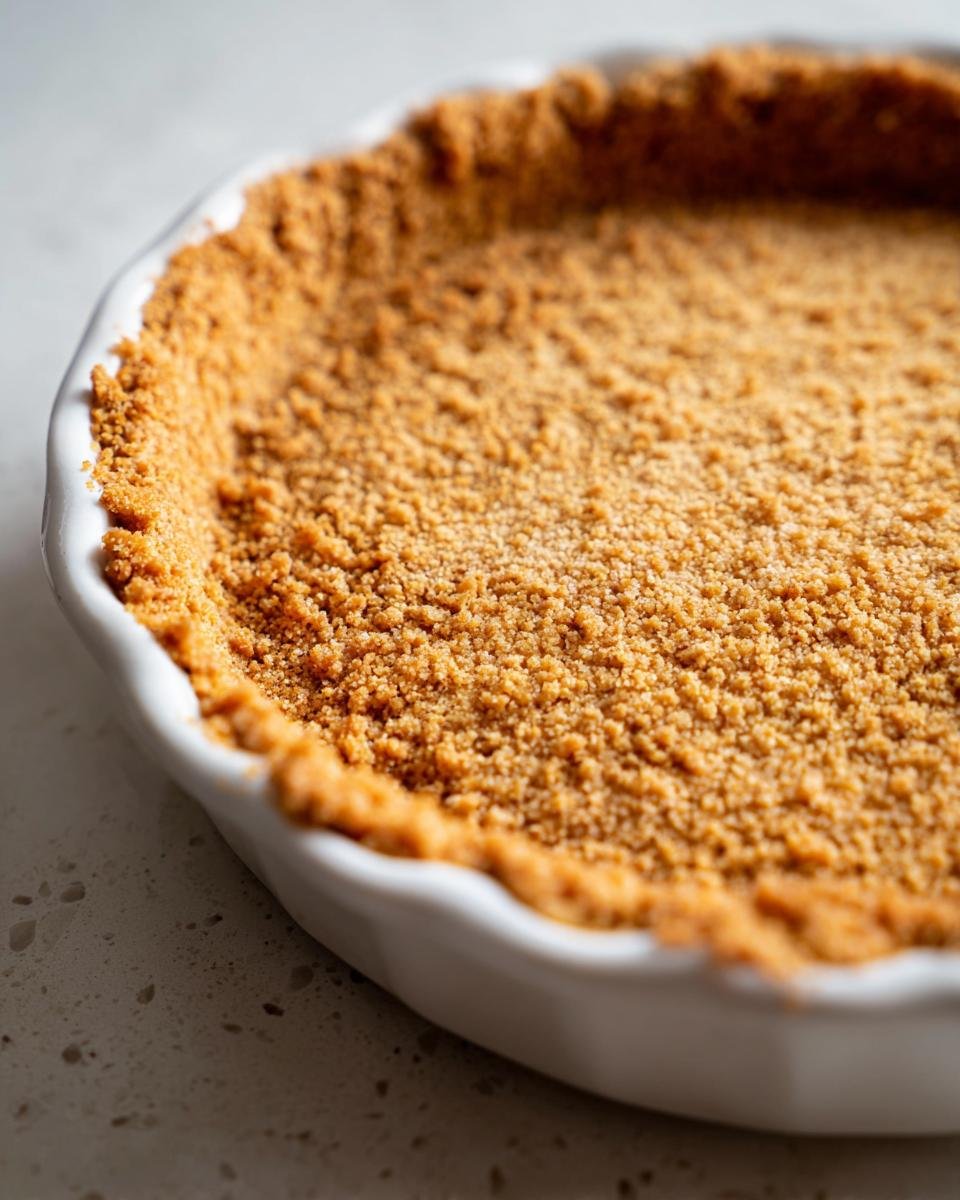
Time to get those hands dirty! Transfer all that gorgeous, buttery sand into your 9-inch pie plate or springform pan. Now, press is the key word, not sprinkle. You need to pack this in firmly across the bottom and make sure you push it up the sides evenly, too—especially if you’re making a cheesecake where the crust helps support the filling.
My secret for making sure it doesn’t crumble when sliced? I use the flat bottom of a dry measuring cup or a small drinking glass to really tamp it down. Press shoulder-to-shoulder across the whole surface until it feels rock solid. A loose crust just doesn’t cut it in my book! Once it feels tight, it’s ready for its quick trip to the oven for that crucial 10 minutes of baking.
If you’re making something like icebox cake later, you can skip the oven and just chill this pressed crust in the fridge instead!
Baking and Cooling Your Graham Cracker Crust
We’ve mixed it, we’ve pressed it firm, and now it’s time for what I call the structural set. That quick 10-minute bake is absolutely vital, even if you’re planning on making a no-bake filling on top of it later! Going into that 350-degree heat just toasts the flour trace amounts in the crumbs and really sets that butter, guaranteeing your crust doesn’t just fall apart the second you try to slice into your dessert.
You want to watch it, though. Since it’s so thin and we used melted butter, things can go wrong quickly. After 10 minutes—and I mean *exactly* 10 minutes unless your oven runs really cold—pull the pan out. You’re looking for the edges to look slightly darker, maybe a tiny hint of browning around the rim, but the center should still look set, not wet. If you see it bubbling furiously, pull it out a minute early, honestly. It’s better slightly under-baked and cooled than scorched!
The cooling part is the real test of patience, I know, because who wants to wait when there’s pie to make? But this step is non-negotiable for structural integrity! You must let this graham cracker crust cool down completely on a wire rack before you even *think* about pouring cheesecake batter or lemon curd into it. If you pour warm filling into a warm crust, the butter softens again, and you’ll get a soggy mess or, worse, cracks when it chills.
I usually let mine sit on the counter for at least an hour until it’s room temperature. If I’m making a cheesecake that needs a long chill time anyway, I’ll pop the completely cooled crust into the fridge for about 20 minutes before adding the filling. It just makes it feel extra solid and ready to handle whatever heavy topping you throw at it!
Pro Tips for Mastering Graham Cracker Desserts
Even with the best basic recipe for a graham cracker crust, sometimes you run into little kitchen quirks, right? I’ve got a few tricks up my sleeve that I’ve picked up over the years to make sure these beloved graham cracker desserts turn out picture-perfect every single time, whether they involve the oven or an ice bath.
My biggest insider secret, which comes straight from my notes on recipes like my no-bake cheesecake, is protecting those edges if you use a springform pan. Since the crust is so thin, those edges start browning way too fast! Before you bake the crust, take a small strip of aluminum foil and carefully wrap it around the very edge sitting on the pan bottom. This acts like a little heat shield and keeps those delicate crumbs from turning dusty brown before the center is set. It’s a small step, but it makes a huge difference!
Making the No-Bake Option for Graham Cracker Desserts
Not every dessert needs heat, and sometimes you just don’t want to turn on the oven, especially in the summer. Good news! This graham cracker crust recipe is built for versatility. If you’re making a mousse or a pudding pie that requires absolutely no baking, you can skip the 10 minutes in the 350-degree oven.
Instead of baking, you just press the mixture firmly into your pan, just like we talked about, and then move it straight to the refrigerator. You need patience here, though! You must let it chill for a minimum of 30 minutes. I usually let mine sit for a full hour just to be sure it’s really solid. The cold helps the melted butter firm back up, binding those crumbs together so efficiently that you’d swear it was baked. It’s the perfect foundation for whipped fillings.
Also, don’t forget that little tip about making your own crumbs if you don’t have a box of crumbs on hand! Just toss a few whole graham crackers into your food processor and pulse until you have that perfect sandy texture. It honestly smells so much better when you make them fresh. No need to worry about exact measurement either; if you pulse them lightly, you might even get some slightly bigger pieces, which just adds a nice textural surprise to your finished graham cracker desserts!
Variations on the Classic Graham Cracker Crust for Graham Cracker Desserts
While the classic graham cracker crust is perfect for almost everything, sometimes you want to give your graham cracker desserts an extra little kick, right? It’s really easy to pivot this base recipe without having to look up a whole new formula. Think of this basic crust as your blank canvas, ready for some customization! It’s all about tweaking the crumbs or adding a little extra spice to match whatever amazing filling you have planned.
For starters, if you are making something chocolate-heavy—maybe you’re pairing this with a rich chocolate cheesecake or a deep fudge pie—swap out the graham crackers entirely! You can use plain vanilla wafer crumbs, or go wild and use chocolate wafer crumbs instead. Just use the exact same amount, and keep everything else in the recipe the same: the sugar and the melted butter amount stays steady. That swap alone totally changes the flavor profile!
If you’re sticking with the classic graham flavor but want to deepen it, I always throw in about half a teaspoon of ground cinnamon right in with the crumbs and sugar. Cinnamon and honey notes just sing together beautifully, and it immediately makes your crust smell incredible while it bakes. If you’re aiming for a warmer flavor profile that reminds you of fall, try a quarter teaspoon of nutmeg along with the cinnamon. Trust me, these tiny additions elevate what seems like a plain base into something special.
It’s little changes like these that take a good graham cracker dessert and push it into the ‘make this again next week’ category. If you are looking for a truly show-stopping base, check out how I adapt crumb crusts for my irresistible red velvet cheesecake brownies—it’s a different vibe, but the same principle of building a solid foundation!
Serving Suggestions for Graham Cracker Desserts Using This Crust
Now that you have this absolutely perfect, sturdy, and subtly sweet graham cracker crust ready to go, the real fun begins: choosing what goes on top! Because this base is so beautifully neutral—not too sweet, not too spicy—it acts like the best supporting actor in any dessert drama. It lets the stars of the show really shine, whether they are tart, creamy, or layered.
My absolute go-to, the standard bearer, is, of course, a classic baked cheesecake. This crust handles the weight of a rich cream cheese filling without complaint, and the slight crunch cuts through the richness perfectly. I swear, the combination of that buttery, toasted graham flavor against the smooth, cool cheesecake is just divine. You really need a crust this solid to support a proper cheesecake!
But don’t stop there! This is where this recipe earns its keep in my recipe book. It’s spectacular under anything tart. Think about making a super zingy lemon meringue pie or a beautiful lime key lime pie. The slightly savory, honeyed notes of the graham crackers balance out that sharp citrus tang so well. It’s miles better than a soggy traditional pastry crust underneath all that meringue or whipped topping.
And for those hot summer days when you just can’t face the heat, remember the no-bake option! This crust is the ideal foundation for any icebox pie. Chocolate pudding pie, peppermint cream pies, or even just layered with stabilized whipped cream and fresh berries. These kinds of no-bake graham cracker desserts rely totally on the chill factor to set up, and the firm, cold crust you create by chilling it is the perfect partner. If you haven’t had success with creamy fillings sticking to the crust before, this recipe is the solution!
If you’re looking to try a totally different style of creamy dessert that still needs a solid bottom layer, you need to see my notes on the heavenly Japanese cheesecake—while the cake itself is super light, it benefits from a simple press-in base too!
Frequently Asked Questions About Graham Cracker Desserts
I get so many questions about this crust because everyone who tries it loves it and immediately starts dreaming up new graham cracker desserts! It’s a simple recipe, but sometimes the details trip people up. Here are the things I hear most often when people are making this base for the first time.
Can I use store-bought crumbs instead of making my own for Graham Cracker Desserts?
Absolutely, yes! I mentioned making your own crumbs, but if life is busy, grab that canister of pre-crushed graham crackers. They work like a charm for any of the graham cracker desserts we’ve talked about. The only thing I’d tell you to watch out for is how they are packed in the can. Sometimes they get super compacted during shipping, so when you measure out that 1 1/2 cups, try not to press them down hard into the cup. Scoop lightly, level off, and proceed! Too much crust mixture can lead to a crust that tastes too thick or doesn’t bake quite right.
How long does this graham cracker crust last in the refrigerator?
This is a great question for anyone who likes to prep ahead, like I do sometimes! If you have baked and completely cooled your graham cracker crust, and you haven’t put any filling in it yet—stored tightly covered in the fridge—it stays really fresh for about three days. Honestly, it’s best on day one or two. Once you add a wet filling, that timeline changes based on the filling itself, naturally. If you’re making a no-bake version for an icebox cake, you should aim to fill it within 24 hours for the best texture, just so that butter doesn’t start getting too soft again.
If you want to see how I store other chilled recipes, check out the prep instructions for my no-bake funfetti Oreo cake—it has some great tips on keeping things fresh!
Why does my crust keep crumbling when I cut the pie?
That usually screams one of two things to me: either you didn’t add enough melted butter, or you didn’t press it firmly enough into the pan before baking or chilling. Remember how I talked about using the bottom of a measuring cup? Do that! You need physical pressure to bind those crumbs adequately. If you feel like you added enough butter and you still had crumbling, Next time, try whipping the butter into the crumbs slightly more vigorously right before pressing, just to make sure every single piece is coated before you tamp it down into the 9-inch pan.
Nutritional Estimates for This Graham Cracker Crust
You know I always say that homemade food just tastes better, and the amazing thing about making your own graham cracker crust is that you know exactly what went into it! Since we are talking about simple components—crumbs, sugar, and butter—it’s usually pretty straightforward. However, because we all use slightly different brands of butter or measure crumbs slightly differently, these numbers are just rough estimates.
This breakdown is based on the recipe yielding one standard 9-inch crust, and then dividing that up into 8 even slices. If you eat the entire thing yourself—hey, no judgment here!—you’ll just multiply everything by eight! But generally, these figures give you a good idea of what you’re adding to your amazing graham cracker desserts.
Keep in mind that the final nutritional profile of your whole dessert—say, that cheesecake you top it with—will change these numbers dramatically, but for the crust alone, here is what we’re looking at:
- Serving Size: 1/8 of crust
- Calories: Approximately 180 per slice
- Fat: Around 10 grams total (including 6 grams of saturated fat)
- Carbohydrates: About 20 grams
- Sugar: Roughly 7 grams present
- Protein: A small boost at only 2 grams
- Cholesterol: Around 25 mg
It’s good to have these figures handy, but honestly, when I’m making something this delicious, I try not to look too closely! I just make sure to use good, real butter, and the flavor payoff is always worth it when you’re enjoying one of these rich graham cracker desserts.
Print
Simple Graham Cracker Crust
- Total Time: 20 min
- Yield: One 9-inch crust 1x
- Diet: Vegetarian
Description
A basic recipe for a graham cracker crust suitable for pies and cheesecakes.
Ingredients
- 1 1/2 cups graham cracker crumbs
- 1/4 cup granulated sugar
- 6 tablespoons unsalted butter, melted
Instructions
- Preheat your oven to 350 degrees Fahrenheit.
- Combine graham cracker crumbs and sugar in a medium bowl.
- Pour in the melted butter and mix until the crumbs are evenly moistened.
- Press the mixture firmly and evenly into the bottom and up the sides of a 9-inch pie plate or springform pan.
- Bake for 10 minutes.
- Remove from the oven and let it cool completely before filling.
Notes
- You can make your own crumbs by pulsing whole graham crackers in a food processor.
- For a no-bake crust, chill the pressed crust in the refrigerator for at least 30 minutes instead of baking.
- Prep Time: 10 min
- Cook Time: 10 min
- Category: Dessert
- Method: Baking
- Cuisine: American
Nutrition
- Serving Size: 1/8 of crust
- Calories: 180
- Sugar: 7
- Sodium: 120
- Fat: 10
- Saturated Fat: 6
- Unsaturated Fat: 4
- Trans Fat: 0
- Carbohydrates: 20
- Fiber: 1
- Protein: 2
- Cholesterol: 25
Keywords: graham cracker crust, pie crust, cheesecake base, easy dessert crust, no-bake crust option