
Oh, I absolutely *love* those desserts you can throw together when the weather hits that perfect, sticky heat and the thought of turning on the oven makes you sweat! We all need those foolproof recipes in our back pocket, right? Well, I’ve got the ultimate champion for those days: the simplest, most refreshing Lemon Icebox Cake you will ever meet. Seriously, if you can whisk, you can make this! It feels fancy, but trust me, it’s barely any effort at all. I adore this recipe because it requires zero baking time, and that bright, tart lemon flavor cuts right through any heavy dinner. It’s my go-to when company shows up unexpectedly!
Why This Lemon Icebox Cake Recipe Works So Well
When I talk about this Lemon Icebox Cake, people immediately ask if I cheated because it tastes so complex for how easy it is. The secret is that it relies on minimal, smart ingredients doing all the heavy lifting. You don’t need a fancy stand mixer or hours of slaving over a hot stove. It’s pure genius!
Here’s exactly why this recipe is glued to the front of my recipe binder:
- It’s completely no-bake! Say goodbye to preheating the oven when it’s already boiling outside.
- The prep time is ridiculously fast. You are looking at maybe fifteen minutes tops before it heads into the fridge to do its magic.
- That flavor—wow! The freshness of real lemon juice and zest sings through the creamy filling.
- It uses pantry staples. Seriously, sweetened condensed milk and graham crackers are your best friends here.
If you want a chilled dessert that tastes like summer vacation, this is the one. Trust me, once this sets, it’s game over for every other lemon dessert!

Gathering Your Ingredients for the Perfect Lemon Icebox Cake
Okay, listen up, because even though this recipe is simple, ingredient quality really shines through here. Since there’s no cooking going on, you need to make sure the few things you use are top-notch. Forget that bottled lemon juice—we need the real, sharp stuff for that signature zing! Before you even start whisking, pull out your lemon sugar ingredients, or at least make sure you have a couple of bright, yellow lemons ready for zesting.
You’ll need a standard 8×8 inch baking dish for this, so grab that container. Here’s the full list of what you need to assemble before mixing:
- One 14-ounce can of sweetened condensed milk. This is what gives us that incredible sweetness and smooth body!
- About half a cup of wonderfully fresh lemon juice, squeezed right before use.
- A teaspoon of bright lemon zest. Don’t skip this; the oils in the zest pack a huge flavor punch.
- One 8-ounce container of frozen whipped topping—and critically, make sure it’s fully thawed before you start folding it in!
- An 11-ounce box of graham crackers. These are the structural backbone of the whole thing.
Now, for a little secret swap if you want a different vibe: If you’re feeling adventurous, you can absolutely swap those graham crackers out for vanilla wafers. They soften up beautifully too, offering a slightly mellower flavor profile for your Lemon Icebox Cake!
Step-by-Step Instructions for Your No-Bake Lemon Icebox Cake
This is where the magic happens, and I promise you, it’s straightforward! We are going to build this glorious dessert like tiny, delicious bricks. Remember, because this is a chilled, set dessert, the order you do things matters a little bit more than in traditional baking. It’s more assembly than cooking, really. For the full experience, make sure your whipped topping is completely thawed, but still cold. We don’t want any warm spots when we mix!
Creating the Bright Lemon Cream Filling
First things first, let’s get that beautiful, tangy filling going! Grab a medium bowl—nothing fancy needed. You’re going to ditch the mixer here, too! Pour in your can of sweet condensed milk. Now, slowly stream in that fresh lemon juice and toss in your zest. Whisk this combination gently until everything looks nicely combined and smooth. It should thicken up slightly right there once the acid hits that milk, and that’s a good sign! Next, take your thawed whipped topping. This is the tricky part that makes all the difference: gently, I mean *gently*, fold it in with a spatula. You want to keep all those fluffy air bubbles intact, so don’t stir vigorously! Just slice down the middle and scoop up, over, and over until you don’t see any white streaks anymore. Don’t worry if it takes a minute; volume is key for that airy texture!
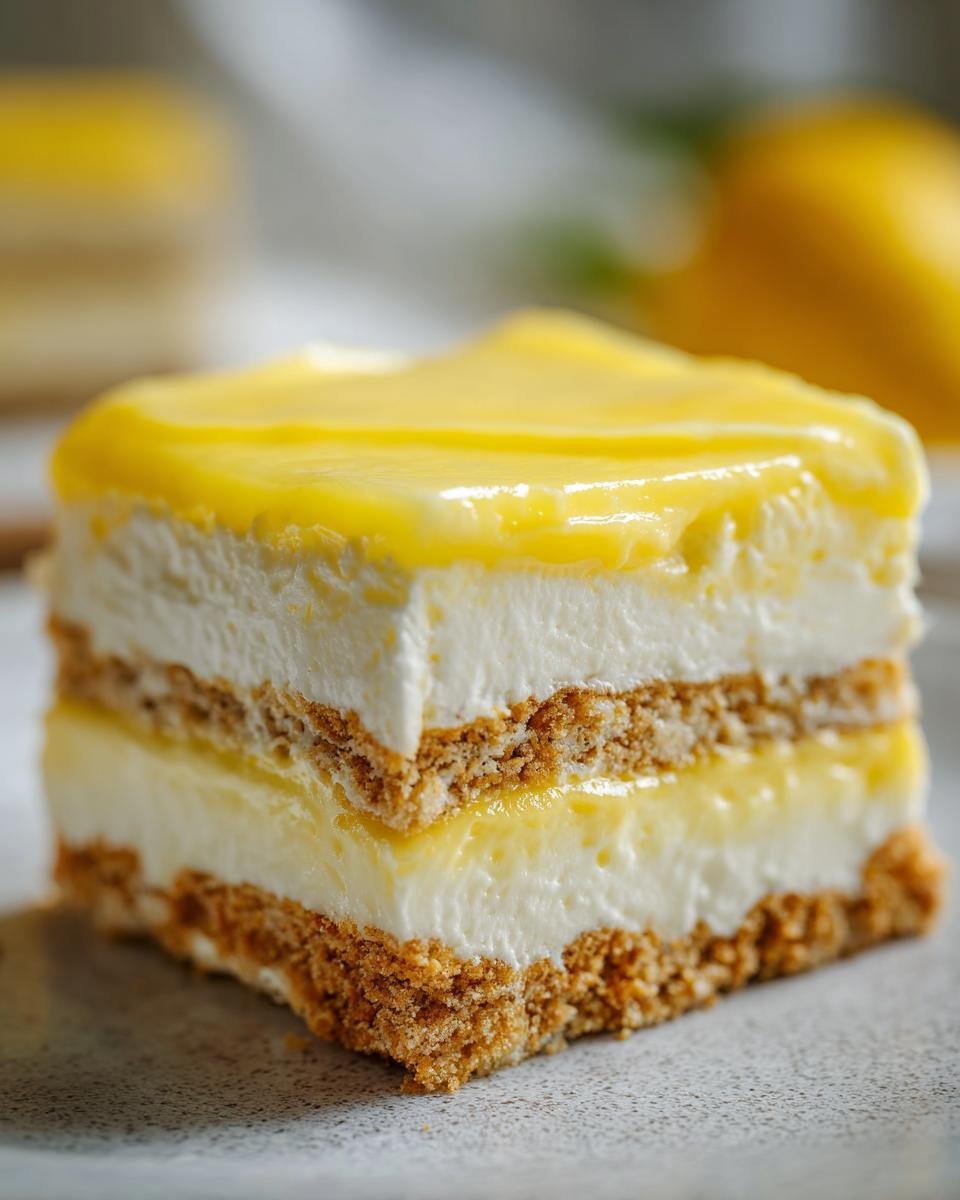
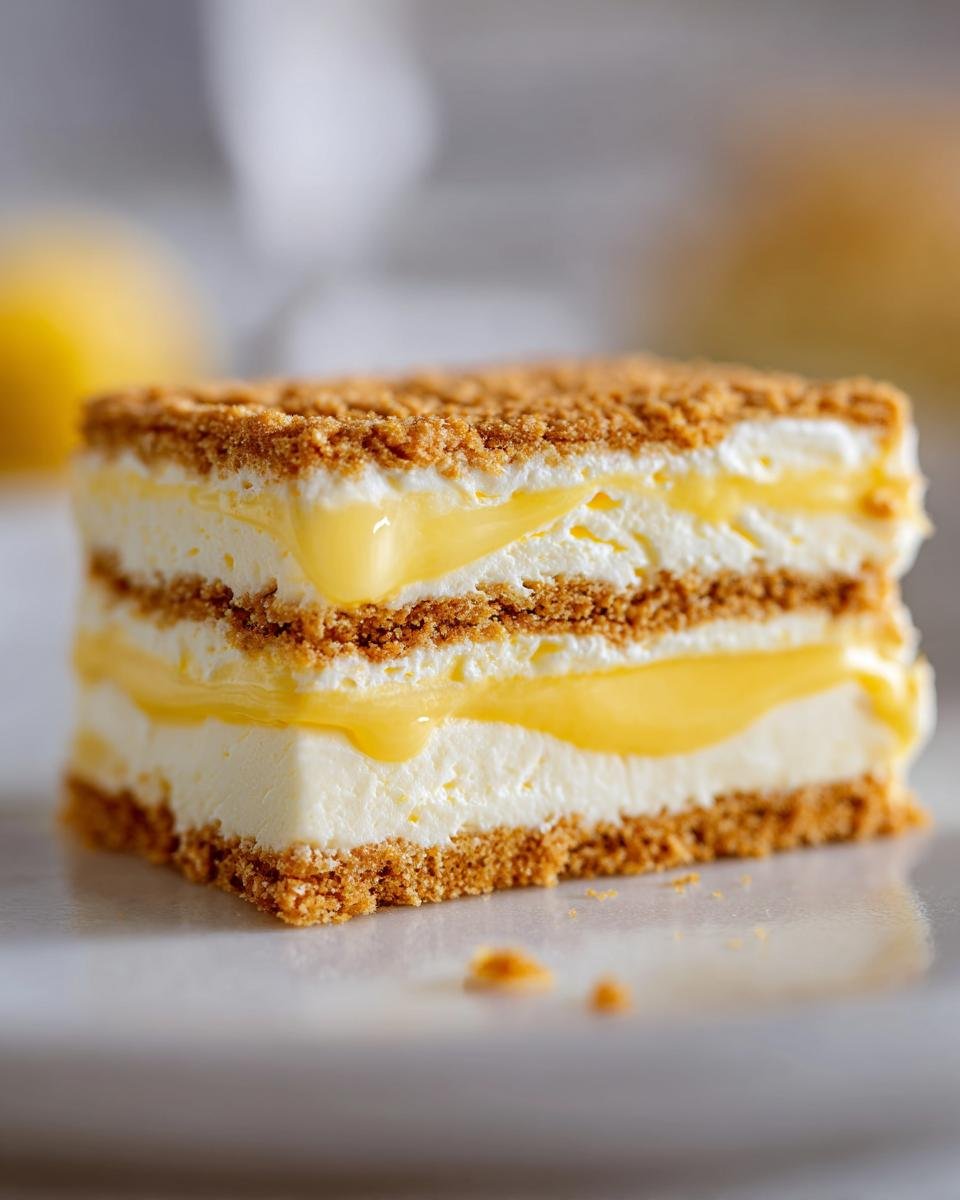
Layering the Graham Cracker Cake Structure
Now we transition to building the actual cake in your 8×8 dish. Take those graham crackers and line the bottom edge-to-edge, making one solid layer. Don’t leave big gaps! Next, carefully scoop half of that fluffy lemon cream mixture you just made and spread it out evenly over those crackers. Smooth it out gently so you don’t crush the layer underneath. Go ahead and add your second layer of graham crackers right on top of that cream. Don’t press down hard; just let them rest. Then, take the remaining half of your lemon mixture and dollop it over the second cracker layer. Smooth it out one last time. Finish the entire construction with a final, full layer of graham crackers on top. You should see three cracker layers and two cream layers when you look at the side.
The Essential Chilling Time for Your Lemon Icebox Cake
This is the hardest part, I know! Once you’ve sealed up your dish tightly with plastic wrap—make sure it’s truly tight so it doesn’t dry out—it has to go into the refrigerator. You absolutely *must* chill this for a minimum of six hours, but honestly, overnight is my secret weapon. Why the long wait? Because those graham crackers need time to soak up the moisture from the lemon cream. If you try to cut it early, you’ll end up with crunchy cracker bits floating in runny cream, and nobody wants that mess! Patience here ensures the crackers soften into this wonderful, tender cake-like structure that defines a perfect Lemon Icebox Cake. Trust me, waiting is worth the heavenly, cool slice you get the next day!
Tips for the Best Ever Lemon Icebox Cake
Now that you’ve built your masterpiece, let’s talk about making sure that slice comes out perfectly every single time, even if you’re a first-timer! My biggest piece of advice, echoing what I mentioned earlier, is to be religious about that chilling time. Six hours is the bare minimum, but I’m telling you, I make mine the night before. The magic happens overnight when those sturdy graham crackers fully soften up and absorb all that amazing condensed milk and lemon goodness. If you cut it too soon, it just feels messy!
You already know I whispered about swapping graham crackers for vanilla wafers if you ever want a textural change. The wafers make the cake slightly sweeter and give it a smoother mouthfeel, which is lovely for a change of pace. But here’s one more tip that kicks the flavor up a notch: zest your lemons *before* you juice them! Get that bright yellow part—the zest—off first, because those oils hold the majority of the pure lemon perfume. If you juice first, you might accidentally scratch the bitter white pith underneath, and we definitely don’t want any bitterness sneaking into our sweet Lemon Icebox Cake!
Finally, when you’re folding in that whipped topping, remember what I said about being gentle. You are protecting air bubbles! You want volume, not a deflated flat mess. It’s like gently tucking the clouds into the lemon base. Slow and steady wins this race, promise!
Serving Suggestions for Your Chilled Lemon Icebox Cake
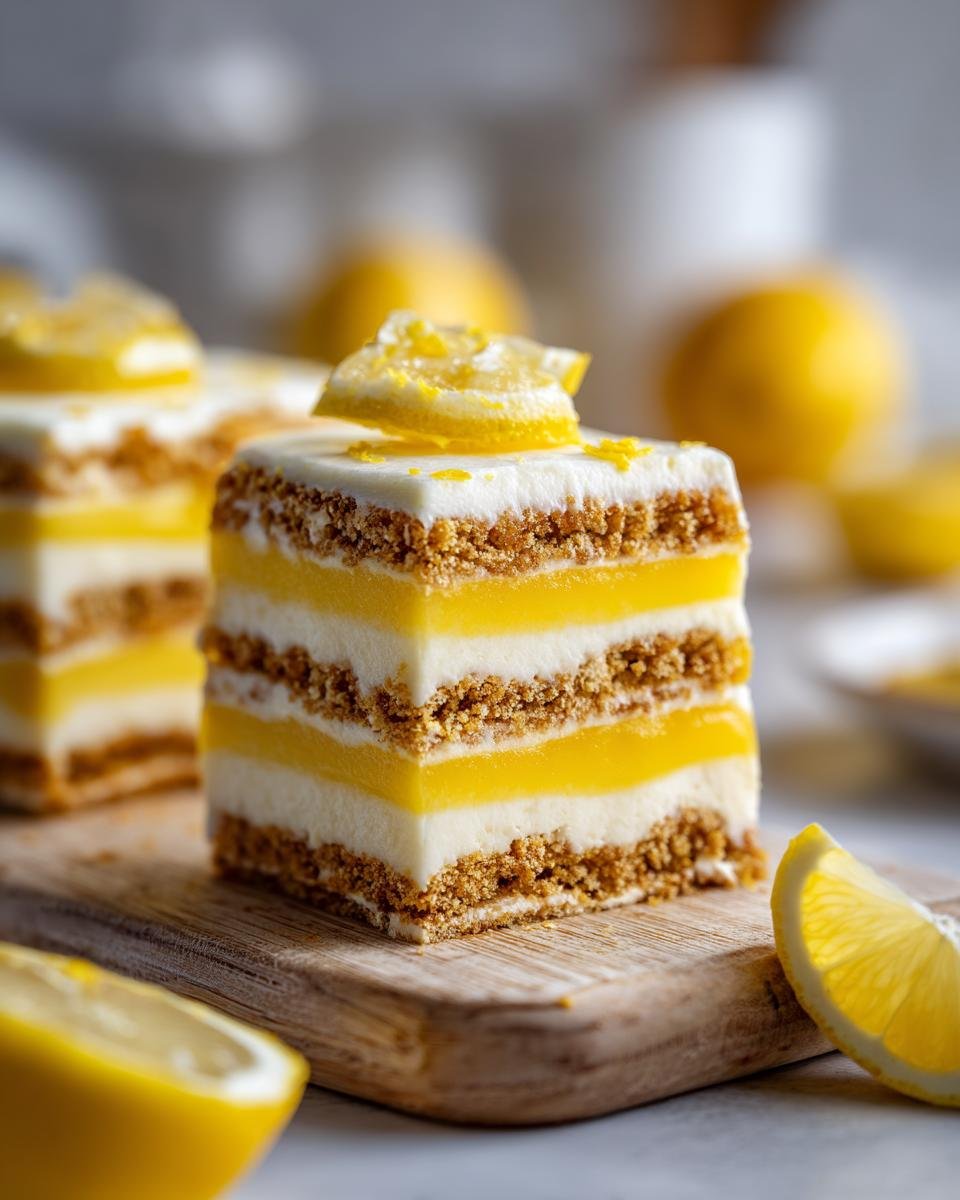
Once this beautiful Lemon Icebox Cake has set its structure overnight, you get to the fun part: making it look as good as it tastes! Because the flavor is already so bright and tangy, you don’t need a heavy topping. Honestly, sometimes I just serve it plain, straight from the dish, because I can’t wait!
If you want to dress it up just a touch, a light dusting of powdered sugar looks absolutely elegant right before serving. My current obsession, though, is topping each slice with a few fresh raspberries or thin slices of strawberry. The slight tartness of the berries just complements the lemon cream perfectly. You could also serve small side bowls of fresh fruit salad alongside it for guests who want a little something extra. It’s so refreshing!
Storing and Keeping Your Lemon Icebox Cake Fresh
Since this is a chilled dessert, storage is super simple, which is just another perk! Once you’ve cut a serving of your amazing Lemon Icebox Cake, you must cover the remaining portion tightly. I mean TIGHTLY! Use plastic wrap right up against the cut surface, or put the lid securely on your 8×8 dish. It needs to stay chilled the whole time, of course. You want to eat any leftovers within about three days. Any longer and those lovely softened graham crackers start getting a little too soggy for my taste. Keep it in the coldest part of your fridge!
Frequently Asked Questions About Lemon Icebox Cake
Can I make this Lemon Icebox Cake ahead of time?
Oh, yes, you absolutely can! In fact, I highly recommend it. This Lemon Icebox Cake actually tastes better the next day. Making it even 24 hours in advance gives the graham crackers plenty of time to fully absorb the gorgeous lemon cream. It ensures that perfect, melt-in-your-mouth texture we are aiming for. Just wrap it tight and keep it in the fridge!
What happens if I don’t chill the Lemon Icebox Cake long enough?
If you try to rush it and cut into it after just an hour or two, you’ll have a structural disaster on your hands! The cream won’t have set properly, and the crackers will still be pretty crunchy. You’ll end up with layers that slide around when you try to serve them, and you’ll definitely have runny bits of filling instead of those beautiful, defined layers. Six hours is the non-negotiable minimum for a tidy slice of Lemon Icebox Cake.
Can I use fresh lime juice instead of lemon for this icebox cake?
Fun fact: you totally can! If you’re feeling a tart twist, you can swap the lemon juice and zest entirely for an equal amount of fresh lime juice and zest. It turns into a fantastic Key Lime Icebox version instantly! Just make sure the limes are wonderfully fresh so you get that bright, clean flavor you need to balance the sweetness of that condensed milk.
Is this dessert truly no-bake?
One hundred percent, yes! That’s the beauty of it. There is absolutely no oven required for this Lemon Icebox Cake. We mix, layer, and chill. That’s it. It’s the perfect summer treat because the only temperature change happening is from room temperature to refrigerator cold!
Estimated Nutritional Snapshot for Lemon Icebox Cake
Okay, so while this delightful Lemon Icebox Cake is incredibly simple to pull together, we should talk about what’s actually in that creamy, cool slice. Since we aren’t baking or adding tons of extra sugars, it’s actually pretty straightforward compared to some heavy layered cakes. But remember, this is purely an estimate based on the standard ingredients called for in the recipe—we aren’t counting every molecule here!
If you slice this beauty into 9 generous servings, here’s the general breakdown:
- Calories: Around 305 per slice. That’s not bad for a dessert that tastes this rich!
- Sugar: Expect about 38 grams. That condensed milk carries a lot of that sweetness, so it’s a treat!
- Total Fat: Roughly 13 grams, with about 7 grams coming from saturated fat from the whipped topping.
- Carbohydrates: You’re looking at about 45 grams, mostly coming from the graham crackers and sugar.
- Protein: A modest 5 grams to round things out.
If you’re super diligent, you can always adjust by using low-fat whipped topping or even trying a reduced-sugar condensed milk if you find it! But honestly, for a truly classic, refreshing indulgence, these numbers are based on the original ingredients that make this Lemon Icebox Cake so utterly perfect. Enjoy it—it’s worth every single calorie!
Share Your Favorite No-Bake Lemon Icebox Cake Creations
Alright, my friends, we’ve reached the end of the tour, and I hope you’re heading straight to your fridge to check on that Lemon Icebox Cake setup! Seriously, I poured my heart into making this recipe sound as easy and delicious as it actually is, and now it’s your turn to make it your own.
I absolutely LIVE for hearing how things turned out! Did you manage to keep your hands out of the dish overnight? Did you try the vanilla wafer swap, or did you stick to the classic graham crackers? Please, please, let me know in the comments below!
Leave me a rating if this recipe saved your summer dessert plans—five stars if it was the easiest thing you made all week! And if you have any strange questions—like, “Can I substitute yogurt for the whipped topping?” (Spoiler: Don’t!)—drop those below too. I check the comments all the time and love chatting about keeping cool with a fantastic, no-fuss Lemon Icebox Cake!
Print
Lemon Icebox Cake
- Total Time: 6 hr 15 min
- Yield: 9 servings 1x
- Diet: Vegetarian
Description
A simple, no-bake dessert featuring layers of lemon cream and graham crackers.
Ingredients
- 1 (14 ounce) can sweetened condensed milk
- 1/2 cup fresh lemon juice
- 1 teaspoon lemon zest
- 1 (8 ounce) container frozen whipped topping, thawed
- 1 (11 ounce) box graham crackers
Instructions
- In a medium bowl, whisk together the sweetened condensed milk, lemon juice, and lemon zest until combined.
- Gently fold in the thawed whipped topping until no streaks remain.
- Arrange a single layer of graham crackers in the bottom of an 8×8 inch baking dish.
- Spread half of the lemon mixture evenly over the crackers.
- Top with another layer of graham crackers.
- Spread the remaining lemon mixture over the second layer of crackers.
- Top with a final layer of graham crackers.
- Cover the dish tightly with plastic wrap.
- Refrigerate for at least 6 hours, or preferably overnight, before serving.
Notes
- You can use vanilla wafers instead of graham crackers for a different texture.
- For a stronger lemon flavor, add an extra teaspoon of zest.
- Prep Time: 15 min
- Cook Time: 0 min
- Category: Dessert
- Method: Chilling
- Cuisine: American
Nutrition
- Serving Size: 1 slice
- Calories: 305
- Sugar: 38
- Sodium: 120
- Fat: 13
- Saturated Fat: 7
- Unsaturated Fat: 6
- Trans Fat: 0
- Carbohydrates: 45
- Fiber: 1
- Protein: 5
- Cholesterol: 35
Keywords: lemon icebox cake, no bake dessert, lemon cream, graham cracker cake, chilled dessert