
Sometimes you just need something sweet, and you need it *now*, right? You know what I mean—those times when the craving hits hard, but you also have zero desire to spend an entire afternoon fussing over cooling racks and delicate piping bags. That, my friends, is where the absolute king of easy desserts enters the picture: the legendary Seven Layer Bars. Seriously, if I could only bake one dessert forever, these would probably win. They are the definition of maximum payoff for minimal effort.
The first time I made these, I swear I wasn’t paying close attention because I was prepping dinner simultaneously. I threw down the butter, then the crumbs, then sprinkled everything else over the top in what felt like three minutes flat. I put them in the oven, forgot about them for a bit, and when I pulled them out, golden and bubbly? Wow. They disappeared so fast at the picnic last weekend that I barely got one for myself! That gorgeous, sweet, chewy tower of goodness that is a Seven Layer Bar simply cannot be beaten when it comes to satisfying a crowd quickly.

Why These Seven Layer Bars Are a Must-Make Dessert
Honestly, these bars are my secret weapon when someone calls me last minute and asks me to bring a dessert. They just work every single time, no drama required. Forget chilling, rolling dough, or complicated folding techniques; these babies are all about stacking things neatly and letting the oven do the heavy lifting.
Here’s why I always have the ingredients for these on hand. You might want to check out that fun No-Bake Funfetti Oreo Icebox Cake if you like easy treats too, but these baked bars are where it’s at!
- They are genuinely crowd-pleasing. Ask anyone—chocolate, butterscotch, coconut, and graham cracker crust? Yes, please!
- The texture is unreal! You get the crunchy base, the chewy middle from the milk, and the melty pools of chocolate on top.
- They travel like a dream. No frosting sliding off or delicate pieces breaking apart in the car.
Quick Assembly for Perfect Seven Layer Bars
You don’t even need a stand mixer for this! Seriously, the whole assembly time takes maybe fifteen minutes if you’re moving at a leisurely pace. You are basically just melting some butter, pressing crumbs, and then sprinkling the next item on top of the last one. That condensed milk does all the binding work for you, holding those seven distinct layers together so perfectly. It’s magic, I tell you!
Gathering Ingredients for Your Seven Layer Bars
This part is so satisfying because you are literally just gathering what you need and setting it aside. There’s no complex measuring or balancing act here, which is why I love these so much. You’ll need exactly one cup of unsalted butter because we need to melt it down for that buttery base, so set that aside first. Then, grab that gorgeous can of sweetened condensed milk—that’s our real binder here, trust me!
For the dry layers, we are sticking to the classics: one and a half cups of graham cracker crumbs is perfect for a sturdy crust across that 9×13 pan. Then come the stars of the show! You’ll need one cup each of the chocolate chips (I stick to semisweet) and the butterscotch chips. Follow that up with one cup each of shredded coconut and your chopped nuts. Have those nuts chopped and ready to go before you start assembling!

Ingredient Notes and Substitutions for Seven Layer Bars
Now, about those nuts. The recipe notes mention you can swap those out if you need to, and I totally support that move! If you have a nut allergy in the family, just use another cup of chocolate chips or maybe stir in some chopped pretzels for a little salty crunch. Either way works great, but the balance in my preferred version comes from those two different types of chips.
Why both chocolate and butterscotch? Well, the semisweet chocolate gives you that familiar deep cocoa flavor, but the butterscotch chips melt down into these wonderfully gooey, slightly salty pockets that contrast perfectly with the sweetness of the condensed milk. They really elevate what could be just a simple chocolate bar into something way more interesting. Don’t skip the butterscotch if you can help it—that little bit of extra flavor profile is worth grabbing that second bag of chips!
Step-by-Step Instructions to Bake Seven Layer Bars
Okay, this is where the fun happens! It feels professional, but I promise you, if you can pile stuff onto a plate, you can make these bars. The key here is organization—measure everything out first, because once you start layering, you need to move quickly so the butter doesn’t soak things up weirdly before you get to the milk. If you’re looking for another reliably gooey favorite, you absolutely *must* check out my recipe for Gooey Chocolate Chip Cookies; it keeps that wonderful melted-and-rich texture theme going!
Preparing the Pan and Base Layer
First things first: get that oven preheating to 350 degrees Fahrenheit. Don’t wait! These bars bake fast, so you want the oven ready when you are. The most important thing I learned early on? Line that 9×13 pan with parchment paper, but make sure you leave a good overhang on the sides. That overhang is your handle later when you lift the whole slab out to slice everything perfectly.
Once it’s lined, pour in your one cup of melted butter. You’ll want to spread that around nice and even. Next, dump in the graham cracker crumbs. Use the bottom of a drinking glass or a flat measuring cup to really press those crumbs down firmly into the butter. You want a nice, dense carpet on the bottom—no loose crumbs allowed!
Layering the Sweet Components for Seven Layer Bars
After the crust is set, it’s time for the magic binder: the sweetened condensed milk. Carefully pour the can over the crumb layer. Don’t just dump it in the center! Tilt the pan gently and pour slowly, letting the milk self-level across all those crumbs. It should be a thin, even, milky sheet.
Now we layer the chips and the rest. Sprinkle the cup of chocolate chips evenly over the milk. Then, follow that immediately with the cup of butterscotch chips, making sure they cover as much surface area as possible. Next, scatter your cup of shredded coconut across the top. Finally, the nuts go last—sprinkle them right over the top layer. If you’re using pecans or walnuts, make sure they are chopped roughly so you get a little nut in almost every single square.

The Final Bake and Cooling Process for Seven Layer Bars
Into the oven they go! Bake these for about 25 to 30 minutes. You aren’t looking for it to look fully cooked like a cake; you want the edges to start turning golden brown and you want the very top surface to look set—not jiggly in the middle. Watch carefully after the 25-minute mark.
And here is my absolute personal expertise tip, which I know you’ll appreciate when you try to slice them: DO NOT try to cut these hot! They will turn into a beautiful, delicious wreck. Let them cool completely in the pan—and this is crucial—then pop them into the fridge for at least an hour before pulling them out via the parchment paper handles. Chilling is what gives you those clean, professional-looking squares you usually only see in bakeries. Trust me on the chill time!
Tips for Achieving Perfect Seven Layer Bars Texture
Listen, these bars are super forgiving, but there is one thing we absolutely cannot mess up, and that is the texture when we try to slice them. If you rush this part, you’ll get a beautiful, warm, gooey mess that needs a fork, which, while delicious, isn’t exactly what we’re aiming for when we want nice bar shapes.
The cooling time is almost as important as the baking time itself. Remember how I said you want them set when they come out of the 350-degree oven? Great. Now, they need to cool down completely on the countertop. Once they are just lukewarm, that’s when the real secret happens—into the refrigerator they go! Seriously, aim for at least an hour of chilling. That time lets the melted butter and the condensed milk fully solidify, making the whole structure firm up. When you go to slice them after chilling, the knife glides right through without dragging all the chocolate and coconut with it. It’s like cheating! If you’re looking for other fast sweet fixes, check out these No-Bake Cookie Delights for speedy sweetness.

Also, use a really sharp knife. A dull knife will just press down and smear everything. A sharp blade cuts through all those layers—crumb base, chewy middle, and topping—cleanly and beautifully!
Storage and Making Ahead with Seven Layer Bars
The best part about these bars, other than making them, is that they taste even better the next day once they’ve really settled in the fridge. If you happen to have any leftovers—which I highly doubt you will—store them in an airtight container. They’ll keep happily on the counter for about two days, but honestly, they are much better kept cool because that chilling keeps them from getting too soft.
And yes, you can absolutely freeze these! I usually cut them into squares first, then layer them between sheets of parchment paper in a freezer-safe container. They freeze like a dream for up to three months. Just let them thaw on the counter for about half an hour before you decide to sneak one!
Variations on Classic Seven Layer Bars
You know how I love to stick close to tradition, but with something as fun and flexible as these Seven Layer Bars, you absolutely should play around a little bit! The beauty of these bars is that they don’t mind a little mix-up, as long as you keep that condensed milk layer happy, everything else is fair game.
If you’re bored of the standard chocolate/butterscotch combo—though I will never understand why anyone would be!—try swapping one of those pools out. For a real decadent treat, replace the butterscotch chips with peanut butter chips. Oh my gosh, the combination of peanut butter and chocolate in this chewy base is incredible! It’s rich, salty, and sweet all at once.
Or, if you want something a little brighter tasting, try using white chocolate chips instead of the butterscotch. That cuts through the richness just a touch. I also love sprinkling in some mini marshmallows with the coconut layer—they puff up slightly and sort of melt into the texture. If you are feeling daring, check out my Chocolate Chip Banana Overnight Oats for another idea on pairing great flavors together, though these bars are obviously much more indulgent!
Just stick to adding roughly the same volume of substitutes. Switching out the nuts for something like shredded white chocolate or toffee bits adds totally new dimension without changing the structure one bit. Have fun with it!
Frequently Asked Questions About Seven Layer Bars
It’s funny how many questions people have about these bars, but I guess when something looks that good and seems that easy, you want to make sure you don’t mess it up! I try to answer everything I can right here so your first batch of Seven Layer Bars turns out absolutely perfect. By the way, if you love easy party food, you simply must check out this Seven Layer Taco Dip—it’s a guaranteed hit!
Can I make Seven Layer Bars without nuts?
Absolutely, you totally can! Like I mentioned in the ingredient notes, if you have an allergy or just aren’t a fan of pecans or walnuts, you can skip them entirely. Or, feel free to substitute them with another cup of chips, or honestly, even some toffee bits work wonders! You won’t miss the nuts at all because the other six layers are so deeply flavorful and chewy.
What is the best way to cut the Seven Layer Bars neatly?
This is the number one question I get, and the answer is always the same: chill time! If you try to cut them warm or even just room temperature, you’ll drag all those gooey chocolate and butterscotch layers right out the side. I know it’s hard waiting when they smell that good, but once they are completely cool, transfer the entire pan to the refrigerator for at least an hour. Once they are cold, the knife goes right through them like butter, giving you those beautiful, structured squares.
Why are my Seven Layer Bars greasy or soggy on the bottom?
That usually happens for one of two reasons, and I learned this the hard way! First, did you press down super hard on the graham cracker crumb base? If the crumbs aren’t packed tightly into the melted butter, they soak up the milk unevenly and steam instead of baking into a nice crust. Second, make sure you’re using that parchment paper correctly and haven’t allowed the bottom layer of butter to pool too thick right there. A solid, pre-pressed crust prevents sogginess!
Do I have to use sweetened condensed milk? Can I use evaporated milk?
Nope, you really can’t swap evaporated milk for the sweetened condensed milk here. Sweetened condensed milk is thick and extremely sugary because much of the water has been cooked out, and that sugar is what helps the layers bind and caramelize during baking. Evaporated milk is much thinner and won’t provide that crucial structure or sweetness. Stick to the canned sweetened condensed milk for these bars; it truly is the heart of the whole Seven Layer Bars recipe!
Estimated Nutritional Snapshot for Seven Layer Bars
Now, I know you’re going to ask, because I always do, but we have to talk numbers for a second. Look, these bars are made of butter, condensed milk, and chocolate chips, so we aren’t exactly splitting lettuce leaves here! But I always think it helps to have a general idea of what you’re diving into, especially before you bring these decadent treats to a gathering.
Please remember that this nutritional information is just an estimate based on standard ingredient quantities and serving sizes calculated for 24 bars. If you cut them bigger or smaller, or if you accidentally use more chocolate than I did (which I fully support, by the way), the numbers will shift!
Here’s a quick look at what you can generally expect in one of these delicious squares. These are based on the recipe details provided, and they help me feel just a little bit better about eating two instead of one!
- Serving Size: 1 bar
- Calories: Roughly 250 calories per bar
- Sugar: About 20 grams – that’s the condensed milk and the chips doing their job!
- Fat: Around 16 grams, broken down into about 9 grams saturated fat. Totally worth it for that chewiness!
- Protein: About 3 grams, mostly coming from the nuts and dairy.
- Carbohydrates: Around 25 grams.
See? They are a wonderful, rich treat, meant for enjoying and sharing, not for counting every little thing. When something tastes this good, sometimes you just have to say, “I’ll have another one tomorrow!”
Share Your Experience Making These Seven Layer Bars
Okay, now that you’ve seen how foolproof these Seven Layer Bars are, I absolutely need to hear about your batch! Baking is so much more fun when we can share the results, right? Don’t just walk away with sticky fingers and a happy tummy; come back here and let me know what you thought!
Did you stick to my classic layer order, or did you go rogue and try a little something different? Let me know in the comments below if you made any tweaks—maybe you used heath bits instead of walnuts, or perhaps you swapped out those coconut flakes for something else? I’m always looking for fun new ways to build these stacks!
If you followed this recipe, please leave a rating! A quick five-star review tells other folks that this recipe is reliable and delicious, and it really helps my little blog out. And hey, if you snapped a photo of your golden, gooey creation, tag me on social media! I love seeing them all piled up ready to be devoured. If you’re looking for another staple item that’s easy to make from scratch, you have to try my tips for an amazing homemade cake flour substitute—it’s a staple I use all the time!
Print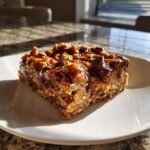
Seven Layer Bars
- Total Time: 45 min
- Yield: 24 bars 1x
- Diet: Vegetarian
Description
A simple, sweet bar cookie with seven distinct layers.
Ingredients
- 1 cup (2 sticks) unsalted butter, melted
- 1 package (14 ounces) sweetened condensed milk
- 1 1/2 cups graham cracker crumbs
- 1 cup semisweet chocolate chips
- 1 cup butterscotch chips
- 1 cup shredded coconut
- 1 cup chopped nuts (walnuts or pecans)
Instructions
- Preheat your oven to 350 degrees Fahrenheit (175 degrees Celsius). Line a 9×13 inch baking pan with parchment paper, leaving an overhang on the sides for easy removal.
- Press the melted butter evenly into the bottom of the prepared pan.
- Sprinkle the graham cracker crumbs over the butter layer. Press them down gently.
- Pour the sweetened condensed milk evenly over the graham cracker layer.
- Sprinkle the chocolate chips over the milk layer.
- Sprinkle the butterscotch chips over the chocolate chips.
- Distribute the shredded coconut evenly over the chips.
- Sprinkle the chopped nuts over the coconut layer.
- Bake for 25 to 30 minutes, or until the edges are golden brown and the top is set.
- Let the bars cool completely in the pan on a wire rack before lifting them out using the parchment paper overhang.
- Cut into squares before serving.
Notes
- You can substitute the nuts with more chocolate chips if you prefer.
- For cleaner cuts, chill the cooled bars in the refrigerator for at least one hour before slicing.
- Prep Time: 15 min
- Cook Time: 30 min
- Category: Dessert
- Method: Baking
- Cuisine: American
Nutrition
- Serving Size: 1 bar
- Calories: 250
- Sugar: 20
- Sodium: 100
- Fat: 16
- Saturated Fat: 9
- Unsaturated Fat: 7
- Trans Fat: 0
- Carbohydrates: 25
- Fiber: 1
- Protein: 3
- Cholesterol: 30
Keywords: seven layer bars, magic bars, dessert, sweet bars, chocolate chip, butterscotch