
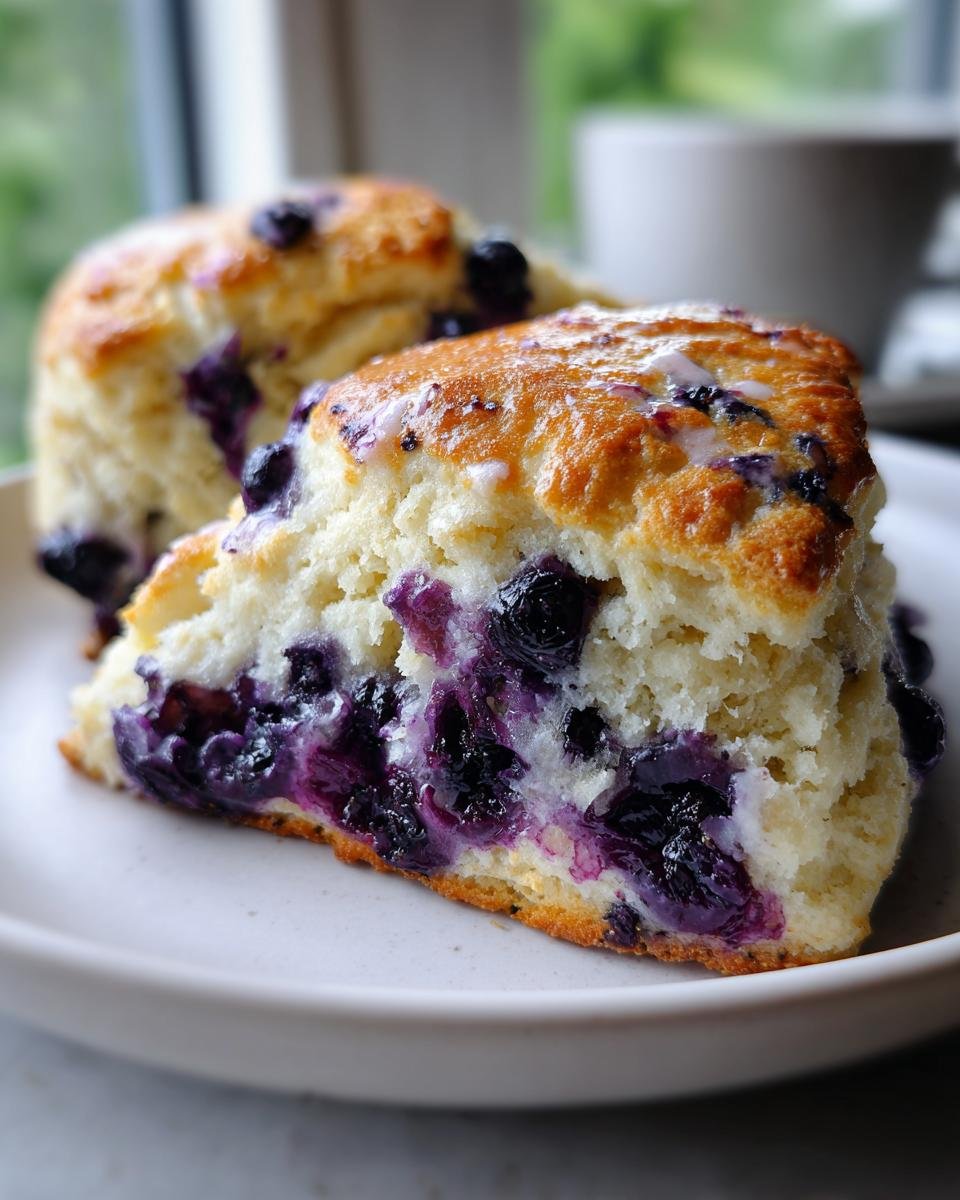
You know that slightly chilly, wonderfully dense, yet somehow still tender pastry you just have to grab when you stop for your morning coffee? Me too! I spent what felt like ages trying to recreate that bakery magic in my own kitchen. My first few batches were honestly hockey pucks—too dry, too crumbly. But persistence pays off, my friends! After tweaking the fat content and getting the chilling just right, I finally nailed the texture. Trust me when I say these homemade Starbucks Blueberry Scones are every bit as good, if not better, than the ones from the café. We’re talking about bursting blueberries and that perfect sugary crunch on top. Let’s get baking!
Why You Will Love These Starbucks Blueberry Scones
Honestly, once you make these at home, you might never go back to the café versions. I know I didn’t! They are so much better when you make the crust just right. Here’s what makes this recipe my go-to:
- They have that signature dense, tender crumb that makes a real scone satisfying.
- Every bite gives you a little burst of sweet, juicy blueberry flavor.
- No complicated chilling steps or loaf pans needed—we mix and bake fast!
- The coarse sugar topping provides the perfect sweet crunch you get at the coffee shop.
- They come together quicker than your usual weekend baking project. Seriously fast!
It’s just the right balance of flaky texture with the sweetness you want in your breakfast pastry.

Essential Ingredients for Perfect Starbucks Blueberry Scones
When you’re copying a bakery classic, the ingredients matter more than you think. I learned this the hard way when I tried using melted butter once—spoiler alert: it was a disaster! For this specific texture, we need everything to be very cold. Head over to this great recipe if you want to double-check amounts, but here is what you absolutely need for eight perfect scones:
- 2 cups all-purpose flour (the standard stuff works great!)
- 1/2 cup granulated sugar (for sweetness inside the dough)
- 1 tablespoon baking powder (this gives us the lift we need)
- 1/2 teaspoon salt (don’t skip this, it balances the sweet)
- 1/2 cup cold unsalted butter, cut into small pieces (must be cold!)
- 3/4 cup fresh or frozen blueberries (we talk about using frozen later)
- 1/2 cup heavy cream, plus more for brushing (the magic liquid!)
- 1 large egg
- 1 teaspoon vanilla extract
- About 1/4 cup coarse sugar for topping (sometimes called sanding sugar; this makes the crunch!)
It’s a short list, which means every single item needs to be good quality. Especially that butter!
Expert Tips for Making Fluffy Starbucks Blueberry Scones
Listen, getting those bakery-style scones means respecting the dough. If you treat it gently, it rewards you with gorgeous flaky layers. If you rush it? You end up with something hard enough to use as a doorstop. The biggest secrets aren’t tricky techniques; they’re about temperature control and handling the mixture just enough.
The Importance of Cold Butter in Your Starbucks Blueberry Scones
This is the golden rule! When we say cold butter, I mean out of the fridge, already cut into little cubes. When the cold butter hits the hot oven, those little pieces melt and create steam pockets between the layers of flour. That steam is what pushes the dough up, giving you that beautiful flaky separation instead of a dense hockey puck texture. You are aiming for a texture that looks like coarse meal mixed with pea-sized pebbles of butter. If your butter gets soft while you’re cutting it in, just pop the whole bowl back into the freezer for ten minutes!
Handling Blueberries for the Best Starbucks Blueberry Scones
I know sometimes you just pull the bag of frozen fruit out of the freezer and toss it in, right? Resist that urge! If you thaw the berries first, they completely bleed their juice into the dough, turning your beautiful pale scones into a blue-streaked mess, and worse, adding extra moisture where you don’t want it. Frozen blueberries are great, as long as you toss them straight from the freezer into your dry ingredients. This keeps them icy, so they don’t mush up while you’re mixing everything else together. They’ll cook perfectly fine in the oven later, I promise!
Step-by-Step Instructions to Bake Starbucks Blueberry Scones
Okay, now for the action! This is where patience really matters, especially when mixing, but the whole thing is pretty quick overall. We want that light, cafe-style exterior, and we get that by being fast and gentle at the right moments. Make sure your oven is set to 400 degrees Fahrenheit before you even grab the flour! Line a baking sheet with parchment paper—this saves cleanup majorly, which I am always here for. Ready to see those dry ingredients meet those beautiful cream and egg mixers?
Preparing the Dough for Starbucks Blueberry Scones
First things first: whisk your flour, sugar, baking powder, and salt together in a big bowl. You want that good distribution. Next, you’re cutting in that cold butter. Use a pastry blender or, honestly, just your fingertips! I like using my fingers because I can really feel when the butter is broken down into those coarse crumbs we talked about. Then, gently fold in those icy blueberries. Keep everything light! In a separate, smaller bowl, mix your heavy cream, the egg, and the vanilla extract together until they are just married. Now, pour those wet goodies right into the dry mix.
Here’s the moment to be careful: mix using just a fork until everything is *just* combined. I mean it—stop mixing when you still see a few little streaks of dry flour. If you overwork it trying to make it look perfect, you’ll wake up tomorrow wishing you hadn’t, because the scones will be tough. Trust me on the “do not overmix” rule; it’s crucial for the texture!
Shaping and Topping Your Starbucks Blueberry Scones
Lightly flour a surface and turn that shaggy dough out onto it. Gently pat or roll it until it’s about 3/4 of an inch thick. Don’t press it down too hard, or you squash all those potential air bubbles we made earlier! Cut your dough into 8 lovely wedges—they look more like the bakery that way than round pucks do. Place those wedges onto your lined baking sheet.
Before baking, give the tops a very light brush of extra heavy cream. This is what gives them that beautiful, slightly shiny golden color. If you managed to grab that coarse sugar, sprinkle it generously now! Pop them into the 400°F oven for about 15 to 18 minutes. They are done when they look golden brown and smell heavenly. Let them sit on the hot pan for just a few minutes—maybe 5—before moving them over to a wire rack to cool down. You can check out more details on baking times if you notice your oven runs hot or cold!
Ingredient Substitutions for Your Starbucks Blueberry Scones
One of the best things about baking at home is flexibility! If you don’t have heavy cream on hand, don’t panic; you can still get amazing results. If you swap out the heavy cream for buttermilk, you’ll actually get a slightly tangier scone, which I adore with blueberries.
Also, if blueberries aren’t in season or you just fancy a change, these scones are fantastic with other fruit! Try chopped fresh raspberries or even finely diced apples tossed in a little cinnamon before folding them in. Just keep the volume of fruit roughly the same, around 3/4 of a cup. The important thing is to keep the butter cold and the mixing gentle, no matter what lovely additions you decide on!
Serving Suggestions for Homemade Starbucks Blueberry Scones
So, you’ve pulled off the perfect batch of homemade Starbucks Blueberry Scones! Wow! Now, how do you eat them? While they are totally delicious on their own—especially when still slightly warm from the rack—a good scone demands a proper setting, right?
First off, coffee pairing is essential. These scones practically beg to be served alongside a really hot, strong cup of coffee. Maybe you’re more of a tea drinker? A crisp Earl Grey or a fruity herbal blend cuts right through the richness of the cream and butter perfectly. I often reach for a classic black tea myself.
If you’re serving them for a weekend brunch, skip the complicated frosting and stick to simpler spreads. A pat of good quality salted butter is divine. My personal favorite, though, is a high-quality lemon curd. The slight tartness of the lemon just seems to amplify the natural sweetness of the blueberries in the scone. If you happen to have some extra fruit on hand, maybe some whipped cream and fresh berries on the side make it feel extra fancy!
If you are looking for something different to serve alongside your breakfast pastry creations, check out these fluffy pancake recipes for inspiration. But for these scones, keep the accompaniments simple, letting that perfect texture shine!
Storing and Freezing Starbucks Blueberry Scones
This recipe is wonderful because you barely have to wait for breakfast! You can totally make these ahead without sacrificing that perfect texture. If you baked them, keep cooled scones in an airtight container. They stay great on the counter for about two days, but I like putting them in the fridge after that if I won’t finish them quickly.
But my favorite trick? Freeze them unbaked! Shape the wedges, put them on a small tray lined with parchment, and flash freeze until solid. Once frozen, transfer them to a zip-top bag. When you wake up craving that Starbucks Blueberry Scone taste, just toss the frozen wedges straight onto the baking sheet and add 3-5 minutes to the baking time. It’s like magic!
Frequently Asked Questions About Starbucks Blueberry Scones
I always get flooded with questions when I post these, which is great because it means you guys are excited to bake them! Here are a few things I hear all the time about making sure your homemade Starbucks Blueberry Scones turn out just like the coffee shop version.
Why are my scones tough instead of tender?
Oh, that’s almost always a sign of overmixing! When you mix flour with liquid, you start developing gluten, which is great for bread but terrible for a tender breakfast pastry like a scone. Once you add the wet ingredients to the dry, mix only until the flour streaks are just disappearing. It should still look a little shaggy. If you knead it or mix it like cake batter, you activate too much gluten, and *poof*—you’ve got a tough scone!
Can I use dried or fresh blueberries instead of frozen?
You absolutely can use fresh blueberries, but remember what I said about keeping things cold! If you use fresh ones, make sure they aren’t squishy or slightly bruised, because those will bleed color immediately. As for dried ones? I actually discourage it for this particular style of scone. The Starbucks version relies on that juicy burst from fresh or frozen fruit. Dried fruit won’t give you that moisture release in the oven.
What’s the best way to get a tall, nicely risen scone?
It comes down to two things! First: your baking powder needs to be fresh. If it’s old, your scones won’t rise much. Second, and this is huge: don’t flatten the dough when you cut it. After you pat it into that 3/4-inch thick circle, cut your wedges, and then stand them up on the baking sheet upright, side-by-side, rather than laying them flat. This encourages them to rise upwards!
Do I need to use heavy cream, or can I substitute it?
Heavy cream is my top pick because its high-fat content really contributes to a tender mouthfeel. If you’re in a pinch, half heavy cream and half buttermilk (like I mentioned earlier) is a winner for that nice little tang. You can use milk, but the scones will be slightly less rich and might be a bit drier because milk has less fat than cream.
Estimated Nutrition for Starbucks Blueberry Scones
Now, let’s talk fuel! Because these are scones, they absolutely contain butter and cream, so they are definitely a treat rather than an everyday health food. But knowing what’s in your breakfast is important, especially when you’re making them fresh at home! This gives you a much better idea of what you’re eating compared to grabbing one blindly at the café.
Keep in mind these numbers are based strictly on the recipe provided, assuming you use the coarse sugar topping. If you skip the sugar topping or use low-fat milk instead of cream, those numbers will shift. Think of this as a very helpful guideline!
- Serving Size: 1 scone
- Calories: 280
- Fat: 15g (9g Saturated Fat)
- Carbohydrates: 33g
- Protein: 5g
- Sugar: 12g
It’s a decent amount of sugar and fat, which is what makes them taste so rich and satisfying, right? They offer a tiny bit of fiber and a nice little lift of protein. But seriously, treat these like the wonderful pastry they are—enjoy them with your morning coffee and don’t worry too much about the numbers!
Share Your Homemade Starbucks Blueberry Scones
Wow! We made it through the entire process, and I bet your kitchen smells absolutely amazing right now. I hope you’re feeling proud of the incredible batch of homemade Starbucks Blueberry Scones you just baked!
I would genuinely love to see how yours turned out. Did you go heavy on the coarse sugar topping? Did you manage to keep your butter perfectly cold? Snap a picture of your beautiful breakfast pastries and tag me on social media! Seeing your results makes all the testing and tweaking completely worth it.
Please come back here after you’ve had a chance to taste them and leave a rating and a quick comment below. Your feedback helps other bakers gain the confidence to try this recipe next weekend. Happy baking, and enjoy every sweet, crumbly bite!
Print
Starbucks Style Blueberry Scones
- Total Time: 33 min
- Yield: 8 servings 1x
- Diet: Vegetarian
Description
A recipe for making blueberry scones similar to those sold at Starbucks.
Ingredients
- 2 cups all-purpose flour
- 1/2 cup granulated sugar
- 1 tablespoon baking powder
- 1/2 teaspoon salt
- 1/2 cup cold unsalted butter, cut into small pieces
- 3/4 cup fresh or frozen blueberries
- 1/2 cup heavy cream, plus more for brushing
- 1 large egg
- 1 teaspoon vanilla extract
- 1/4 cup coarse sugar for topping (optional)
Instructions
- Preheat your oven to 400 degrees Fahrenheit. Line a baking sheet with parchment paper.
- In a large bowl, whisk together the flour, granulated sugar, baking powder, and salt.
- Cut in the cold butter using a pastry blender or your fingers until the mixture resembles coarse crumbs.
- Gently stir in the blueberries.
- In a separate small bowl, whisk together the heavy cream, egg, and vanilla extract.
- Pour the wet ingredients into the dry ingredients. Mix gently with a fork until just combined. Do not overmix.
- Turn the dough out onto a lightly floured surface. Gently pat or roll the dough into a 3/4-inch thick circle or square.
- Cut the dough into 8 wedges or squares. Place them on the prepared baking sheet.
- Brush the tops lightly with extra heavy cream and sprinkle with coarse sugar, if using.
- Bake for 15 to 18 minutes, or until the tops are lightly golden brown.
- Let the scones cool on the baking sheet for a few minutes before transferring them to a wire rack to cool completely.
Notes
- If using frozen blueberries, do not thaw them before adding them to the dough.
- For a richer flavor, you can substitute half of the heavy cream with buttermilk.
- You can make these ahead and freeze the unbaked wedges; bake directly from frozen, adding a few extra minutes to the baking time.
- Prep Time: 15 min
- Cook Time: 18 min
- Category: Breakfast
- Method: Baking
- Cuisine: American
Nutrition
- Serving Size: 1 scone
- Calories: 280
- Sugar: 12
- Sodium: 250
- Fat: 15
- Saturated Fat: 9
- Unsaturated Fat: 6
- Trans Fat: 0
- Carbohydrates: 33
- Fiber: 1
- Protein: 5
- Cholesterol: 50
Keywords: blueberry scones, Starbucks scones, breakfast pastry, homemade scones, tea cakes