
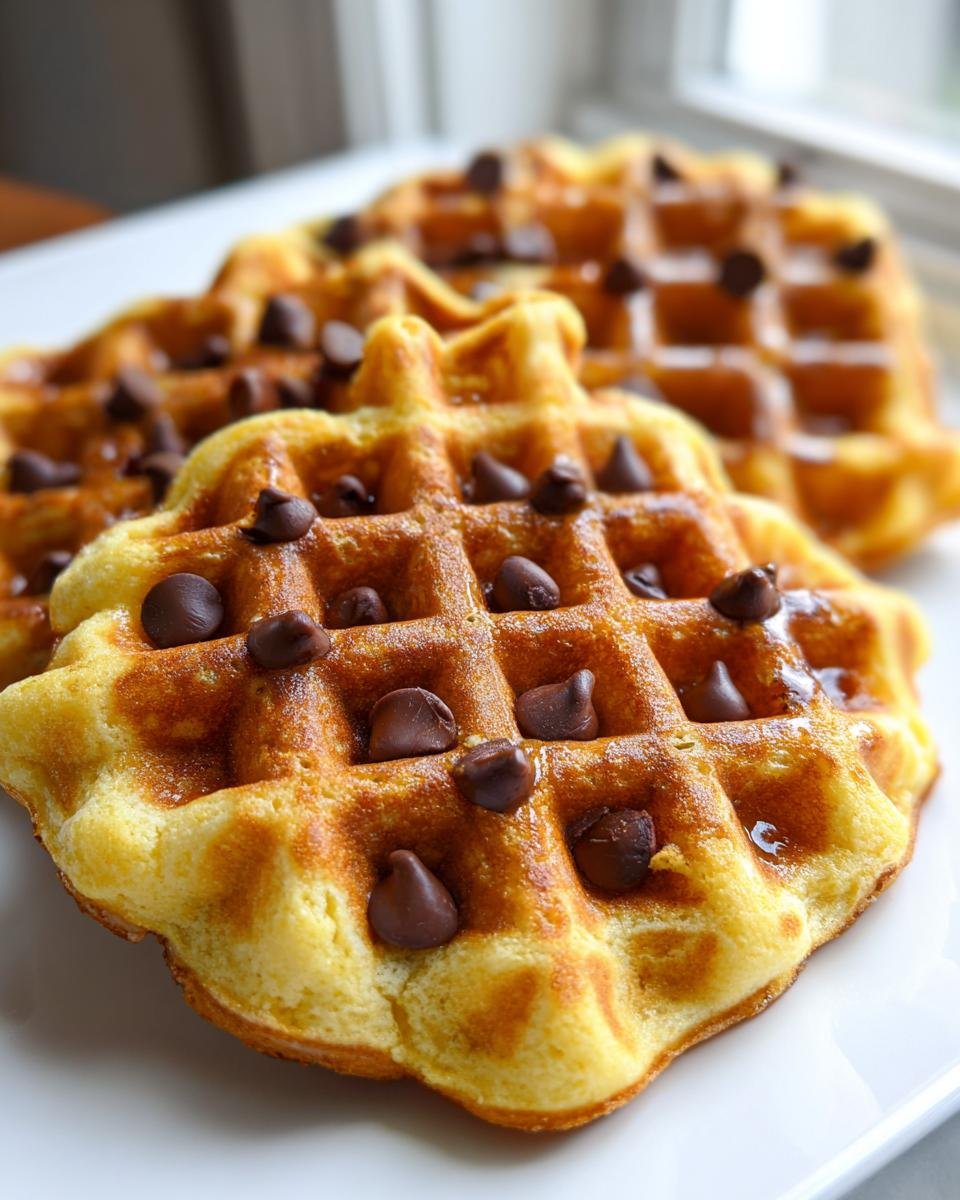
There is nothing, absolutely nothing, that beats the sound of a sizzling waffle iron on a quiet Saturday morning. Forget those sad, rubbery breakfast discs you get at diners—I’m talking about achieving true waffle nirvana right on your own countertop! For years, I battled sogginess; my waffles were either pale puddles or burned charcoal. But folks, I cracked the code! These Chocolate Chip Waffles are my absolute masterpiece. They come out unbelievably crisp on the outside, yet light and airy inside, with those perfect pools of melted chocolate hiding everywhere.

It took maybe six batches of throwing out batter before I figured out the exact science behind that crispy shell. Seriously, once you nail this technique, you’ll never want to make pancakes again (don’t tell my husband I said that!). These aren’t just breakfast; they’re a memory in the making, and they come together so fast you’ll wonder why you waited so long to try them.
Why You’ll Love Making These Chocolate Chip Waffles
I want you to trust me on this one; making amazing waffles at home is easier than you think, especially when you have a recipe built on proper mechanics. You aren’t going to get a better start to your weekend than with these goodies. Here’s why they jump straight to the top of your favorites list:
- The Ultimate Texture Contrast: This is the big one. We nail that perfect crisp, golden edge that shatters ever so slightly when you cut into it, followed immediately by a cloud-like, fluffy interior that stays light. No rubbery waffles here!
- Speedy Morning Magic: Seriously, we’re talking minimal fuss for maximum reward. With only 10 minutes of prep time, you can whip up an entire batch before everyone else has even brewed their coffee. It’s perfect for busy weekday mornings or impromptu weekend brunches.
- Melt-in-Your-Mouth Chocolate: The chips melt just enough so they streak through the batter like ribbons of gooey goodness but still hold their shape. It’s the best texture you can get without making a separate topping. If you want to see how I get my pancakes this fluffy, check out my tips right here!
- Pure Homemade Joy: Nothing beats the smell of fresh vanilla and melting sugar wafting through the house. This recipe just screams ‘special occasion,’ even if Tuesday is the day you decide to make them!
Essential Ingredients for Perfect Chocolate Chip Waffles
Okay, let’s talk about what goes into these beauties. The ingredient list looks pretty standard, but I promise you, the quality and how you handle them makes all the difference between a good waffle and the kind that makes you want to hug the grid lines.
For this recipe, you need:
- 1 3/4 cups all-purpose flour (Just the regular stuff, nothing fancy needed!)
- 2 tablespoons white sugar (This helps with browning, trust me.)
- 1 teaspoon baking soda (Our main lift agent—don’t skip this!)
- 1/2 teaspoon salt
- 2 large eggs (Make sure these aren’t ice-cold from the fridge.)
- 1 3/4 cups milk
- 1/2 cup vegetable oil (This is key for texture, more on that in a second.)
- 1 teaspoon vanilla extract (Get the good stuff if you can!)
- 1 cup semi-sweet chocolate chips
That’s it! Simple ingredients, right? But we need to dive into those crucial little details that push this recipe over the top.
Ingredient Notes and Substitutions for Your Chocolate Chip Waffles
This is where we get technical, but in a fun way! My biggest discovery for extra crispiness was using oil instead of melted butter in the batter. Oil stays liquid at a lower temperature than butter does when cooked, which stops the waffle from absorbing too much moisture and becoming soft too fast. Trust me, the oil works magic on the exterior!
Now, for the chocolate chips, you have total freedom! If you prefer a sweeter, milder taste, go ahead and use milk chocolate chips. But honestly, the deep richness of dark chocolate chips cuts through the sweetness of the batter perfectly. If you want to get really gourmet, toss in a handful of peanut butter chips or even some chopped nuts along with the chips!
Equipment Needed for the Best Chocolate Chip Waffles
You don’t need a whole arsenal of fancy gadgets for these beauties since the batter is so straightforward. But having the right tools sure makes life easier and cleaner! Having these items on hand means you can get started making your Chocolate Chip Waffles practically instantly.
Here is what you’ll need to have ready on your counter:
- A good quality waffle iron—this is non-negotiable! Make sure you know how to set the temperature or darkness level.
- Two solid mixing bowls—one needs to be large enough to handle all the dry ingredients, and the other is for mixing up the liquids.
- A whisk for smoothly combining the flour mixture and for beating the eggs in the wet bowl.
- A rubber spatula or wooden spoon for gently folding in those gorgeous chocolate chips at the end. You definitely don’t want to break them up with the whisk!
- A ladle or measuring cup to scoop the batter precisely onto the hot iron. Consistency in scooping means consistency in cooking time, which really helps!
That’s pretty much it, friends. No complex machinery required, just good old-fashioned mixing and cooking!
Step-by-Step Instructions for Crispy Chocolate Chip Waffles
Getting these Chocolate Chip Waffles right is all about patience during prep and speed when cooking. My biggest rule? Never, ever make the batter until your iron is already blazing hot! You need that immediate sizzle when the batter hits the plate. I usually plug mine in first thing, giving it a solid 10 minutes to get properly heated up.
Once you’re ready to mix, you’ll notice we keep the wet and dry ingredients totally separate at first. This is the secret sauce for getting those airy pockets inside later. If you dump everything in at once, you end up activating the gluten way too fast, and suddenly, your waffle isn’t fluffy, it’s just dense chewy bread shaped like a waffle. We don’t want that! When you’re combining the two, remember the keyword here is *just combined*. A few little streaks of flour are totally fine; they’ll dissolve on the iron. For more light breakfast ideas, you can check out my quick pancake prep guide!
Mixing the Batter for Fluffy Chocolate Chip Waffles
Keep those two bowls divided! Whisk your dry stuff—flour, sugar, baking soda, and salt—until it’s perfectly airy and uniform. In the second bowl, gently whisk your eggs, then add the milk, oil, and vanilla. When you pour the wet into the dry, use your spatula and fold about ten times. Seriously, count them! Stop immediately when you no longer see loose, dry flour streaks. Then, and only then, gently fold in your cup of chocolate chips. They just need a quick toss to distribute, so they don’t sink to the bottom or melt prematurely.
Cooking Your Chocolate Chip Waffles to Golden Perfection
Now the fun part! Scoop just the right amount of batter onto the preheated iron—don’t feel like you have to fill every crevice; the batter will spread itself out beautifully. Close the lid. Now, you pretty much have to wait patiently! Let the iron do the talking. Don’t lift the lid early just to peek, or you risk tearing your perfect waffle apart. Cook it until the steam stops coming out aggressively, usually until it hits that deep golden-brown setting your iron provides. If you’re making a huge batch and need to keep them warm, don’t stack them up on a plate—they will steam themselves soggy! Instead, place the cooked waffles in a single layer on a baking sheet set inside an oven that’s barely warm, maybe 200°F, until it’s time to eat.
Tips for Success When Making Chocolate Chip Waffles
Even with the best recipe, sometimes little hiccups happen in the kitchen, right? I’ve learned a few tricks over the years from my inevitable disastrous batches that really guarantee that beautiful, crispy result every single time you tackle these Chocolate Chip Waffles.
Here are three things I swear by that aren’t written in the basic instructions:
Let the Batter Take a Quick Nap
After you gently fold those chocolate chips in, let that whole bowl of batter sit on the counter for about ten minutes before you start cooking. I used to think this was nonsense, but letting the batter rest lets the flour fully hydrate. This is super important because when the flour drinks up that liquid, it helps the exterior become glass-crisp when it hits the hot iron, and it keeps the inside from collapsing. But don’t let it sit for hours, or the baking soda will start to fizzle out!
Clean As You Go (Especially the Iron!)
Waffle irons get sticky, and when they get sticky, the next waffle is *always* worse than the last. If you see batter bubbling over or dripping down the sides, pause your batch immediately once that waffle is done. Unplug the iron, let it cool slightly so you don’t burn yourself, and wipe down any crusty bits with a damp cloth or a soft brush while it’s still warm. If the surface is clean, the next waffle will release perfectly. Never dunk your iron in water, obviously, but keeping the heating surface clean is half the battle!
The Power of the Second Waffle
This is true for almost every waffle recipe out there: your first one is usually a test run, and often, it ends up a little pale or slightly disappointing. Why? Because the iron itself wasn’t fully saturated with enough heat, or you guessed the right scoop amount wrong. Don’t stress if Waffle #1 isn’t perfect! But Waffle #2? That one is usually the benchmark for true perfection because the iron is fully cranked and seasoned. Keep that first, perfectly fine waffle for yourself while the other ones bake for the crowd!
Variations on Classic Chocolate Chip Waffles
Look, these Chocolate Chip Waffles are fantastic just the way they are, right? They hit that perfect breakfast sweet spot. But if you’re feeling a little adventurous one morning, or maybe you’re out of the standard semi-sweet chips, don’t sweat it! The base recipe is so sturdy that it handles little upgrades like a dream. These aren’t complicated changes; we’re just sneaking in a little extra flavor when no one is looking.
I always suggest keeping the main ingredients the same—that oil and the ratio of wet to dry is what keeps them crispy—but here are a couple of ways I like to spice things up in my kitchen:
Add a Pinch of Cozy Spice
If you like that warm, almost gingerbread spice vibe but don’t want to turn it into a full-on pumpkin waffle, just add about 1/2 teaspoon of ground cinnamon to your dry ingredients when you whisk them together. It doesn’t change the texture at all, but it gives the whole batch a wonderfully cozy aroma that tastes incredible with maple syrup. Honestly, it just makes the whole house smell better than usual!
Go Nuts or Go Nutty-Butter
If you happen to have some chopped pecans or walnuts lying around, toss in about a half cup along with your chocolate chips. Give them a gentle fold in at the very end. The nuts toast up slightly on the iron, giving you an extra layer of crunch that complements the crispy exterior perfectly. Speaking of peanut butter and chocolate, if you love that combo, you absolutely have to check out my recipe for peanut butter chocolate chip cookies! It’s a completely different bake, but that flavor pairing is legendary.
Mix Up Your Chocolate Game
I mentioned milk or dark chocolate earlier, but sometimes texture matters more than flavor. Try using mini chocolate chips instead of the regular size. They melt much faster and create these tiny little explosions of molten chocolate throughout the waffle instead of just bigger puddles. It makes the entire experience feel a little different and keeps every single bite interesting. You can also mix in some white chocolate chips for a fun, diner-style look!
Serving Suggestions for Your Homemade Chocolate Chip Waffles
Okay, you’ve done the hard part! The irons are cooling down, the kitchen smells incredible, and you have a towering stack of perfectly crispy, chocolate-studded waffles in front of you. Now comes the fun—making them look as good as they taste! Honestly, these Chocolate Chip Waffles are delicious just by themselves, still warm off the iron. But where’s the fun in that? A truly great breakfast always needs the right finishing touches.
I like to keep toppings simple because the chocolate chips are already doing most of the heavy lifting, but presentation really elevates the whole experience. Here are the go-to items my family demands every time we make a batch.
The Maple Syrup Drizzle
You simply cannot serve a waffle without syrup, right? My rule here is to never, ever use that corn syrup stuff that looks like colored glue. You want pure maple syrup. Warm it up slightly in the microwave for about 15 seconds before pouring—it pours smoother and soaks in just a tad better, rather than just sitting on top of the crispy crust.
Fluffy Whipped Cream
If you have a canister, just use it! If you’re feeling fancy (or if it’s a holiday), whip some heavy cream yourself with a splash of vanilla and maybe just a tiny dusting of powdered sugar. A dollop sitting right in the middle of the waffle steam looks gorgeous. It starts to melt down the sides, bathing those chocolate pockets in creamy goodness.
Fresh Fruit is Mandatory
For me, the acidity of fresh fruit is the only thing that keeps these rich, sweet waffles from feeling too heavy. Strawberries are my absolute favorite; slice them thinly and layer them right over the syrup. Blueberries are also amazing because they look so vibrant against the golden brown batter. If you happen to have some blackberries, even better!
A Little Chocolate Overload
If you’re serving this to someone who deserves a serious treat, go ahead and melt a few extra chocolate chips or some chocolate syrup and drizzle it diagonally across the finished stack. Warning: this takes them from ‘breakfast’ territory straight into ‘decadent dessert,’ but hey, you earned it! If you want to get really wild with chocolate, I have a crazy decadent chocolate milkshake recipe that pairs perfectly for an over-the-top brunch experience!
Storage and Reheating Instructions for Leftover Chocolate Chip Waffles
The first rule of making amazing Chocolate Chip Waffles is always making too many! Because let’s be real, they are never quite as good straight up cold from the fridge the next morning. But that doesn’t mean we toss them! We have systems for leftovers, and my system is all about achieving that glorious, just-made crunch when you reheat them.
If you have any of these golden beauties left, you need to deal with them quickly before they go soft. Please, do not stack them straight from the iron into a container. They will steam themselves into a sad, soggy pile within minutes. You need air circulation first!
Storing Them Until Tomorrow
Let your finished waffles cool completely—I mean stone cold—on a wire cooling rack. This takes about 20 minutes, but it is the most important step for leftovers! Once they are totally cool, lay them in a single layer in a freezer bag or an airtight plastic container. If you have a huge batch, you can layer a piece of parchment paper between each waffle as you stack them in the container. This stops them from sticking together into one giant, chocolatey brick.
For the fridge, they’ll be good for about three days stored this way. But if you know you won’t get to them before then, move them straight to the freezer! They freeze like a dream. Just make sure they are fully cooled first, and they will last up to two months in the freezer looking and tasting almost brand new.
The Reheating Revelation: Restoring the Crisp!
This is the part I am most passionate about! Microwaving waffles? That’s a crime against breakfast, because it makes them warm spongey messes. We are aiming for crispy, remember?
Here are my two methods:
- The Toaster/Toaster Oven Method (Best for single waffles): This is faster, and it works best for one or two waffles. Pop them right into your toaster or toaster oven on a medium setting. It takes about 1 to 2 minutes, but watch them closely! They heat up fast and the direct heat crisps up the surface again beautifully.
- The Oven Method (Best for batches): If you pulled a whole stack out of the freezer or fridge, this is your play. Set your oven to 350°F (175°C). Lay the waffles out in a single layer on a baking sheet—no stacking allowed! Pop them in for about 5 to 8 minutes, until they are piping hot all the way through and have that signature crunch back. If they were frozen, they might need 10-12 minutes.
Once they are warm and crisp, they are ready for that drizzle of warm maple syrup you need to give them. It’s magic, I tell you—it truly brings these Chocolate Chip Waffles back to life!
Frequently Asked Questions About Chocolate Chip Waffles
I get so many great questions about these waffles, which just proves how badly everyone wants that perfect crispy texture! I tried to cover all the major points in the instructions, but sometimes you just need a quick Q&A to clear things up. Don’t worry if you mess up a batch or two at first; we’ve all been there while learning those little kitchen secrets!
Can I make the Chocolate Chip Waffles batter ahead of time?
This is a tricky one, and generally, I’d say no—at least not for very long. Because we use baking soda as our leavening agent, the batter is most active right after you mix the wet and dry ingredients. If you let it sit for hours, the lift will totally dissipate, and you’ll end up with those slightly sad, flatter Chocolate Chip Waffles that aren’t fluffy! However, an absolute short rest—say, 10 to 15 minutes on the counter while you finish getting the coffee ready—is actually beneficial! That little break lets the flour hydrate, which helps the crisp exterior form. So, a quick nap is great; an overnight stay in the fridge? Not so much.
What is the secret to making the crispiest Chocolate Chip Waffles?
If you remember nothing else from this whole guide, remember the fat choice! The single biggest factor in achieving that shatteringly crisp exterior is using oil instead of melted butter in the batter. As I mentioned earlier, oil stays liquid at lower temperatures than butter does, which means less moisture is absorbed by the flour mixture while it sits on the hot iron plate. This helps the waffle cook faster and allows that beautiful, dry crust to form.
The second huge secret is making sure your waffle iron is screaming hot before the batter even touches it. I mean, truly preheated according to the manufacturer’s recommendation, sometimes 10 minutes is not enough if your iron is big! You want that immediate, hard sizzle when the batter hits the surface. That instantaneous cooking action locks in the crisp.
Why are my Chocolate Chip Waffles soggy or dense?
This usually comes down to two classic kitchen oopsies! A dense waffle almost always means you overmixed the batter. You mixed those dry ingredients into the wet ones until every last speck of flour was gone, right? If so, you developed the gluten, which means a dense, chewy texture instead of a light, airy one. When mixing, stop as soon as the streaks disappear. The second reason for sogginess? Not cleaning your iron between batches, or storing finished waffles in a stack that’s sealed tight. That trapped steam softens the crust immediately. Reheat them in a toaster oven next time!
Can I use self-rising flour instead of all-purpose flour?
I would steer clear of that, sweet friend! This recipe relies specifically on the interaction between the all-purpose flour and the measured amount of baking soda we add for our lift. Self-rising flour has salt and leavener already baked in, and it’s usually formulated for cake or bread recipes that have different ratios of fat and liquid. If you substitute it, you risk having a chemical taste or a texture that just won’t crisp up the way you want it to. Stick to the AP flour—it’s foolproof here!
What kind of chocolate chips cook best in waffles?
Semi-sweet is my absolute go-to because it offers that great contrast against the sweet fluffy batter. But honestly, you can use whatever chip you love! I sometimes use milk chocolate for the kids, and it melts into these softer, sweeter pockets. If you use dark chocolate chips, you get that slightly more intense, almost bitter note that really balances out the syrups. Just avoid chocolate chunks, though; they tend to be too thick and they won’t melt nicely through the batter before the waffle itself is cooked.
Estimated Nutritional Information for Chocolate Chip Waffles
Now, I know some of you hardcore foodies like to track things, and that’s totally fine! But I have to give you the big dose of reality right at the start: this is homemade cooking, and nutrition labels are for things made in a sterile factory, not in my kitchen! These numbers are just an educated guess based on the standard ingredients we used.
We use full-fat ingredients like oil and milk, so these aren’t exactly diet food, but man, are they worth every crunchy, chocolatey bite! Remember, if you swap oil for butter, or use dark chocolate instead of semi-sweet, these numbers are going to shift around a little bit. Treat this as a helpful guide rather than a hard-and-fast scientific fact!
Based on dividing the recipe into 4 servings (which is a very generous serving, by the way!), here’s what we are looking at per serving (one good-sized waffle):
- Calories: About 350
- Fat: Roughly 18g (and that includes the wonderful oil we used for crispness!)
- Saturated Fat: Around 5g
- Carbohydrates: In the ballpark of 40g
- Sugar: About 18g (And yes, some of that is delicious melted chocolate!)
- Protein: Around 9g
- Sodium: Roughly 300mg
- Cholesterol: Circa 60mg
We’ve only got about 2g of fiber in there, but that’s what you get for swapping out whole wheat flour for that fluffy white stuff! Don’t sweat the small stuff too much when you are enjoying breakfast this good. If you’re aiming for a slightly healthier morning, try my tips on adding fruit right into the batter for a little nutritional boost!
Share Your Perfect Chocolate Chip Waffles Experience
Whew! Now that you’ve conquered the crispy, chocolatey mountain that is homemade Chocolate Chip Waffles, I absolutely need to hear about it! Seriously, nothing makes me happier than seeing the beautiful stacks of waffles my readers make. Did your iron produce those perfect deep pockets? Did you manage to get the outside extra crunchy?
Don’t be shy—come tell me everything in the comments below! Drop a star rating if you think this recipe deserves a spot in your regular rotation. It really helps other folks who are nervously eyeing their waffle iron for the first time.
And if you snap a photo while everyone is still sitting around the table with syrup dripping down their chins, please tag me on social media! Seeing is believing, and I’d love to celebrate your breakfast success with you. Go grab that syrup, dig in, and let me know how you liked them!
Print
Chocolate Chip Waffles
- Total Time: 25 min
- Yield: 4 servings 1x
- Diet: Vegetarian
Description
A recipe for making classic waffles with chocolate chips mixed into the batter.
Ingredients
- 1 3/4 cups all-purpose flour
- 2 tablespoons white sugar
- 1 teaspoon baking soda
- 1/2 teaspoon salt
- 2 large eggs
- 1 3/4 cups milk
- 1/2 cup vegetable oil
- 1 teaspoon vanilla extract
- 1 cup semi-sweet chocolate chips
Instructions
- Preheat your waffle iron according to the manufacturer’s directions.
- In a large bowl, whisk together the flour, sugar, baking soda, and salt.
- In a separate bowl, whisk the eggs, milk, oil, and vanilla extract.
- Pour the wet ingredients into the dry ingredients and mix until just combined. Do not overmix.
- Gently fold in the chocolate chips.
- Pour the batter onto the hot waffle iron and cook until golden brown and crisp, following your iron’s instructions for doneness.
- Serve immediately.
Notes
- For crispier waffles, you can substitute the vegetable oil with melted butter.
- You can substitute semi-sweet chocolate chips with milk chocolate or dark chocolate chips.
- Prep Time: 10 min
- Cook Time: 15 min
- Category: Breakfast
- Method: Waffling
- Cuisine: American
Nutrition
- Serving Size: 1 waffle
- Calories: 350
- Sugar: 18g
- Sodium: 300mg
- Fat: 18g
- Saturated Fat: 5g
- Unsaturated Fat: 13g
- Trans Fat: 0g
- Carbohydrates: 40g
- Fiber: 2g
- Protein: 9g
- Cholesterol: 60mg
Keywords: chocolate chip waffles, breakfast, homemade waffles, sweet waffles