
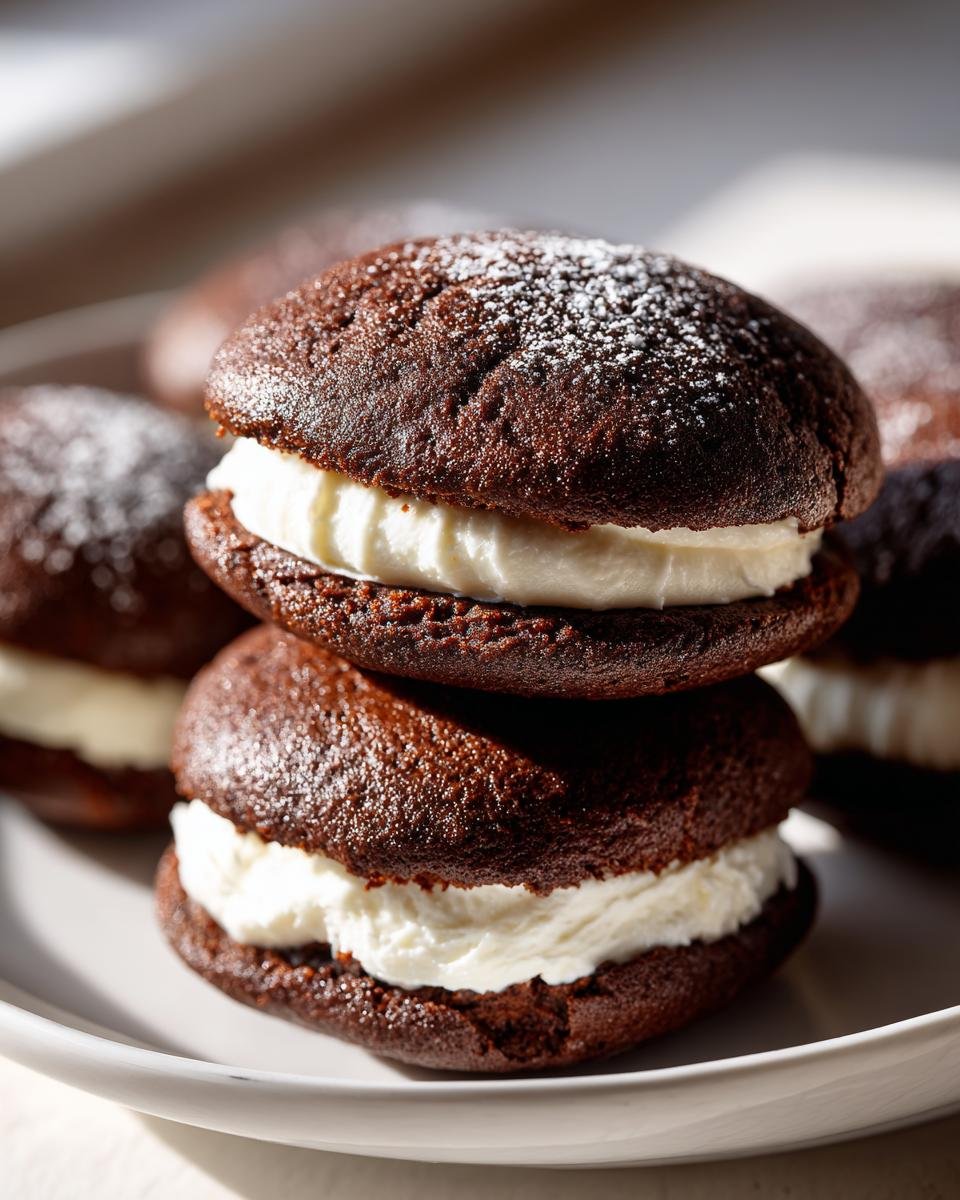
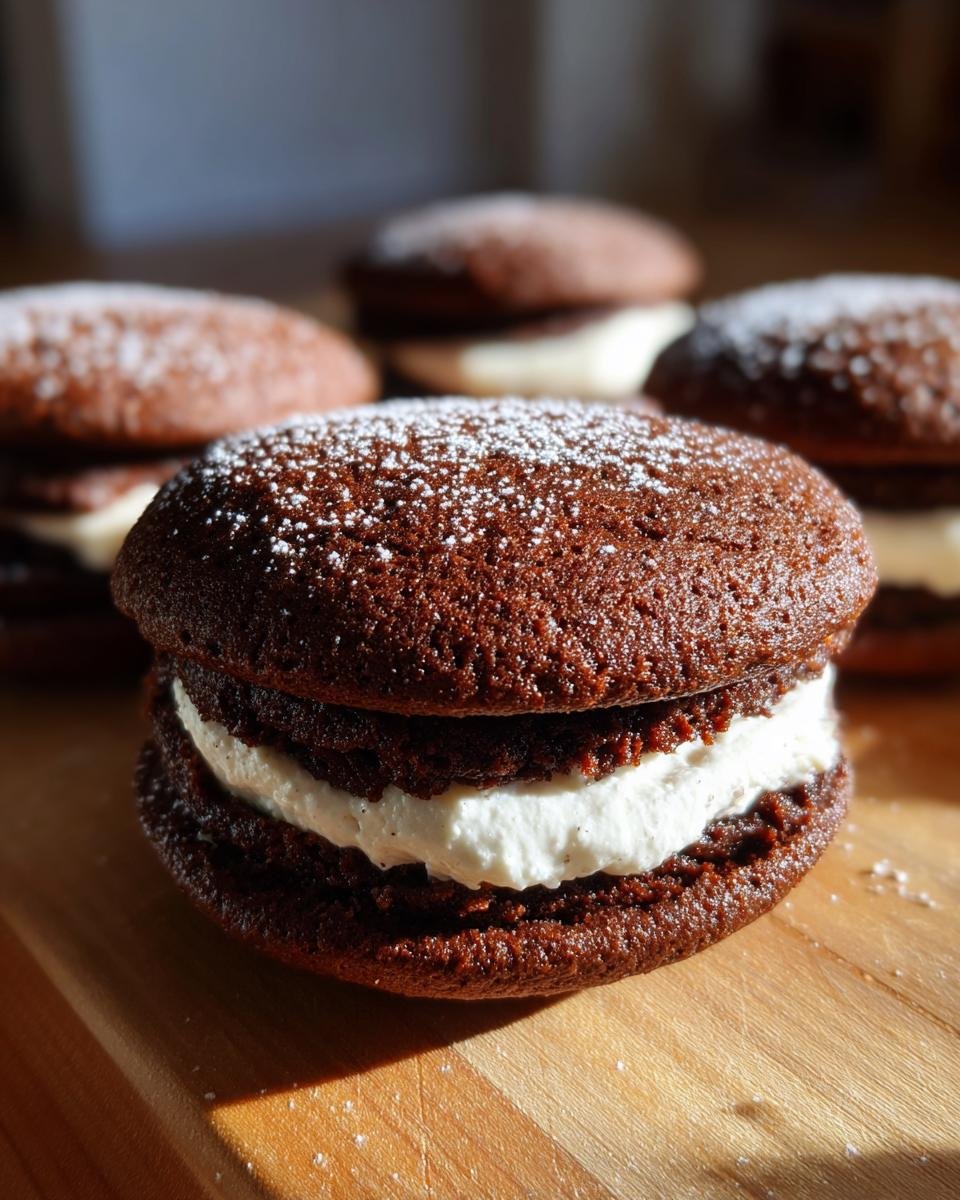
Oh my gosh, are you ready to step back in time? There’s just something about those truly nostalgic desserts—the ones that taste exactly like childhood summers—that nothing else can touch. And when I think of that iconic taste, I immediately think of the perfectly soft chocolate cake paired with that fluffy, sweet filling. Trust me when I say, this recipe for Old Fashioned Whoopie Pies is the real deal. I learned this from my aunt, who insisted on using just the right amount of cocoa. Every time I bite into one, I remember sitting on her porch swing, trying very hard not to get filling all over my chin!
This isn’t just another sandwich cookie recipe; it’s about capturing that soft, almost cake-like structure that makes a whoopie pie famous. Seriously, the texture is everything. We’re going to nail that pillowy cake surface and the rich, creamy center that just melts in your mouth. Forget the store-bought cardboard versions; after you try this method, you’ll never look back!

Why You Will Love These Old Fashioned Whoopie Pies
Honestly, once you make these from scratch, you’ll see why they’ve been around for so long. They are unbelievably satisfying and surprisingly simple to pull together on a weeknight. You don’t need any fancy skills, just a mixer and some enthusiasm!
- Classic, authentic flavor that tastes just like Grandma used to make.
- The texture is spot on: chocolate cakes that are dense yet wonderfully soft.
- The filling is super rich, creamy, and holds its shape perfectly.
- This recipe for Old Fashioned Whoopie Pies comes together fast—you can be eating them in under an hour!
- It’s a totally rewarding baking project that you can `whip up` when unexpected guests show up.
Essential Ingredients for Perfect Old Fashioned Whoopie Pies
Okay, let’s talk about what goes into these beauties because ingredient quality really matters here, especially for the chocolate cake part. Don’t try to eyeball anything; these measurements need to be respected if you want that perfect melt-in-your-mouth texture we’re aiming for in our Old Fashioned Whoopie Pies. I always lay everything out first, kind of like a little baking assembly line!
For the cake layers, we need the basics, but pay attention to condition. Yes, everyone says ‘softened butter,’ but I mean truly softened—like you can easily press your finger into it without resistance. Also, good quality unsweetened cocoa powder makes a world of difference in that deep chocolate flavor. If you’ve ever made your own flour blends, you know how important getting the dry ingredients right is; you can even check out my thoughts on `flour substitutes` if you’re running low!
Now for that cloud-like filling. This is where the combination of butter and shortening shines. I know some folks only use butter, but the shortening helps keep the filling light and bright white, which is just classic for this treat. It keeps it from getting too heavy when it’s sandwiched between those chocolate cakes.
For the Chocolate Cake Layers
- 1 cup all-purpose flour
- 1 teaspoon baking soda (Make sure it’s fresh!)
- 1/2 teaspoon salt
- 1/2 cup unsalted butter, softened
- 1 cup granulated sugar
- 1 large egg (Room temperature is best!)
- 1 teaspoon vanilla extract
- 1/2 cup unsweetened cocoa powder
- 1/2 cup milk
For the Creamy Filling
- 1/2 cup powdered sugar, sifted!
- 1/4 cup unsalted butter, softened
- 1/4 cup shortening
- 1 teaspoon vanilla extract
Step-by-Step Instructions for Old Fashioned Whoopie Pies
This is where the fun really starts! We need to move quickly but thoughtfully here, especially when mixing the cake batter. If you’ve ever had a tough pancake or a dense cake, you know the culprit is usually overmixing. We want these chocolate shells to stay wonderfully tender, just like little cakes, not tough cookies. Trust me on this—gentle mixing yields the best results! We’ll go through this in three main stages so nothing gets confusing. If you’re checking out my `pancake guide`, you’ll see the same principle applies!
- First things first: Get that oven fired up to 350 degrees F (175 degrees C). Line those baking sheets with parchment paper. This step is non-negotiable; it keeps cleanup simple and prevents sticking!
Preparing the Chocolate Cake Layers
We start by getting our dry stuff ready. In a small bowl, you just need to whisk together the flour, baking soda, and salt. Whisking gets out any lumps and makes sure the leavening agent is evenly spread out. Set that aside for a minute.
Now for the mixer! In a big bowl, cream together that softened butter and the granulated sugar until the mix turns light and fluffy. It should look pale and airy—that’s what we call creaming, and it’s adding air into the bake! Then, beat in your single egg and the teaspoon of vanilla extract.
Once that’s combined, grab your cocoa powder and milk and stir them together in a separate little bowl until they’re smooth. Nobody wants dry cocoa powder pockets! Here comes the gentle part: Add the flour mixture and the cocoa mixture alternately into your butter mixture. Start and end with the flour. Mix on low speed or by hand until *just* combined. Seriously, stop mixing as soon as you don’t see streaks of dry flour anymore! That’s our secret to tenderness.
Baking and Cooling the Old Fashioned Whoopie Pies Shells
Time to scoop! Drop rounded tablespoons of batter onto your prepared sheets. Make sure you leave about 2 inches between them because they will spread out a bit while baking. They shouldn’t look perfectly round right now; that’s fine!
Bake these beauties for about 10 to 12 minutes. Keep an eye on them—you don’t want them crispy! Once they’re done, let them cool right there on the baking sheet for just a few minutes. Transfer them carefully to a wire rack to cool down completely. We cannot fill them warm, or hello, melted filling disaster! Getting those chocolate shells perfectly cool is mandatory for assembling the best Old Fashioned Whoopie Pies.
Making the Creamy Filling and Assembling
While those cakes cool, let’s make the frosting magic happen. In a clean bowl, beat together the powdered sugar, softened butter, shortening, and the last teaspoon of vanilla extract. Beat it on medium speed until everything is smooth, creamy, and stiff enough to hold its shape a little bit. If you’ve ever made a good buttercream, the technique is similar to what I use for `pastry cream` filling.
Assembly is easy! Take one cooled chocolate shell and spread a nice, generous dollop of that creamy filling right onto the flat side. Then, take another shell and place it flat-side down right on top, making a perfect sandwich. Aren’t they perfect?
Tips for the Best Old Fashioned Whoopie Pies
I’ve made enough of these Old Fashioned Whoopie Pies to know the little things that stop them from turning out right. If you follow these tiny pointers, you’ll get bakery-quality results every single time. It takes practice, but these tips make it much easier!
First, when dropping the batter, use a small cookie scoop if you have one. This ensures all your tops are roughly the same size, so when you match them up later, you aren’t pairing a giant with a mini! Secondly, don’t press down on the cakes after scooping. Let them bake as they are; pressing them down ruins that fluffy top we are going for.
Also, I noticed that if your butter and shortening for the filling aren’t the exact same consistency—softened but cool—the filling can look a little grainy. You want it incredibly smooth there, just like in the directions! If you’re curious about keeping cookies soft longer, check out my tips for `gooey cookies`; the principles are similar!
Ingredient Notes and Substitutions for Old Fashioned Whoopie Pies
I often get questions about tweaking the ingredients in these Old Fashioned Whoopie Pies, and some swaps are okay, but others can be tricky. Remember, this recipe relies on a gentle cake structure, so we have to be careful changing the balance.
For the filling, using shortening is really important because it helps the frosting stay stable and fluffy at room temperature. Try to stick to the recipe there. If you absolutely cannot use shortening, you can try swapping it with more butter, but you’ll need to chill the filling for about 30 minutes before assembling so it doesn’t ooze out immediately.
If you’re out of regular milk, buttermilk usually works as a substitute in the cake batter, and sometimes it even makes the chocolate flavor pop a bit more! For a richer cake, feel free to use dark cocoa powder, just remember you might need an extra splash of milk because darker cocoa powder tends to be a bit drier. It’s all about experimenting carefully, just like when making `homemade broth`!
Storage and Reheating Instructions for Your Old Fashioned Whoopie Pies
These treats are best eaten the day they’re made, honestly! But life happens, so storage is important. If you have leftovers of your wonderful Old Fashioned Whoopie Pies, the best way to keep them is at room temperature. Make sure they are in a truly airtight container. I find that if you layer them with wax paper sheets between the layers, they don’t stick together—which is a lifesaver!
They usually stay fresh and soft on the counter for about three days. Don’t worry about refrigeration unless your kitchen is super hot; chilling can sometimes make the cake layers a little firm. They definitely don’t need reheating, but if you wanted to treat yourself, a quick 10 seconds on the counter should bring them right back to life!
Variations on the Classic Chocolate Old Fashioned Whoopie Pies
Once you nail the classic chocolate version, you absolutely have to start playing around! That soft cake base is a perfect canvas for lots of fun flavors. These are my favorite ways to spice up the standard Old Fashioned Whoopie Pies.
For the cake, try adding half a teaspoon of instant espresso powder along with the cocoa; it deepens the chocolate flavor without making it taste like coffee. Or, if you’re feeling autumnal, mix in a pinch of cinnamon and nutmeg! The filling can also be fun. Instead of just vanilla, try swapping that out for a teaspoon of peppermint extract for a holiday treat. Or, for a twist, you can mix in some creamy peanut butter into the filling for a sweet and salty surprise. Honestly, there are `so many delicious variations` you can come up with!
Frequently Asked Questions About Old Fashioned Whoopie Pies
I’ve answered a few common things people ask me when they first try to make these classic sandwich cookies. If you have other ideas, definitely drop them in the comments!
Why are my whoopie pie cakes flat?
Usually, flat cakes mean either your baking soda is old and has lost its power, or you mixed the batter way too much. Remember, we want just combined! Overmixing develops gluten, making the cakes tough and heavy instead of light and domed.
Can I make the filling ahead of time?
You certainly can make the creamy filling ahead of time! Keep it in an airtight container in the fridge. Before you use it, let it sit on the counter for about 30 minutes and then give it a quick whisk by hand. Cold filling can often be too stiff to spread nicely onto the Old Fashioned Whoopie Pies shells.
What is the difference between a whoopie pie and a sandwich cookie?
That’s a great question, and it all comes down to texture! A traditional sandwich cookie is usually crisp, like a shortbread or an Oreo. Whoopie pies are distinctly different because the chocolate part is light, cake-like, and very soft—it’s designed to squish together with that rich filling, almost like a small homemade cake.
What is the secret to that creamy filling?
The secret to that signature creamy filling is the balance of fat! Using both butter and shortening gives it the right richness from the butter but the lightness and structural stability from the shortening. It keeps that filling perfectly fluffy, which is the hallmark of a great whoopie pie, just like the filling in my `chocolate milkshake`!
Estimated Nutritional Information
Just a quick heads-up before you jump in! The nutritional breakdown you see for these incredible Old Fashioned Whoopie Pies is just an estimate taken from standard recipe databases. Believe me, once you start tweaking ingredient amounts or brands, those numbers will change. This recipe is definitely a treat, so enjoy it for what it is!
Share Your Old Fashioned Whoopie Pies Creations
I truly hope you loved making these as much as I love sharing this piece of family baking history with you! If you give this recipe a go, please come back and let me know how they turned out in the comments below. Five stars means you think they are perfect!
And if you snap a picture of your perfectly filled sandwiches, tag me on social media! I absolutely adore seeing everyone’s results. If you run into any trouble or have brilliant ideas for the next batch, feel free to send me a message on `my contact page`. Happy baking!

Tips for the Best Old Fashioned Whoopie Pies
I’ve made enough of these Old Fashioned Whoopie Pies to know the little things that stop them from turning out right. If you follow these tiny pointers, you’ll get bakery-quality results every single time. It takes practice, but these tips make it much easier!
First, when dropping the batter, use a small cookie scoop if you have one. This ensures all your tops are roughly the same size, so when you match them up later, you aren’t pairing a giant with a mini! Secondly, don’t press down on the cakes after scooping. Let them bake as they are; pressing them down ruins that fluffy top we are going for.
Also, I noticed that if your butter and shortening for the filling aren’t the exact same consistency—softened but cool—the filling can look a little grainy. You want it incredibly smooth there, just like in the directions! If you’re curious about keeping cookies soft longer, check out my tips for `gooey cookies`; the principles are similar!
Ingredient Notes and Substitutions for Old Fashioned Whoopie Pies
I often get questions about tweaking the ingredients in these Old Fashioned Whoopie Pies, and some swaps are okay, but others can be tricky. Remember, this recipe relies on a gentle cake structure, so we have to be careful changing the balance.
For the filling, using shortening is really important because it helps the frosting stay stable and fluffy at room temperature. Try to stick to the recipe there. If you absolutely cannot use shortening, you can try swapping it with more butter, but you’ll need to chill the filling for about 30 minutes before assembling so it doesn’t ooze out immediately.
If you’re out of regular milk, buttermilk usually works as a substitute in the cake batter, and sometimes it even makes the chocolate flavor pop a bit more! For a richer cake, feel free to use dark cocoa powder, just remember you might need an extra splash of milk because darker cocoa powder tends to be a bit drier. It’s all about experimenting carefully, just like when making `homemade broth`!
Storage and Reheating Instructions for Your Old Fashioned Whoopie Pies
I truly believe these Old Fashioned Whoopie Pies are at their absolute peak the day you make them, but hey, we can’t eat 12 pies in one sitting, right? So, storage is key!
The best spot for them is right on the counter in an airtight container. They stay soft and cakey that way for about three days. If your kitchen runs super hot, you *can* put them in the fridge, but promise me you’ll let them warm up on the counter first! Chilling can sometimes make those gorgeous chocolate cakes a little firm, and we don’t want that structure compromised.
Don’t worry about reheating them at all. They are perfect served at whatever temperature they come out of the container. Keeping these Old Fashioned Whoopie Pies fresh is simple if you just keep the air out!
Variations on the Classic Chocolate Old Fashioned Whoopie Pies
Once you nail the classic chocolate version, you absolutely have to start playing around! That soft cake base is a perfect canvas for lots of fun flavors. These are my favorite ways to spice up the standard Old Fashioned Whoopie Pies.
For the cake, try adding half a teaspoon of instant espresso powder along with the cocoa; it deepens the chocolate flavor without making it taste like coffee. It really makes the cocoa shine! Or, if you’re feeling autumnal, mix in a pinch of sweet cinnamon and nutmeg right when you add the flour. It smells heavenly while baking, I promise.
The filling can also get a makeover! Instead of just vanilla, try swapping that out for a teaspoon of peppermint extract for a fun holiday treat. My absolute favorite swap, though, is mixing in about a quarter cup of creamy peanut butter—it makes a savory-sweet sandwich that is just divine. There are `so many delicious variations` you can come up with once you have the basic recipe down pat!
Frequently Asked Questions About Old Fashioned Whoopie Pies
I’ve answered a few common things people ask me when they first try to make these classic treats. It takes a little practice to get them perfect, but once you do, you’re set for life! Let’s clear up any confusion about measurements or textures.
Why are my whoopie pie cakes flat?
This usually points to two things: either your baking soda is old and has lost its power, or you mixed the batter way too much. Remember the rule—we want the batter *just combined*! Overmixing develops gluten, which makes the cakes tough and heavy instead of light and domed. We want puff!
Can I make the filling ahead of time?
You absolutely can make that gorgeous creamy filling in advance! Keep it in an airtight container right in the fridge. Before you use it to assemble your Old Fashioned Whoopie Pies, make sure you let it sit out on the counter for maybe 30 minutes, then give it a quick whisk by hand. Cold filling can sometimes be too stiff to spread nicely, and we love that generous layer underneath the top cake layer.
What is the difference between a whoopie pie and a sandwich cookie?
That’s a great observation! A traditional sandwich cookie is usually crisp and crumbly, right? Whoopie pies are distinctly different because the chocolate part is light, soft, and definitely cake-like. They are almost meant to squish a bit when you bite into them—that interaction with the marshmallowy filling is what makes them so special. They feel less like a cookie and more like a tiny, handheld cake—the ultimate sandwich cookie comfort!
What is the secret to that creamy filling?
The secret to that signature creamy filling, which sits so perfectly between the layers? It’s the combination of fats! Using some butter gives it the flavor we love, but the shortening is key because it helps the frosting stay stable and fluffy for longer at room temperature. It keeps that filling incredibly light, almost like what I aim for when making a good chocolate `milkshake` topping.
Estimated Nutritional Information
Now, listen up, because I always get asked about the macros when I bring these along to a potluck! Before you dive deep into tracking your Old Fashioned Whoopie Pies, I need to give you the mandatory disclaimer.
The estimated nutritional details I have on file are just that: estimates. They are based on the specific brands and ingredient measurements I jotted down when I first formulated this recipe. Things like the specific brand of cocoa powder I use or the exact fat content of my shortening can totally change those numbers.
So, if you are tracking calories or macros strictly, please treat this information as a general guideline only. Your homemade Old Fashioned Whoopie Pies might look a little different on your tracker, and honestly, that’s okay! We bake these for joy, not for spreadsheets, right?
Share Your Old Fashioned Whoopie Pies Creations
I truly hope you loved making these as much as I love sharing this piece of family baking history with you! Now it’s your turn. Once you’ve polished off a few of these incredible Old Fashioned Whoopie Pies, please come back and let me know what you thought!
Did they taste just as wonderfully nostalgic as you hoped? Were your chocolate shells perfectly cakey? Let me know in the comments below, and definitely give the recipe a star rating if you think it deserves it. Sharing your experience helps other home bakers know they can trust this classic recipe!
And if you managed to snap a picture of your perfectly filled sandwiches before they disappeared? Oh, I live for those photos! Tag me on social media so I can see your amazing work. It makes my day to see this recipe showing up in kitchens all over the place. If you run into any tricky spots or maybe figured out a fun little variation, don’t keep it a secret—use my `contact page` to send me the details!
Print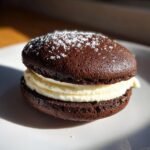
Old Fashioned Whoopie Pies
- Total Time: 32 min
- Yield: 12 pies 1x
- Diet: Vegetarian
Description
Classic chocolate whoopie pies with a creamy filling.
Ingredients
- 1 cup all-purpose flour
- 1 teaspoon baking soda
- 1/2 teaspoon salt
- 1/2 cup unsalted butter, softened
- 1 cup granulated sugar
- 1 large egg
- 1 teaspoon vanilla extract
- 1/2 cup unsweetened cocoa powder
- 1/2 cup milk
- 1/2 cup powdered sugar (for filling)
- 1/4 cup unsalted butter, softened (for filling)
- 1/4 cup shortening (for filling)
- 1 teaspoon vanilla extract (for filling)
Instructions
- Preheat your oven to 350 degrees F (175 degrees C). Line baking sheets with parchment paper.
- In a small bowl, whisk together the flour, baking soda, and salt. Set aside.
- In a large bowl, cream together the softened butter and granulated sugar until light and fluffy.
- Beat in the egg and vanilla extract.
- In a separate bowl, mix the cocoa powder and milk until smooth.
- Gradually add the flour mixture and the cocoa mixture alternately to the butter mixture, beginning and ending with the flour mixture, mixing until just combined. Do not overmix.
- Drop rounded tablespoons of batter onto the prepared baking sheets, spacing them about 2 inches apart.
- Bake for 10 to 12 minutes. Let the cakes cool on the baking sheets for a few minutes before transferring them to a wire rack to cool completely.
- To make the filling, beat the powdered sugar, softened butter, shortening, and vanilla extract together until smooth and creamy.
- Once the cakes are completely cool, spread a generous amount of filling on the flat side of one cake and top with another cake, flat side down, to form a sandwich.
Notes
- You can store finished whoopie pies in an airtight container at room temperature for up to 3 days.
- For a richer chocolate flavor, use dark cocoa powder.
- Prep Time: 20 min
- Cook Time: 12 min
- Category: Dessert
- Method: Baking
- Cuisine: American
Nutrition
- Serving Size: 1 pie
- Calories: 350
- Sugar: 35
- Sodium: 150
- Fat: 18
- Saturated Fat: 10
- Unsaturated Fat: 8
- Trans Fat: 0
- Carbohydrates: 45
- Fiber: 1
- Protein: 4
- Cholesterol: 45
Keywords: whoopie pies, chocolate cakes, sandwich cookies, old fashioned dessert, creamy filling