
You know those desserts that look totally show-stopping but seem like they take three days and a culinary degree? Well, forget those! I live for that sweet spot where flavor is maxed out, but cleanup is almost zero. This **Chocolate Poke Cake** is the absolute champion of that category, trust me. It’s pure, dense, rich chocolate heaven soaked in the sweetest hug you can imagine. The first time I made this, I thought I’d actually failed because the top looked all weird and hole-y after baking, but then I poured that condensed milk mixture over it while it was still warm—wow! It just vanished, turning the whole thing into this unbelievably moist, gooey delight. It’s the easiest, most decadent thing you’ll make all year.
Why This Chocolate Poke Cake is Your New Go-To Dessert
If you need something chocolatey fast, this is the answer. Seriously, I keep all the main components stocked just in case of a sudden chocolate emergency. Why is this cake the best secret weapon in my arsenal?
- It’s unbelievably fast—you’re mixing less than 15 minutes before it hits the oven.
- The soak turns a standard box mix into the moistest cake you’ve ever made.
- It requires zero fancy frosting skills; the topping is super simple.
If you love this type of decadent chocolate situation, you absolutely have to check out my recipe for the Ultimate Chocolate Milkshake Delight next time summer rolls around!
Essential Ingredients for the Perfect Chocolate Poke Cake
When you’re dealing with a simple **Chocolate Poke Cake**, the quality (and specificity!) of your ingredients really shines through. Since there aren’t a million things going on, we need to make sure these basics do their job perfectly. You’ll grab a standard box of chocolate cake mix, but everything else is about richness and density. Here’s what you absolutely need for this recipe to deliver that iconic gooey factor.
- 1 box (15.25 oz) chocolate cake mix (your favorite brand!)
- 1 can (14 oz) sweetened condensed milk
- 1/2 cup chocolate syrup
- 1/2 cup hot water
- 1 tub (8 oz) frozen whipped topping, thawed
Ingredient Notes and Substitutions for Your Chocolate Poke Cake
Listen, that chocolate syrup you use matters! If you use a darker, Hershey’s style syrup, you get a deeper flavor. If you use a lighter, sweeter glaze, the taste will be milder. I always sneak in about a teaspoon of instant espresso powder into the condensed milk mixture—you can’t taste coffee, but wow, does it make that chocolate flavor pop! It just deepens everything up beautifully.
Step-by-Step Instructions for Making a Delicious Chocolate Poke Cake
Okay, this is the fun part where the magic happens! It feels like cheating because you’re mostly just following the box directions, but then we get to the poking, and that’s where we take it from good to legendary. Remember, timing is everything here; don’t let that cake cool down too long before it gets its sweet soak. If you want to see my favorite way to make a super fudgy cake, check out my Amazing ’70s Hershey’s Chocolate Cake recipe!
Baking and Poking: Key Steps for Your Chocolate Poke Cake
First things first, get that oven preheated and your 9×13 pan ready. Mix up that chocolate cake according to the box—no shortcuts there! Bake it until it’s done, just like normal. The absolute key moment is right out of the oven. While it’s still piping hot, grab a fork or the handle of a wooden spoon—I prefer the spoon handle, it makes a cleaner, wider hole—and poke holes all over the top. You want them about an inch apart because that warm cake just drinks up that filling!

Creating the Gooey Filling for Your Chocolate Poke Cake
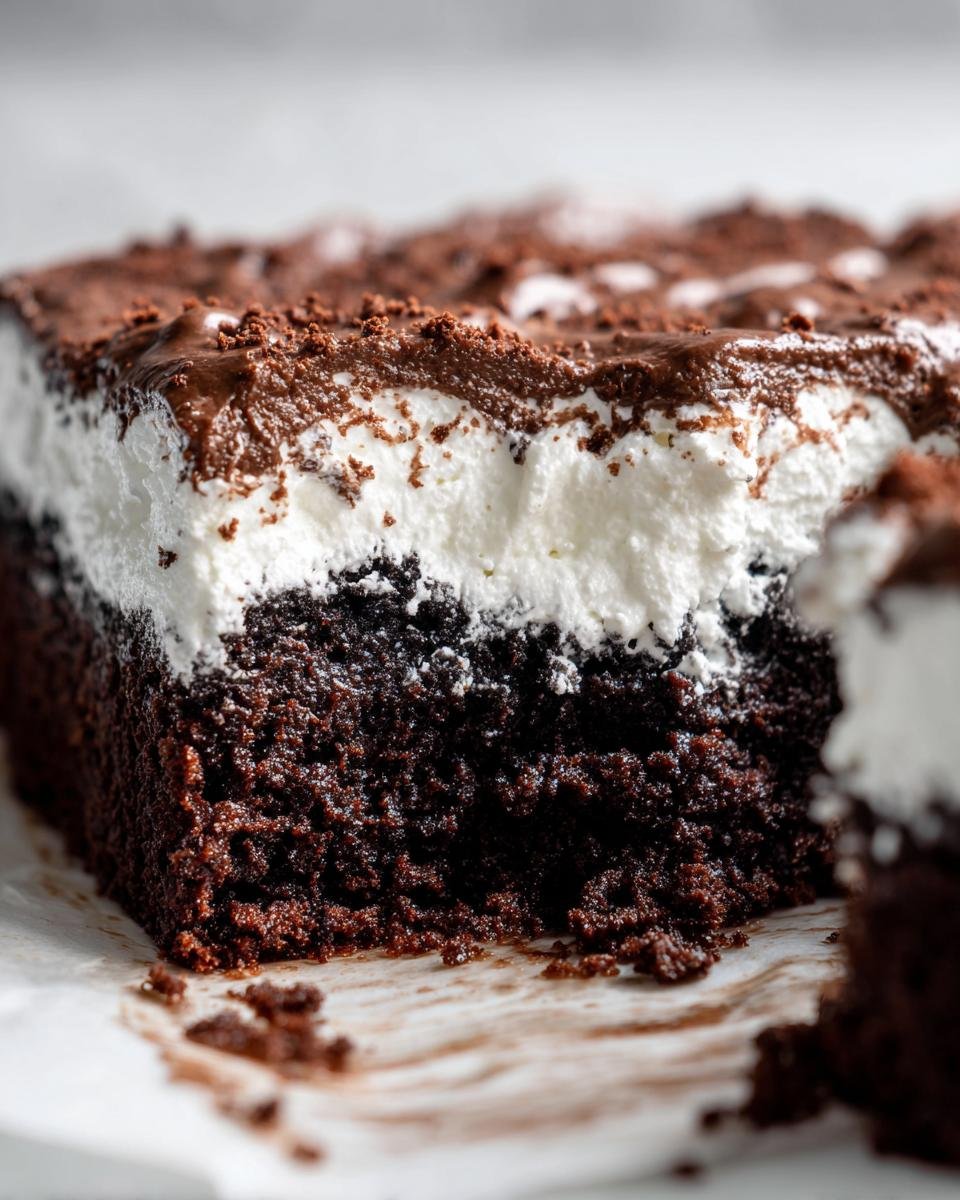
While the cake is baking, whisk together your sweetened condensed milk and the chocolate syrup until they are totally blended. This is your powerhouse soak! I usually just pour this mixture right over the warm, poked cake. Now, if you find yours seems a little too thick to run into those holes easily, you can whisk in that half-cup of hot water, but honestly, I skip the water most times for ultimate gooeyness. Pour it evenly so every square inch gets drenched.
Chilling and Finishing Your Chocolate Poke Cake
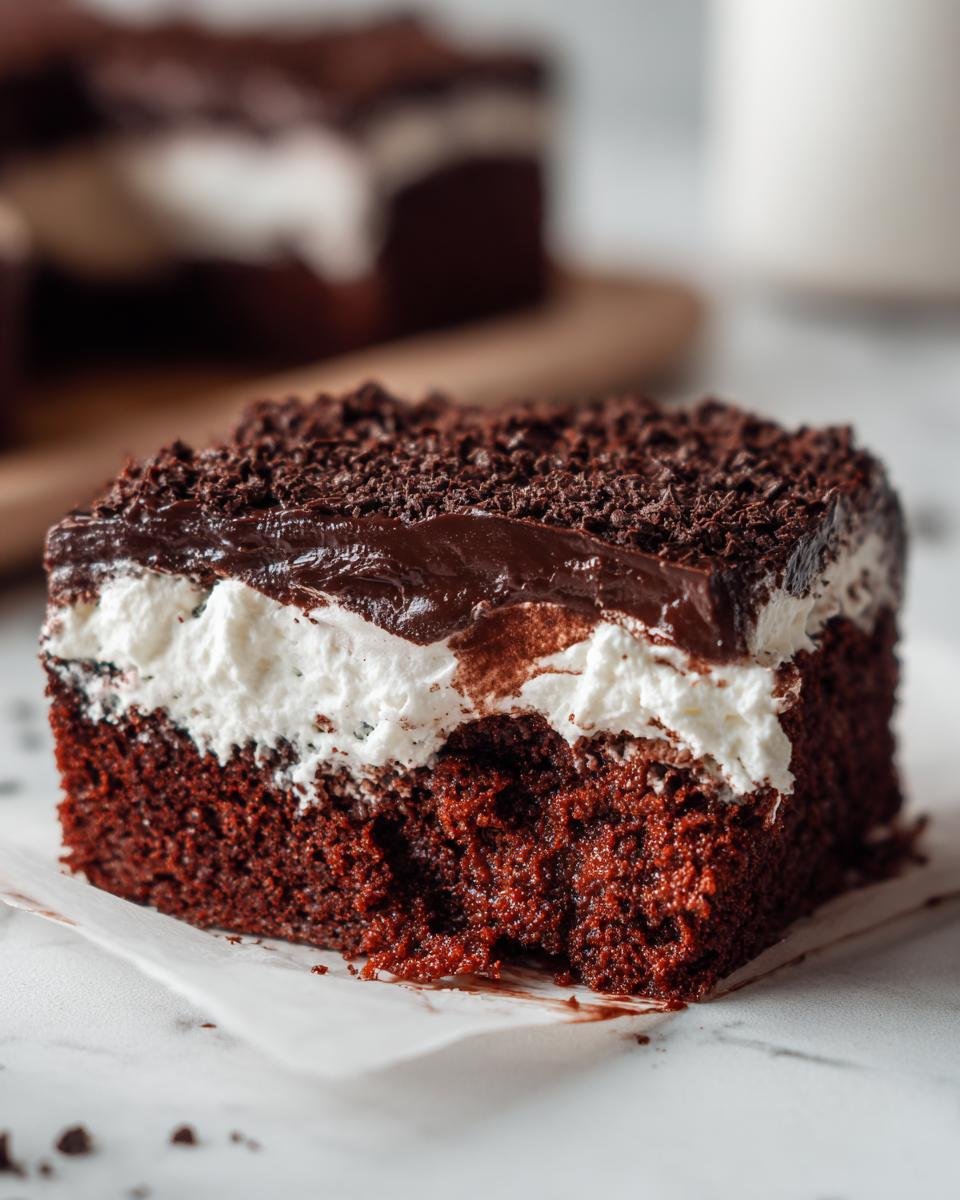
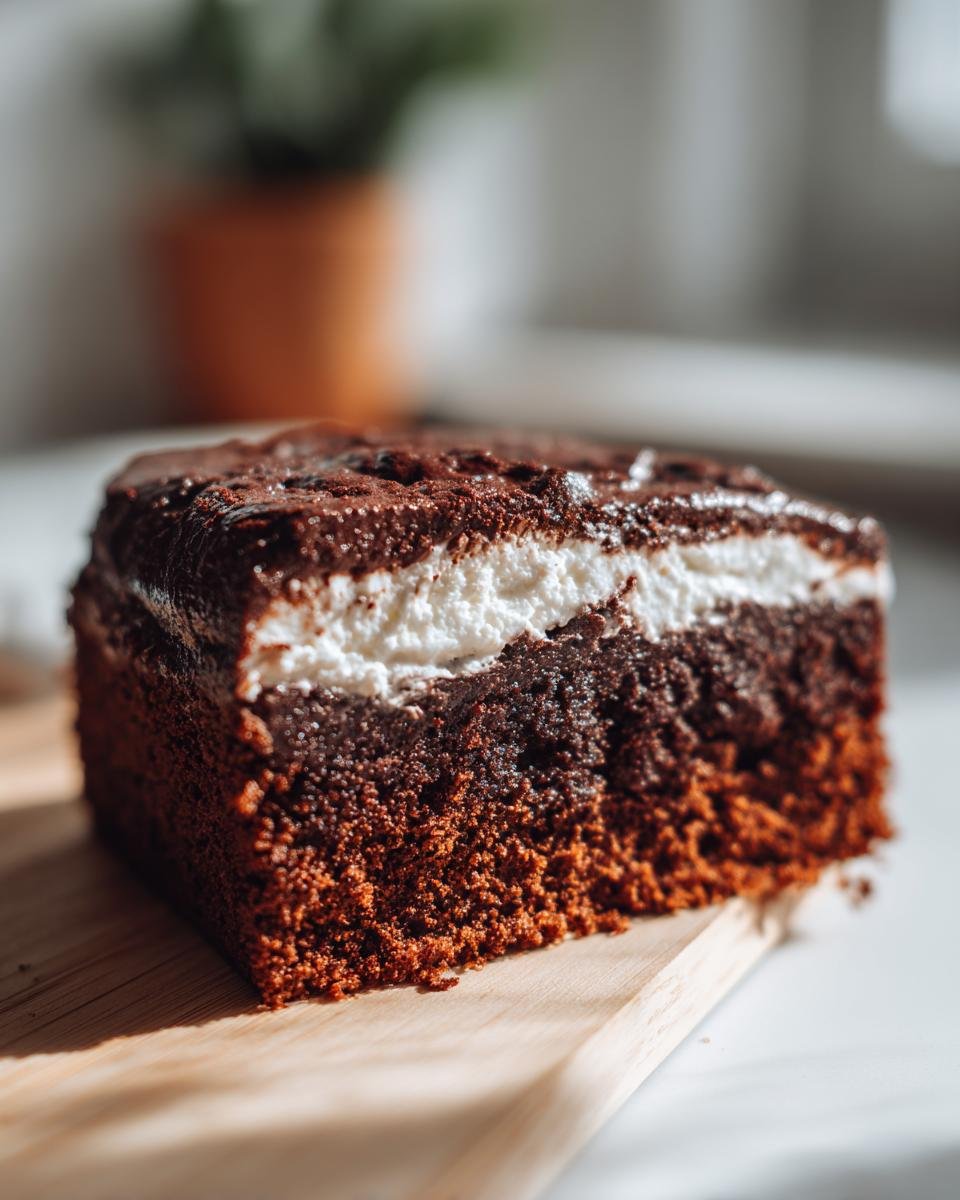
This part requires patience, which is tough when the cake smells this good! You have to let the cake cool completely—and I mean completely—after the amazing soak has done its work. If you put the whipped topping on warm cake, you’ll have soup! Once it’s cool, spread that thawed whipped topping gently over the whole surface. Then, cover it up and stick it in the fridge for at least two hours. That chilling time is crucial for the texture to set up right.
Pro Tips for the Ultimate Chocolate Poke Cake Texture
We all want that famous, dreamy texture, right? The kind where every bite is moist and nothing is soggy. My biggest battle used to be the whipped topping weeping later on, turning the top layer watery. My trick? Before spreading the thawed whipped topping, I gently pat the surface of the cake with a paper towel to soak up any condensation that might have settled.
Also, distribution of the soak is everything. If you see one side of the cake has sucked up all the liquid, gently tilt the pan or use a small spatula to move the shiny puddles over to the drier spots. I think the secret weapon here, besides the condensed milk, is letting it sit at room temperature for about 20 minutes after pouring before you put it in the fridge. It gives the soak time to settle deep down. If you want to explore other mind-blowing poke cake recipes, you have to check out my Amazing Boston Cream Poke Cake variation!
Variations on the Classic Chocolate Poke Cake
While the classic chocolate version is fantastic, this poke cake framework is honestly begging for fun experiments! Don’t feel locked into just chocolate cake mix, either. I’ve made this same soak over a vanilla cake mix, and it turns into this incredible sweet-and-creamy confection. For a real autumn twist, try using a spice cake mix—the spices play so nicely with the sweet condensed milk!
My real favorite variation, especially for grown-up gatherings, is shaking up that liquid soak. Instead of using just hot water, I’ll swap in about a quarter cup of strong, cold brewed coffee or, yes, even a little splash of bourbon! It doesn’t make it boozy, but that little bit of depth really sings next to the chocolate syrup. It adds a sophisticated layer without changing how easy the recipe is. If you’re looking for another deep chocolate flavor bomb, you should have a look at my Chocolate Olive Oil Cake Recipe!
Serving Suggestions for Your Chocolate Poke Cake
Honestly, this cake is so rich and sweet on its own, it almost doesn’t need a thing. But if you’re serving it after a big dinner, you might want something to cut through all that gooey goodness. I usually keep it simple. A scattering of fresh raspberries or sliced strawberries on top adds a fantastic pop of color and a little tartness that balances everything out perfectly.
If you really want to go all out—and don’t we all sometimes?—a small scoop of high-quality vanilla bean ice cream melting slowly on the side is just divine. It turns this super easy dessert into something truly special. Speaking of decadent treats, if you’re looking for another crowd-pleaser, you have to try my recipe for the Best Banana Pudding Recipe!
Storage and Reheating Instructions for Chocolate Poke Cake
Because this beauty has that lovely whipped topping, we absolutely have to keep it cold! Don’t even think about leaving leftovers on the counter. Cover the pan tightly with plastic wrap—make sure the wrap doesn’t actually touch the whipped topping, though!—and pop it straight into the fridge.
It stays perfectly delicious and moist for about three to four days when stored this way. Honestly, it tastes best around day two after the filling has really settled in. You shouldn’t try to reheat this one; the whipped topping just won’t survive the microwave, sadly! Just take a slice out about 15 minutes before serving to take the chill off.
Frequently Asked Questions About Chocolate Poke Cake
I get so many messages about this recipe, and that’s wonderful! It’s just proof that everyone needs a super easy dessert recipe in their back pocket for when company drops by unexpectedly. Most questions I get revolve around keeping that gorgeous moisture locked in, which is really the whole point of a **Chocolate Poke Cake**.
Can I make this Chocolate Poke Cake ahead of time?
Yes, you absolutely can! This is actually one of the best features of this cake. I usually mix the cake, poke the holes, and pour the soak over it the day before I plan to serve it. That gives the milk mixture plenty of time to really penetrate, making it an even more **moist cake**. However, I only spread the whipped topping on about four hours before serving—if you put the topping on too early, it can sometimes start to weep or separate overnight.
What is the best way to get the soak into the holes?
You want to make sure every single hole gets filled right to the bottom! After you pour the condensed milk and syrup mixture over the top, grab a small offset spatula or the flat part of a butter knife. Gently start pressing the liquid deeper down into the holes you just poked. Don’t mash the cake, just use gentle pressure to push the topping down into those empty channels. If the cake is still warm, it really helps suck it right in there!
If you’re looking for another amazing, easy recipe that requires minimal fuss but delivers maximum flavor, you have to see my recipe for the Amazing 1-Bowl Peanut Butter Cream Pie next!
Estimated Nutritional Information for Chocolate Poke Cake
I always tell people that the best part about this **Chocolate Poke Cake** is that it tastes like it should clock in way higher calories than it does, but here we are! Because we’re using a box mix and simple ingredients, the numbers stay surprisingly reasonable for such a decadent dessert. Remember, these values are just estimates based on the standard components I listed in the ingredients section. If you use a different cake mix or sweeter chocolate syrup, things might shift a tiny bit!
Here is a quick rundown based on a twelve-serving yield:
- Calories: 350
- Sugar: 45g
- Fat: 18g (with 8g saturated fat)
- Carbohydrates: 48g
- Protein: 4g
It’s good to know where you stand, but honestly, when something tastes this good and is this easy, I try not to overthink the science too much. Enjoy that sweet slice!
Print
Simple Chocolate Poke Cake
- Total Time: 50 min
- Yield: 12 servings 1x
- Diet: Vegetarian
Description
A moist chocolate cake with a sweet, gooey filling poured over the top after baking.
Ingredients
- 1 box (15.25 oz) chocolate cake mix
- 1 can (14 oz) sweetened condensed milk
- 1/2 cup chocolate syrup
- 1/2 cup hot water
- 1 tub (8 oz) frozen whipped topping, thawed
Instructions
- Prepare the chocolate cake mix according to package directions for a 9×13 inch pan.
- Bake the cake as directed on the package.
- While the cake is still warm, use the handle of a wooden spoon or a fork to poke holes all over the top, about 1 inch apart.
- In a small bowl, whisk together the sweetened condensed milk and chocolate syrup.
- Pour the milk and syrup mixture evenly over the top of the warm cake, allowing it to soak into the holes.
- In a separate bowl, mix the hot water with the remaining sweetened condensed milk and chocolate syrup mixture if you prefer a thinner glaze, or use the mixture as is. Pour this over the cake.
- Let the cake cool completely, about 1 hour.
- Spread the thawed whipped topping evenly over the cooled cake.
- Chill the cake for at least 2 hours before serving.
Notes
- You can use any brand of chocolate cake mix.
- For extra flavor, add a teaspoon of vanilla extract to the condensed milk mixture.
- Keep leftovers refrigerated.
- Prep Time: 15 min
- Cook Time: 35 min
- Category: Dessert
- Method: Baking
- Cuisine: American
Nutrition
- Serving Size: 1 slice
- Calories: 350
- Sugar: 45g
- Sodium: 250mg
- Fat: 18g
- Saturated Fat: 8g
- Unsaturated Fat: 10g
- Trans Fat: 0g
- Carbohydrates: 48g
- Fiber: 2g
- Protein: 4g
- Cholesterol: 25mg
Keywords: chocolate, poke cake, easy dessert, sweet cake, condensed milk