
Okay, listen up! If you’re trying to cut back on carbs but secretly miss that satisfying mound of fluffy rice under your curry or stir-fry, I have solved your life. Cauliflower rice? It sounds boring, but trust me, when you make it right—and I mean *truly* right—it’s a game-changer. For months, I struggled with watery batches that tasted like sad, steamed vegetables, but not anymore!
This little guide is my foolproof system for **how to make and store cauliflower rice** so it stays beautifully separated and ready for dinner. It’s fast—seriously, ten minutes top—and I promise it’s the only way you’ll ever want to process cauliflower again. It completely took over my weekly meal prep routine; now I always have a bag ready to go!

Why This Method for How To Make And Store Cauliflower Rice Works Best
I know there are a million ways to turn a head of cauliflower into something resembling rice, but most of them result in mush, and frankly, I don’t have time for cleanup that takes longer than the cooking itself! This method is superior because it prioritizes speed and texture. We are talking ten minutes, start to finish, using just a standard food processor.
The secret is the short pulse time—never let that machine run too long! You want grains, not paste, and that’s what stops our **how to make and store cauliflower rice** system from becoming watery. This technique gives us that beautiful, light texture that mimics actual rice perfectly, which is why I keep coming back to it every week. If you’re looking for something to pair this with, check out my recipe for those amazing cauliflower cheese patties! Plus, you get about four cups ready to go in one batch.
Quick Prep and Yield Details
Here’s the snapshot so you know what a quick win this recipe is:
- Prep Time: 10 min
- Cook Time: 0 min (It’s raw!)
- Total Time: 10 min
- Yield: 4 cups
Essential Ingredients for How To Make And Store Cauliflower Rice
The beauty of this recipe, besides how fast it comes together, is how incredibly simple the ingredient list is. I mean, you can’t get much easier than this! Seriously, we only need one main thing to start this process, but how you prep it makes all the difference in the world. You absolutely must start with just one medium head of cauliflower, and I mean it—it has to be washed clean and then patted down until it is *bone dry* before it even thinks about going near the processor.
Don’t try to cheat this step! If that cauliflower has any surface water clinging to it, you’re going to end up with soggy rice later, and that defeats the whole purpose of making this amazing low carb rice substitute. Trust me on the dryness; it’s non-negotiable for success.
Step-by-Step Instructions: How To Make And Store Cauliflower Rice
Alright, this is where the magic happens! You’ve got your dry florets, and now we turn them into actual usable rice. If you want my advice—and you should, because I’ve made mountains of this stuff—you need to treat your food processor gently. We are treating those florets like delicate jewels, not trying to grind them into dust! This simple approach ensures you master **how to make and store cauliflower rice** perfectly.
If you want to see some other amazing ways to use up cauliflower once you’re done, you have to check out my recipe for perfectly crispy roasted cauliflower, but for rice, let’s stick to the pulsing method!
Preparing the Cauliflower Head
First things first, we need to get this head ready for action. Grab that beautiful cauliflower and strip off all those tough outer leaves. Next, cut right around the core underneath and pull that hard part out. Toss both the leaves and core—they aren’t what we need for our rice base here.
After that, hack the main part of the cauliflower into nice, manageable florets. They don’t have to be perfect little guys, just small enough to fit easily into your food processor bowl without forcing them.
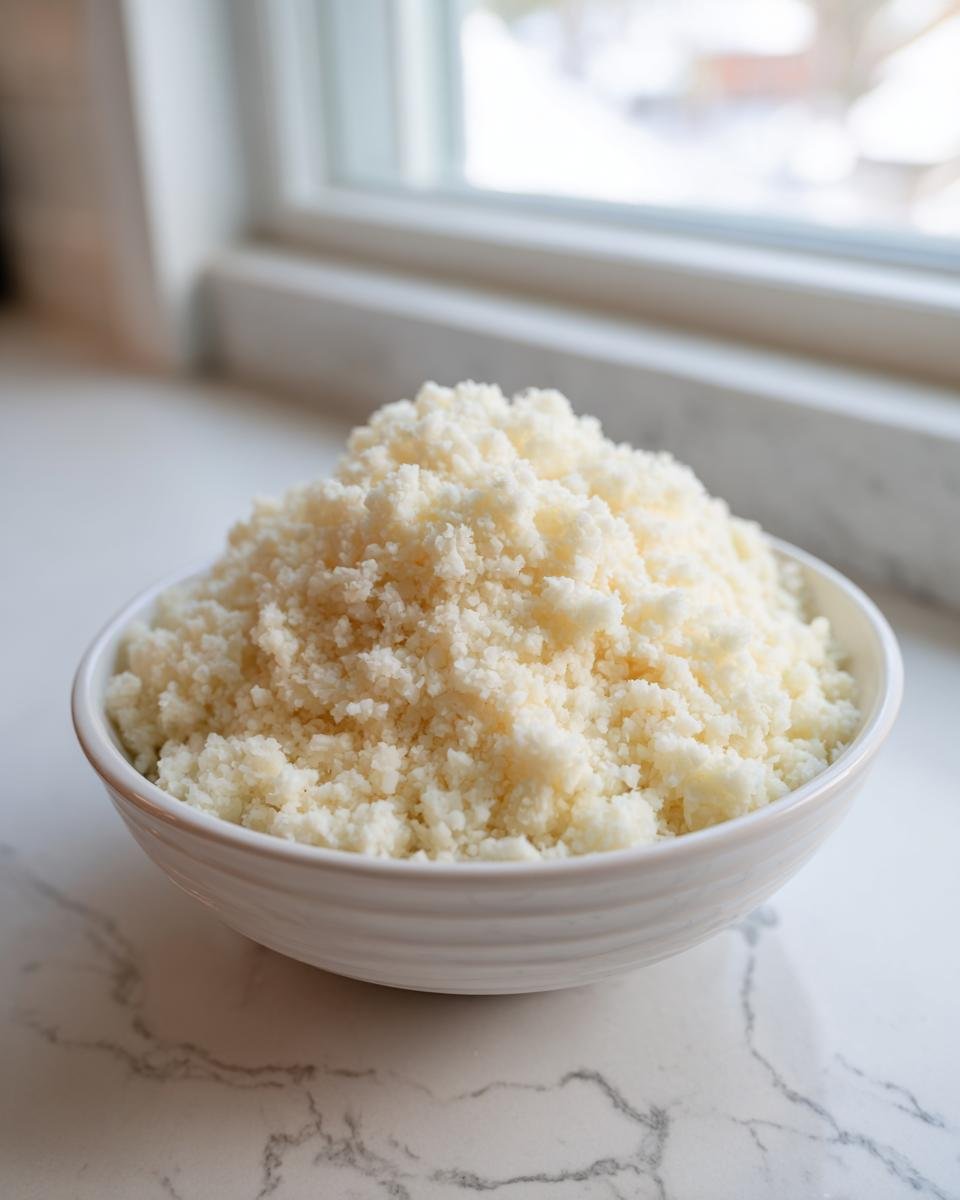
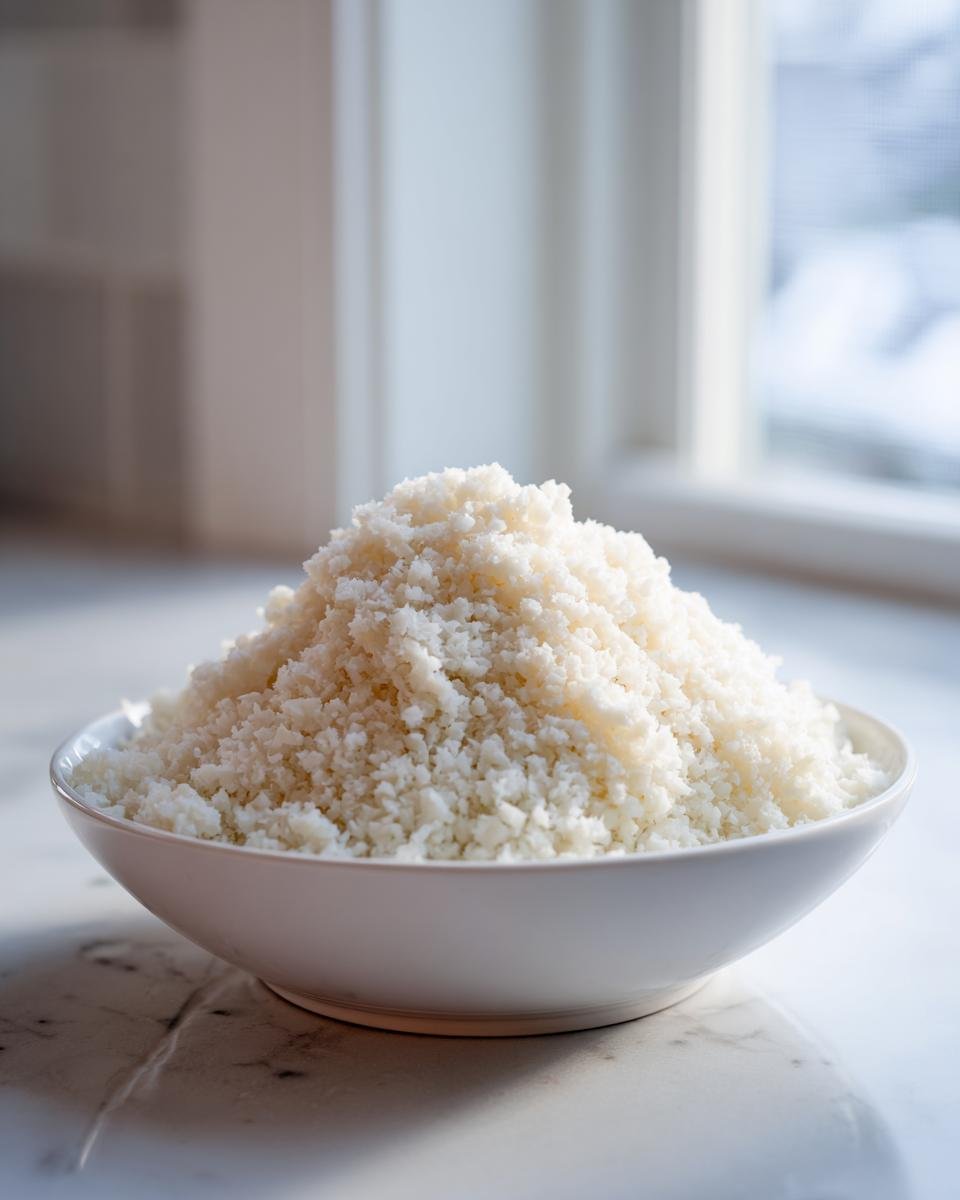
Processing into Rice Texture (Food Processor Method)
Now, load those florets right into the food processor bowl. You will likely have to do this in a couple of batches, depending on how big your head of cauliflower was, so don’t cram them in there! Put the lid on tight, and instead of grinding away, you are going to use short, quick bursts. Pulse, pulse, pulse!
This is my authority tip: stop the second it looks like rice grains. If you let it go too long, you will hear the motor groan, and your beautiful florets will turn into a wet, sticky paste. We want fluffy rice substitute, not soup! Pulse until you see most of the pieces are the size of grains of rice, maybe a little bigger.
Alternative Method: Grating Cauliflower Rice
Now, maybe you don’t own a food processor, or maybe mine is in the dishwasher (it happens!). No sweat! You can absolutely still make this amazing rice using a good old-fashioned box grater. Take one of those large hole sides—not the shredding side, the bigger grating side.
Hold the floret firmly and just grate it right over a large bowl. It takes a little more elbow grease than the machine, but the texture is surprisingly close! Just make sure you stop near the bottom core when grating too, because that last bit can be tough and chunky. Either way, you are now ready to use it or store it!
Tips for Perfect Cauliflower Rice Texture
I wish I could stress this enough: the texture is everything! If you get mushy cauliflower rice, you’ll never want to make it again, and that would be a tragedy because this low carb swap is just too good to give up.
Moisture is the enemy, plain and simple. If you are finding your rice is coming out a little on the wet side, even after patting the florets dry, you might be over-processing, like I mentioned before. It happens when you get distracted mid-pulse! But there’s another trick I learned when I was making huge batches for a party.
If you’re processing a big volume, spread the florets out on a baking sheet for about 15 minutes before you even put them in the processor. It just lets a little extra surface water evaporate into the air. You don’t even need the oven! Just let them sit out on the counter completely uncovered while you gather your bowls and lids. This small waiting period really helps keep things dry and fluffy when you finally pulse them down.
Also, never try to cook the rice right after processing if you plan on storing leftovers! If you cook it and then try to chill it, that trapped steam is going to ruin the texture instantly. Process it, store it raw, and then, right before you serve, give it a quick sauté or steam for just three or four minutes. That way, every batch you eat tastes fresh, firm, and perfectly separated—never gooey!
How To Store Cauliflower Rice for Future Meals
Making a huge batch means you get to reap the rewards all week long! Honestly, mastering **how to store cauliflower rice** is crucial, because once processed, you don’t want to waste those precious, perfectly sized grains. If you plan on using it within a few days, refrigeration is your best friend, but if you’re prepping for a busy month, freezing is the real golden ticket. It’s all about keeping that moisture locked out so it doesn’t get slimy!
If you’re using this rice substitute in something like my amazing cauliflower potato salad recipe later, you probably want to air-dry it first, but for general use, these storage tips work every time.
Short-Term Refrigeration Storage
For keeping it fresh for quick meals, grab yourself an airtight container. I like the glass ones because I can see if any condensation is trying to sneak in! Make sure the rice is completely cool and dry before sealing it up. Stick that container in the fridge, and you should be golden for about three to five days. Any longer than that, and the texture really starts to degrade, becoming a bit softer than I personally like for my low carb rice substitute.
Long-Term Freezing for Best Results
If you made a giant batch—and why wouldn’t you?—you need to freeze it. This is the key to long-term meal prep success! Don’t just toss the raw rice in a big Ziploc bag; that leads to freezer burn in no time. Instead, spread your cauliflower rice thinly on a baking sheet lined with parchment paper.
Flash-freeze those grains for about an hour until they are solid little pebbles. Once they’re hard, transfer them into a heavy-duty freezer bag, squeeze out every last puff of air you can manage, and seal it tight. If you do this right, this rice will last easily two to three months, and it won’t clump together into one giant block when you pull it out! When you’re ready to eat, you can cook it straight from frozen in a hot skillet. Easy peasy!
Serving Suggestions for Fresh Cauliflower Rice
Now that you have your perfect, fresh, raw cauliflower base, the possibilities are endless because it’s ready to go right now! I love skipping the cooking step entirely and using it cold as a base for things like hearty salads. It gives the salad such a great crunch that regular grains just can’t match.
But if you want something warm, toss it into a hot pan with just a tiny bit of butter or olive oil for about three minutes until it’s warmed through. It’s absolutely phenomenal underneath a thick, saucy curry or next to a big portion of spicy chili. If you’re looking for something a little more exciting, my shrimp fried rice recipe works beautifully if you sub out the white rice for this version, or try it in these lemon garlic shrimp bowls. Seriously, give it a try!

Frequently Asked Questions About How To Make And Store Cauliflower Rice
I knew you’d have questions! It’s one thing to read about a simple method for **how to make and store cauliflower rice**, but sometimes you need confirmation on the tricky bits, especially the texture stuff. These are the questions I always get when I show people my ten-minute process for this fantastic low carb rice substitute.
Can I use frozen cauliflower to make cauliflower rice?
Oh, I really tried this when I was busy once, and I have to warn you against it! While it seems convenient, frozen cauliflower is already partially cooked or at least stored with a lot of internal water content. If you thaw it out enough to process it, it just turns into a slushy white mess, no matter how much you pat it dry afterward. Stick to fresh heads for the best texture; that’s the one place you can’t really cut corners when learning **how to make and store cauliflower rice** effectively.
Do I need to cook the cauliflower rice after processing?
Nope! That’s one of the best parts. After you process it raw, it stays raw, and that’s how you should primarily store it. You can totally eat it raw if you want to throw it into a big salad—it’s perfectly safe and has a nice crispness. But if you’re using it as a replacement for warm rice, you only need to give it a quick sauté. Seriously, three to five minutes in a hot skillet is all it needs to warm up and soften just a touch. Since the recipe calls for zero cook time, just remember to use that short sauté time when you decide to eat it later!
Estimated Nutritional Overview for How To Make And Store Cauliflower Rice
Because this recipe is so wonderfully minimal—we’re only dealing with one vegetable—the nutritional information is pretty straightforward, which is great news for anyone watching their macros! It’s amazing how much flavor you get for such a tiny calorie count when you learn **how to make and store cauliflower rice** this way. You can eat a huge bowl of this stuff and barely register it!
The numbers below are based on an estimated one-cup serving of the raw, unprocessed cauliflower rice. But listen, I need to be super clear here: these are just fantastic estimates based on one simple ingredient. If you start adding butter, sauces, or any of the wonderful toppings we talked about? Well, those numbers are going to climb right up! Always adjust based on what you actually put on your final dish.
- Serving Size: 1 cup
- Calories: 25
- Sugar: 2g
- Sodium: 30mg
- Fat: 0g
- Saturated Fat: 0g
- Unsaturated Fat: 0g
- Trans Fat: 0g
- Carbohydrates: 5g
- Fiber: 2g
- Protein: 2g
- Cholesterol: 0mg
See? Tiny! If you’re looking for a truly low-calorie staple that can replace traditional grains, this is absolutely your answer for quick weekly meal prep.
Share Your Cauliflower Rice Success
So, that’s it! You now have my entire secret method mastered for **how to make and store cauliflower rice** so it’s never mushy and always ready when you need a fast, healthy side dish. I really hope this makes weeknight dinners so much easier for you!
I’m so eager to hear how this worked out in your own kitchen. Did you use the food processor or did you sweat it out with the box grater? Tell me everything! Drop a star rating right below if you found this guide helpful, and please, please leave a comment sharing your best storage successes or any quick recipes you use your fresh rice in.
If you have any final questions or just want to connect with me about all things low-carb side dishes, you can always reach out on my contact page!
Print
How To Make And Store Cauliflower Rice
- Total Time: 10 min
- Yield: 4 cups 1x
- Diet: Low Calorie
Description
Simple method for preparing fresh cauliflower rice and instructions for proper storage.
Ingredients
- 1 medium head cauliflower
Instructions
- Remove the leaves and core from the cauliflower head.
- Cut the cauliflower into florets.
- Place the florets into a food processor.
- Pulse the florets until they resemble rice grains. Do not over-process into a paste.
- Alternatively, grate the florets using the large holes of a box grater.
- Use immediately or store for later use.
Notes
- For best results, ensure the cauliflower is completely dry before processing.
- If you do not have a food processor, you can use a box grater.
- Cauliflower rice can be frozen for long-term storage.
- Prep Time: 10 min
- Cook Time: 0 min
- Category: Side Dish
- Method: Processing
- Cuisine: General
Nutrition
- Serving Size: 1 cup
- Calories: 25
- Sugar: 2
- Sodium: 30
- Fat: 0
- Saturated Fat: 0
- Unsaturated Fat: 0
- Trans Fat: 0
- Carbohydrates: 5
- Fiber: 2
- Protein: 2
- Cholesterol: 0
Keywords: cauliflower rice, make cauliflower rice, store cauliflower rice, low carb rice substitute